
Step 1: Obtain an M2M Credential
-
Register for an M2M Credential. Follow the steps provided here to acquire your Machine-to-Machine (M2M) credential: https://softwaredevelopers.ato.gov.au/M2M
-
Record the following details during registration:
-
Device Name
-
Org Code
-
Password: Associated with the new M2M credential
-
Step 2: Set Up the Keystore File on a Shared Network
The keystore file must be stored in a network location accessible to all eBECAS users who will be using the USI service. This file is a mandatory requirement of the Government USI service, as the keystore file is used every time a USI validation occurs to verify credentials.
-
You will receive a file named
keystore-new.xmlwhen registering for the M2M credentials. -
Rename
keystore-new.xmltokeystore.xml. -
Place the
keystore.xmlfile in a shared network location accessible to all eBECAS users who will be using the USI service.-
Example of a Shared Path: (Note: This is just an example; actual network setups may vary.)
\\server\KeystoreLocation\keystore.xml
-
-
Ensure all client PCs can access the file from the shared network location via File Explorer.
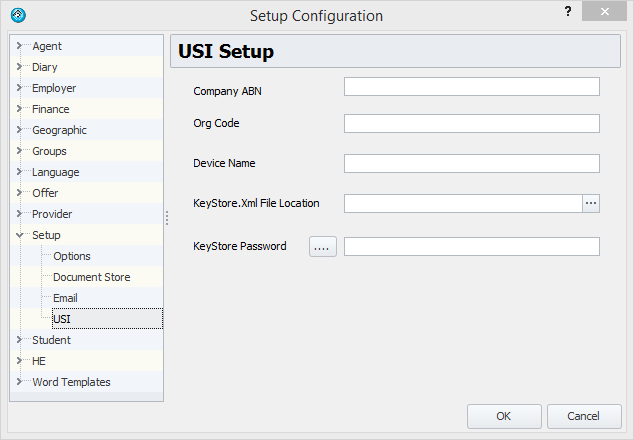
Step 3: Configure USI in eBECAS
-
Go to Utilities > Setup Configuration > USI in eBECAS.
-
Enter the M2M credential details:
-
Device Name
-
Org Code
-
Password
-
-
Set the Keystore File Path. Point to the shared network location where you stored the
keystore.xmlfile in Step 2: Set Up the Keystore File on a Shared Network. -
Click OK to save the configuration.
Final Steps
After saving the settings, notify the eBECAS support team at support@equatorit.com.
The eBECAS team will finalize the configuration to ensure the system is correctly set up to use the new keystore file.