Using Microsoft Word with templates
Microsoft Word can be configured to use templates to populate data from eBECAS/EDMISS to generate a single document or multiple documents.
AutoText is used when generating multiple documents. Bookmarks are used for single record display (numbers and text fields) and to designate and identify the start of a table that can contain many columns.
A template has a specific format that is identified by the document file name suffix following the “.”
Unfortunately the standard setup of the Windows operating system means that the suffix of file names are not shown, so you cannot easily identify a document that is saved as a template file.
To address this please change the option in Windows to display the file name extensions.
In Windows 10 (and earlier versions) go to Control Panel (small icons) and select File Explorer Options
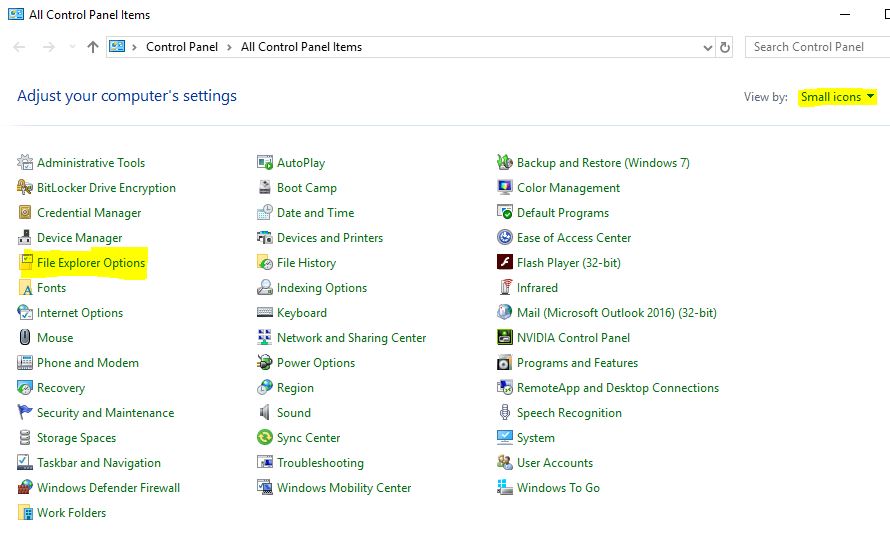
On the View tab, make sure you deselect the option “Hide extensions for known file types”
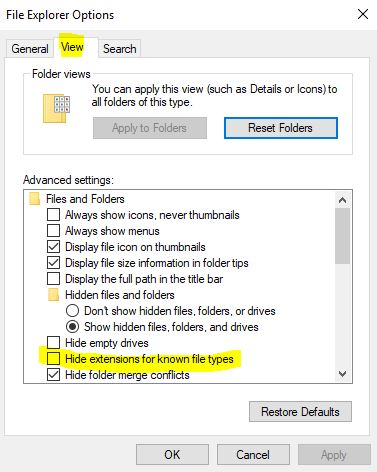
To create and edit a template the Word file name suffix must end with “.dot” or “.dotx”
Displaying the Bookmark and AutoText buttons in MS Word
Microsoft Word 2016 and Word 365
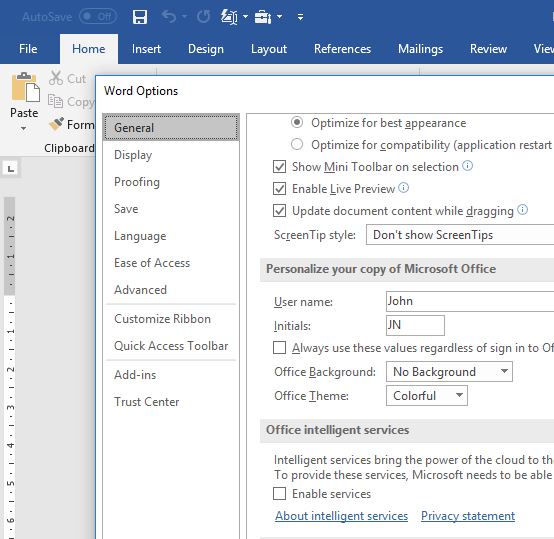
Open Word 365/2016 select from the top left menu – File then select Options and the following screen is displayed
Adding the AutoText option
Select the Quick Access Toolbar from the left menu list.
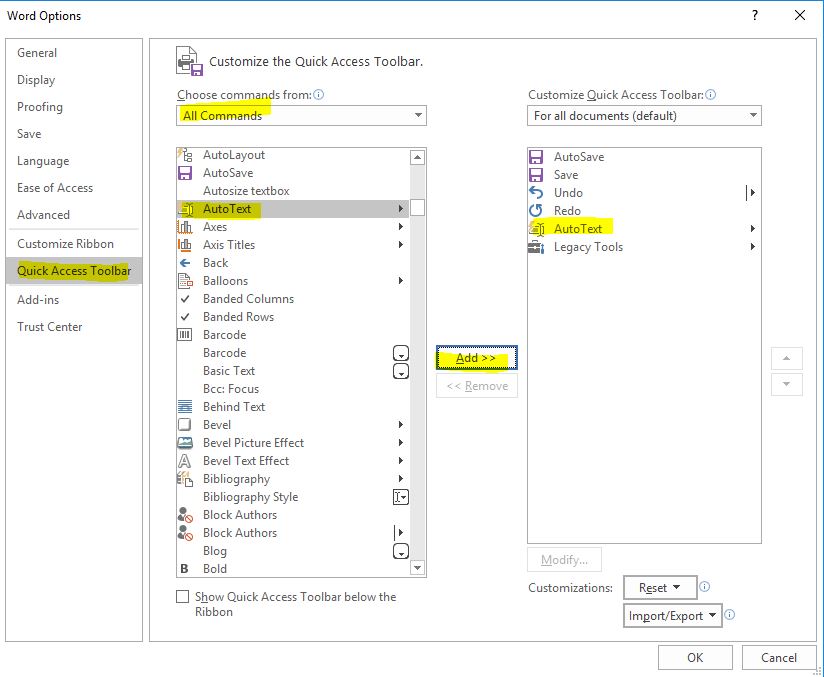
With the Quick Access Toolbar selected on the Word options menu, move over to the “Choose commands from” and select the drop down option All Commands. Locate AutoText from the list, then press the Add button in the middle. You will now see the AutoText option has been added to the Quick Access Toolbar in the right list. Press Ok.
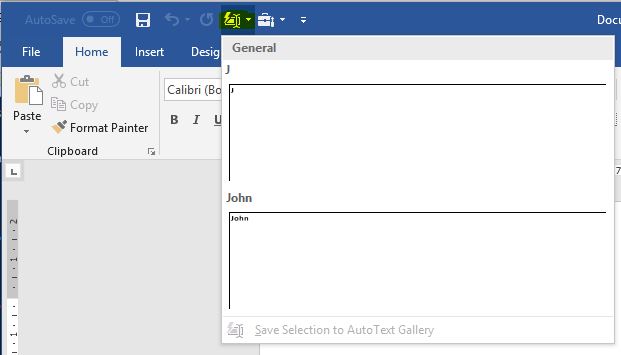
The AutoText option is now displayed on the Quick Access Toolbar
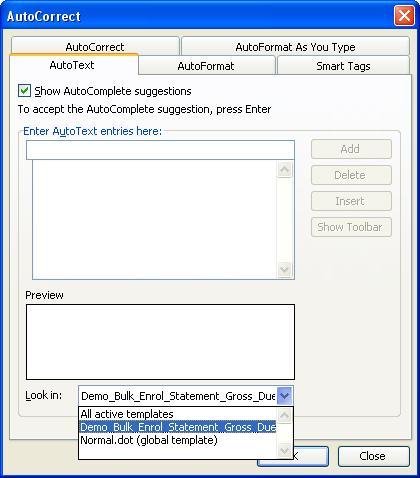
Selecting the AutoText option displays if there is any AutoText entries saved in the Template (the following screen shows none)
Adding the Bookmark option
Bookmarks are used to identify where you want to place text exported from eBECAS/EDMISS.
Select the Quick Access Toolbar from the left menu list.
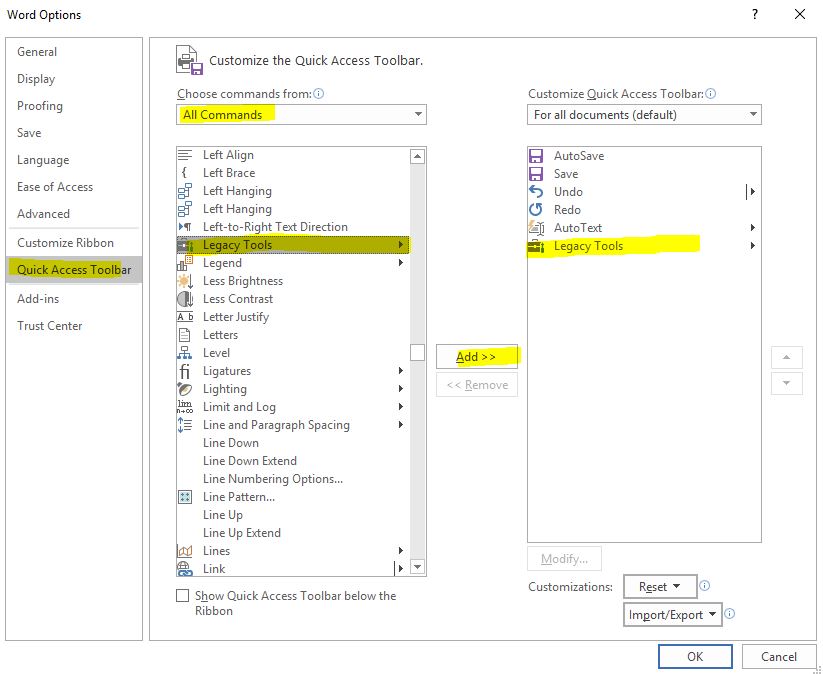
With the Quick Access Toolbar selected on the Word options menu, move over to the “Choose commands from” and select the drop down option All Commands. Locate Legacy Tools from the list, then press the Add button in the middle. You will now see the Legacy Tools option has been added to the Quick Access Toolbar in the right list. Press Ok.
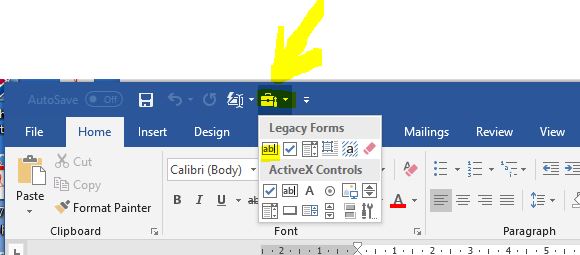
The top left option in the Legacy Toolbar is the Bookmark option.
Microsoft Word 2010
In Microsoft Word 2010, AutoText entries are not shown automatically, you need to display the Autotext button. I suggest you add the Autotext button to the Quick Access toolbar.
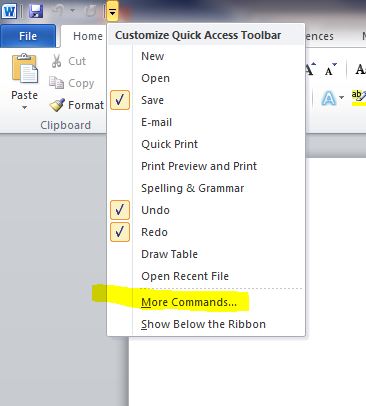
Please select from the top line, above the File Menu in Ms Office, the down arrow, and More Options on the Customise Quick Access Toolbar.
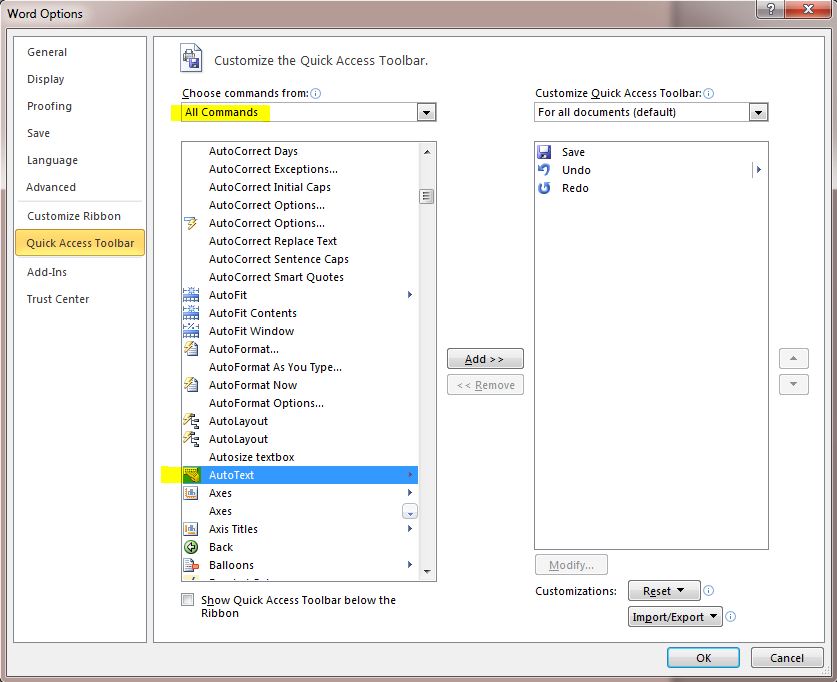
The Word Options will be displayed – select Choose commands from, click All Commands.
Scroll through the list of commands until you see AutoText.
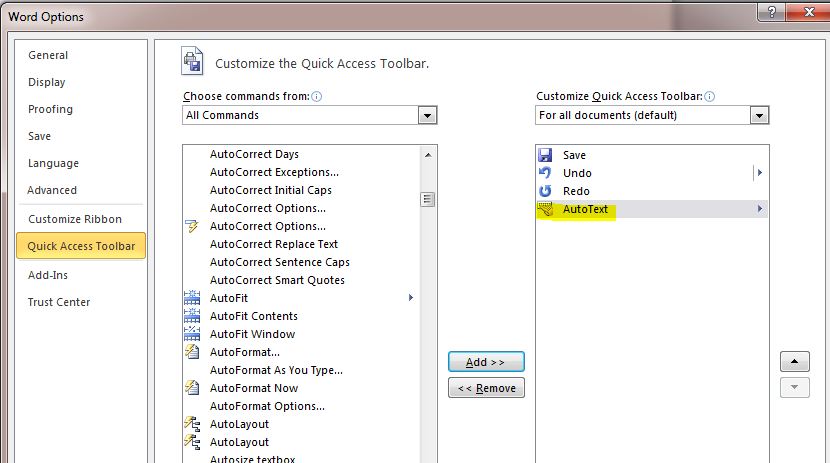
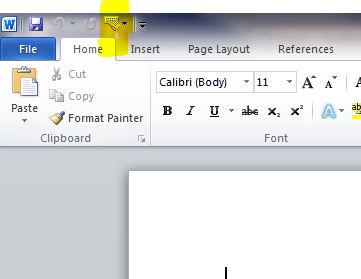
Click AutoText, then click Add. You will now see the AutoText button added to the top of Ms Word 2010.
Microsoft Word 2007
In Microsoft Word 2007, AutoText entries are not shown automatically, you will need to display the Autotext button. You can display the AutoText button by clicking the Microsoft Office Button and then select Click Options.
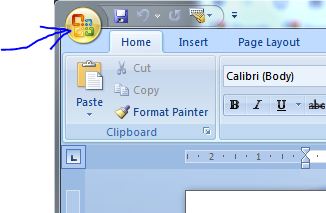
Click Customise, in the list under Choose commands from, click All Commands.
Scroll through the list of commands until you see AutoText
Click AutoText, and then click Add.
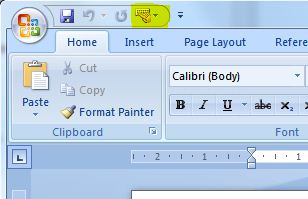
You will now see the AutoText button added to the top of Ms Word 2007.
Microsoft Word 2003
In Microsoft Word 2003, in order to enable and display the AutoText option, you must enable the following menu option View | Toolbars | AutoText. Following this, click the toolbar button AutoText on the AutoText entry toolbar. Make sure you specify the current template name you have open and then click OK.
