Overview
eBECAS/EDMISS supports the import of payments in bulk from a spreadsheet.
Import File Format
You should first prepare an Excel spreadsheet(*.xls/xlsx) with the data to be imported.
Each row in the import file will create/update the payment.
Available fields are :
|
Field Name |
Description |
Notes |
|---|---|---|
|
Student Id |
The Student Number in eBECAS/EDMISS the Payment is made by. |
Required |
|
Payment Amount |
The amount paid. |
Required |
|
Provider Id |
The unique transaction ID supplied by the provider for this payment. If the same Provider ID is supplied in an import(for the same Provider and Student), the Payment details will be updated. |
Required |
|
Payment Date |
The date the payment was made, defaults to today’s date if not specified. |
|
|
Payment Status |
The Status of the Payment as specified by the provider. |
|
Set up the Import
-
To set up Online Payments Receipts Import, navigate to the following:
Main > Finance > Online Payments > Import Payments.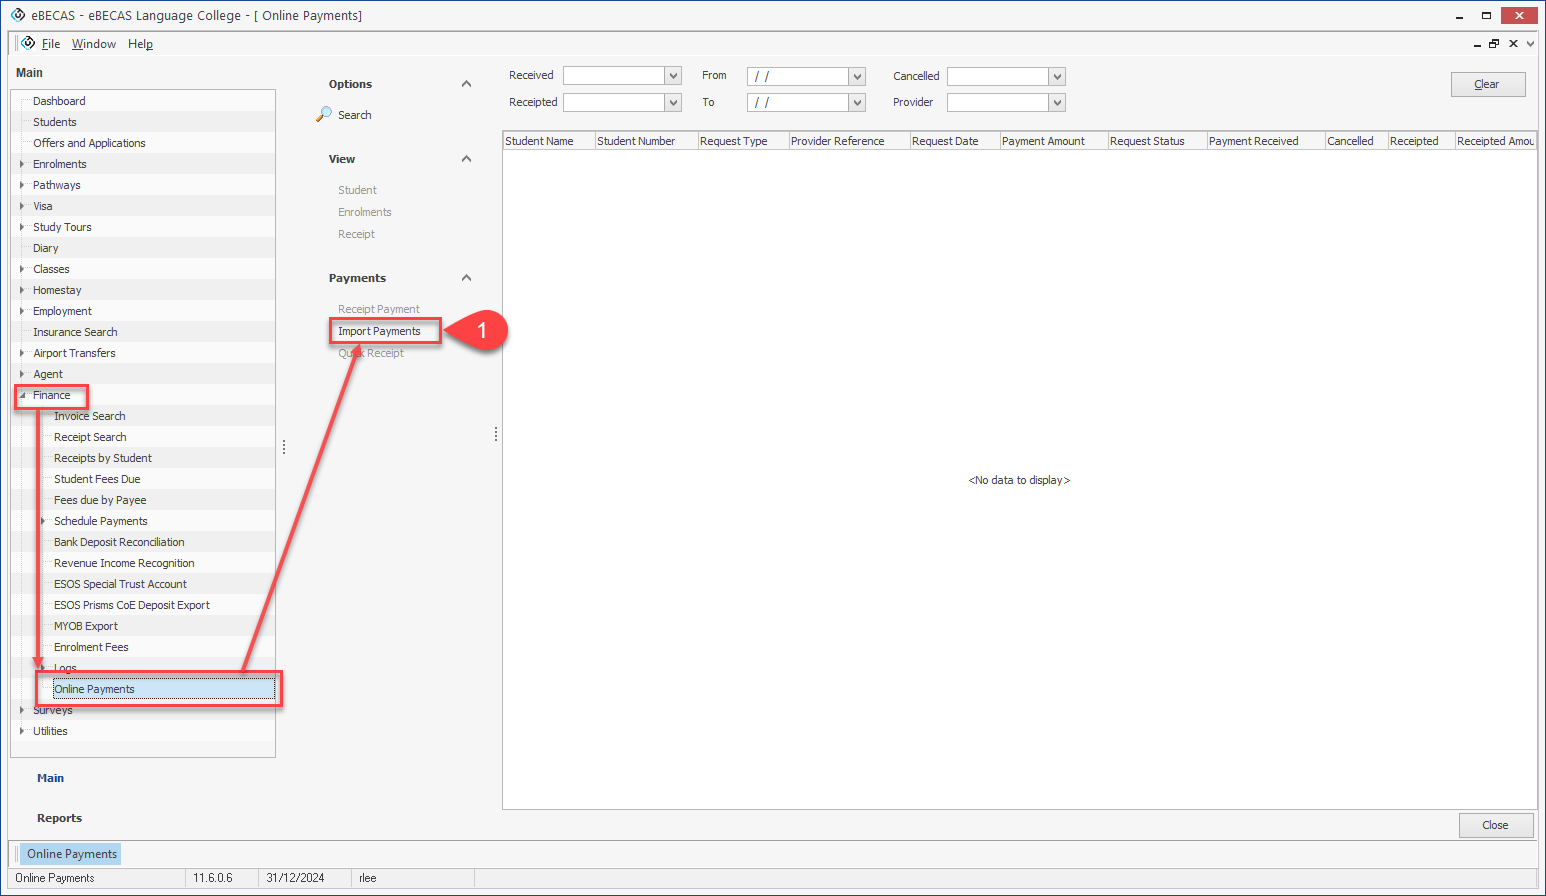
-
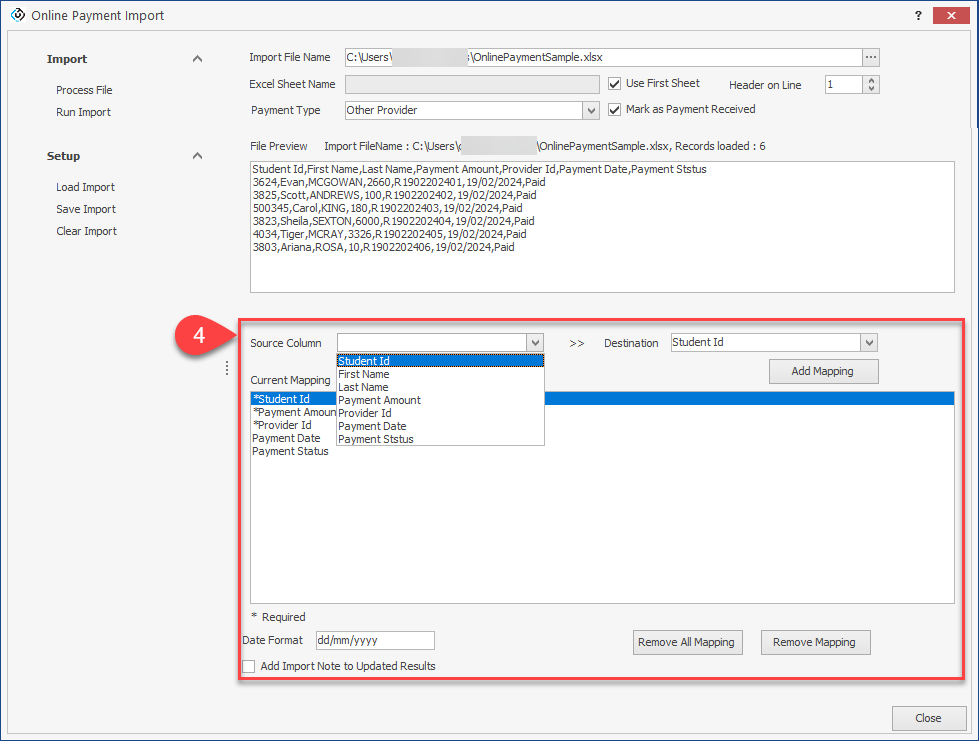
Browse for the Excel Spreadsheet to import and specify the Sheet name the data is on.
Select options as you’re required.-
Use First Sheet: Select this option if you’re importing from the first spreadsheet in the file. Otherwise specify the name of the spreadsheet.
-
Header Line: Specify which row the Headers for the import are located (generally this is the first line, though there may be other information above this such as a title).
-
Payment Type: Specify the Payment Provider.
-
Mark as Payment Received: Select this option if the Payments should be marked as received in eBECAS/EDMISS. (Only Received payments can be receipted).

-
-
Click on Process File and Data will be displayed in File Preview section.
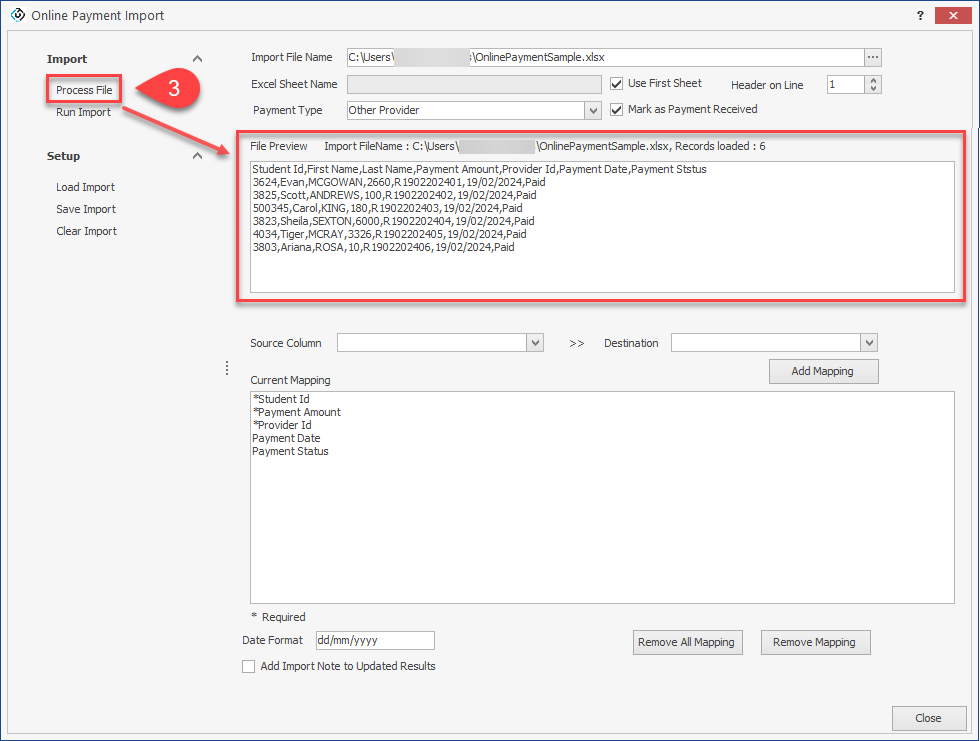
-
Define the mapping by selecting Source Column, specifying the Destination in eBECAS/EDMISS data, and then clicking Add Mapping.
-
Click Run Import to start the import process. Review Payment Import Errors and make necessary updates to the spreadsheet if required.
Click OK to commit the changes once the data is ready to be stored in the eBECAS/EDMISS system.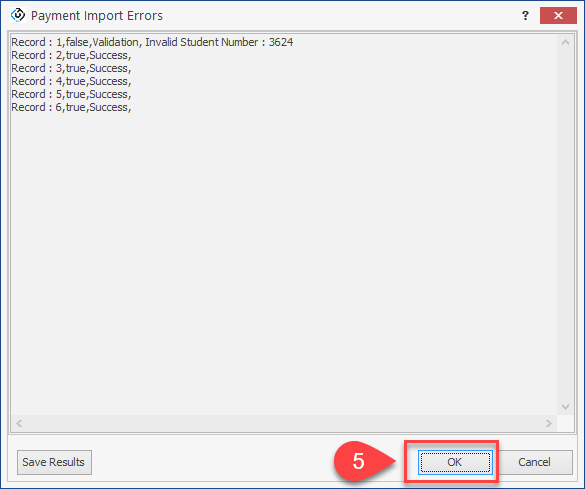
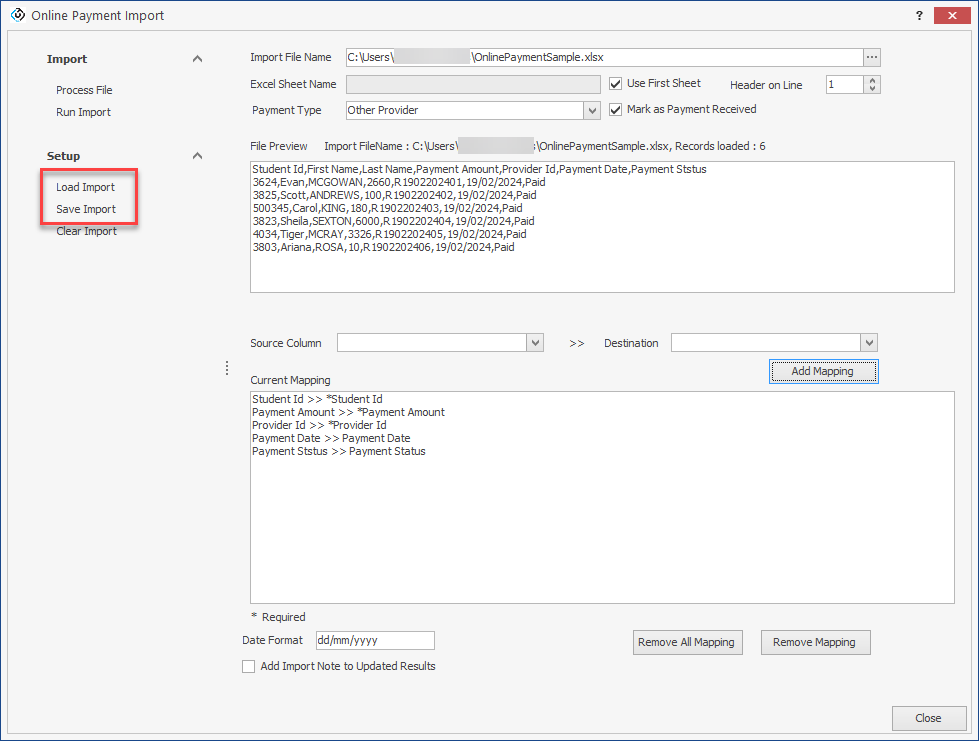
Save and Load Import Settings
Once the Excel file has been selected and processed and the fields mapped, the settings can be saved for later use. Click Save Import to save the import settings.
-
Save Import: To save the import setup to share with other users.
When the import is next run, click Load Import to load the Import settings. Ensure the excel file is in the same location with the same name (or browse and select the new import file). All Mapping and other setting will then be restored ready to Run the import without need for further configuration.
-
Load Import: To load a shared import setup.
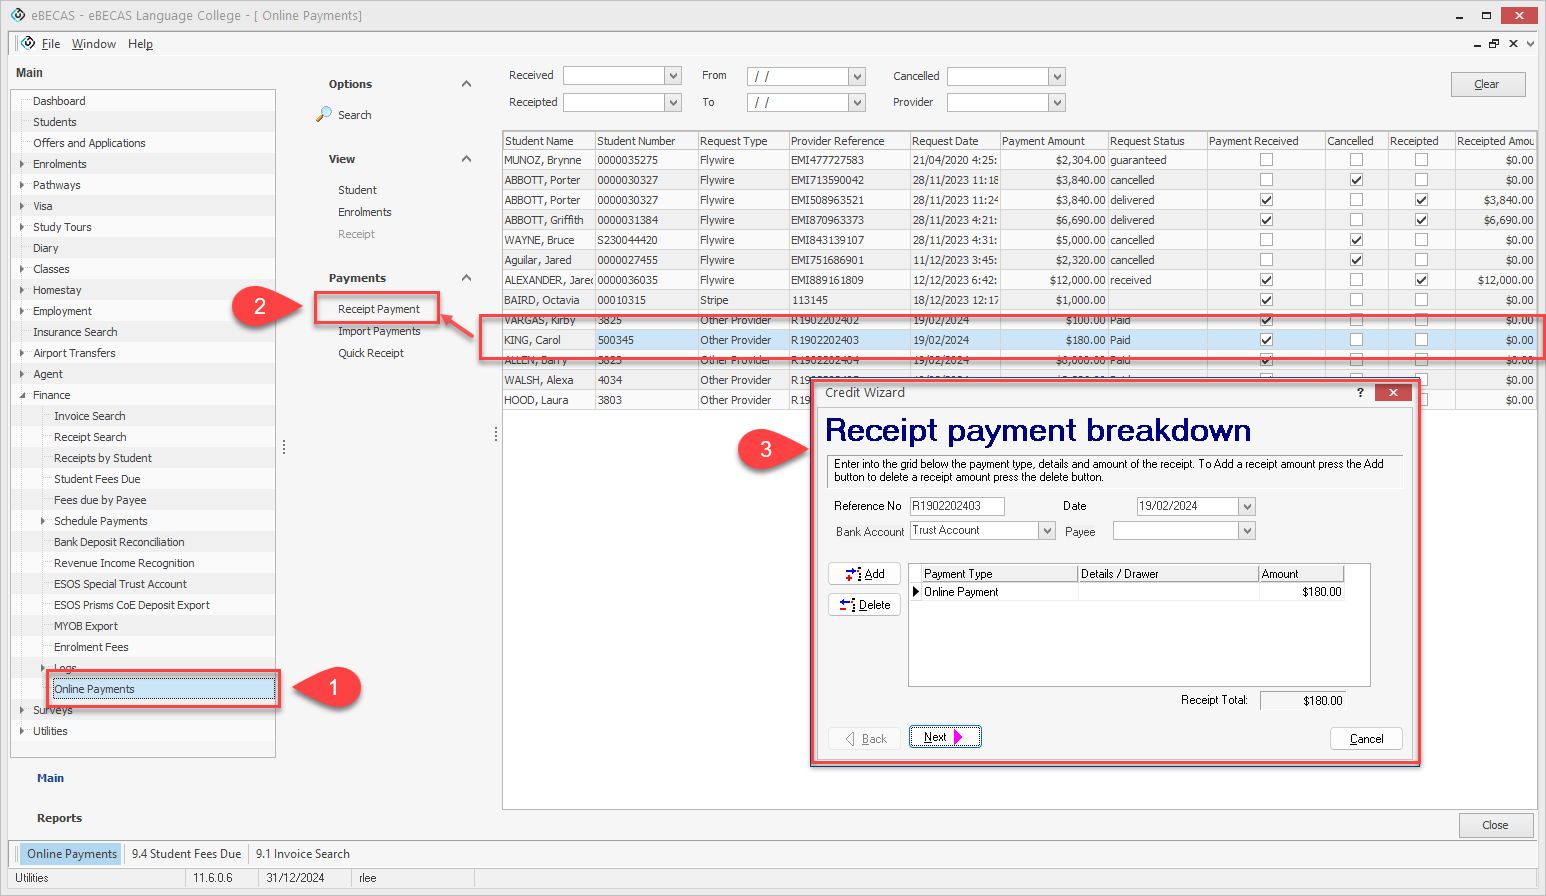
Receipt the Payments
Once Payments are imported, they are available to be Receipted and reconciled in eBECAS/EDMISS.
Receipt Payment through the Credit Wizard
-
From the Online Payment form, search for Payments.
-
Select the record then click on the Receipt Payment option.
-
Create a receipt using the Wizard for a received payment.
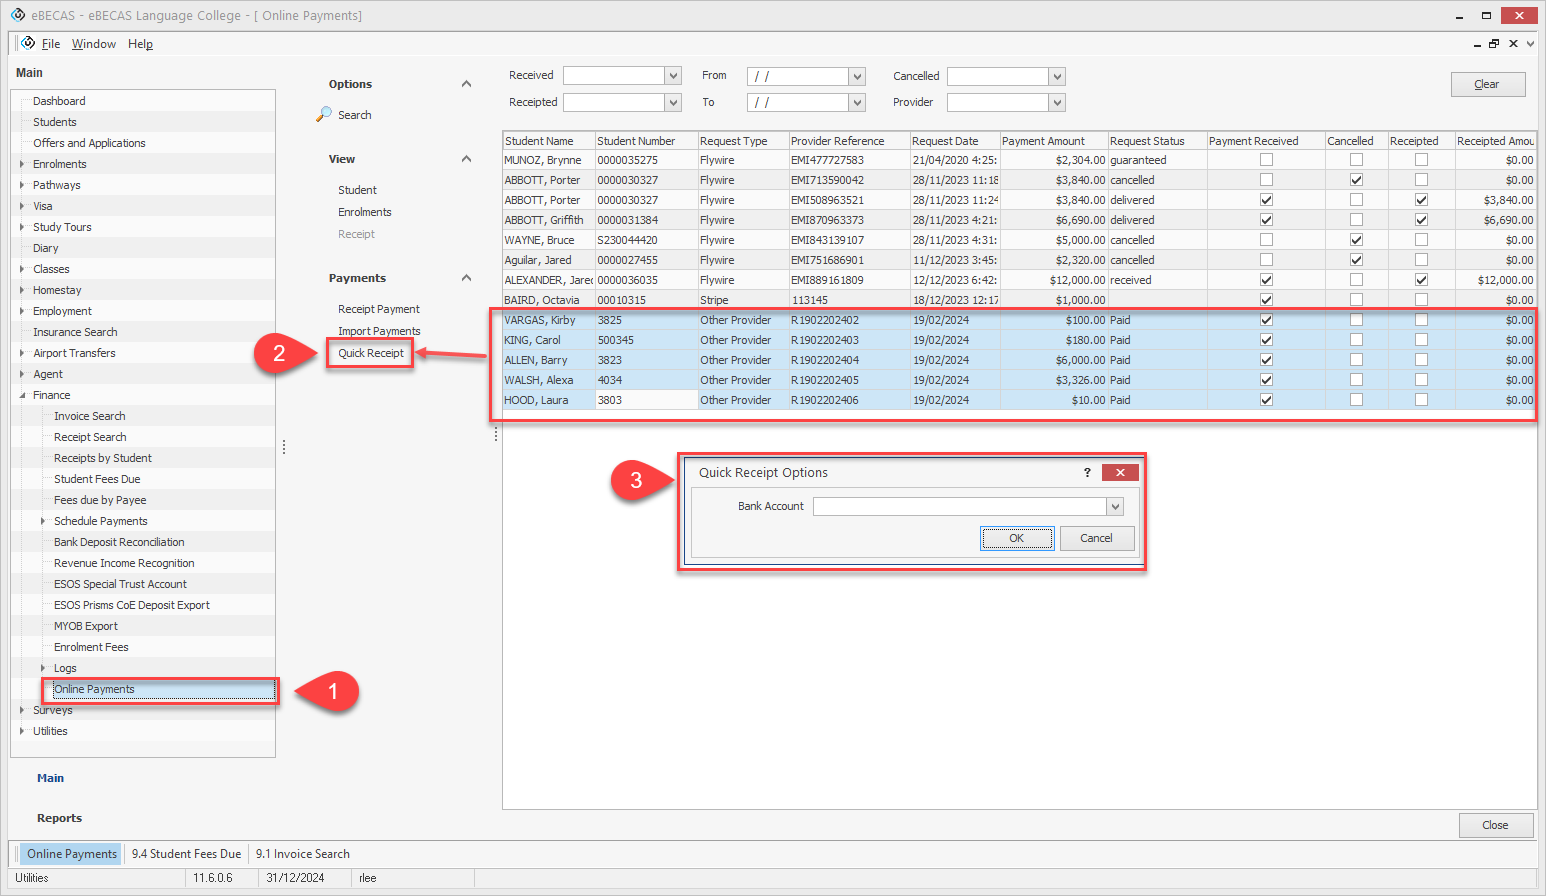
Bulk Receipt Payments through Quick Receipt
-
From the Online Payment form, search for Payments.
-
Select received Payments (using Control or Shift and Select) and click on the Quick Receipt option.
-
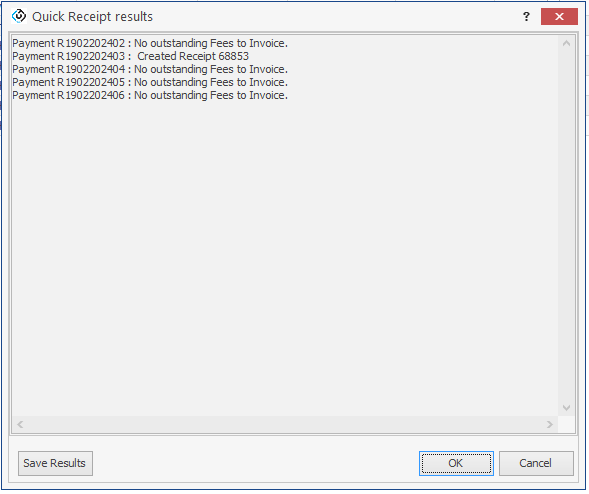
Specify the Bank Account to receipt selected payments. After running the Quick Receipt, eBECAS/EDMISS will display a list of actions taken.