Offer Instalments / Payment Plans
Overview
Instalments or payment plans allow you to break the total amount for an offer item into multiple payments, each with its own amounts and due date.
The payment plans feature is highly versatile can be used for courses and other items such as accommodation, transport etc.
Considerations for Working with Payment Plans
At the offer stage (before the offer is converted), the different instalments in a payment plan can be created and modified. Once the offer is accepted, the instalments generate invoices on the corresponding enrolments (view the Invoices article for details) and can no longer be modified.
For courses with Subject or Units of Study (UoS) pricing, the instalments are determined by the subjects and the Units of Study cost and due dates . Different instalment plans cannot be created for these course types.
View Offer Instalments/Payment Plan
Go to the offer of interest.
Go to the Instalments tab.
You’ll see the data grid of Offer Instalments. For details about available buttons, refer to this article: Data Grids | Single Grid Composition.
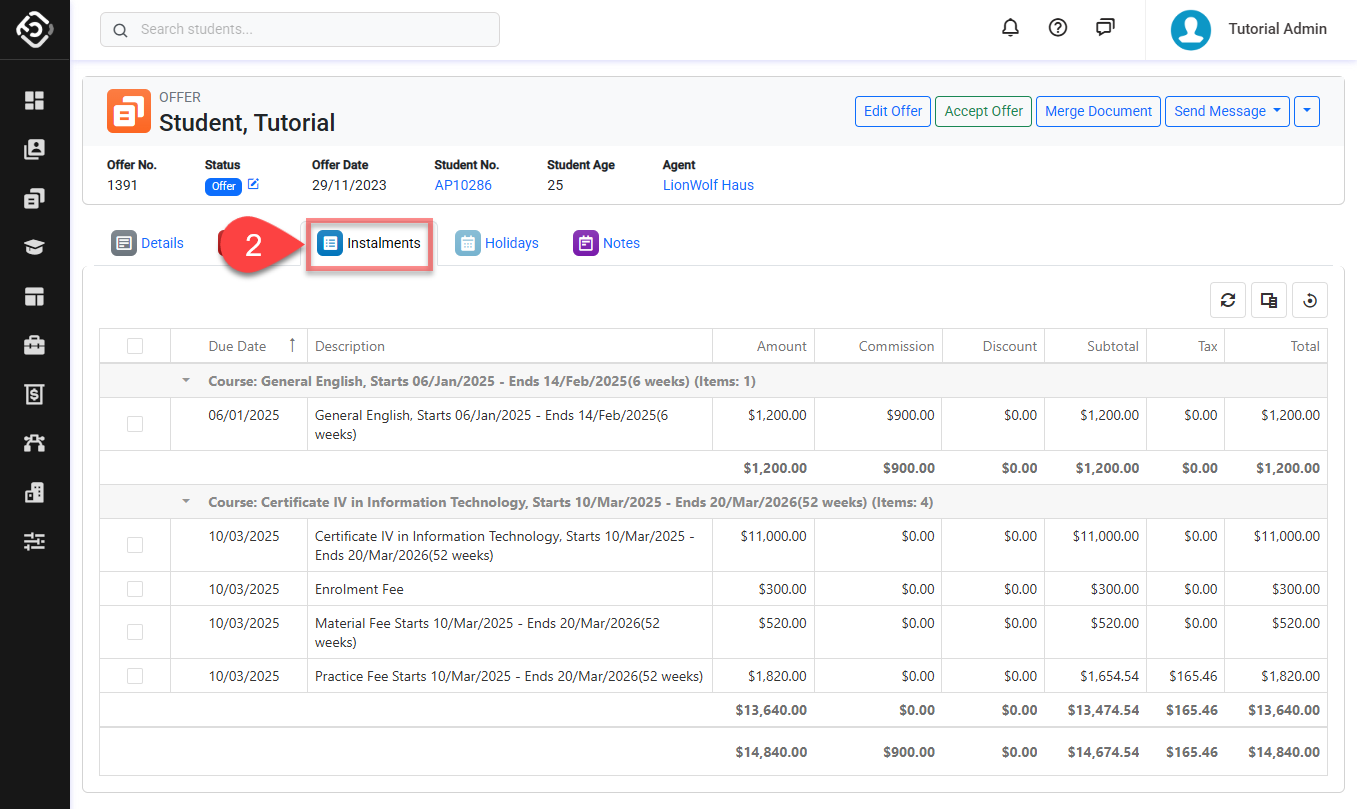
One Instalment Payment Plan
When a course is added to an offer, the system automatically creates one single instalment for the total amount of the course. By default, this instalment due date is the course start date.
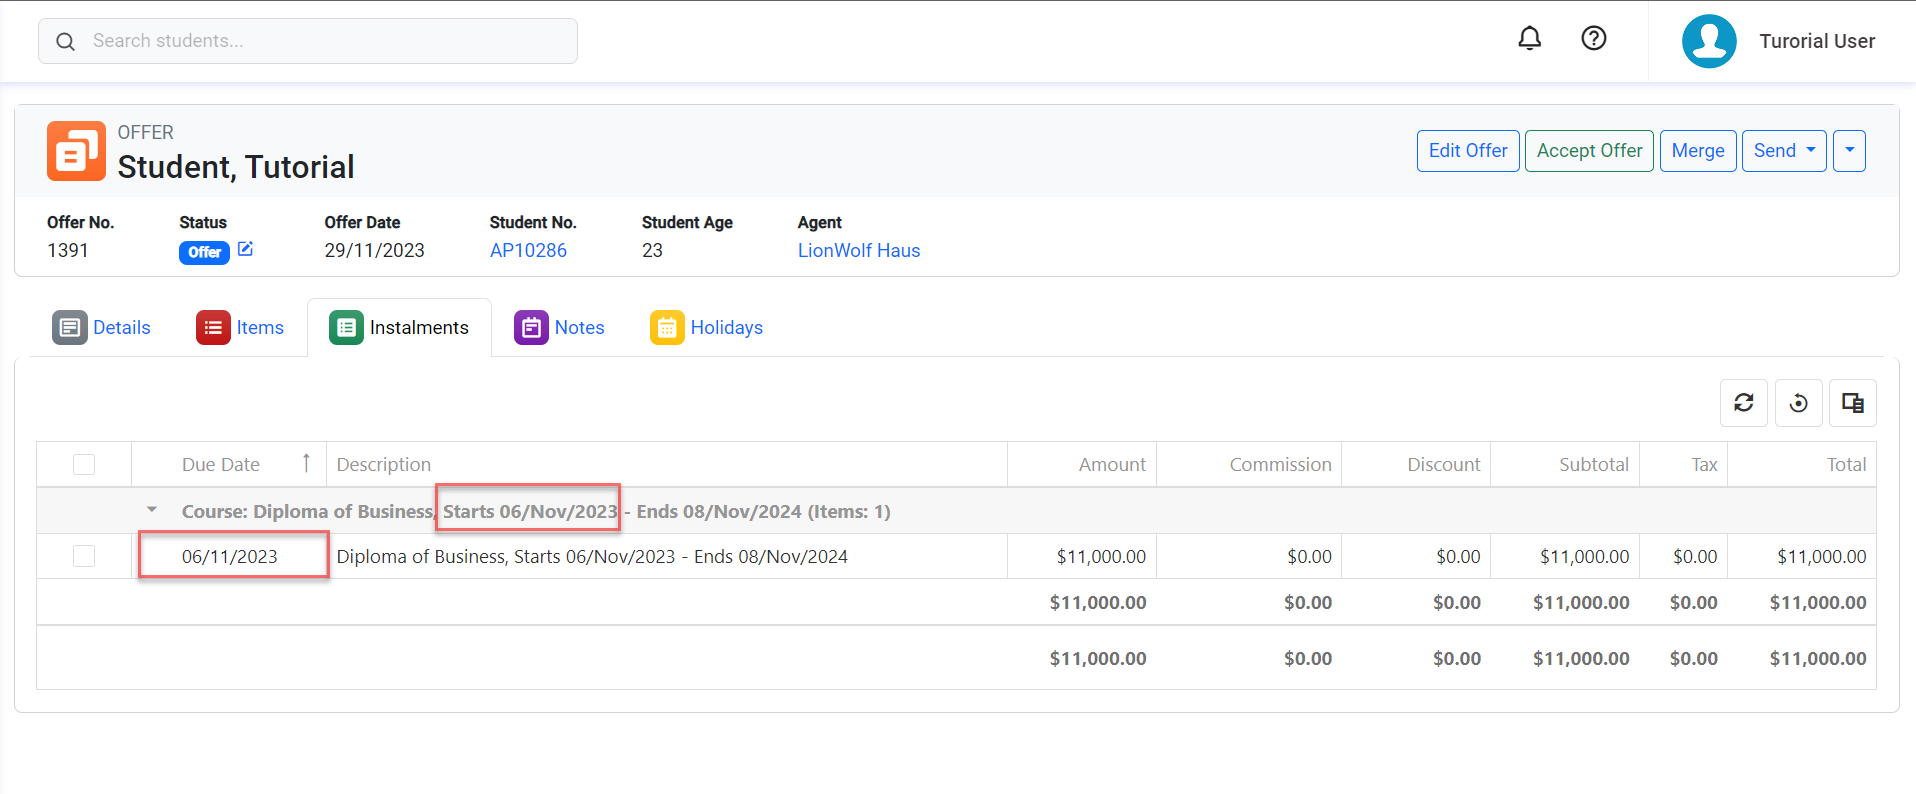
If the student prefers to pay for the offer in full rather than through instalments, there's no need to create new instalments. Simply adjust the due date (if required).
Multiple Instalments Payment Plan
You can create multiple instalments for an offer item either manually or by using the Instalments Generator feature. Both methods are accessible through the Instalments tab.
The Instalments Generator RECOMMENDED
The Instalments Generator is a handy tool that helps you set up multiple instalments just the way you want.
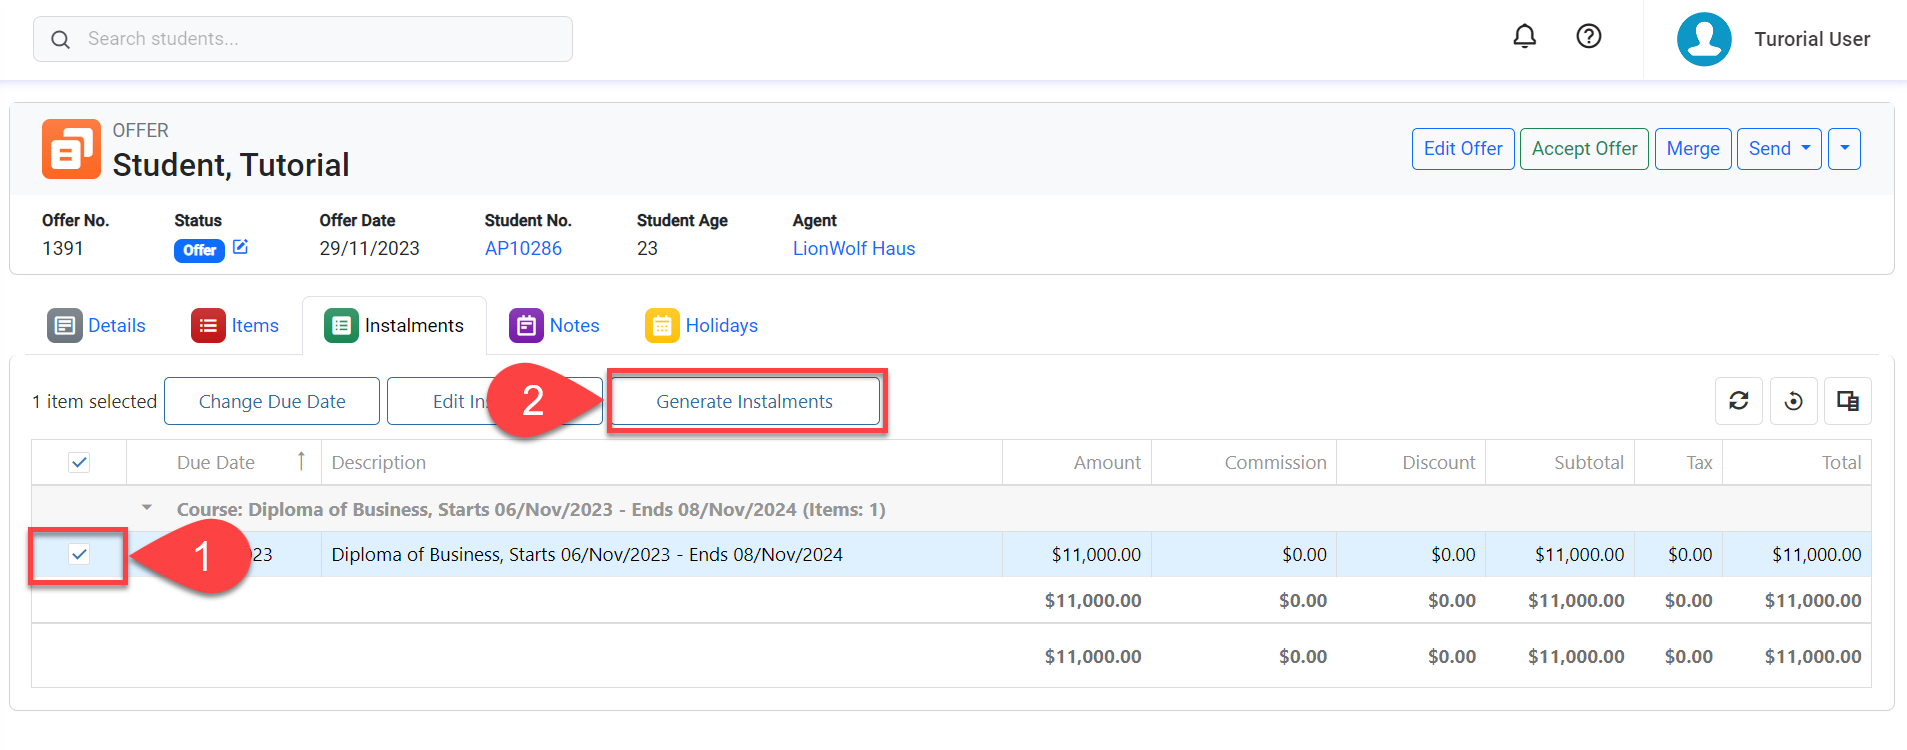
Go to the Instalments tab of the offer and select the offer item you wish to generate instalments for.
Click on the Generate Instalments button from the Actions Panel. If the selected item has already more than one instalment, a warning window will display to let you know that generating new instalments will delete the existing ones.
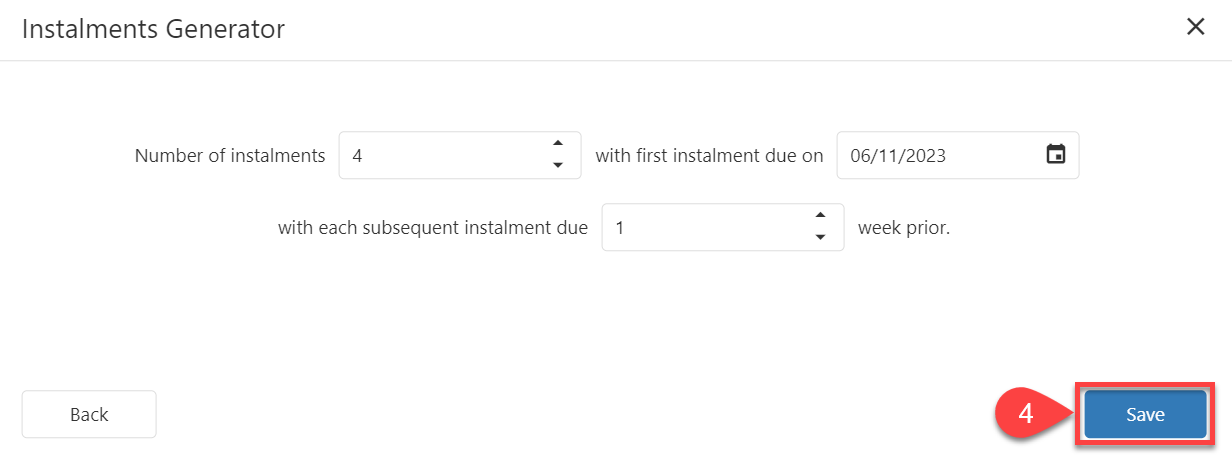
The Instalments Generator window will display. Select an option and set the details. For more details about Instalments Generator and available instalment generator options, please visit this article: Finance Instalments Generator
Click the Save button when you are ready.
The scheduled instalments will be displayed in the data grid.
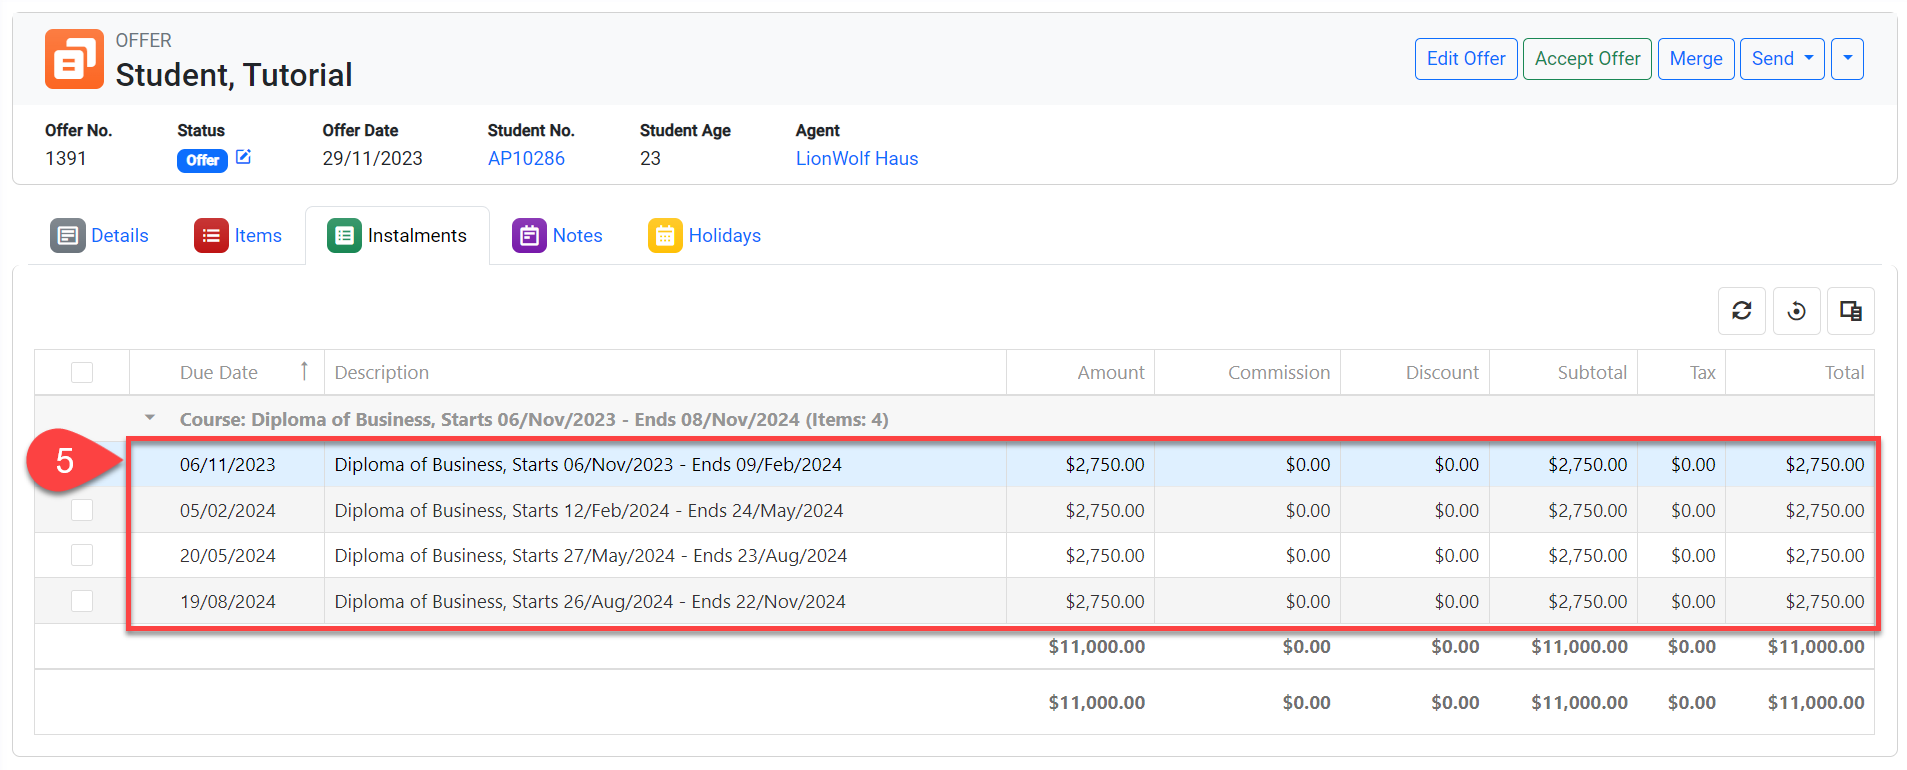
Generate Instalments Manually
In certain situations, when the payment plans do no follow a set of rules, they need to be created or adjusted manually. To do so:
Go to the Instalments tab of the offer and select the offer item that you’d like to generate instalments manually for, then click on Edit Instalments from the Actions Panel.
Or simply double click on the item.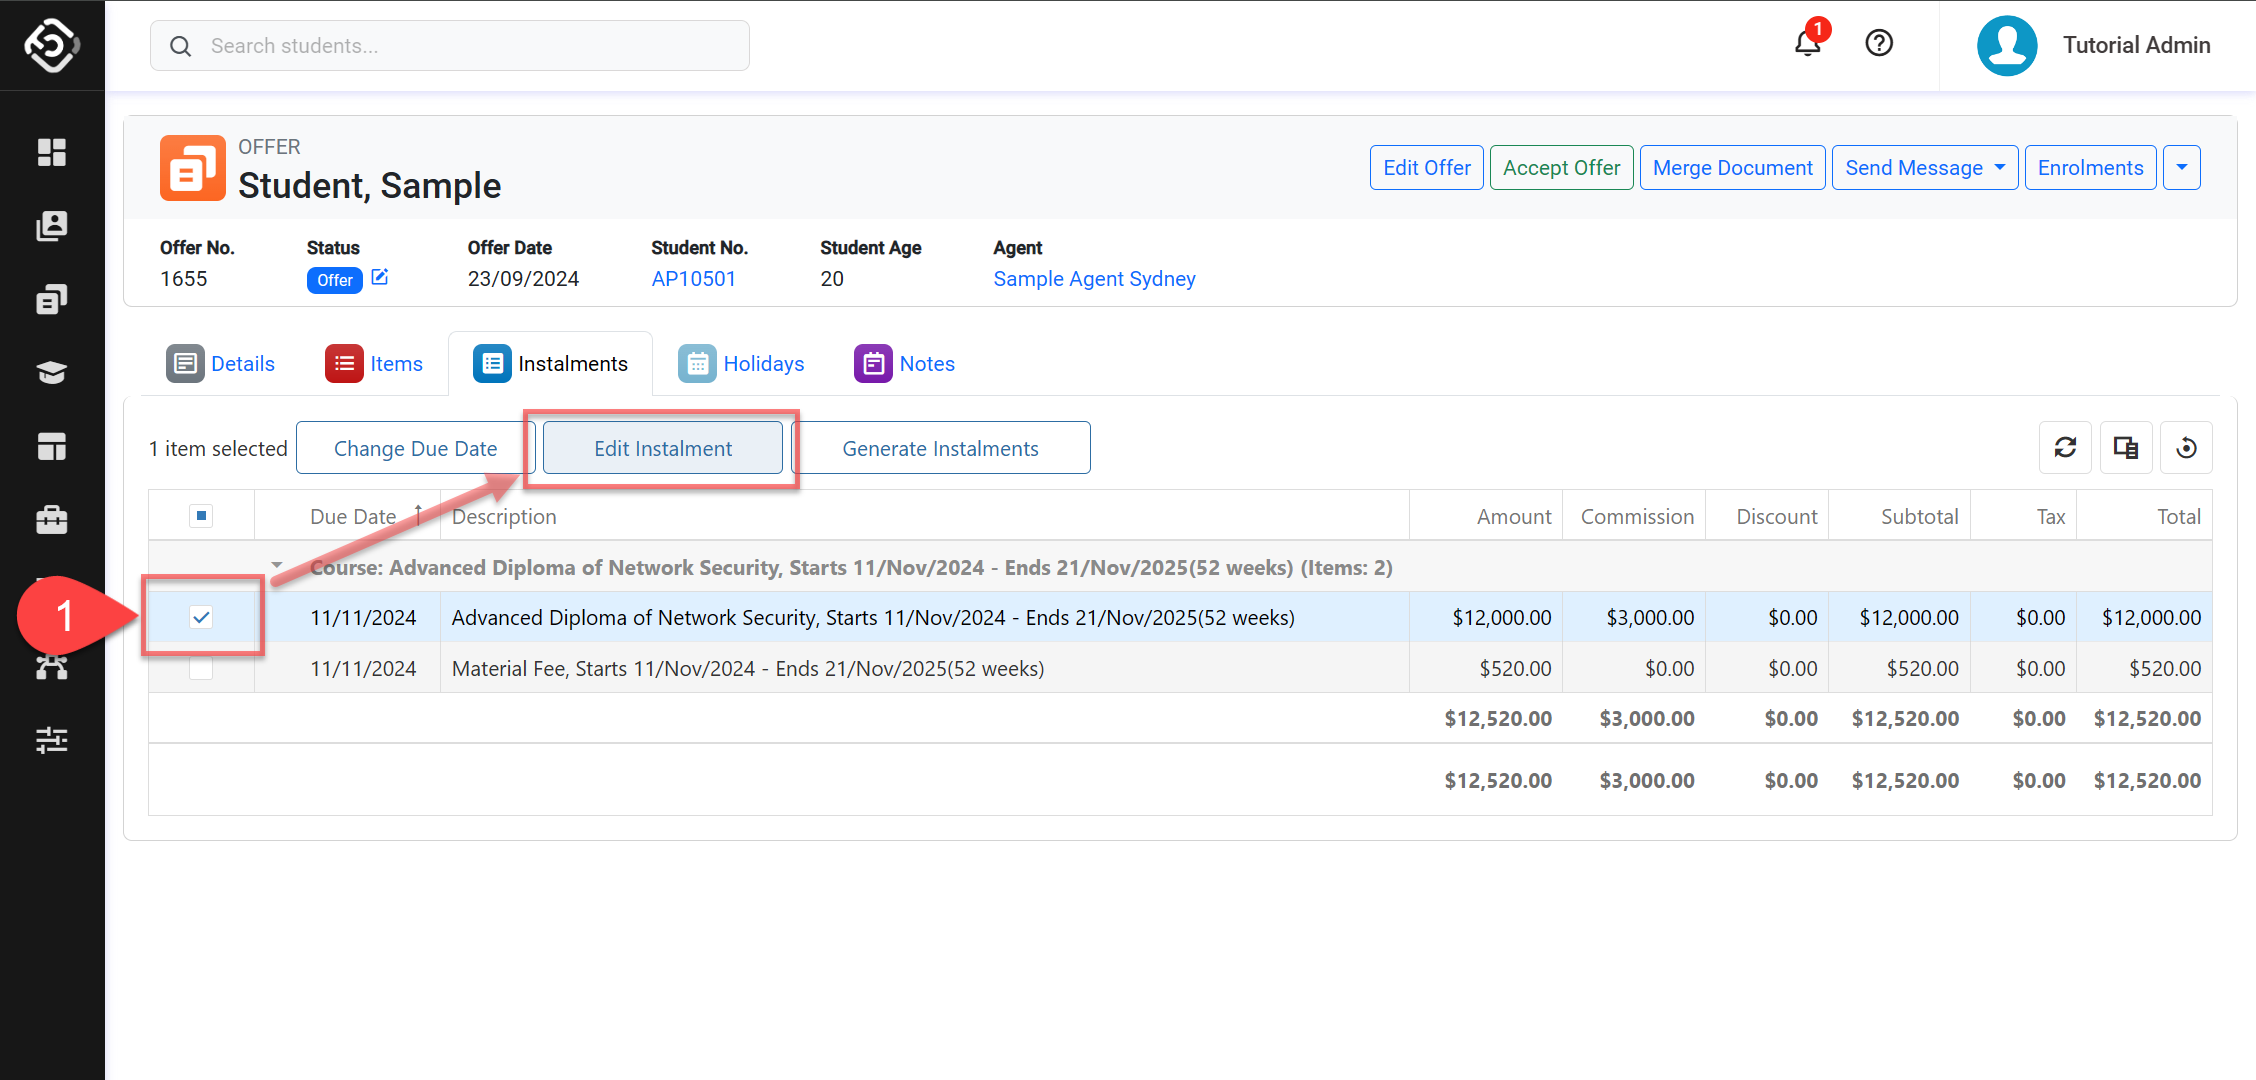
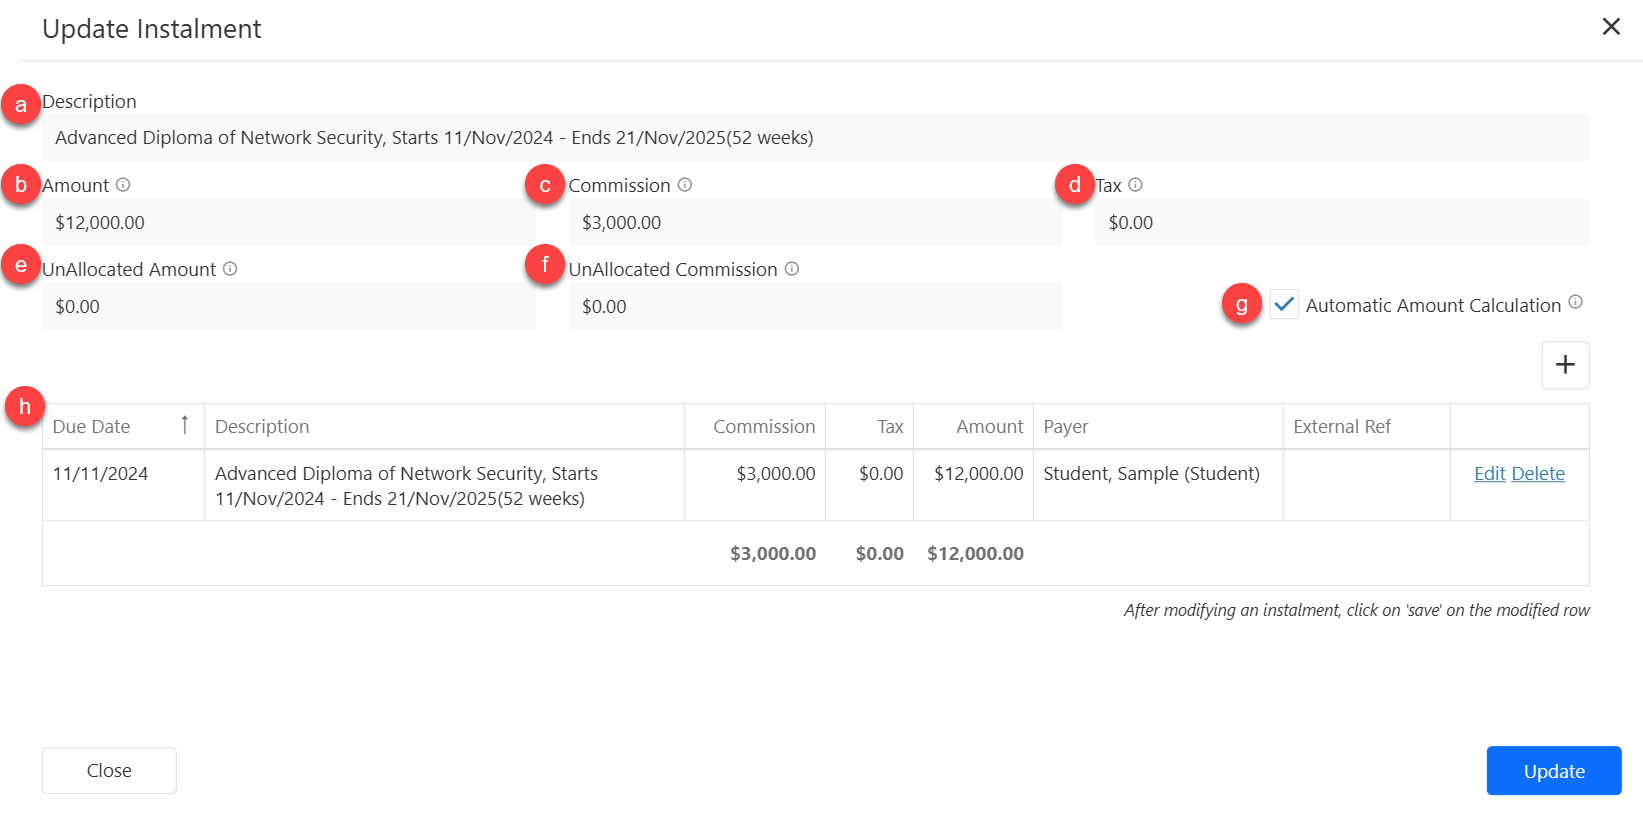
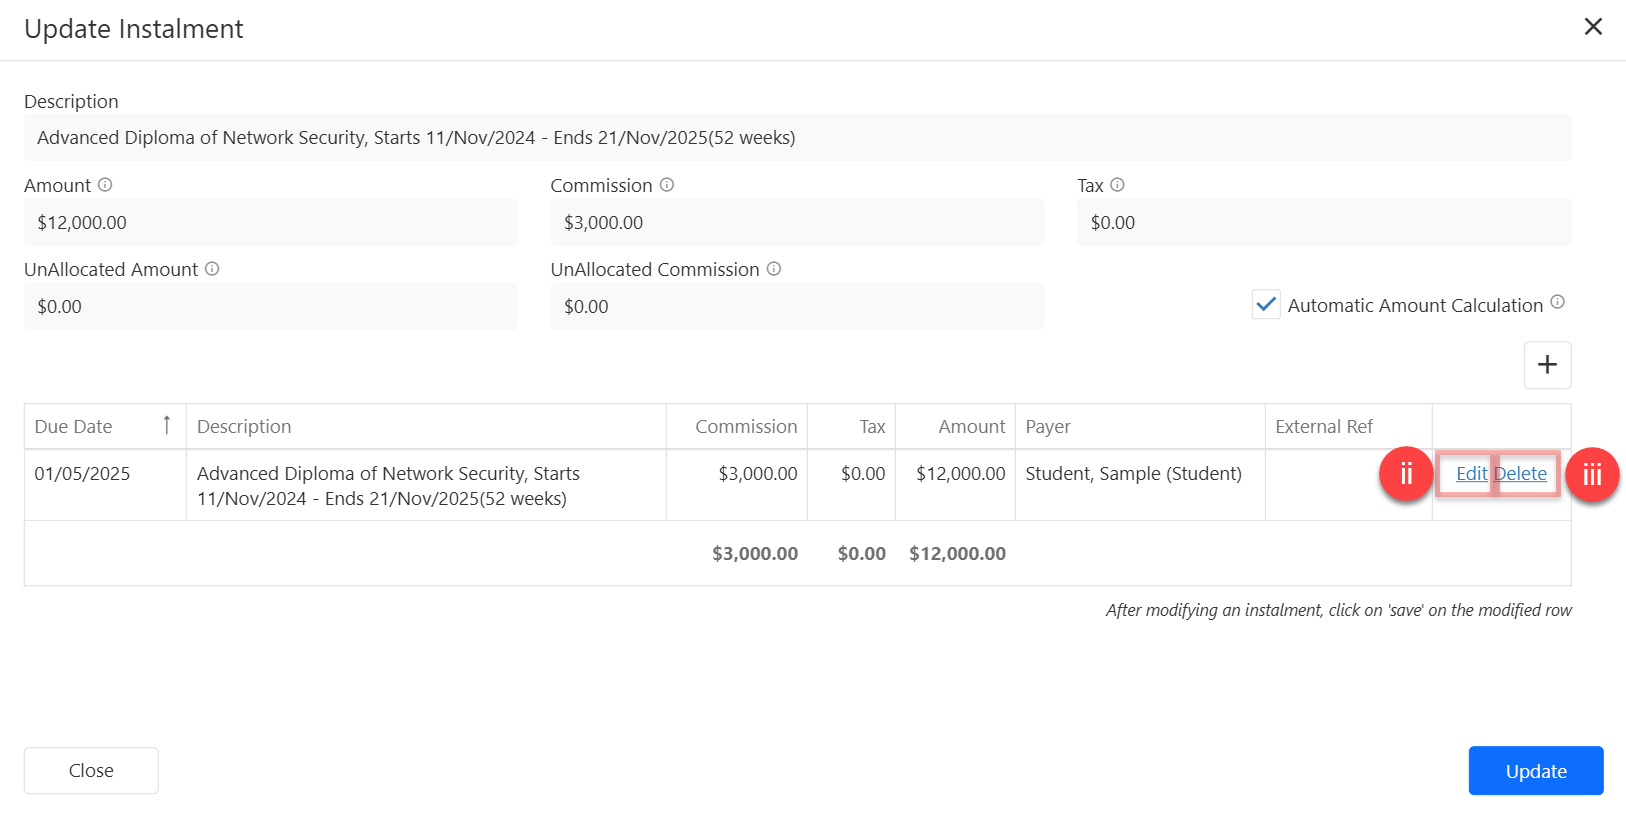
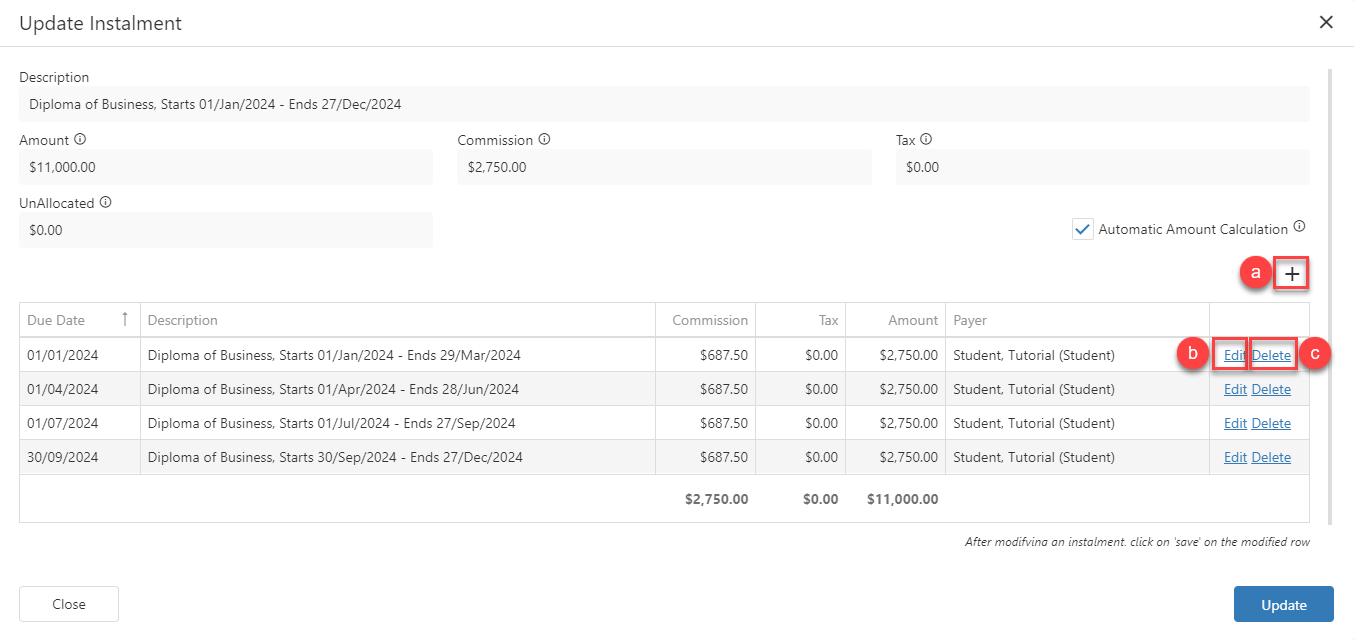
The Update Instalment window will open.
Description: This is the description of the item.
Amount: The total amount for the item. The sum of the instalments amounts must equal this value.
Commission: The total commission for the item. The sum of the instalments commission amounts must match this value.
Tax: The total tax of the item. The sum of the instalments tax amounts must match this value.
UnAllocated Amount: This shows the gap between the item’s total amount and the sum of its instalments. If it’s not zero, it means the instalments add up to either a bit more or a bit less than the item’s actual amount.
UnAllocated Commission (COURSE ITEMS ONLY): This shows the gap between the item’s total commission and the sum of each instalments commission. If it’s not zero, it means the instalments commission adds up to either a bit more or a bit less than the item’s actual commission amount.
Automatic Amount Calculation (COURSE ITEMS ONLY): Select this option to automatically calculate the commission amount for a modified instalment. Leave this unselected if you need to manually adjust the commission for the instalment (the total commission still needs to match the total commission for the item).
Instalments: A grid with the list of instalments for the item. From this grid, you can created, edit and delete individual instalments.
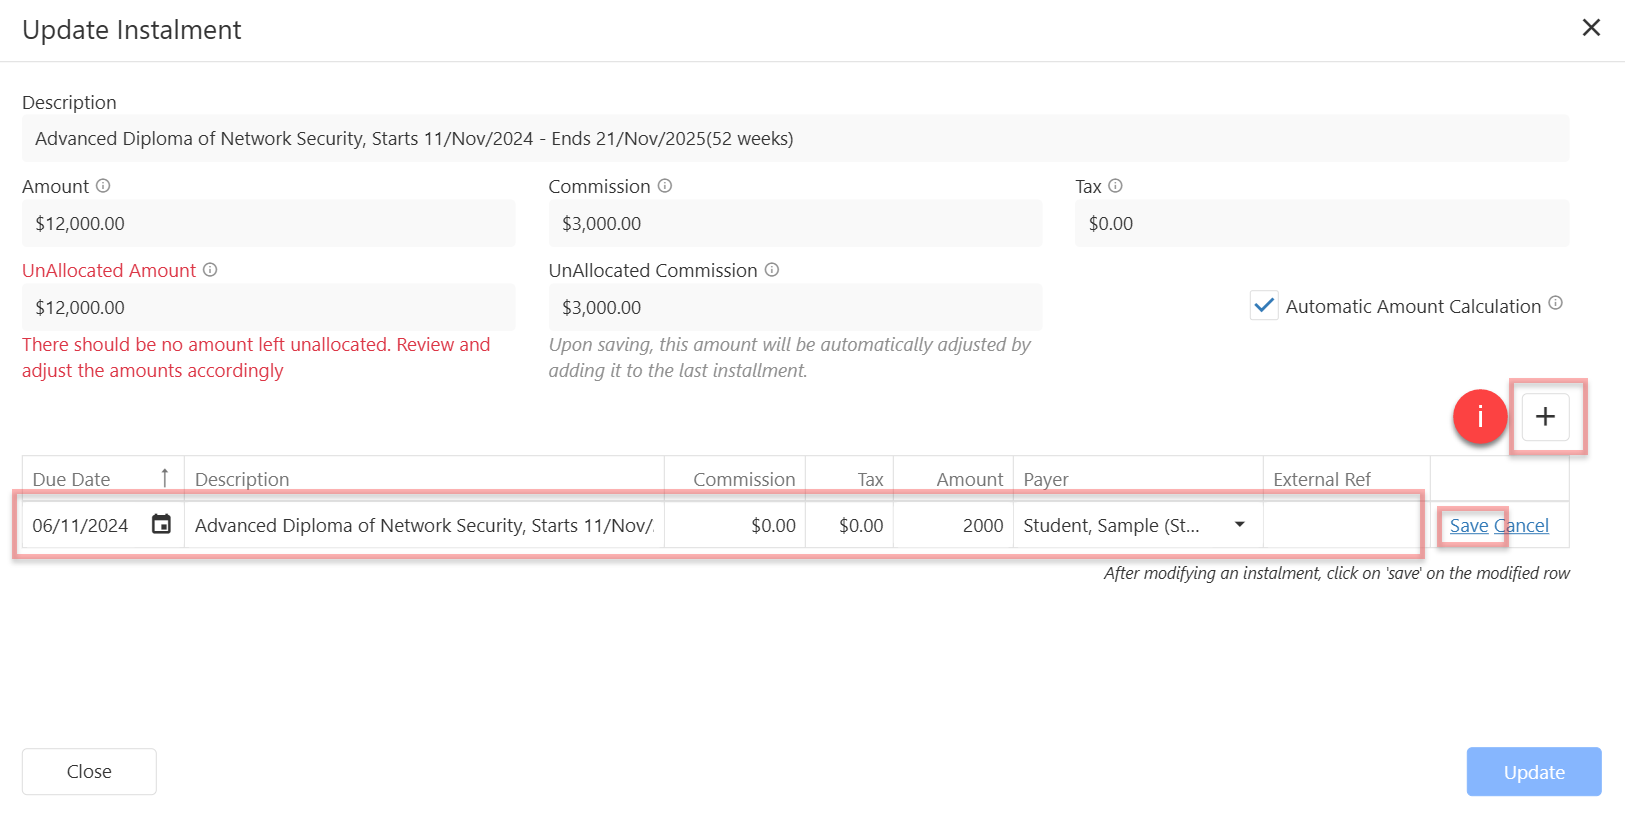
Add an Instalment: Click on the Create icon ➕ at the top right of the data grid. Then enter the details of the instalment and click on Save on the row of the instalment.
Edit an Instalment: Click on Edit on the row of the instalment you want to modify.
Delete an Instalment: If needed, you can delete an instalment from the grid. To do so, click on Delete on the row of the instalment you want to delete.
Tip: Use Payer to Automate Invoice Reminders
Each instalment can have a Payer — the person or organisation responsible for paying that part of the offer.
This information carries over to the invoice once the offer is accepted, identifying who is responsible for payment. It also enables you to send targeted Invoice Reminders — helping reduce missed payments and improve follow-up.
Learn more about Invoice Reminders in this article: Invoice Reminders
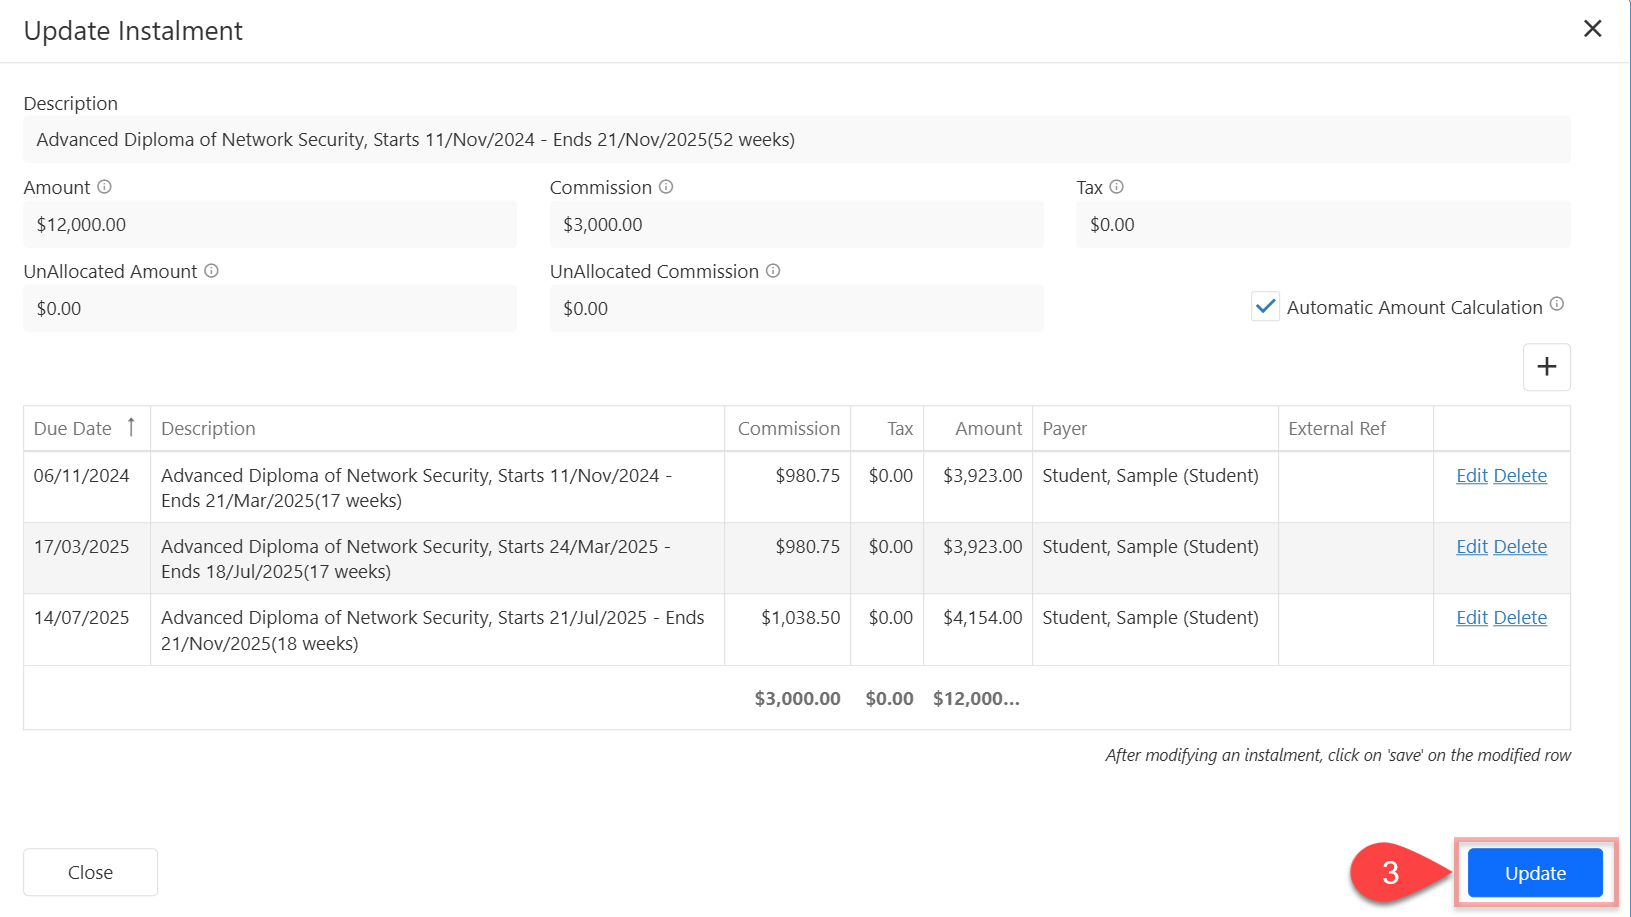
Once all instalments have been created/updated, click on Update to finish.
Instalments Around Holidays
By default, offer instalments are created without taking holidays into account, so a due date may fall within a holiday period. However, if you prefer instalment due dates to avoid holidays, you can update your Offer System Settings to automatically adjust them.
Updating these setting will not modify existing instalment plans but will apply to future payment plans.
Edit Instalments
Edit Instalments individually
For instalments of Units of Study and Subject-Based courses, amount and due date fields can’t be updated directly.
To update these details:
For Units of Study-based courses, go to the Offer Units of Study tab: Edit Offer Units of Study Details
For Subject-based courses, go to the Offer Subjects tab: Edit Offer Subjects Details
Access to Instalments tab in the offer of interest.
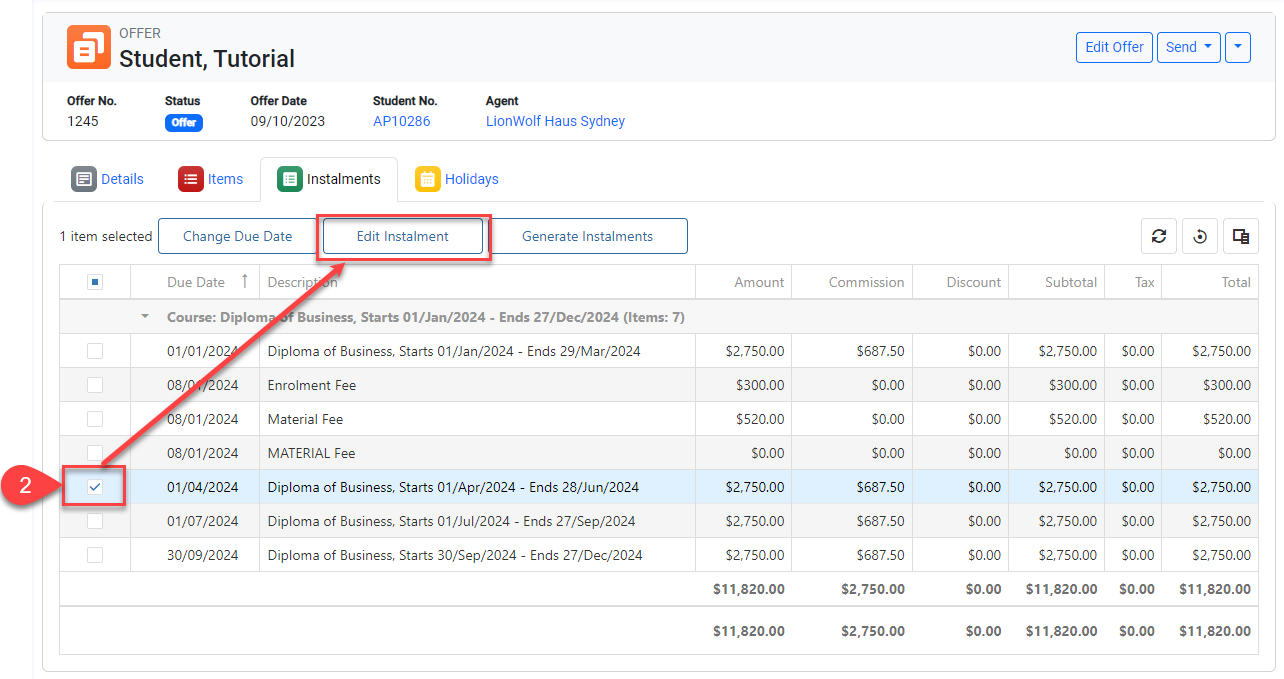
Select any of the instalments for the offer item that you would like to modify. Then click on the Edit Instalment button on the Actions Panel.
A pop-up window will display with all the instalments for the selected item.
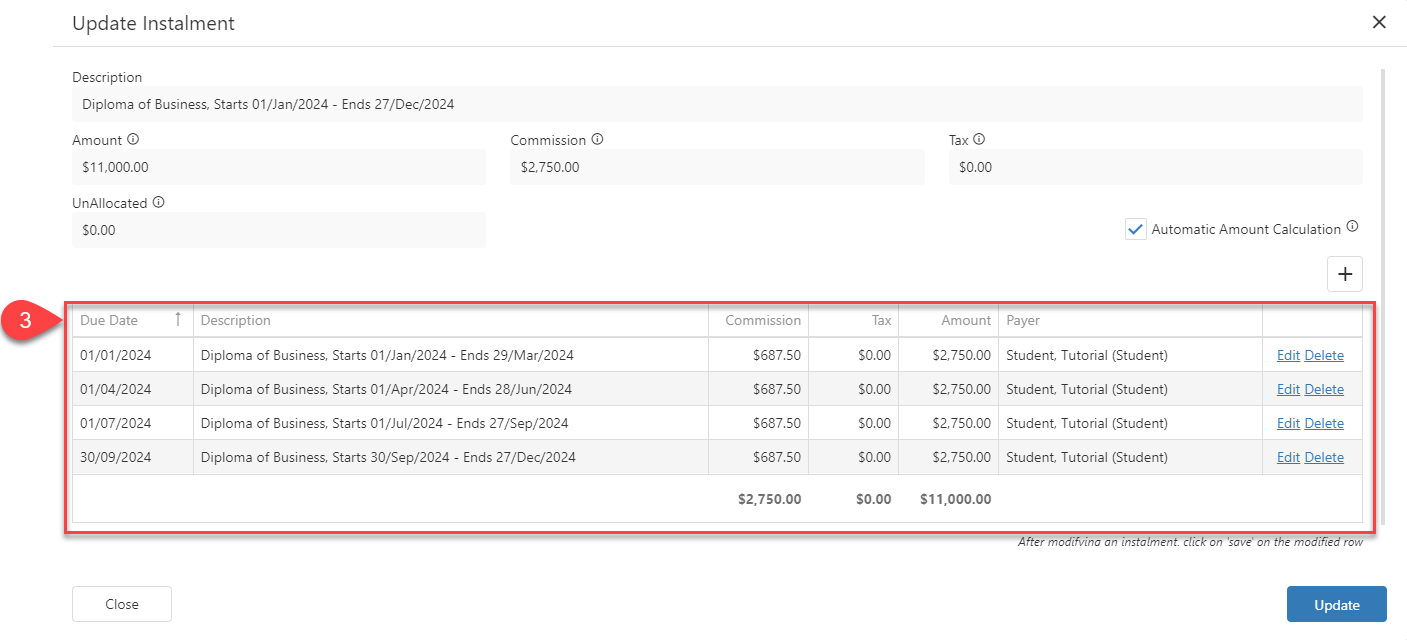
Click on the Create, Edit or Delete button depending on your purpose.
Create: Add instalments.
Edit : Change Due Date, Description, Amount and Payer.
Delete : Delete the instalment.
Tip: Use Payer to Automate Invoice Reminders
Each instalment can have a Payer — the person or organisation responsible for paying that part of the offer.
This information carries over to the invoice once the offer is accepted, identifying who is responsible for payment. It also enables you to send targeted Invoice Reminders — helping reduce missed payments and improve follow-up.
Learn more about Invoice Reminders in this article: Invoice Reminders
Click on the Save button to save the instalment and then on Update to save the payment plan.
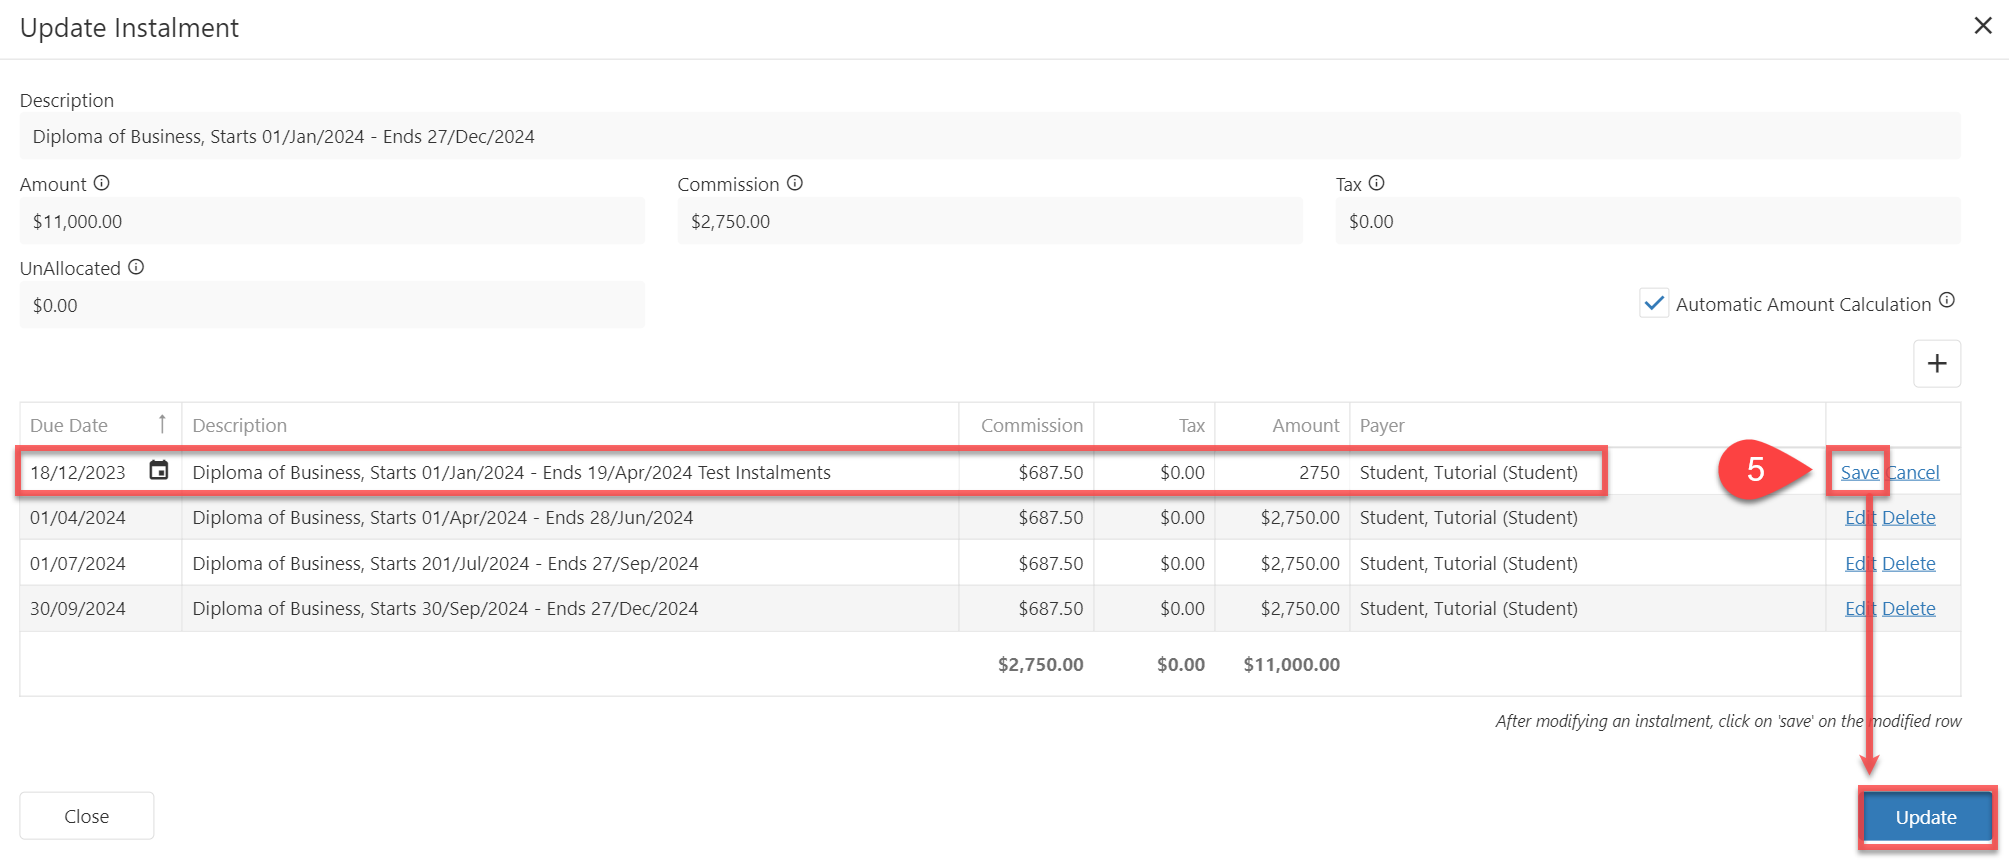
If there's an unallocated balance remaining, you won't be able to update the payment plan.
Edit the Instalments Due Dates
Instalment Due Dates for Units of Study and Subject-Based courses cannot be updated in the Offer Instalments tab, as they follow each Unit or Subject’s Due/Census Date.
For Units of Study-based courses, update the Due/Census Date of the units from the Units of Study tab to adjust the Instalment due dates: Edit Offer Units of Study Details
For Subject-Based courses, update the Due/Census Date of the subjects from the Subjects tab to adjust the Instalment due dates: Edit Offer Subjects Details
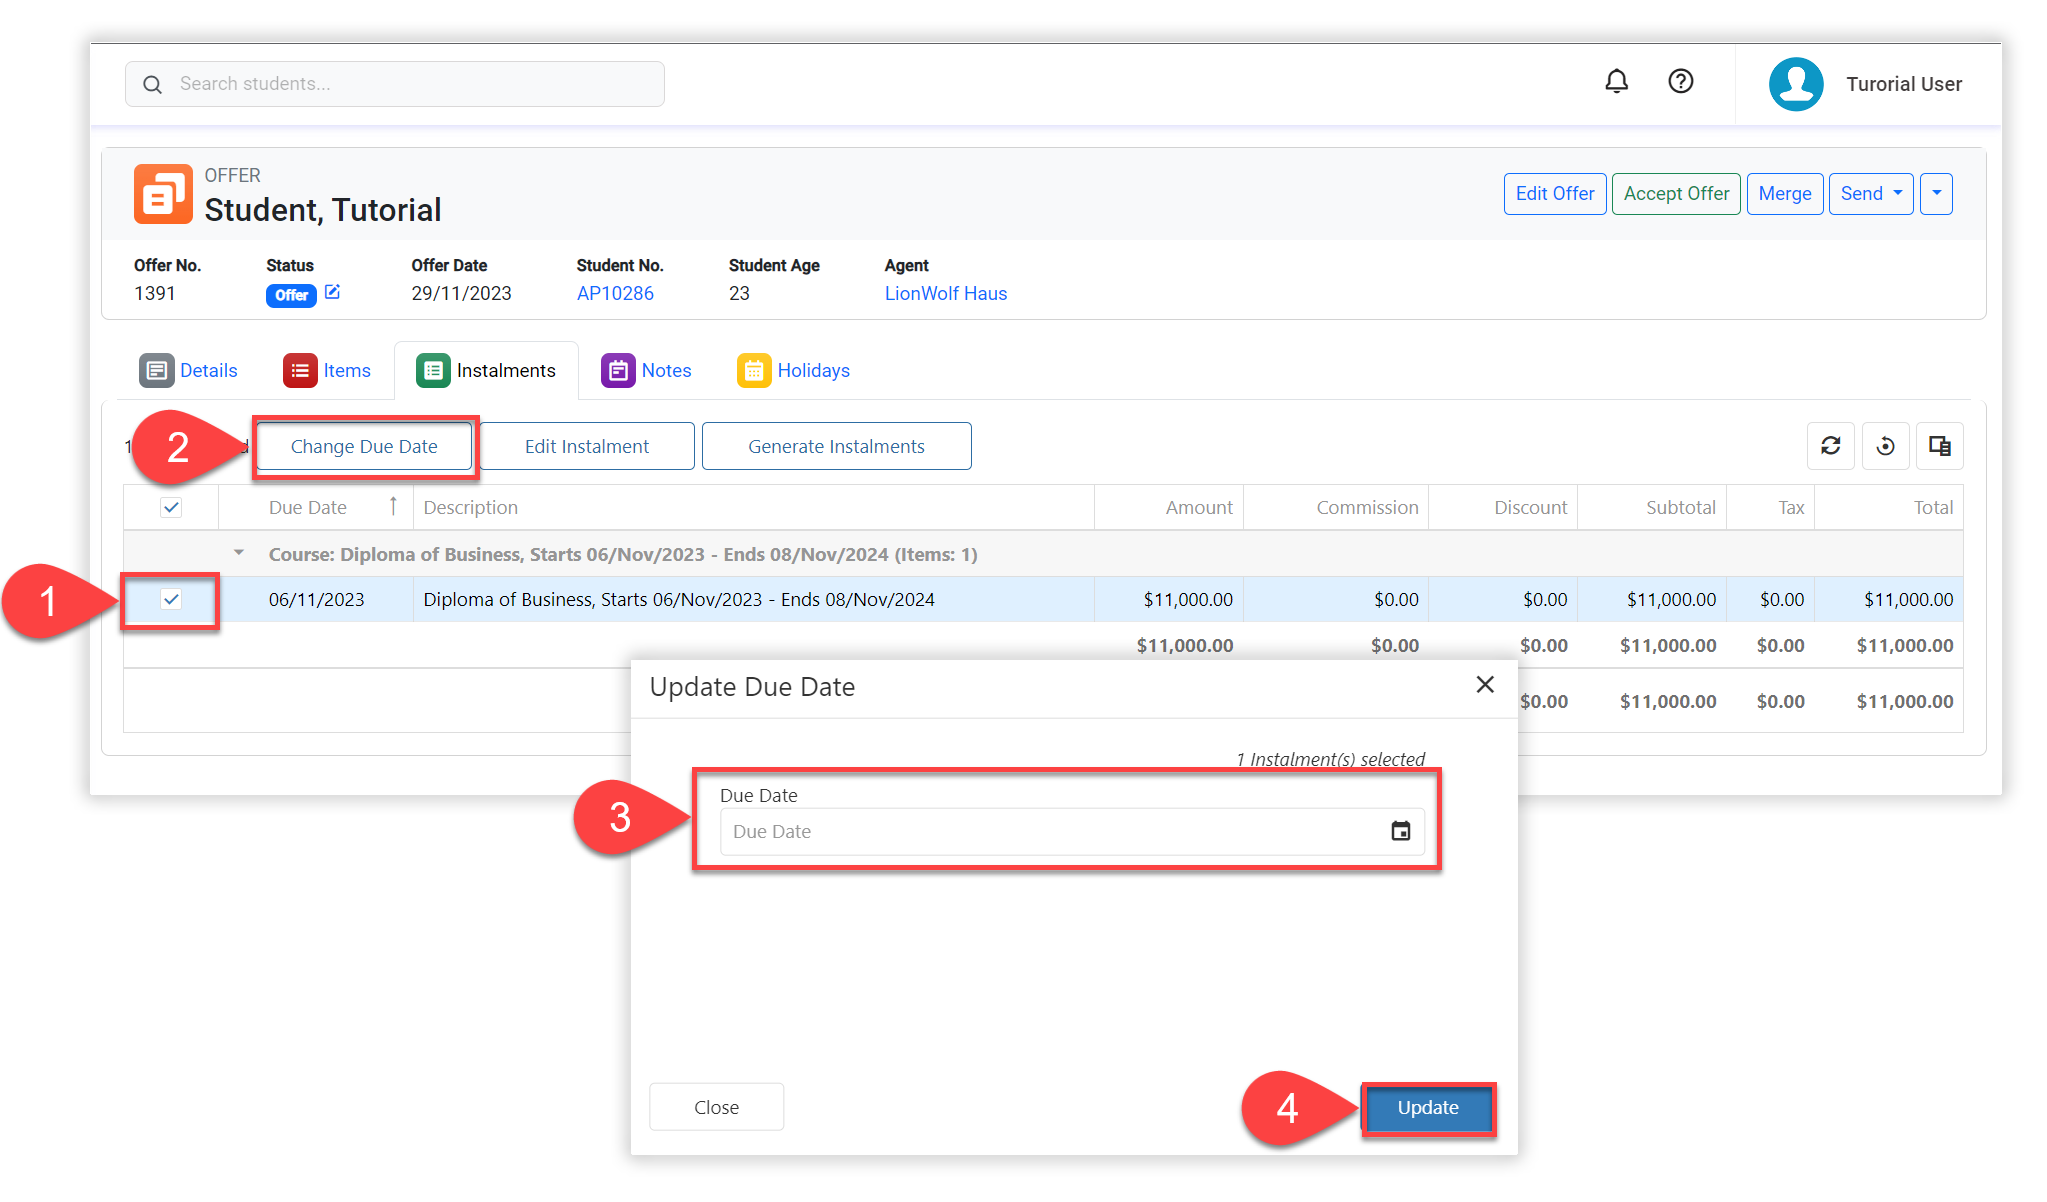
Modifying the due date for a single or multiple instalments is simple:
Select the instalment(s) that you’d like to modify the due date for.
Click on Change Due Date from the Actions Panel.
Select the new due date.
Click on Update to save.
Regenerate all the Instalments
If you wish to recreate the entire payment plan for an item, please follow the steps below.
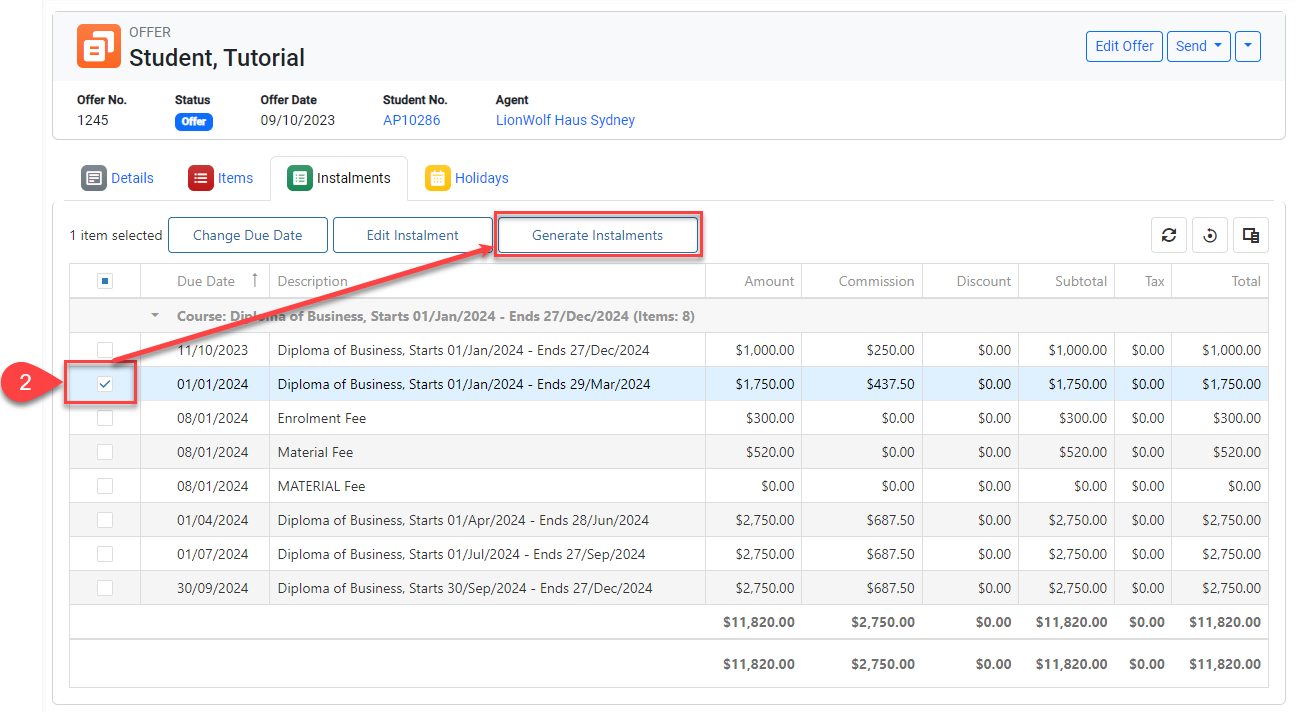
Go to the Instalments tab for the offer of interest.
Select any of the instalments for the item that you want to recreate the instalments for. Then click on the Generate Instalments button.
Follow the Generate Instalments steps outlined above.
