
Roles serve as the backbone of a structured access control system. They help streamline access management by grouping permissions into logical units.
What are Roles
In simple words, a Role is a group of permissions that is assigned to users. Users with that role with inherit the permissions assigned to the role.
By grouping permissions, roles ensure that users have just the right level of access they need, neither too much nor too little.
Roles can be created for standard user access or API access. Standard User Roles control what users can see and do in the system, while API Roles use a separate set of permissions for API users and programmatic access.
The Administrator Role
An administrator, or “admin,” is any user with the Administrator role. The Administrator is the superhero of the system, handling all the setup and maintenance to keep the app running smoothly for everyone.
Admins have unique powers. They can manage user accounts and control what users can see and do within the app. They are the planners and problem-solvers who keep everything on track. Every organization has at least one admin, and their responsibilities can vary based on the size and structure of the company. In smaller institutions, the admin often uses eBECAS/EDMISS just like everyone else.
eBECAS/EDMISS is packed with features and customizable options. Team up with your friendly admin to get the most out of eBECAS/EDMISS and enjoy a smooth, efficient experience.
Given the special privileges and responsibilities of the Administrator role, only other Administrators can perform actions related to this role.
How you contact your administrator, and when and why, depends on your institution’s internal policies and practices.
View Roles
-
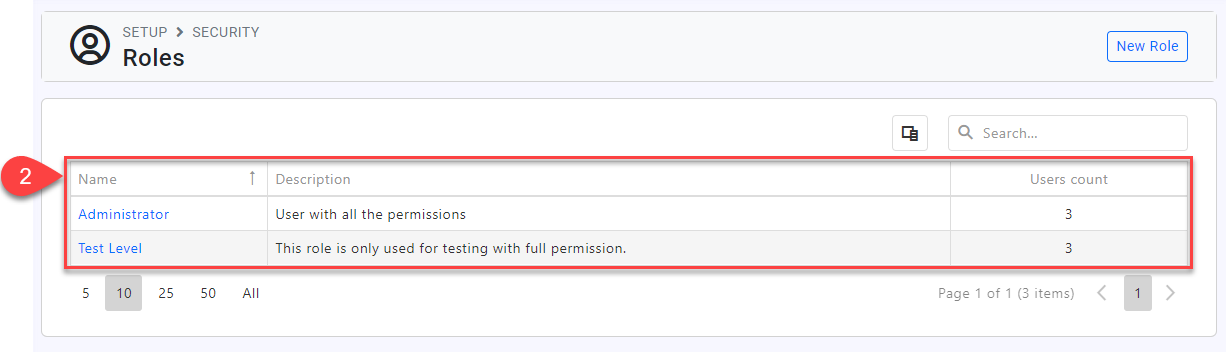
From the Utilities Menu , go to Security > Roles.
-
You can see the list of roles available to be assigned.
Create Roles
-
From the Roles page, click on New Role.
-
Enter the details.
To create an API Role, select the option at the top-right when creating a new role. This type of role can only be used for API users and programmatic access permissions.
API Roles use a separate set of permissions from standard User Roles. These permissions are designed to control what API users can access or perform through the API, rather than what a standard user can see or do in the system.
This option can only be selected during the role creation process, and it cannot be modified after the role is created.
To use an API Role, the Equator API App must be installed.
-
Click Create.
Some examples of Roles could be based on areas of responsibility such as Admissions, Director or Studies, Finance – Receivable/Payable, Student Services, Director of Studies etc.
Assign Roles
Multiple roles can be assigned to the same user. This can be useful when a user needs permissions that are spread across multiple roles. For example, if you have the roles Admissions and Recruitment, you might need the Director of Recruitment to have access to both roles. Instead, of creating a new role, you can assign both roles to that user.
-
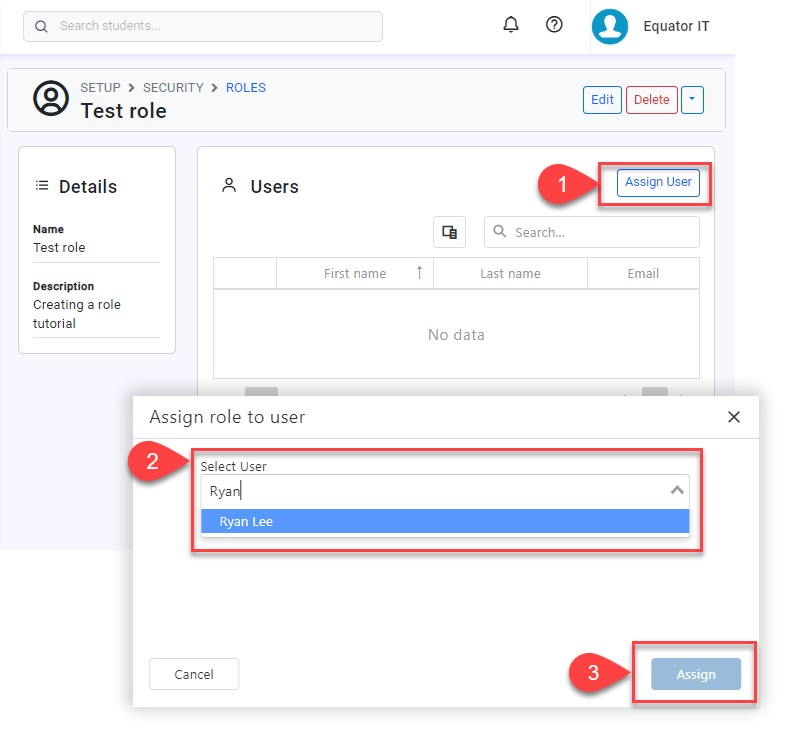
From the Role page, click Assign User.
-
Search and select the user.
-
Click Assign.
Remove Users From Roles
-
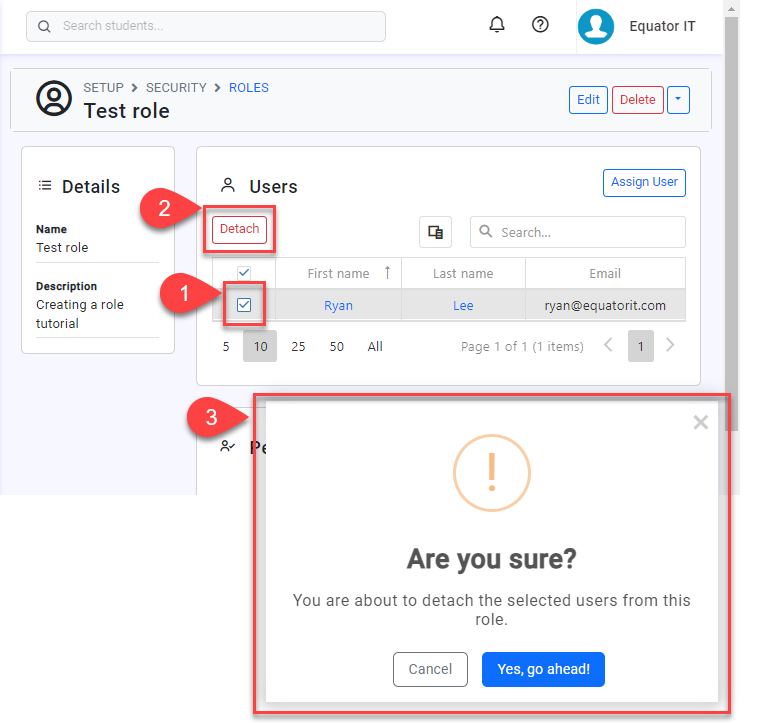
Select the users that you intend to remove from this Role.
-
Click Detach button.
-
Confirm.
Assign/Remove Permissions From Roles
-
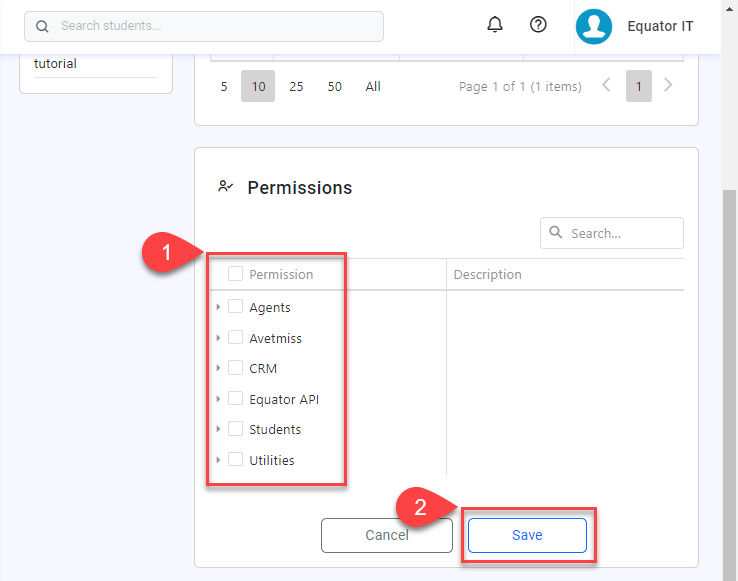
On the Role page, Select / Unselect the permission(s) you intend to apply / remove from the role.
-
Click Save.
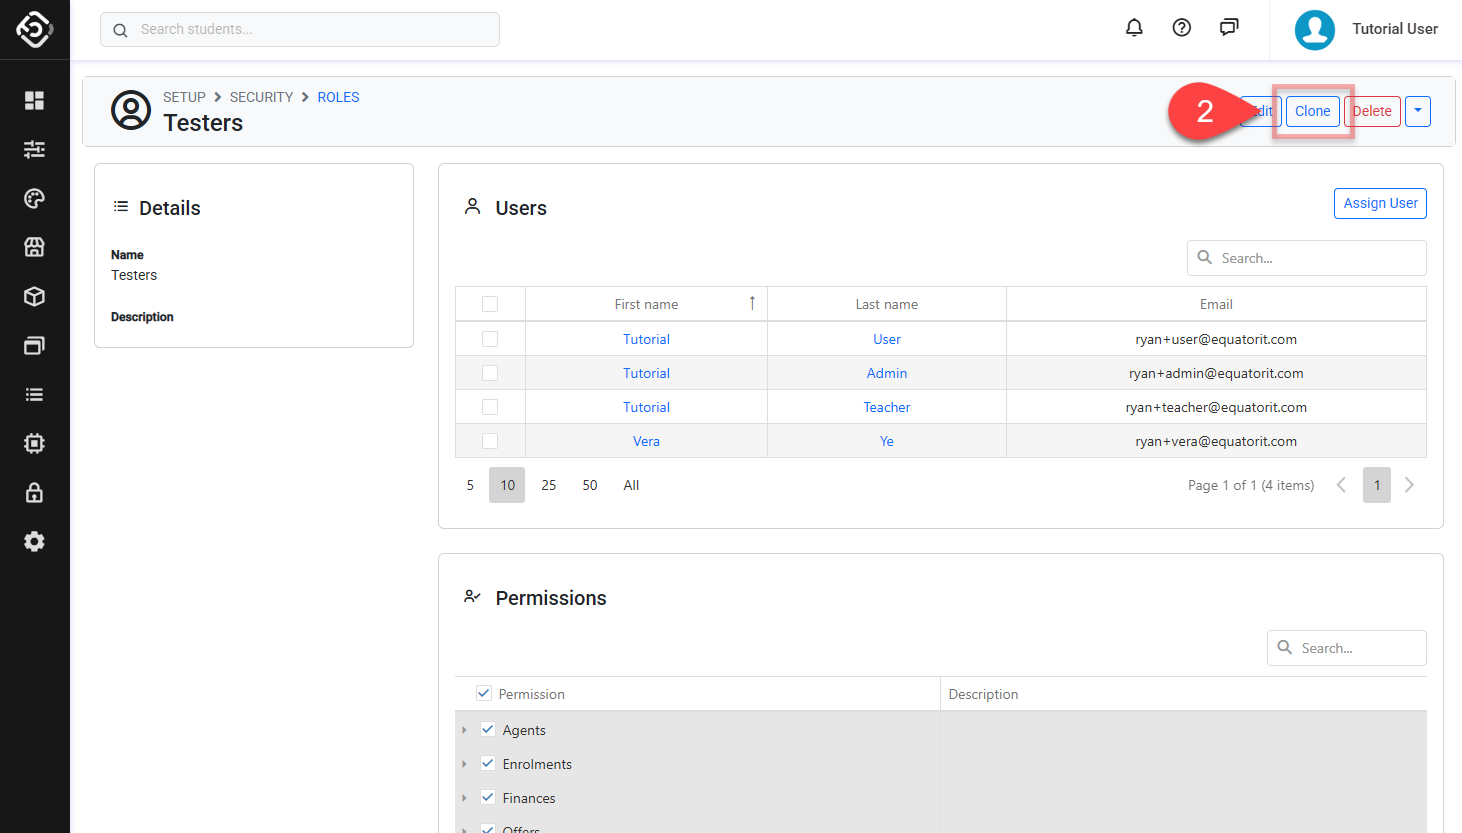
Clone Roles
Cloning Roles lets you create a new role with the same permissions as the original, but without any assigned users. To do so:
-
Go to the role detail page that you intend to clone.
-
Click on Clone button from the top right.
-
A new role with the suffix '-copy' and a randomly generated combination of letters and numbers appended to the name of the original role will be created.
Administrator role can’t be cloned.
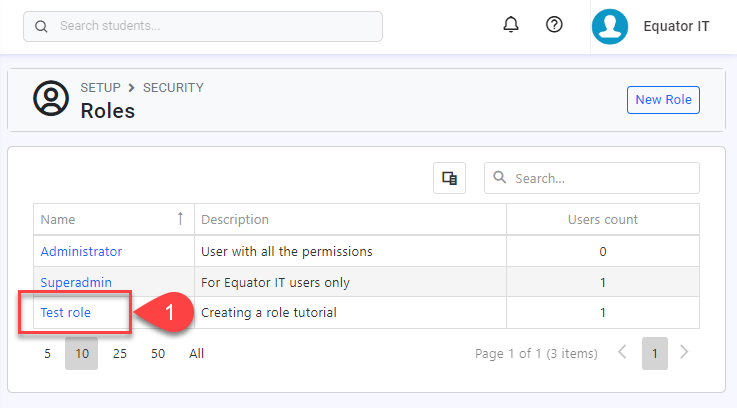
Delete Roles
-
From the Roles list, click on the role that you intend to delete.
-
Click Delete.
-
Confirm.
This action will permanently delete the Role. Please ensure that this task is intended before confirming.
