
Dashboard
Logging in using a computer browser shows the Portal like this, with the dashboard displayed:

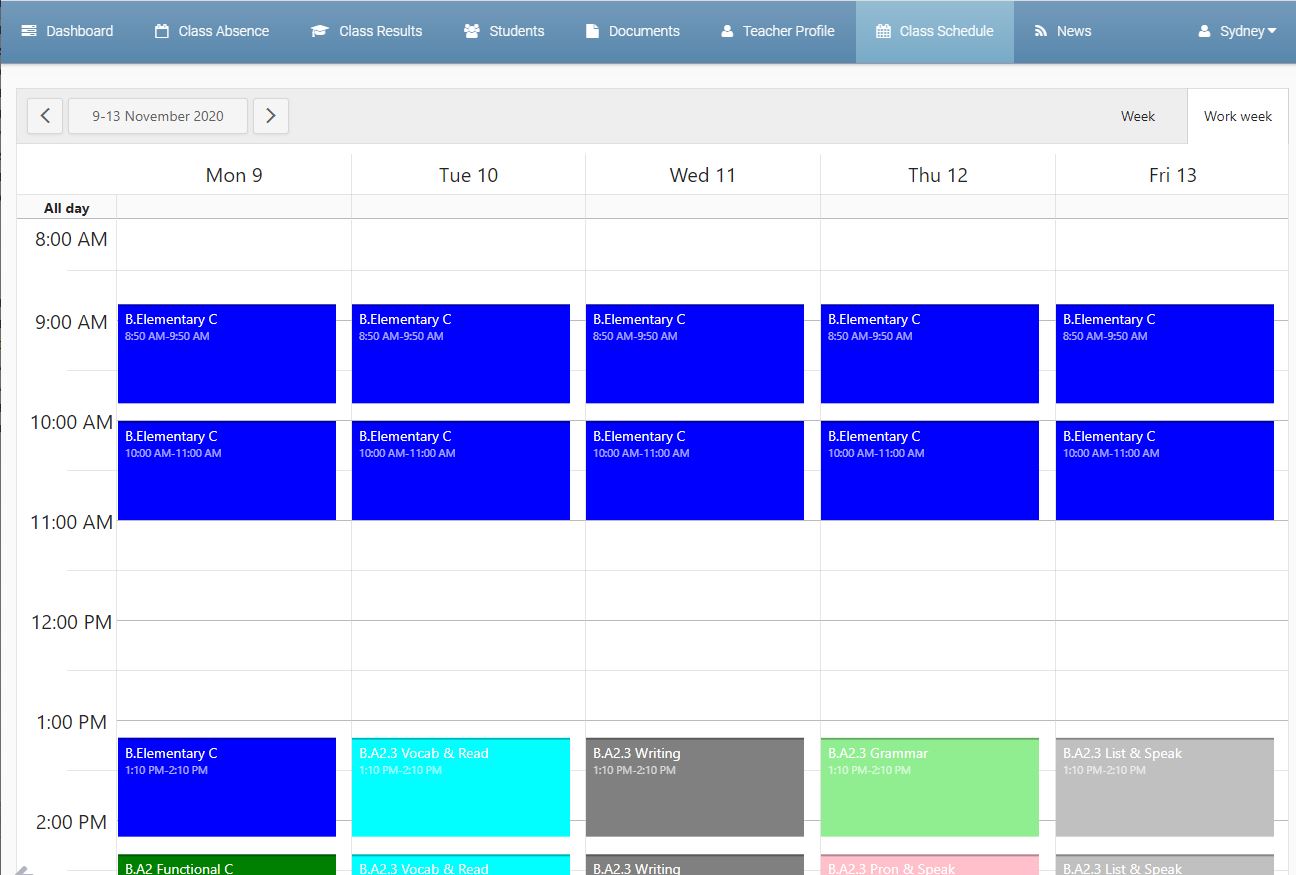
Class Schedule
The teachers classes are displayed. A week or work wee can be displayed. The default is the current week, but you can move forward a back a week.
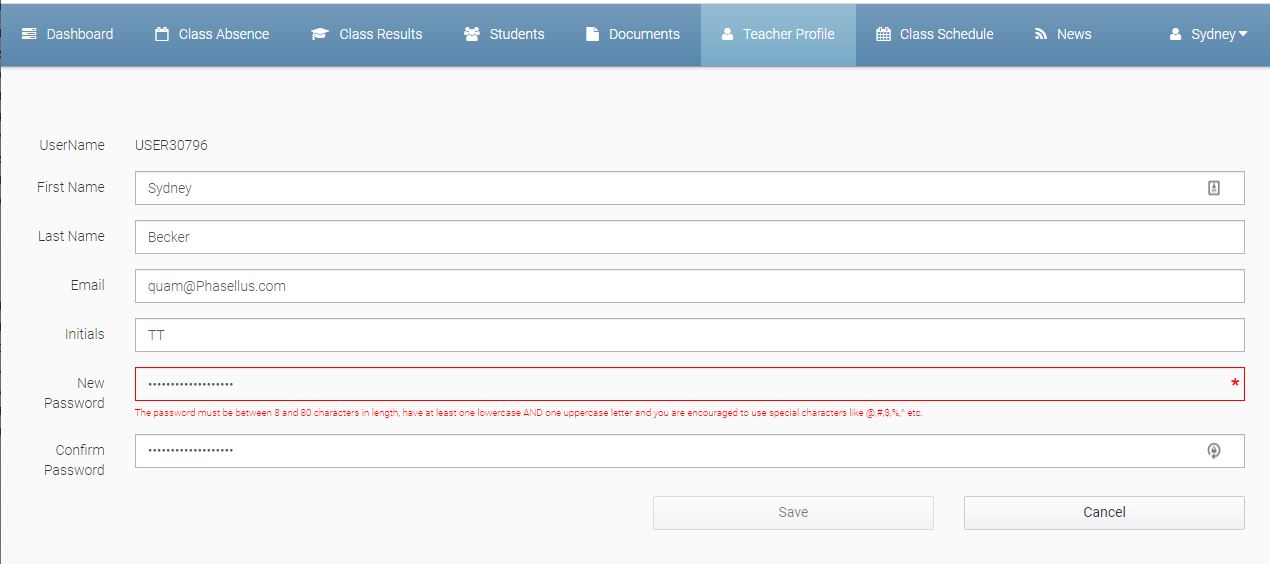
Teacher Profile
The Teacher's Username, First name, Last name, email address, initials, with password can be updated for the current user.
Students
For more details, please visit this article: Students
Class Absence
For more details, please visit this article: Class Absence.
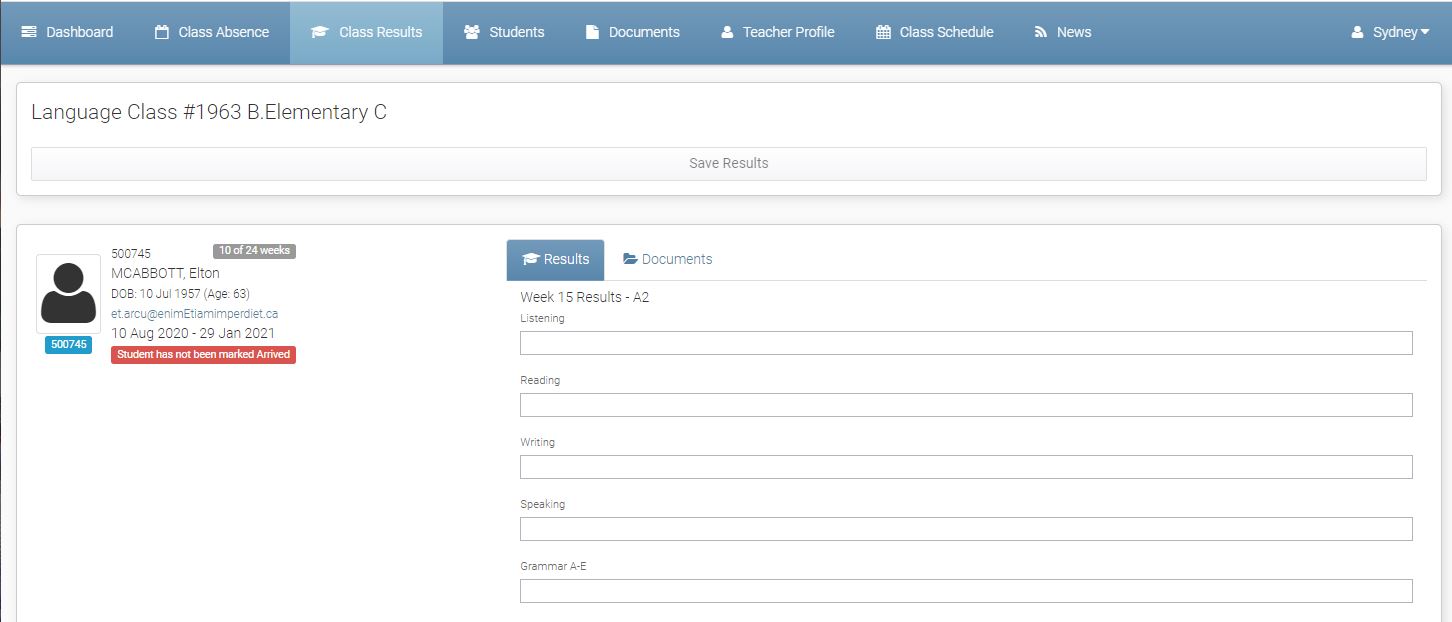
Class Results
Language Class Results integrate with the defined Weekly Results in eBECAS. There is one result set that can be specified by Class per week. The Result set is defined in eBECAS/EDMISS as different custom text fields.
The Results when entered are stored for the student for the week in eBECAS/EDMISS and available to be seen by the Student in the Student Portal. Documents can also be sent to the student.
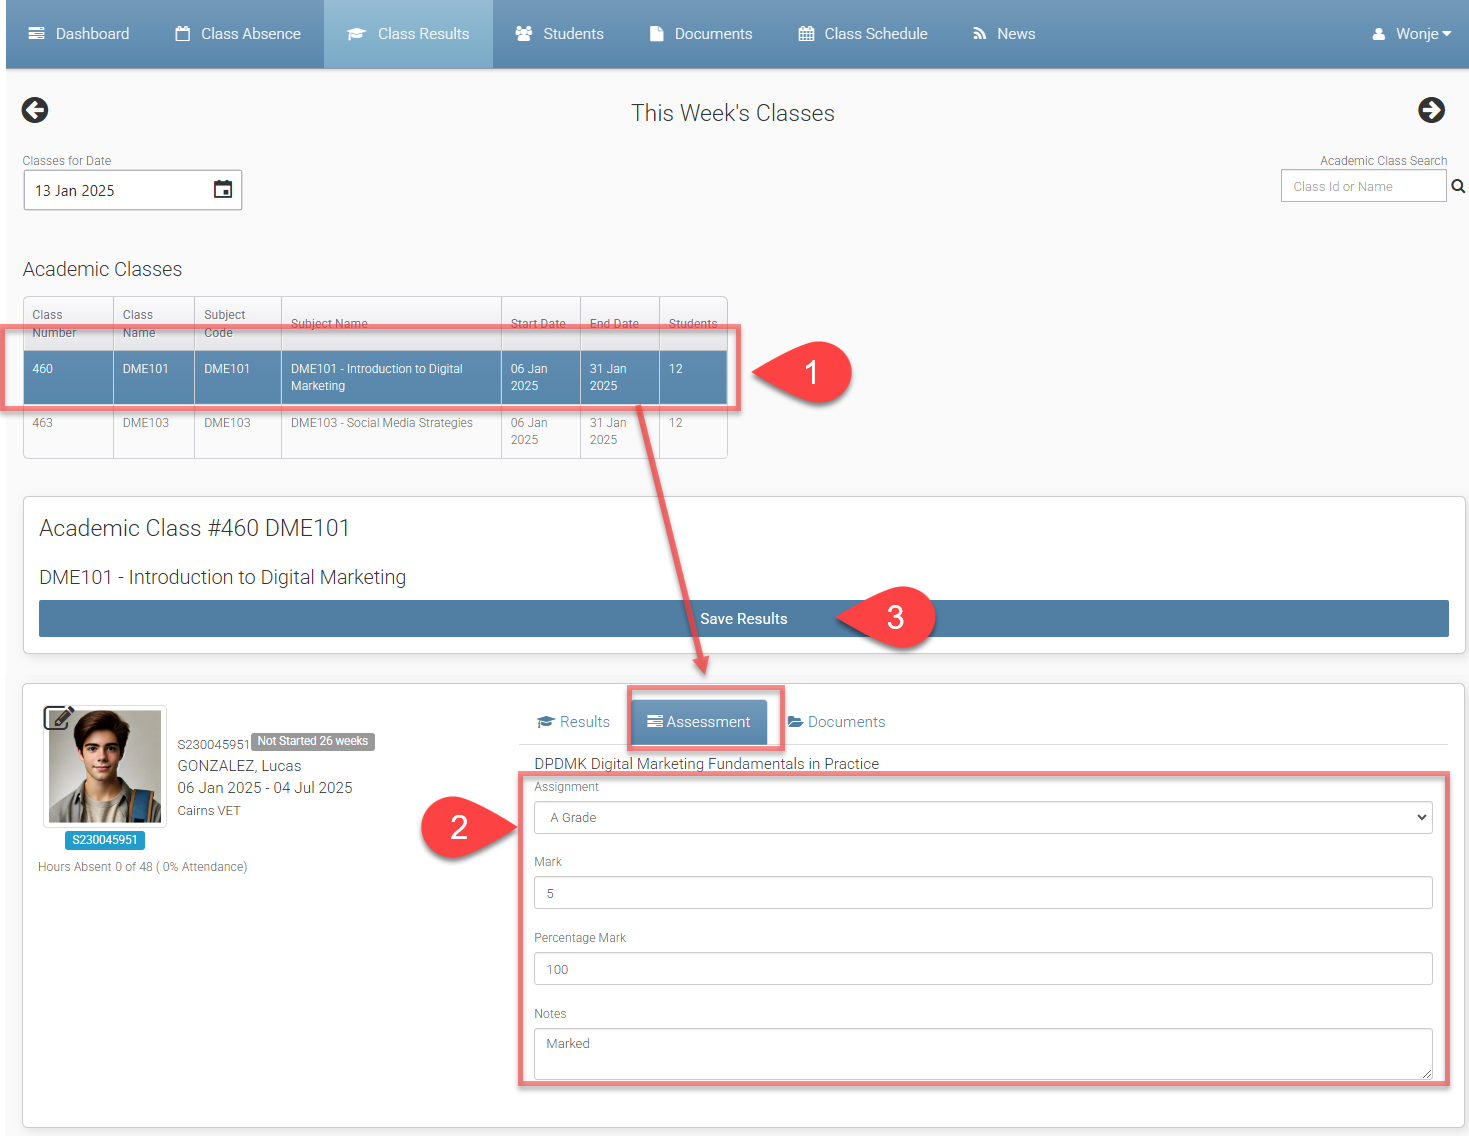
Mark Assessment Results
ACADEMIC class only
-
Select the class and find the student. Then click on the Assessment tab.
-
Set assessment results as you needed.
-
Once it’s ready, click on Save Results.
-
The assessment results will be accessible through Student Portal Results for Students and 1.331 VET & HE Result Edit in eBECAS/EDMISS for administrators.
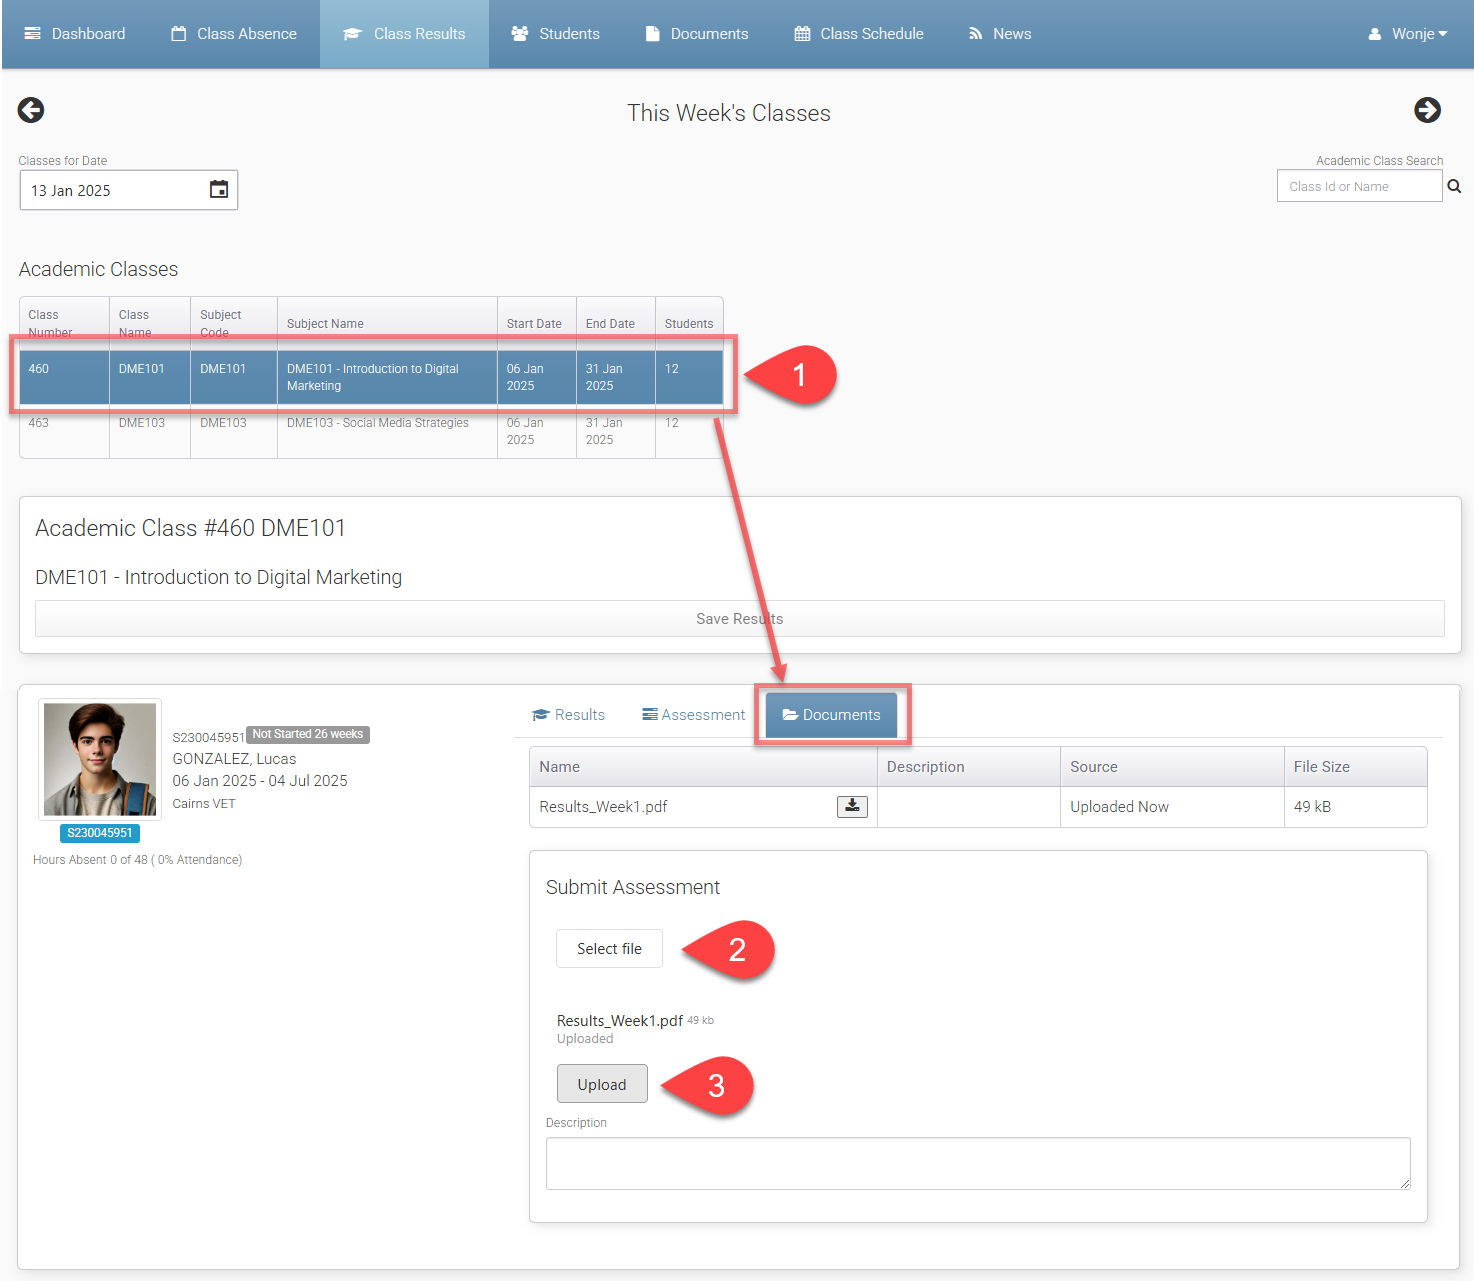
Upload Student Documents
-
Select the class and find the student. Then click on the Documents tab.
-
Click on Select file to choose the file you’d like to upload.
-
If need to clear the selected file, click on the X button and proceed with step 2 again. Otherwise, click on the Upload button.
-
The uploaded documents will be accessible in the student’s document store of 1.1 Student Details in eBECAS/EDMISS for administrators.
Documents
For more details, please visit this article: Managing Class Documents.