User roles are sets of permissions assigned to individual users or groups of users. These roles determine what actions a user can and cannot perform within the system.
To access eBECAS/EDMISS and the menu bar, the user must have the Utilities > Base User Access permission assigned, either using Roles or Security Overrides.
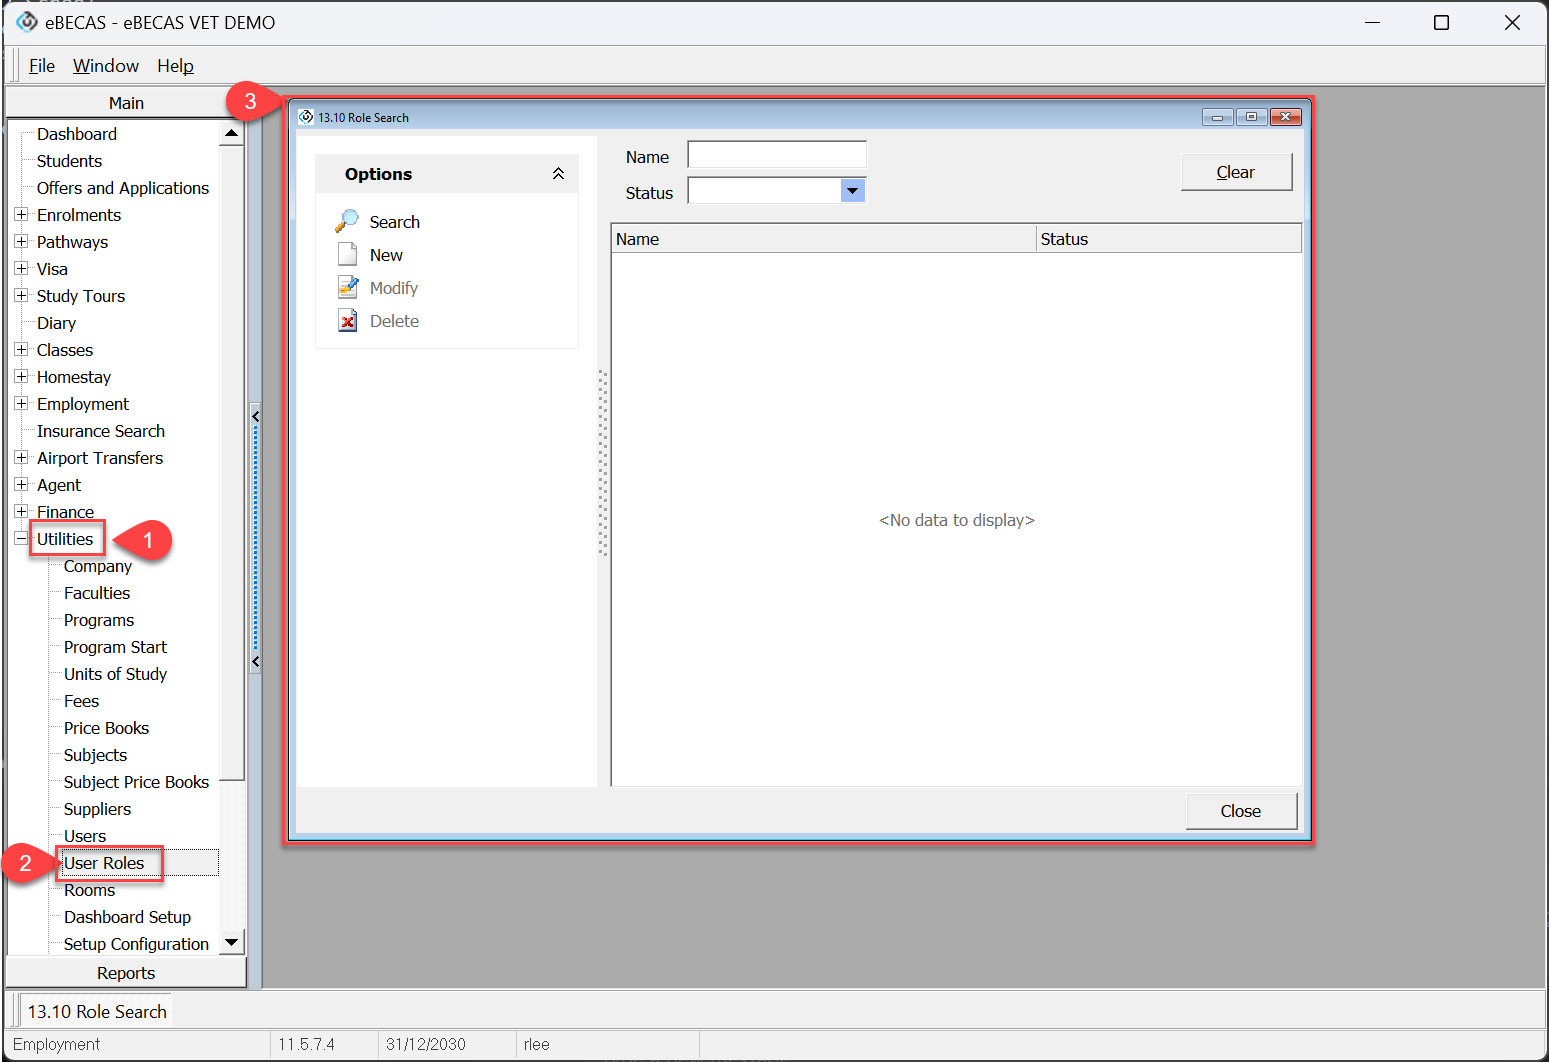
Accessing user roles setup
-
Log into eBECAS using your administrator credentials
-
Go go Main -> Utilities -> User Roles
-
The User Roles setup window will display
Creating a role
-
Click New to open the Role window
-
Enter the details
-
Click Save
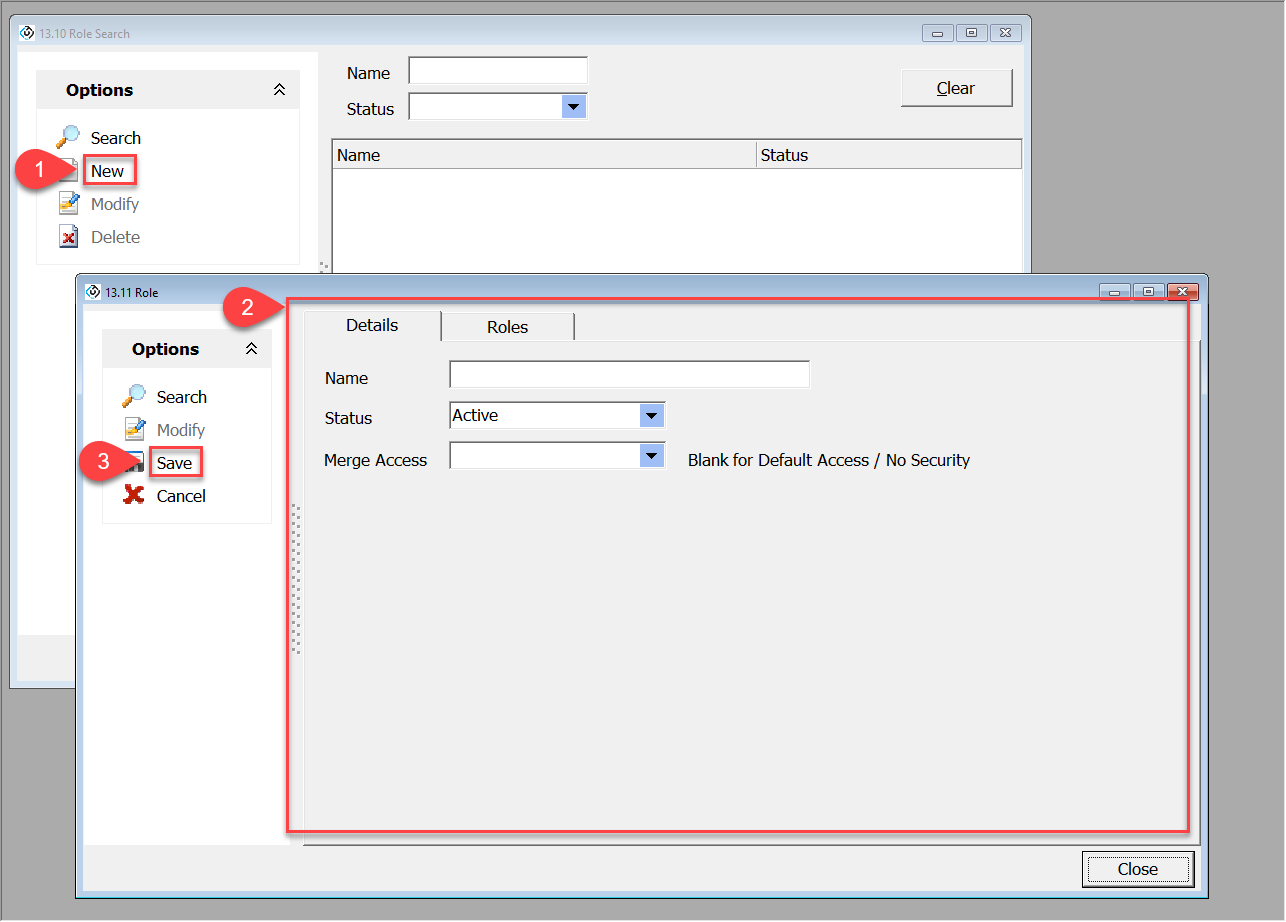
Some examples of Roles could be based on areas of responsibility such as Admissions, DOS, Finance – Payable/Receivable, Student Services etc.
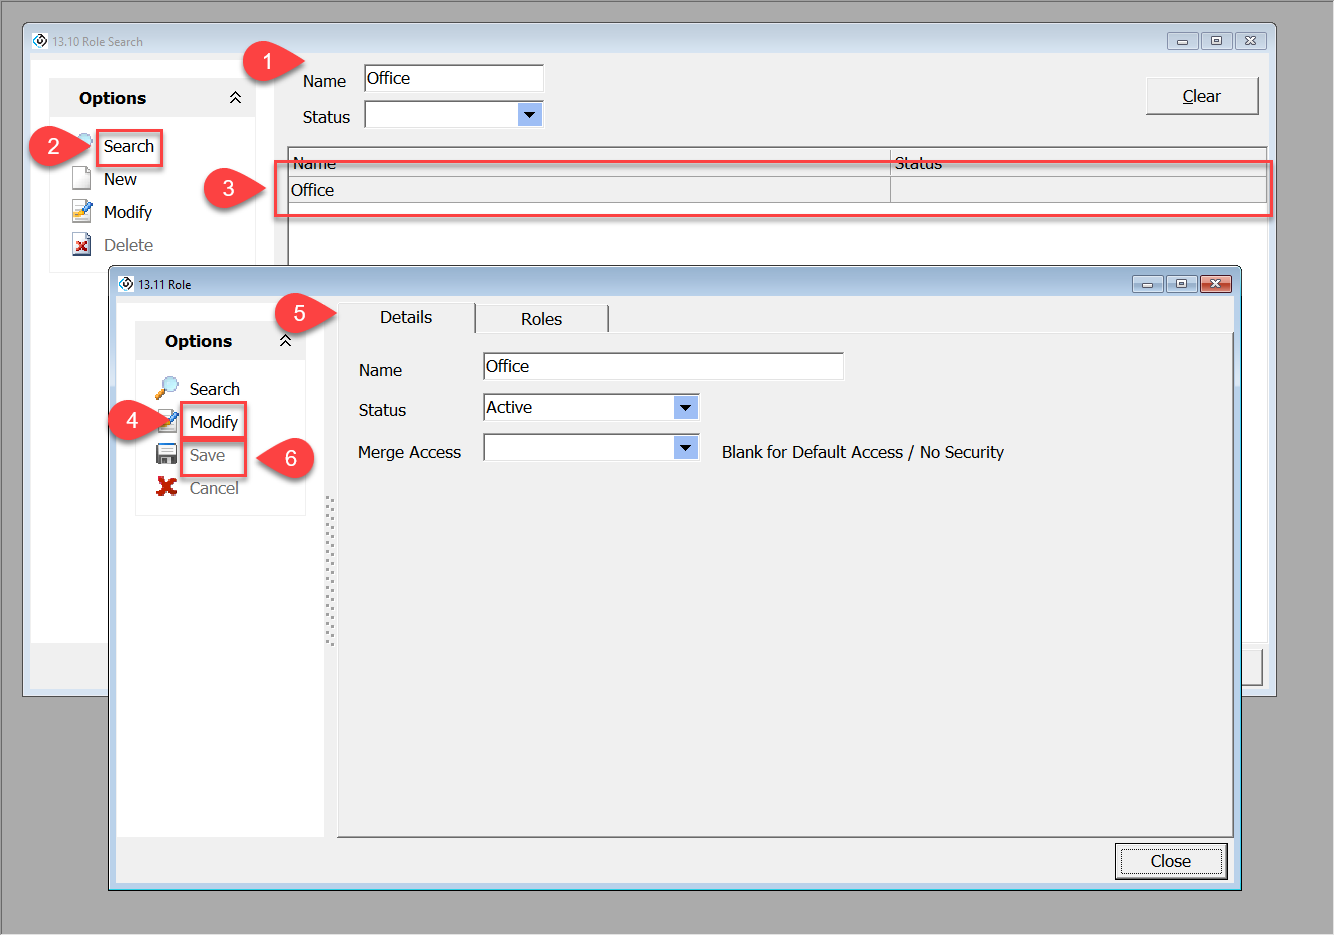
Editing a role
-
Search the role using the filters available
-
Click Search
-
Double click on the role from the results or click Modify from the options panel
-
On the Role window, click Modify to edit this role
-
Update the details accordingly
-
Click Save
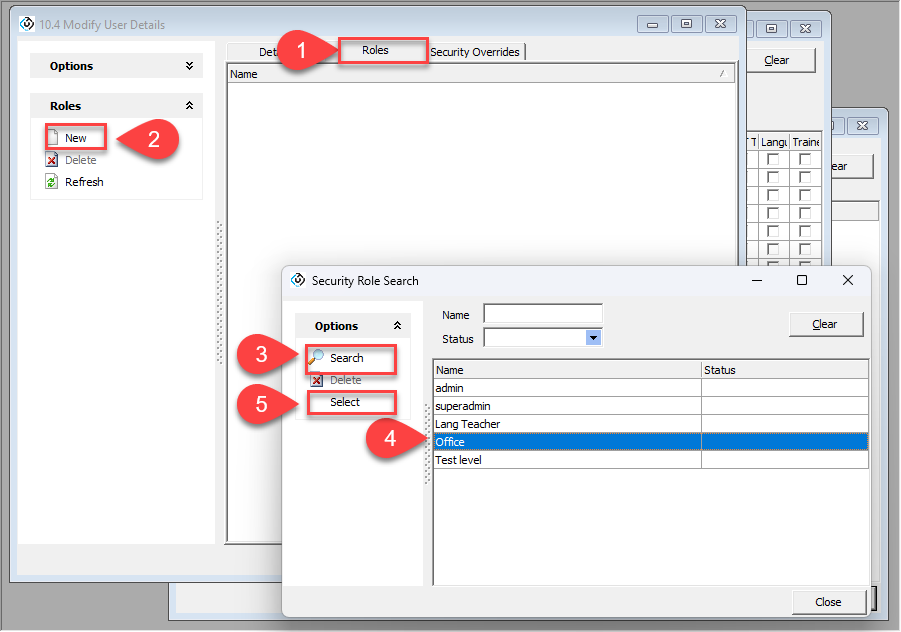
Assigning roles to a user
-
Start from the Roles tab of Edit a user
-
Click New to assign roles to the user
-
Search the roles to assign
-
Select a role/roles that you intend to assign to the user
-
Click Select to assign the roles to the user