
The Reschedule Invoices feature allows you to write off outstanding amounts from selected enrolment invoices and generate new ones with updated due dates and amounts. This is useful when a student’s payment plan needs to be adjusted, while still maintaining a full audit trail of the original invoices and the changes made.
Considerations When Rescheduling Invoices
-
Invoices with any outstanding amount can be rescheduled.
-
All items with a due amount from the selected invoices will be included in the reschedule. Individual items cannot be selected.
-
The outstanding balances on the original invoices will be written off.
-
The total value of the new invoices must equal the outstanding balance of the original invoices.
-
New invoices are created using the Invoices Generator tool.
-
To maintain a clear audit trail, rescheduling is a permanent action and cannot be reversed. However, any newly generated invoices can be rescheduled again if required.
Known Limitations
Keep in mind the following limitations when rescheduling invoices:
-
Descriptions on the new invoice items are automatically set to the product’s Display Name as defined in the product settings, but can be edited if required.
-
When multiple invoice items with the same product are present across the selected invoices, they will be treated as a single item during the rescheduling process. This means they will be combined and cannot be separated into individual items when configuring the new invoices.
Reschedule Invoices
Rescheduling invoices allows you to generate new invoices with updated dates and amounts while writing off the original ones. No changes are applied until the final step is completed.
Start the Reschedule Process
-
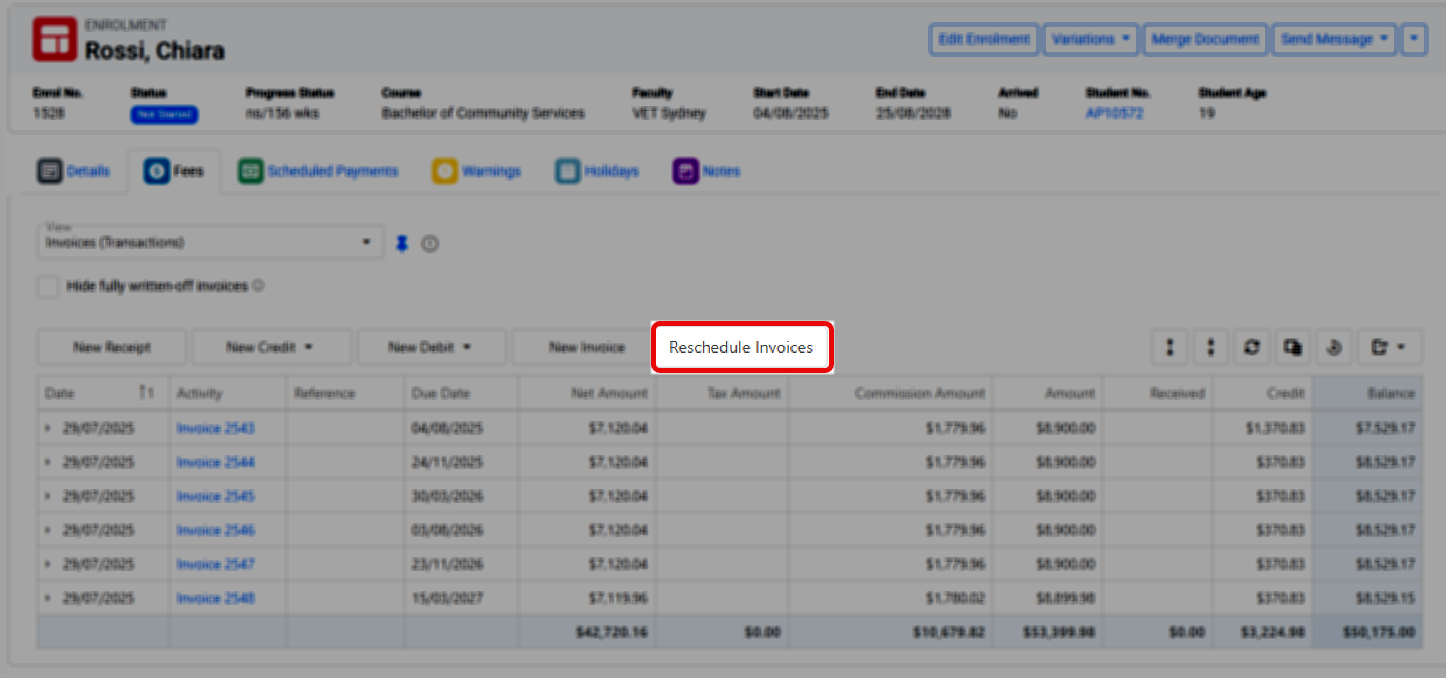
Open the enrolment and go to the Fees tab.
-
Click Reschedule Invoices from the actions panel.
-
A pop-up window will open to begin the process.
Step 1: Select Invoices to Reschedule
Only invoices with an outstanding balance are listed.
Select the invoices you want to reschedule, then click Next.
Note that individual items cannot be selected. All items with an amount due will be included.
Step 2: Select First Invoice Fees
Select any fees you want to include only in the first new invoice. These fees will be added in full and not split across multiple invoices.
Note that only eligible fees from the invoices selected in the previous step are shown.
Click Next to continue.
Step 3: Select Invoice Schedule Method
Select how you want the new invoices to be generated.
If you're unsure which option to choose, refer to this article: Invoices Generator.
Click Next to proceed.
Step 4: Configure the Invoice Schedule
Enter the required settings for the new invoices based on the selected method.
For more information, see this article.
Click Next to continue.
Step 5: Adjust Invoices Details
In this step, you can preview the invoices details based on your selected options. You can adjust the amounts and due dates as needed, but ensure that the total allocated amount matches the amount to be rescheduled. To update a value, click on the relevant cell and enter the new information.
Click Next to continue.
.gif?cb=9ae4c065df5116338f5142e71d29c903)
Step 6: Review, Update Invoice Items and Confirm
No changes have been applied yet.
Review the entire invoices preview with each invoice items and make adjustments as needed. To update a value, click on the relevant cell and enter the new information (note: not all cells are editable).
You can go back to previous steps to make changes or cancel the process.
When ready, click Submit.
New invoices will be created, and corresponding credit write-off transactions will be recorded for the original invoices.
New entries will also be added to the original invoices and the enrolment logs.