
Data Grids are powerful and highly customisable tables that let you see and interact with records from one or multiple related objects, individually and in bulk.
Overview
Data Grids, or simply Grids, are a powerful feature that lets you visualise and interact with a group of records. It displays data in a tabular format and allows you to filter, sort and take actions on those records.
Grids are available in different places in the application and they are context-aware. This means that the data, options and actions available, depend on where the grid is displayed.
Grids can be broadly categorized into Main Grids which located within a View and, Single Grids when they are in other pages (not part of a View).
-
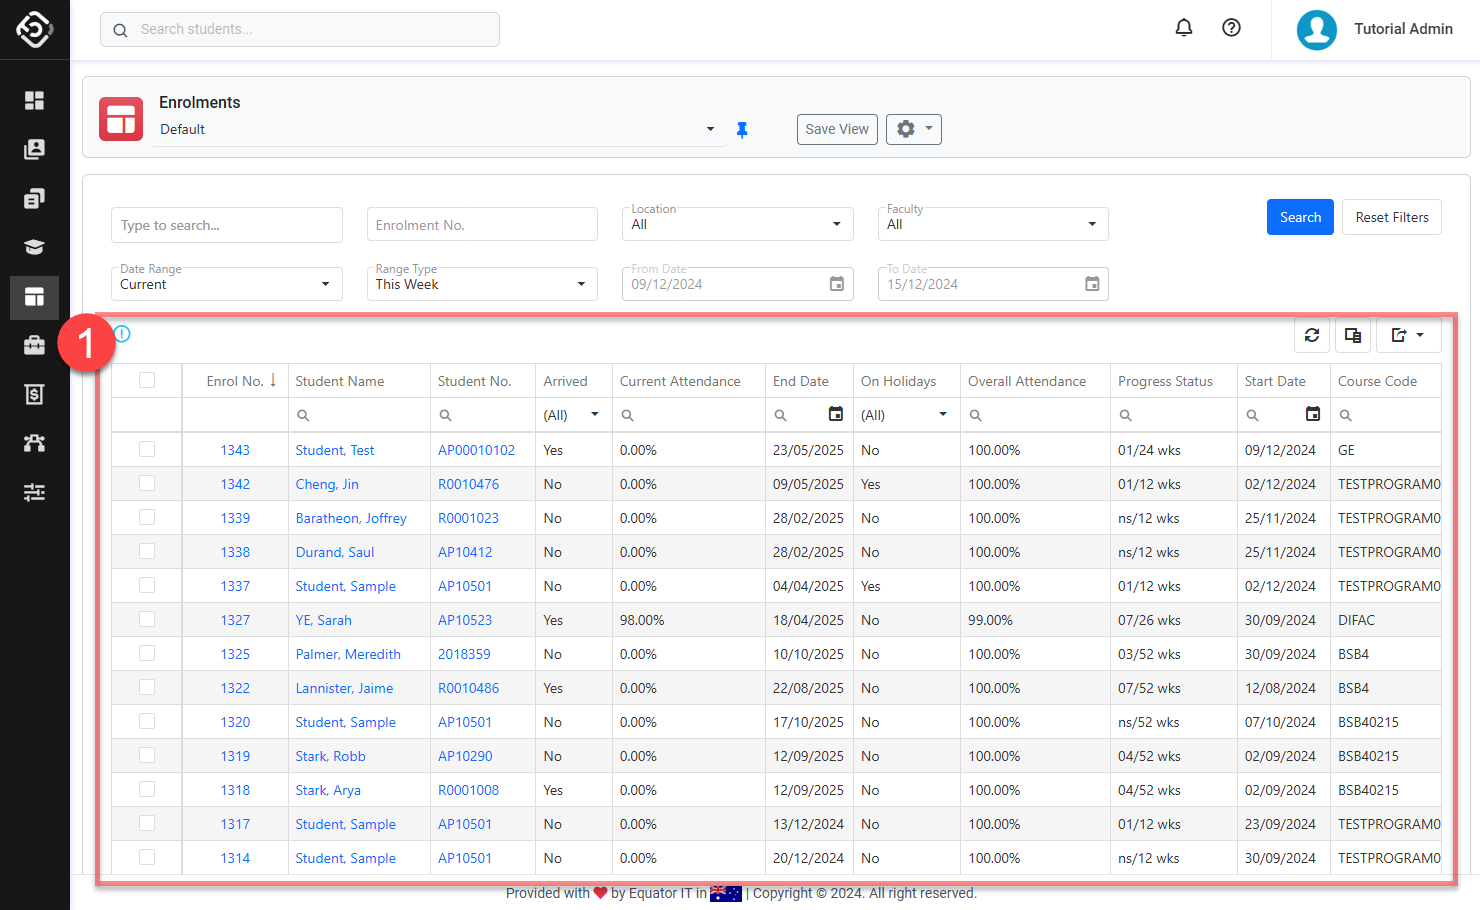
Main Grids: These grids display and provide access to the primary information of the respective object and are not restricted or scoped by a parent object. For example, the Enrolments Main grid, lets you explore all the Enrolments and are not restricted, unless you use the available filters, to any other object such as a Student or Agent.
-
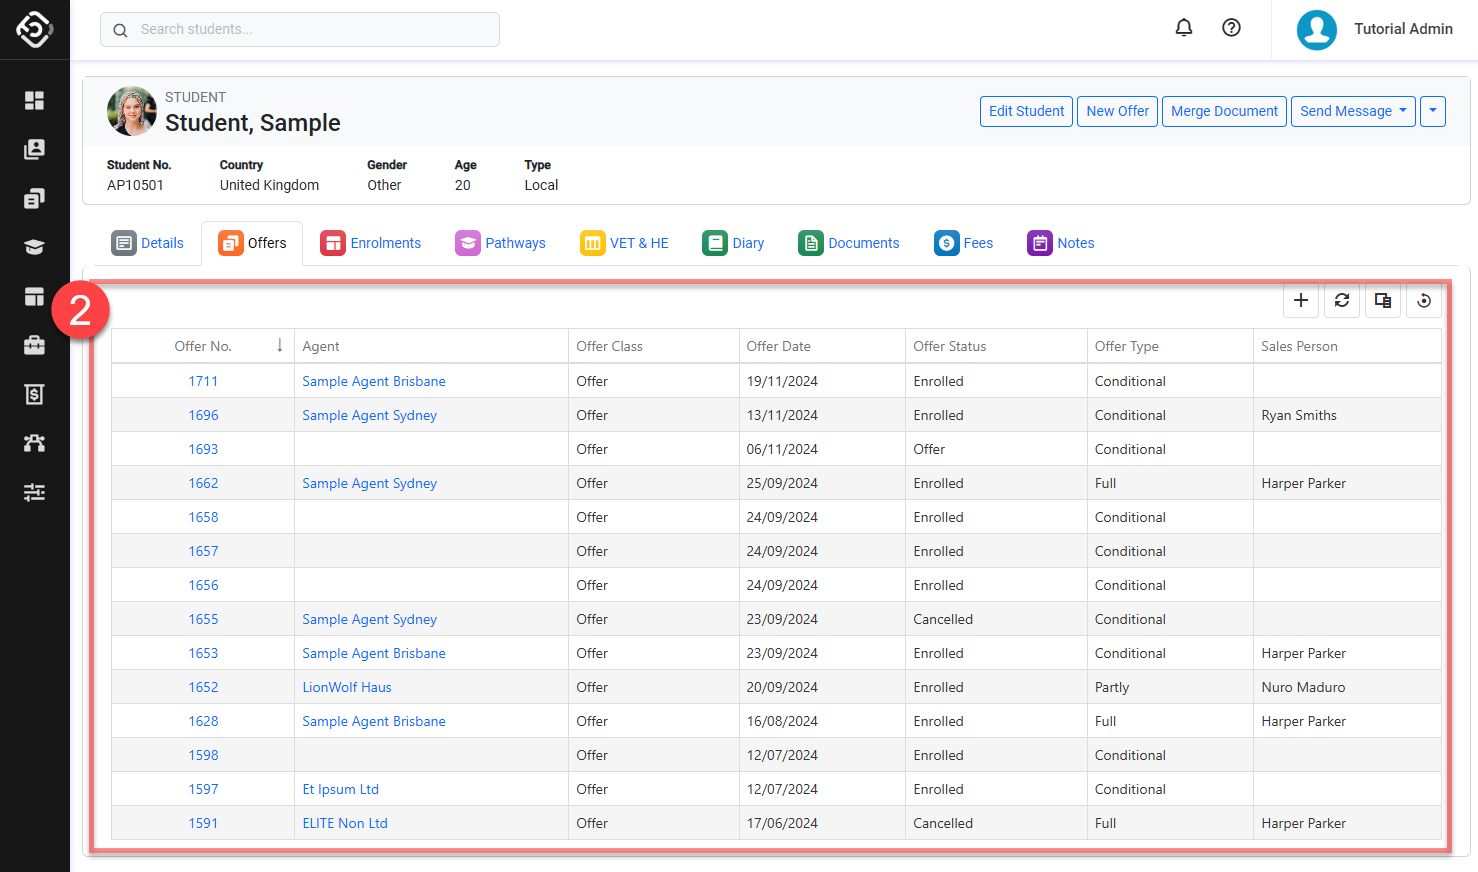
Single Grids: In contrast to the Main Grids, the Single grids are scoped or restricted by a parent object. For example, when you go to the Offers tab, under a particular student, you will see a grid displaying only the offers for that student. On this grid, you cannot see the offers for other students.
Grid’s Composition
Although the options and actions available on every grid might be different, the components are the same.
Main Grids

A. Header Filter: Basic filters for the data grid. These filters will be different on every grid.
B. Search Button: Executes a search using all applied filters, including header filters and column filters.
C. Reset Filter: Resets all filters applied in the Header Filter to their default values.
D. Filtered Indicator: This icon indicates that the data set is being filtered.
E. Action Buttons: When one or more records are selected, the available actions will display in this section. Some actions are only available when only one record is selected.
F. Refresh Data: Click this button to refresh and get the latest data. Your applied filters will remain unchanged.
G. Column Chooser: Customise columns in the grid.
H. Export: Export the current data on the grid.
I. Column Filter: The column filters assists in refining the results by filtering the values for a specific column. Once a value is entered for filtering, the results are automatically updated.
The filter options might differ for each column and some columns do not allow any filters.
J. Advanced Filter panel: Create advanced filters using more complex conditions.
Single Grids
Single Grids may have different available buttons depending on the object and the data being displayed. The following options are commonly available across most grids.
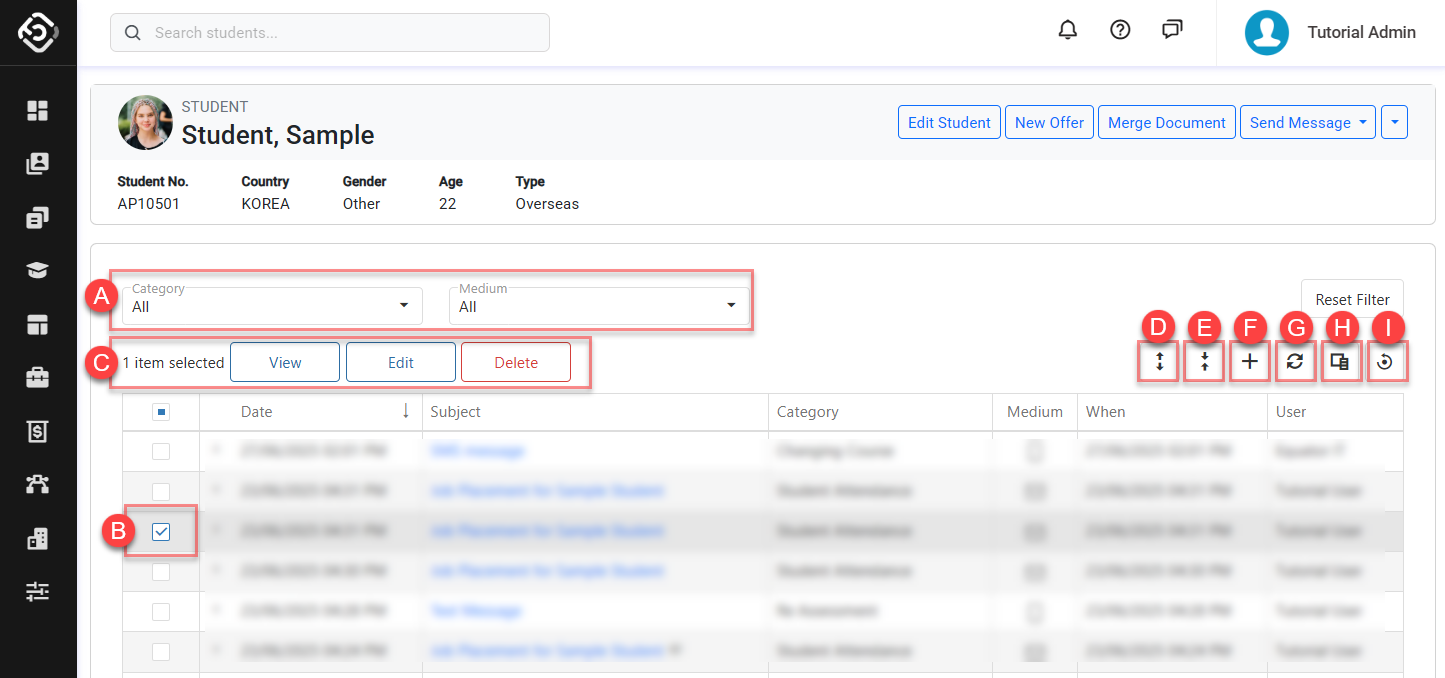
A. Grid Entry Filters: Apply filters to the entries within the grid.
B. Select Box: Select the items in the grid if the grid supports bulk actions.
C. Actions Panel: Run actions on the item(s) selected in the data grid.
D. Expand All: Click to expand all the entries and see the details.
E. Collapse All: Click to collapse all the entries.
Tip
You can also use keyboard shortcuts to expand or collapse all entries:
-
Windows: Ctrl + Alt + E to expand all, or Ctrl + Alt + C to collapse all.
-
Mac: Command (⌘) + Option (⌥) + E to expand all, or Command (⌘) + Option (⌥) + C to collapse all.
F. Create: Create a new entry under the current data grid.
G. Refresh Data: Refreshes the current data grid to get latest values.
H. Column Chooser: Customise columns in the grid. Refer to this article: Customise the Grids
I. Reset View: Reset the grid configuration to the default.
Customise the Grids
Refer to this article: Customise the Grids
Refresh and Reset the Grid
-
Refresh Grid: For grids that handle rapid-changing data, you can refresh the data on the grid without reloading the page. You can do so by clicking on the ‘Refresh’ button.
-
Reset Grid (Single Grids only): When you want to reset the configuration for a Single Grid to its default configuration, click on the ‘Reset button’.
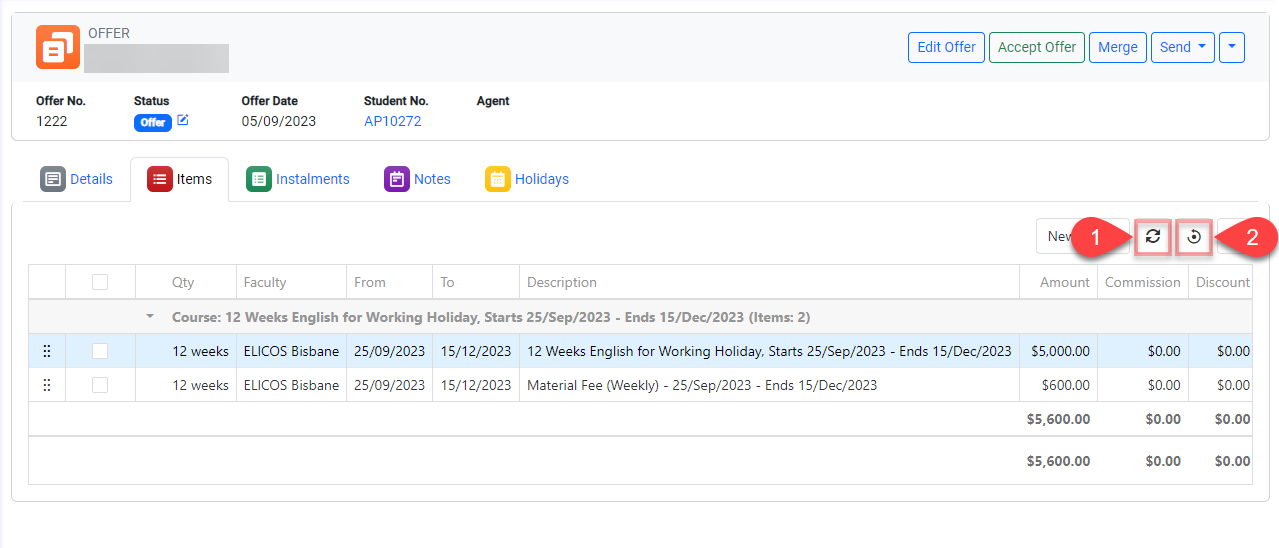
[Example] Offer Items Grid
To reset the Main Grids to their default configuration , you need to reset the View that it belongs to. Go here for more details.
Export Data from the Grid
Refer to this article: Export Data from the Grid
Grid Actions for Single/Multiple Records
Most of the grids offer options that let you perform an action on one or multiple records at the same time. For example, sending an email or SMS to multiple students.
The actions available on every grid might be different as the actions available depends on the context of the grid. Also, some actions might or might not be available when a single or multiple records are selected.
-
Search records that you want to action on.
-
Select the records through Select Boxes.
-
Click on the Action Button that you want to perform.
-
Depending on the selected action, further options might be displayed.
.gif?cb=d7c5b70dd10e3cc9b1e5e5f30aa64ea1)
Example of using Select boxes
This example shows how to start sending single/multiple SMS using Select Boxes in the Student object.
-
Search students that you intend to send the SMS to.
-
Select the students. (Check that action options are different depending on single/bulk selection).
-
Click Send Message > Send SMS, then follow the instruction.
For more detail about Send SMS, see this article: Sending SMS.
.gif?cb=fbd4a79fca712a8597d7b3386a0d0ca4)
Filters
For details information, please refer to this article: Filters