Uploading a Class Document
Teachers can easily upload class documents that students will need for their classes via the Teacher Portal.
-
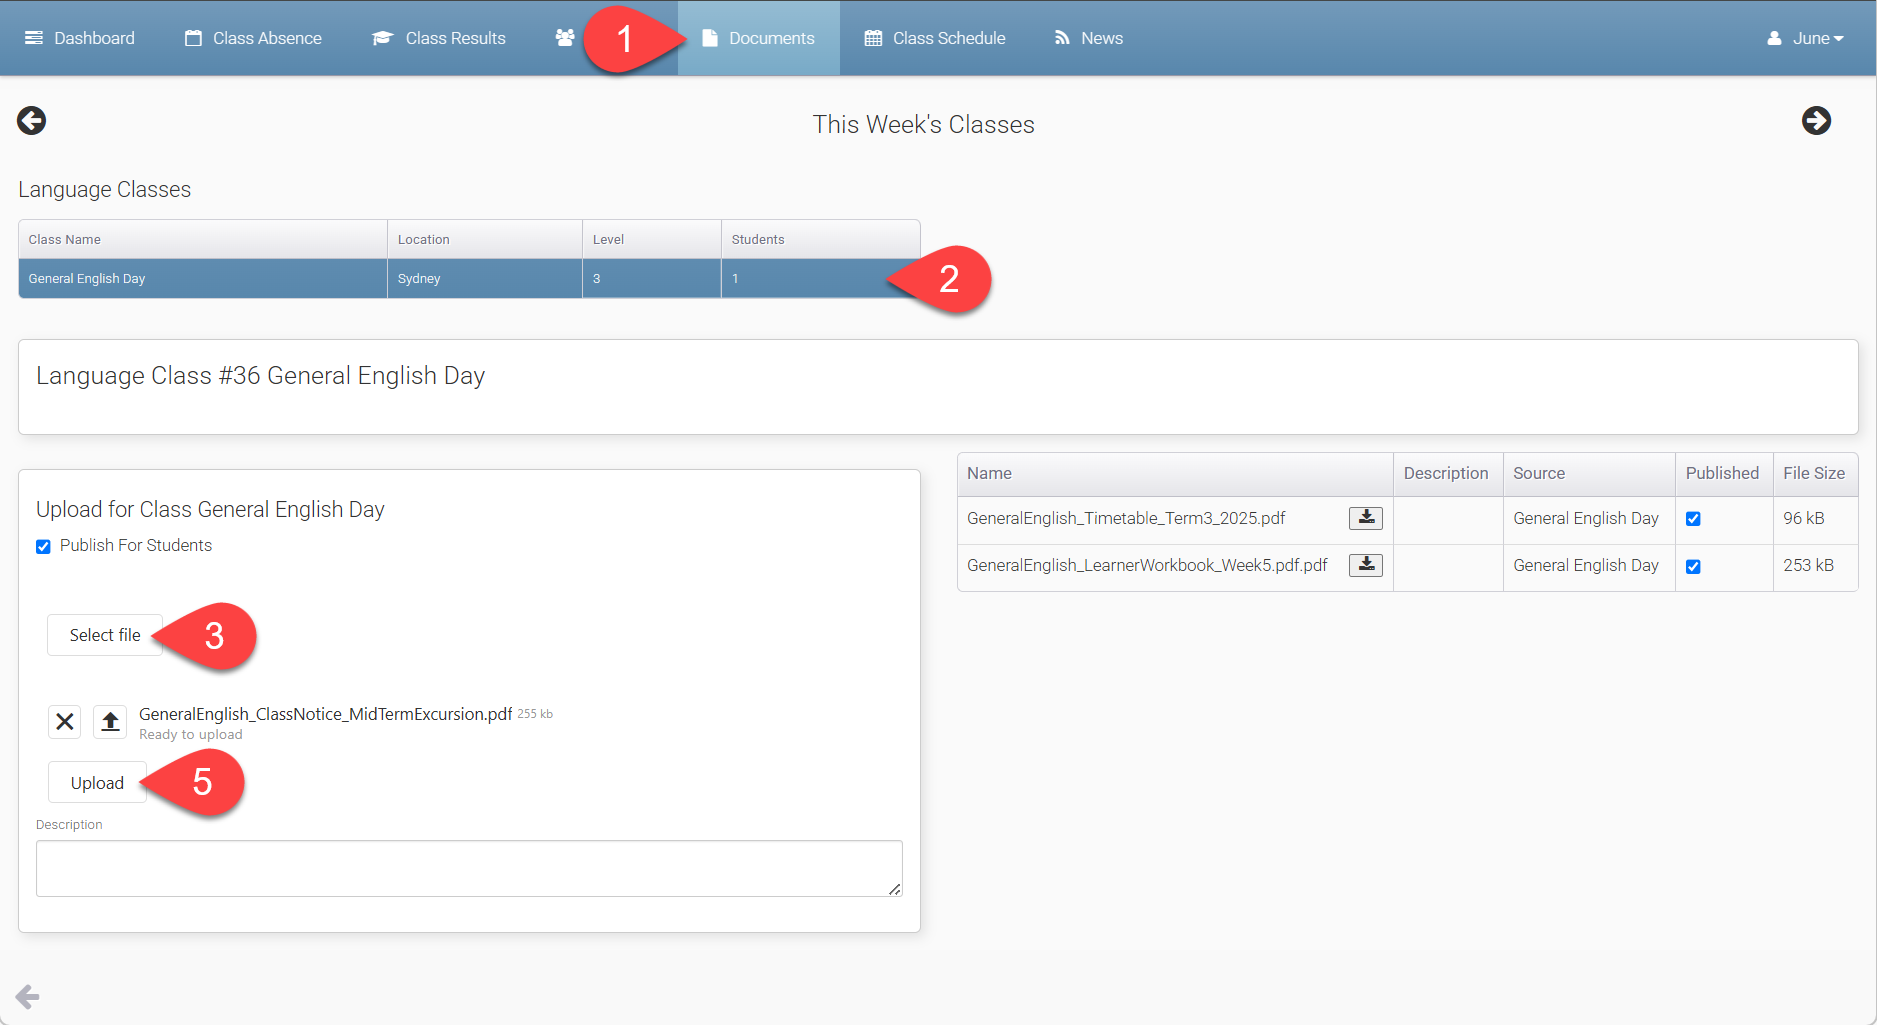
From the teacher portal, go to the Documents tab.
-
Select the class you'd like to upload a document for.
-
Select the file from your device. If need to clear the selected file, click on the X button.
-
admin Account type only If the document is for internal use only and should not be visible to students, uncheck the Publish for Students option.
-
Add description if needed then click on Upload. Once uploaded, the document will be marked as Published and will be visible to all students in the class via Student Portal > Documents tab.
By default, documents uploaded through the Teacher Portal are automatically marked as Published, making them immediately accessible to students via the Student Portal.
If you’d like to control student access based on specific dates (e.g., only visible during a certain period), you can adjust the Published status or set Published From / Published To dates for each document via the eBECAS/EDMISS client.
Managing Uploaded Class Documents
admin Account type only
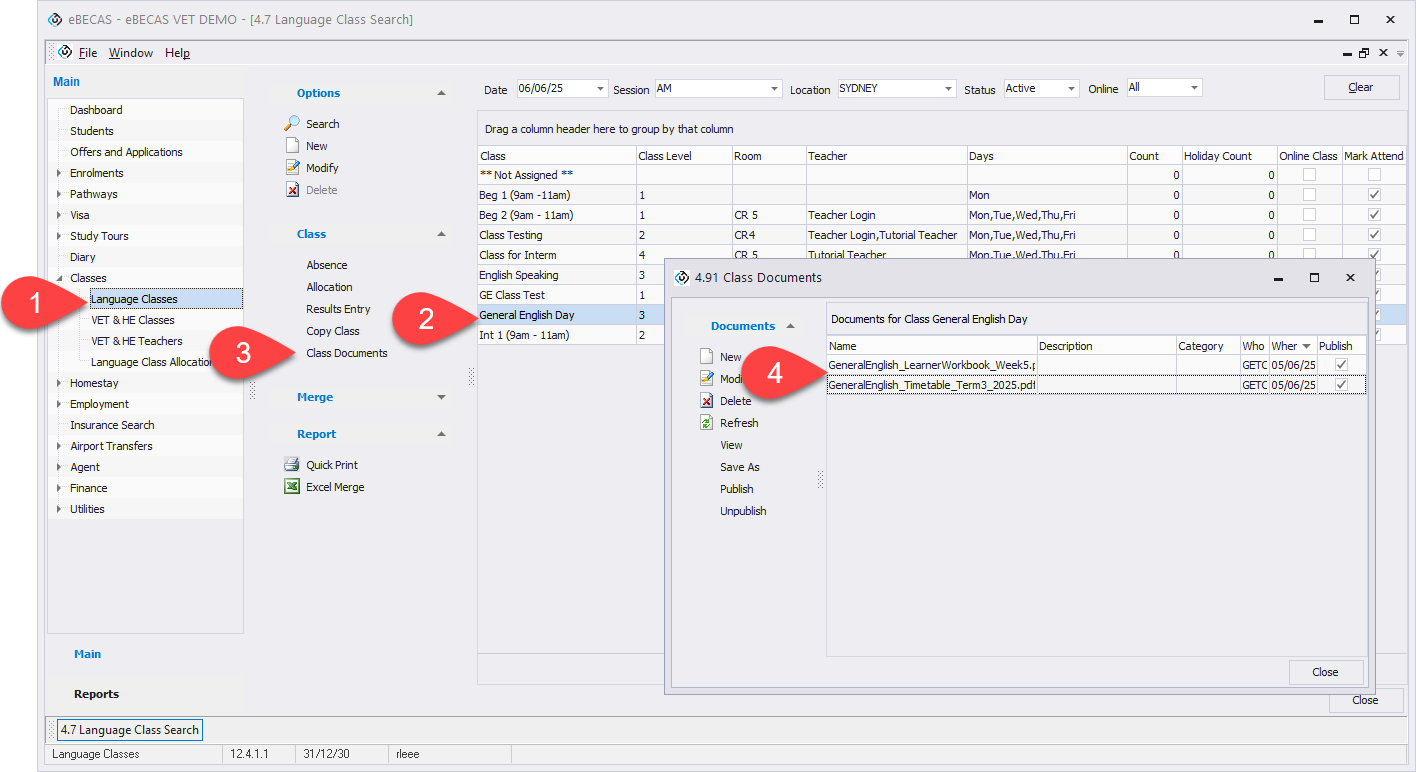
Uploaded documents can be managed by administrators through the eBECAS/EDMISS client.
-
Log in to eBECAS/EDMISS and go to Classes > Language Classes or VET & HE (College) Classes.
-
Search and select the class.
-
From the left-side menu, click Class Documents under the Class section.
-
Update, or remove documents as needed.