Using Next Generation Templates in eBECAS/EDMISS Classic
Overview
eBECAS/EDMISS is transitioning from a Desktop-based platform (Classic) to a web-based platform called Next Generation (NextGen). In NextGen, the template engine has been redesigned to offer enhanced features and functionality. Due to these improvements, templates created in Classic are incompatible with NextGen. However, templates created and managed in NextGen remain usable in Classic, ensuring forward compatibility. This allows users to create and manage templates in one system, ensuring they can be used across both platforms.
To learn more about eBECAS/EDMISS Next Generation Templates, visit this article: eBECAS/EDMISS Next Generation | Templates
Compatible Next Generation Templates
The following template types created in Next Generation can be used in eBECAS/EDMISS Classic:
Email Templates
Document Templates
How to Use Next Generation Templates in Classic
To use a Next Generation template in eBECAS Classic, follow these steps:
Create Email or Document templates in eBECAS/EDMISS Next Generation. For more detailed instruction, visit the following articles: Managing Templates, Creating a Template from a Word File
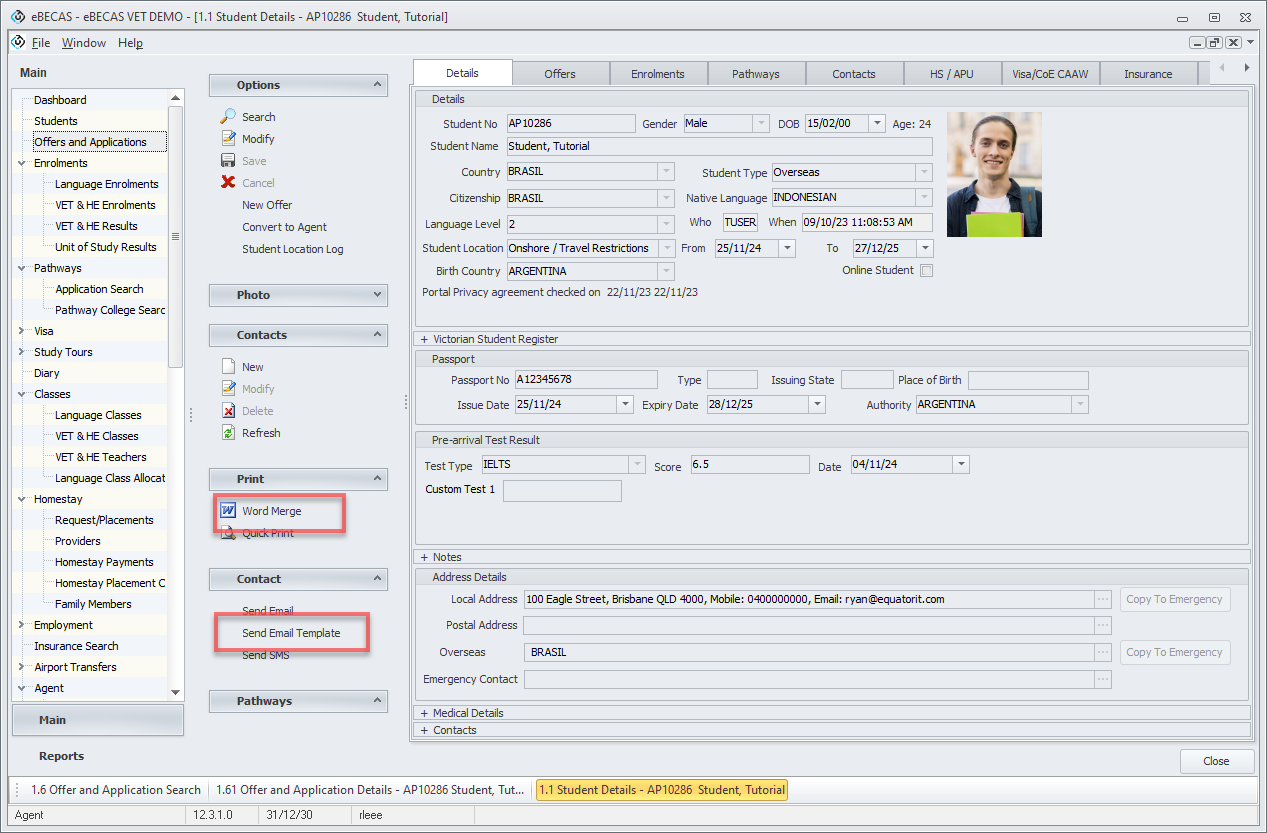
In eBECAS/EDMISS Classic, go to the relevant entry and click on Bulk Email (Send Email Template) or Word Merge.

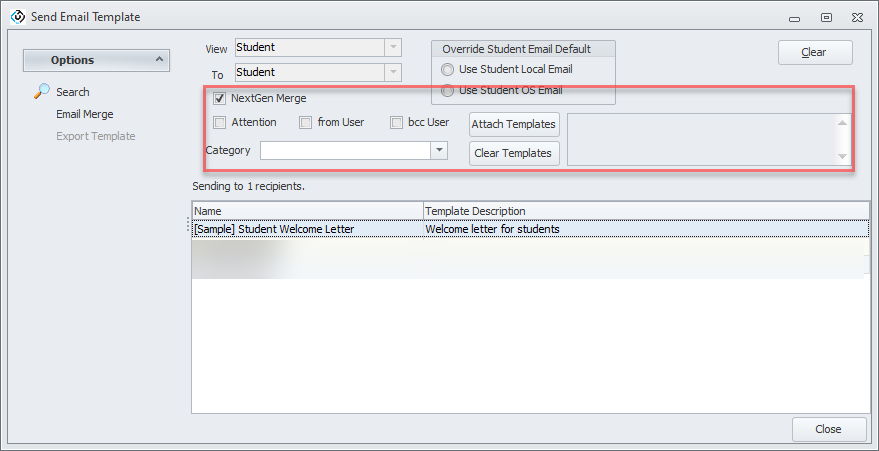
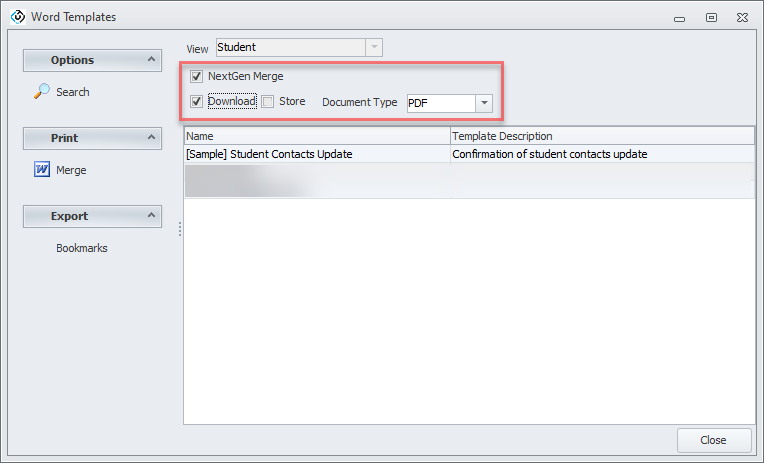
Select the NextGen Merge option and choose the template options as you needed.
Bulk Email (Send Email Template)
Attention: Select this option to flag the email as Important.
From User: Sets the sender’s email address to the current user’s email. If the user does not have an email address or this option is not selected, the email will be sent using the college's email address.
BCC User: Select this option to add yourself to the BCC recipients list.
Category: Select the diary category for the diary entry. When sending an email, the message will be recorded as an entry on the Diary of the entity that you are sending the email to (Students, Agents, etc).
Attach Templates: Allows users to attach document templates to the email. The selected templates will be merged with the email during the sending process.
Clear Templates: Removes all selected document templates.

Word Merge
Download: Downloads the merged document directly to your computer.
Store: Saves the merged document to the Document Store of the corresponding entry.
Document Type: Select the desired document type.

Select the desired template and click Merge or Email Merge.
