Creating Document Templates from a Microsoft Word file is a powerful alternative when your documents require advanced functionality and special formatting.
Due to major updates on Microsoft Word, the templates used in eBECAS/EDMISS Classic are not compatible with the Next Generation template engine. See this article for details on how to migrate your templates.
This article is based on Microsoft 365 version of Word. Please note that the user interface may vary slightly depending on the version of Microsoft Word you are using.
Create a Document Template in Microsoft Word
Before you start creating a template, make sure you are familiar with the concepts of bookmarks for fields and grids.
1. Create/Open a Word Document
Create a Word Document with your desired format/structure, or open a Word Document with the format/structure that you want for the template. You can add header, footer, images, tables, text etc.
2. Insert Single Fields/Grid Tables/Grid or Section Templates
For dynamic content, which will be replaced with data during the merge process, you will need to add fields. Fields is the equivalent of bookmarks, and they represent dynamic data.
There are two ways to insert Single Fields/Grid Tables into a Word Document Template:
-
Download the bookmarks list and copy & paste them, or
-
Manually insert them using Microsoft Word Field feature.
Insert Bookmarks Through Copy & Paste from the Bookmark List Recommended
Download the Bookmark List corresponding to the object that you want to create the template for.
See this article for details: Download Bookmarks for Word Document Templates.
Insert a Single Field
-
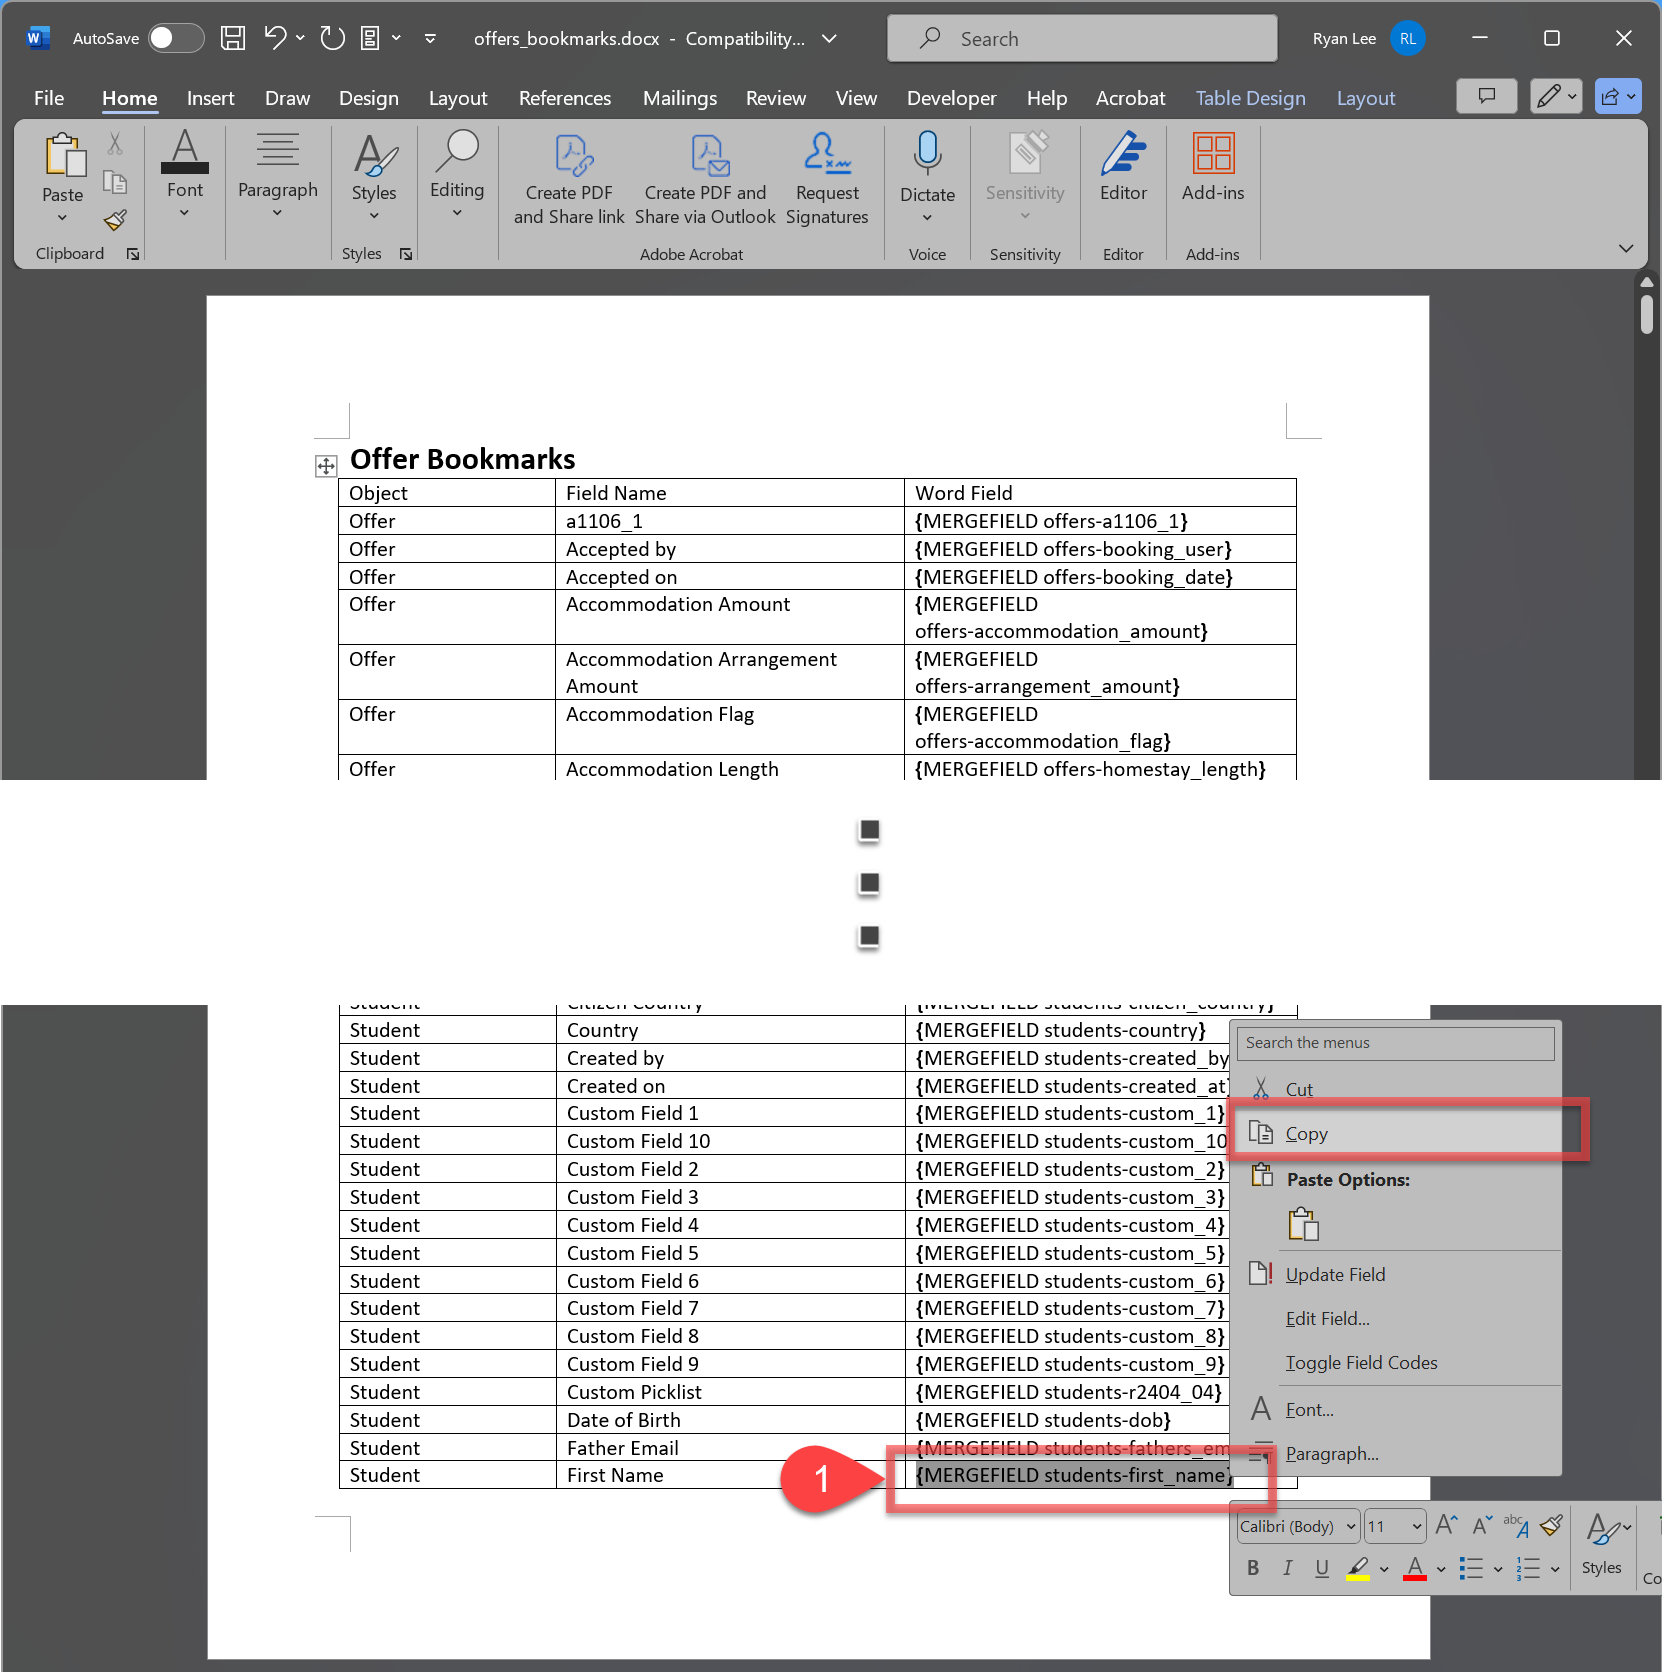
Locate the bookmark you want to copy from the bookmark list document, then highlight the pre-formatted as MERGEFIELDs field located in the Word Field column. Copy the field by using Ctrl + C or right-click and select Copy.
-
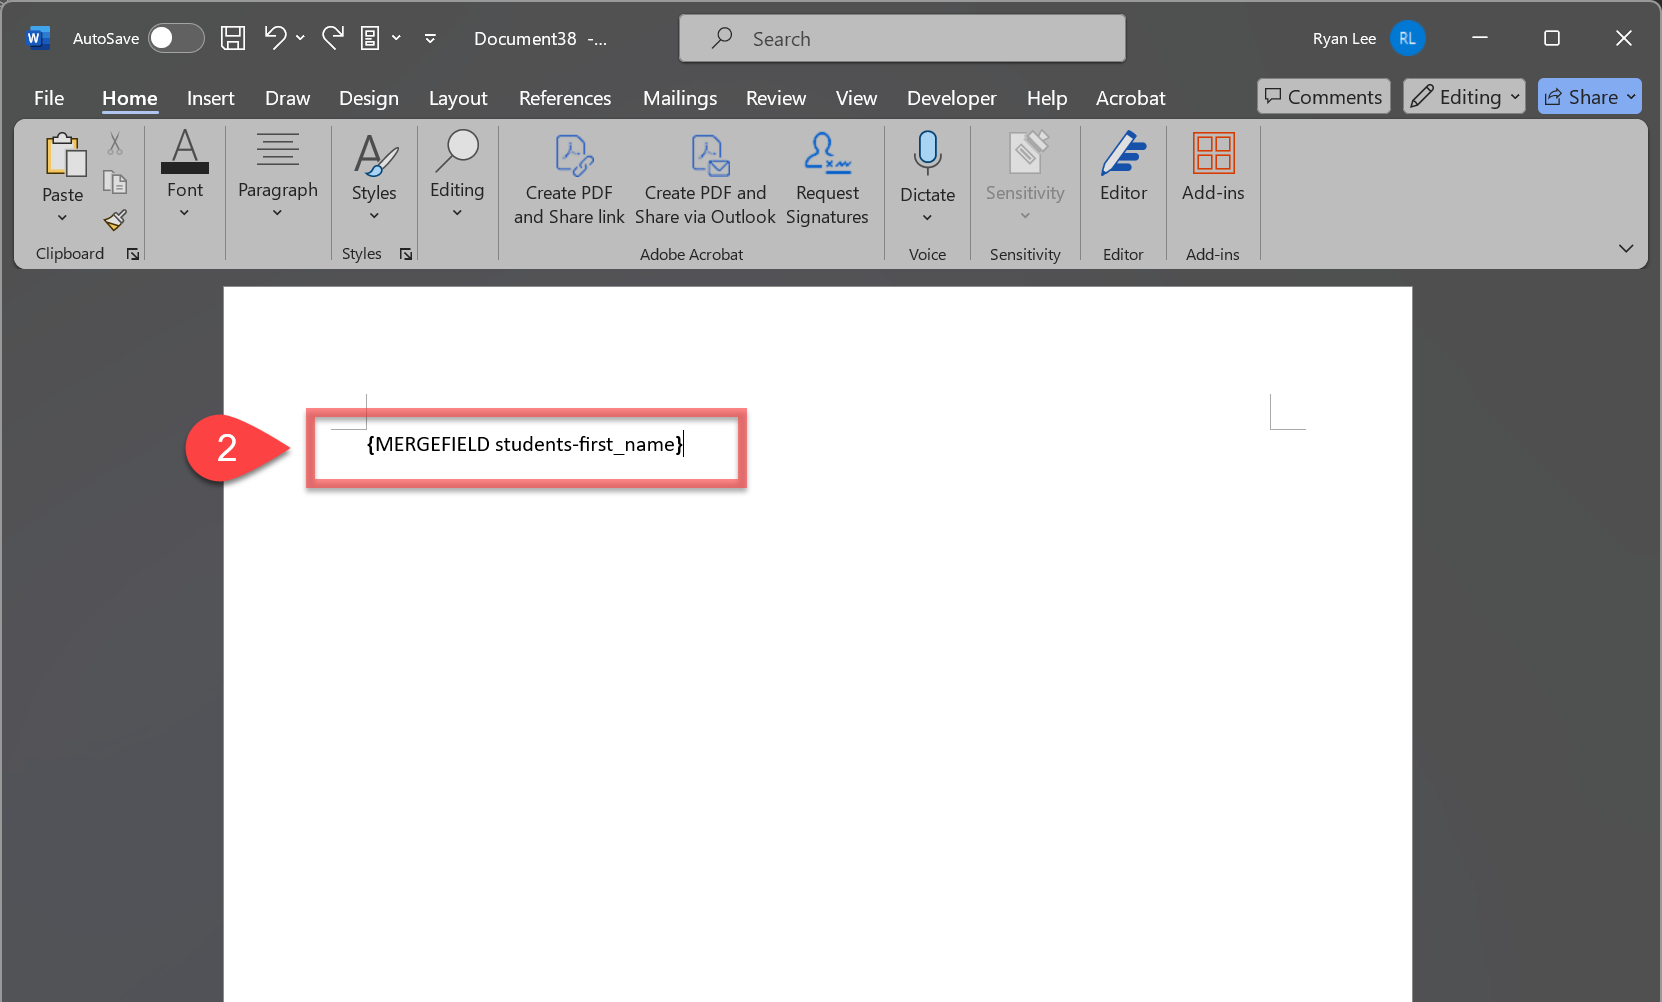
Go back to your Word Document Template and paste it where you’d like to insert it.
-
Repeat this process for all the single fields that you need on your template.
Insert Grids in Tables
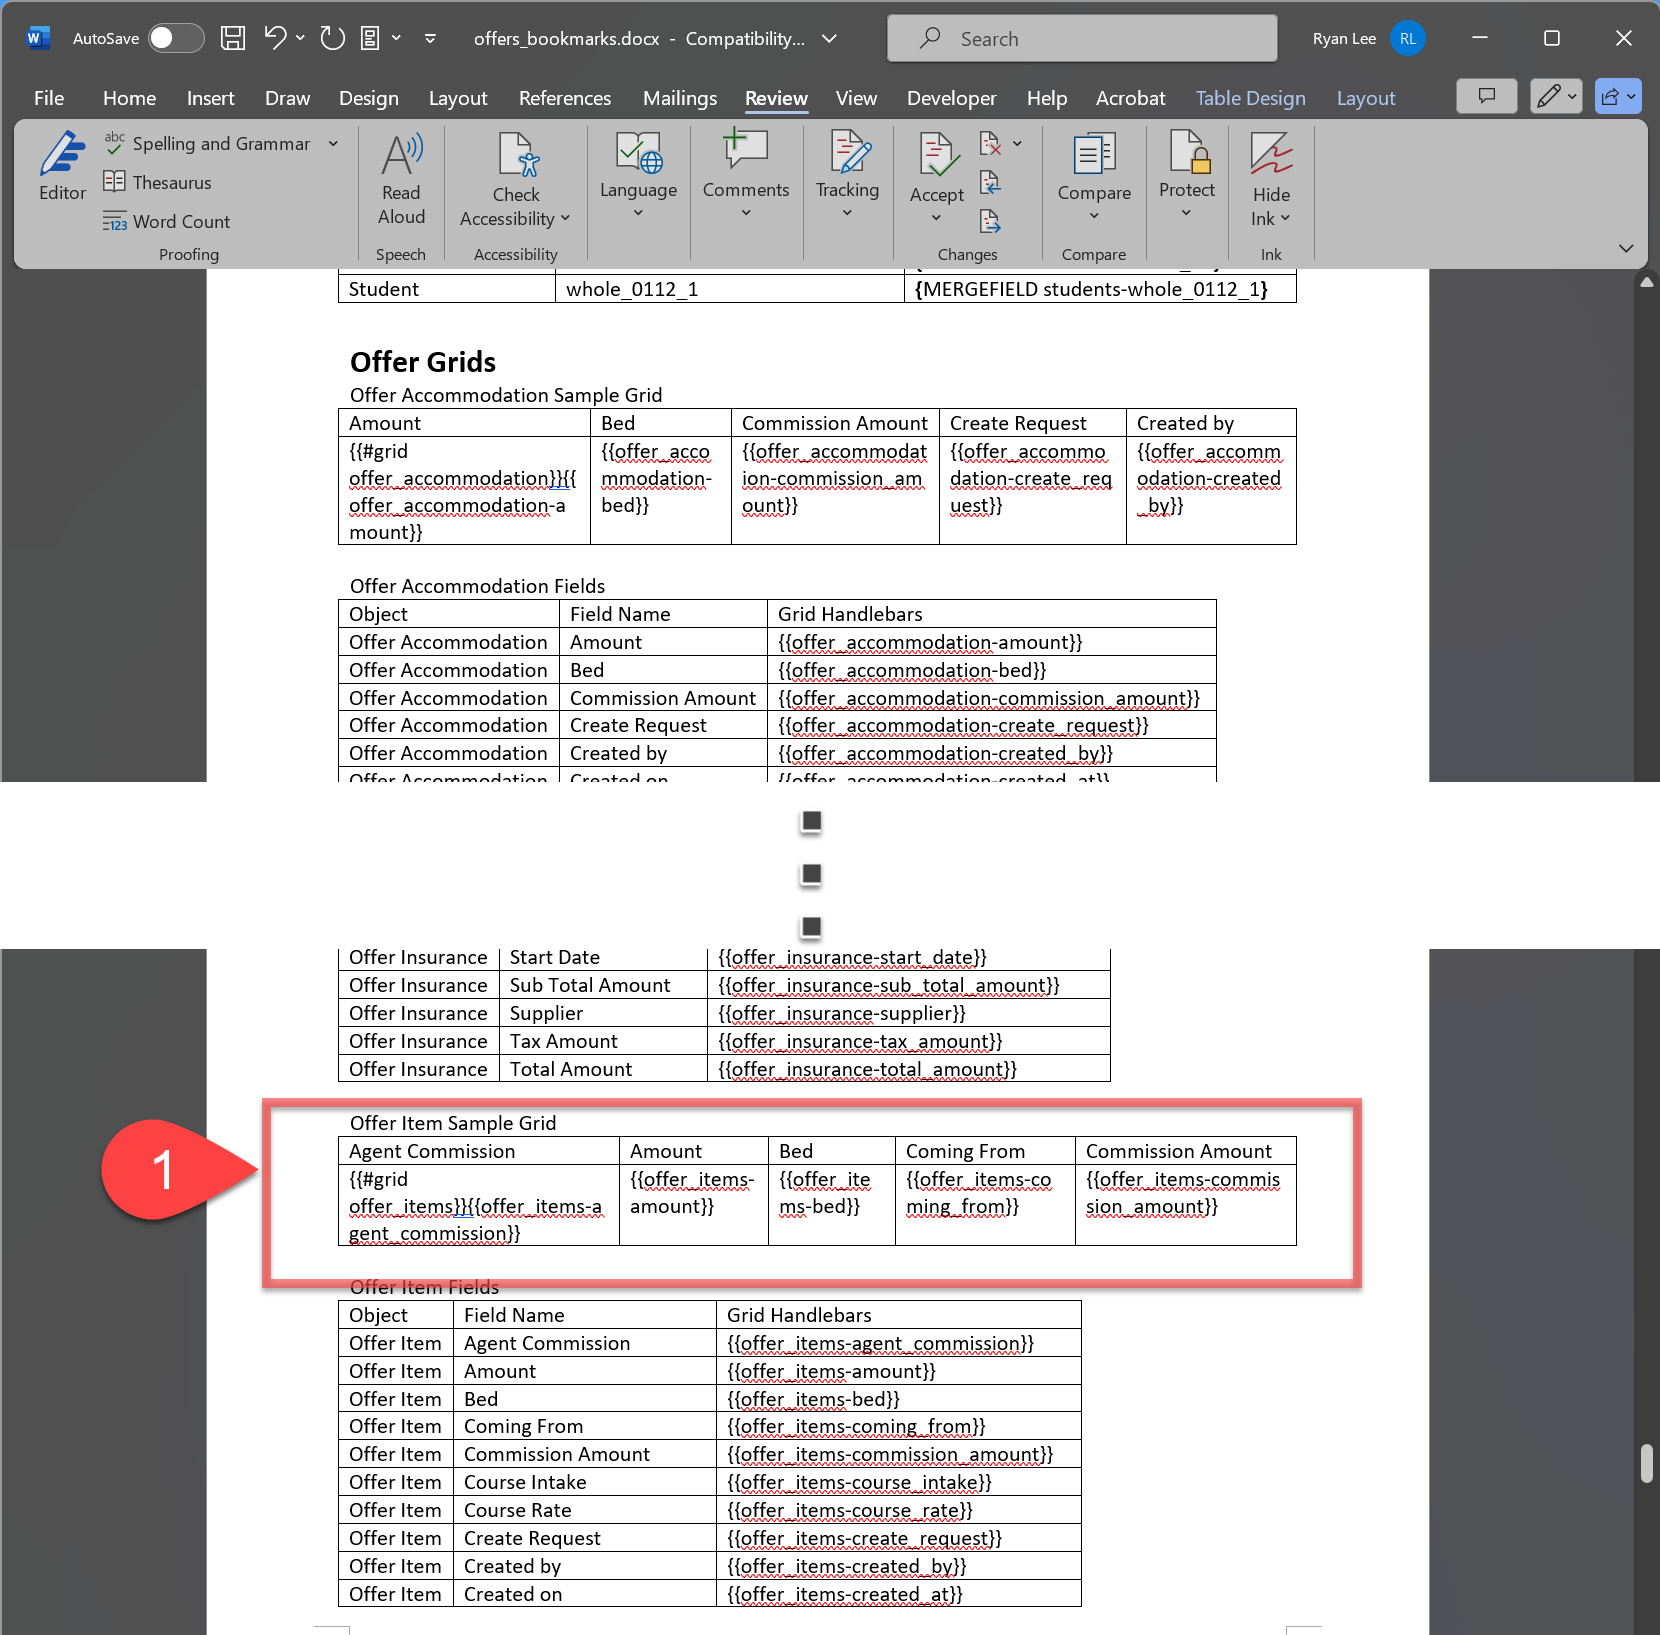
The Bookmarks list provides an example grid table for each grid available. Users can duplicate and modify this sample grid to suit their needs and use it right away. Please familiarize yourself with grids in tables to understand how they work and to learn important tips: Grids in Tables.
-
In the downloaded bookmarks lists document, locate the desired Grid from the Grids list.
-
Copy the sample grid table and paste it into your Word Document Template.
-
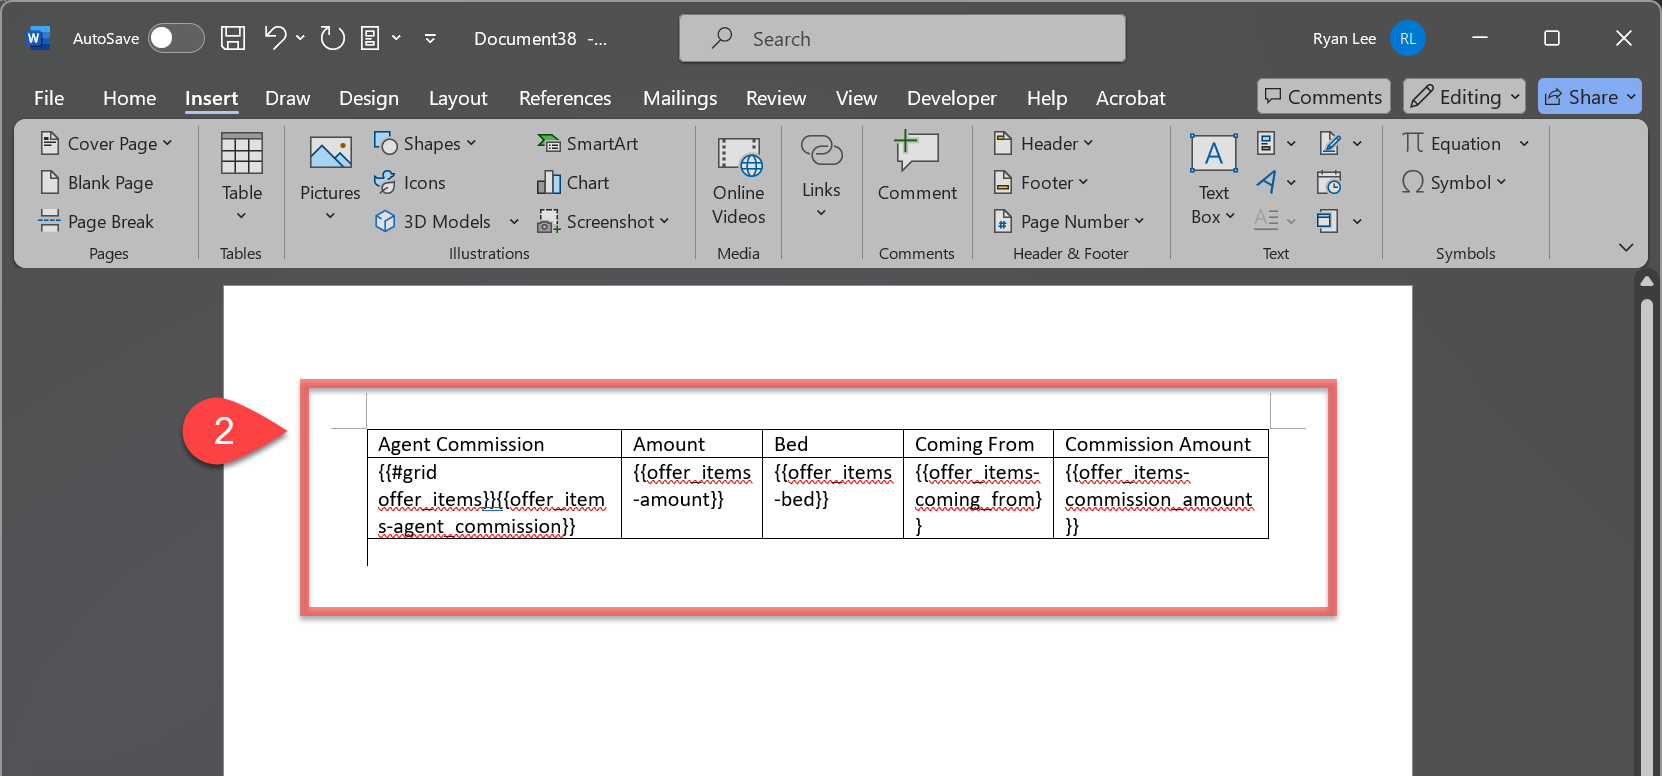
In the grid table on your template, modify it to suit your needs by adding or removing columns, customise the headers and adjust the style as necessary.
Do not remove {{#grid ObjectApiName}} part. The first cell on this row must start with the helper {{#grid ObjectApiName}} to indicate it is a dynamic table.
-
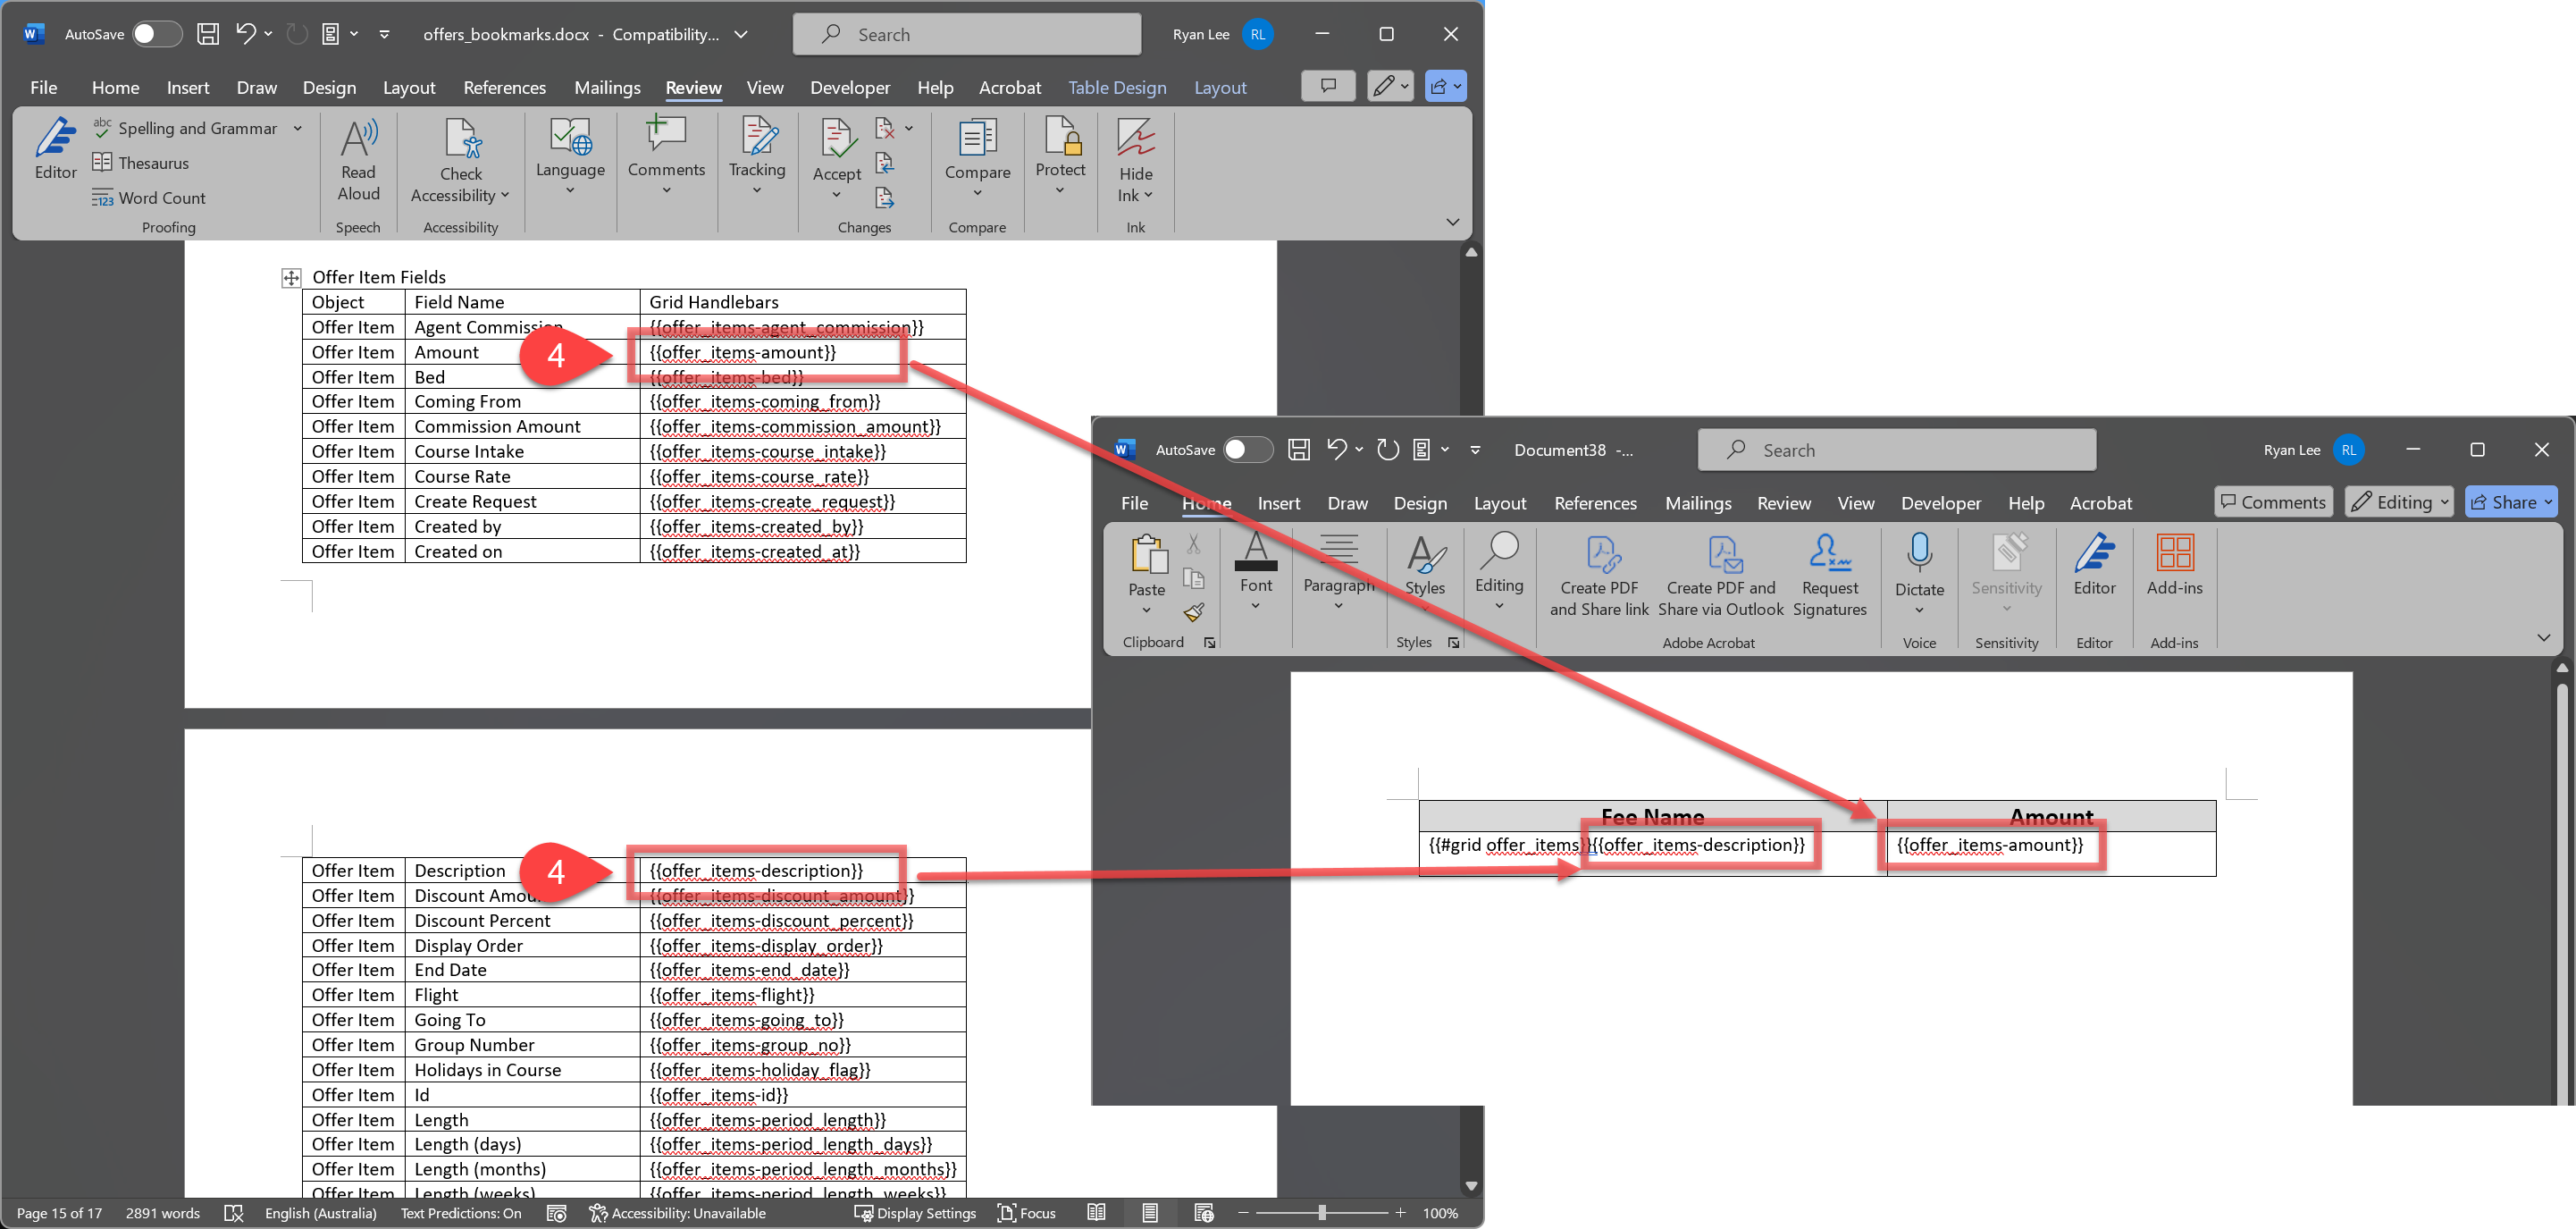
Find the appropriate grid bookmarks from Grid Handlebars for each column of your grid table from the downloaded bookmarks lists document, copy them, and paste them into your Grid table in the Word Document Template.
Insert Bookmarks Manually Using Microsoft Word Field Feature Advanced
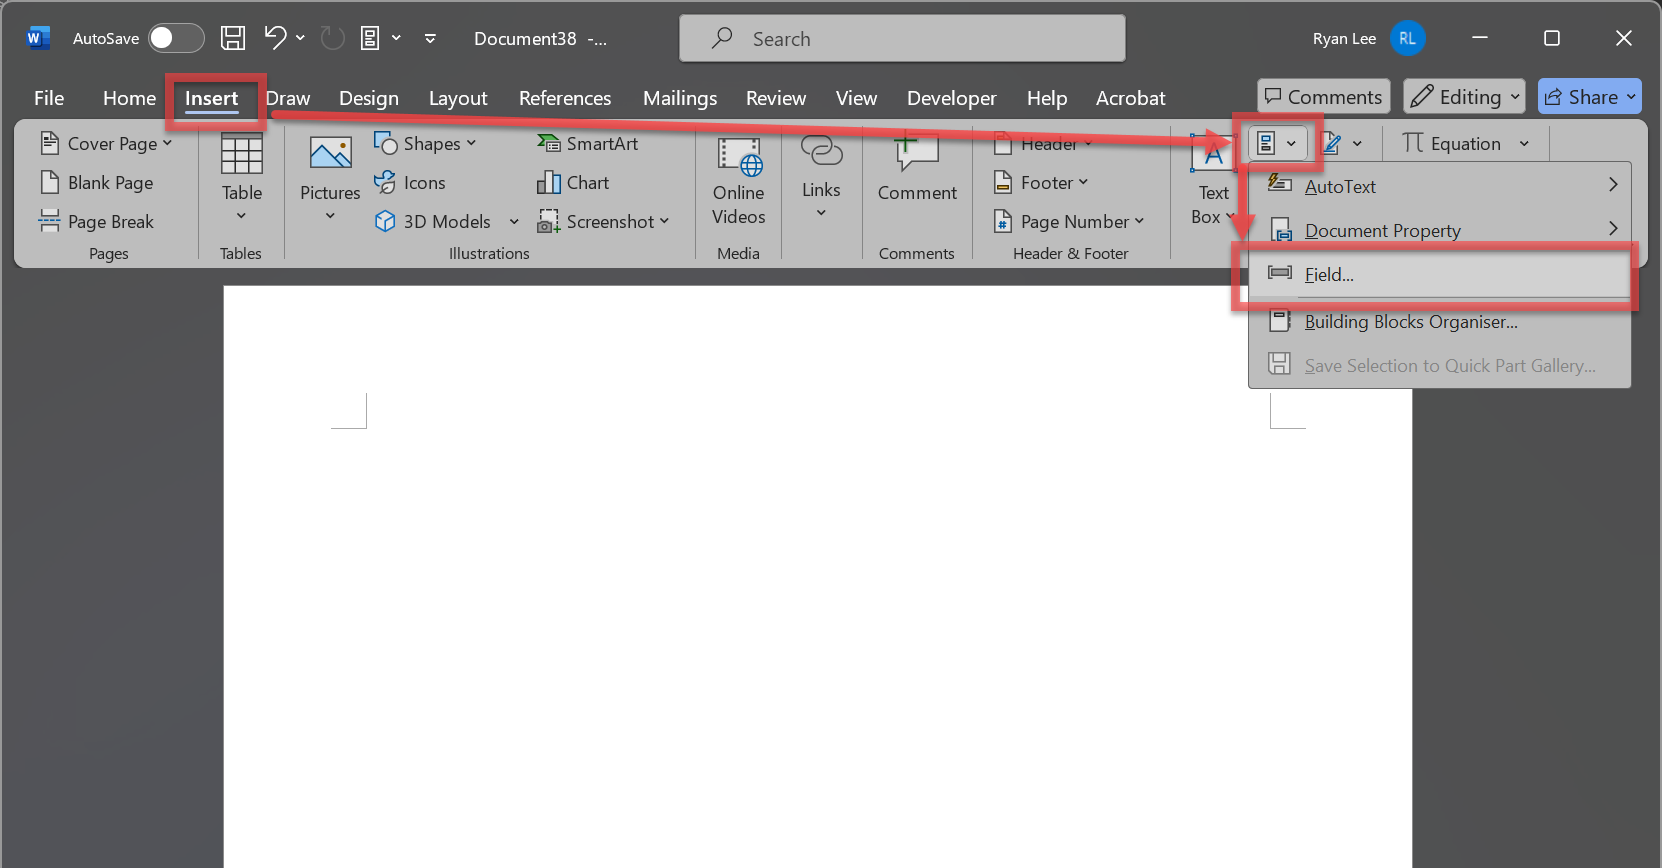
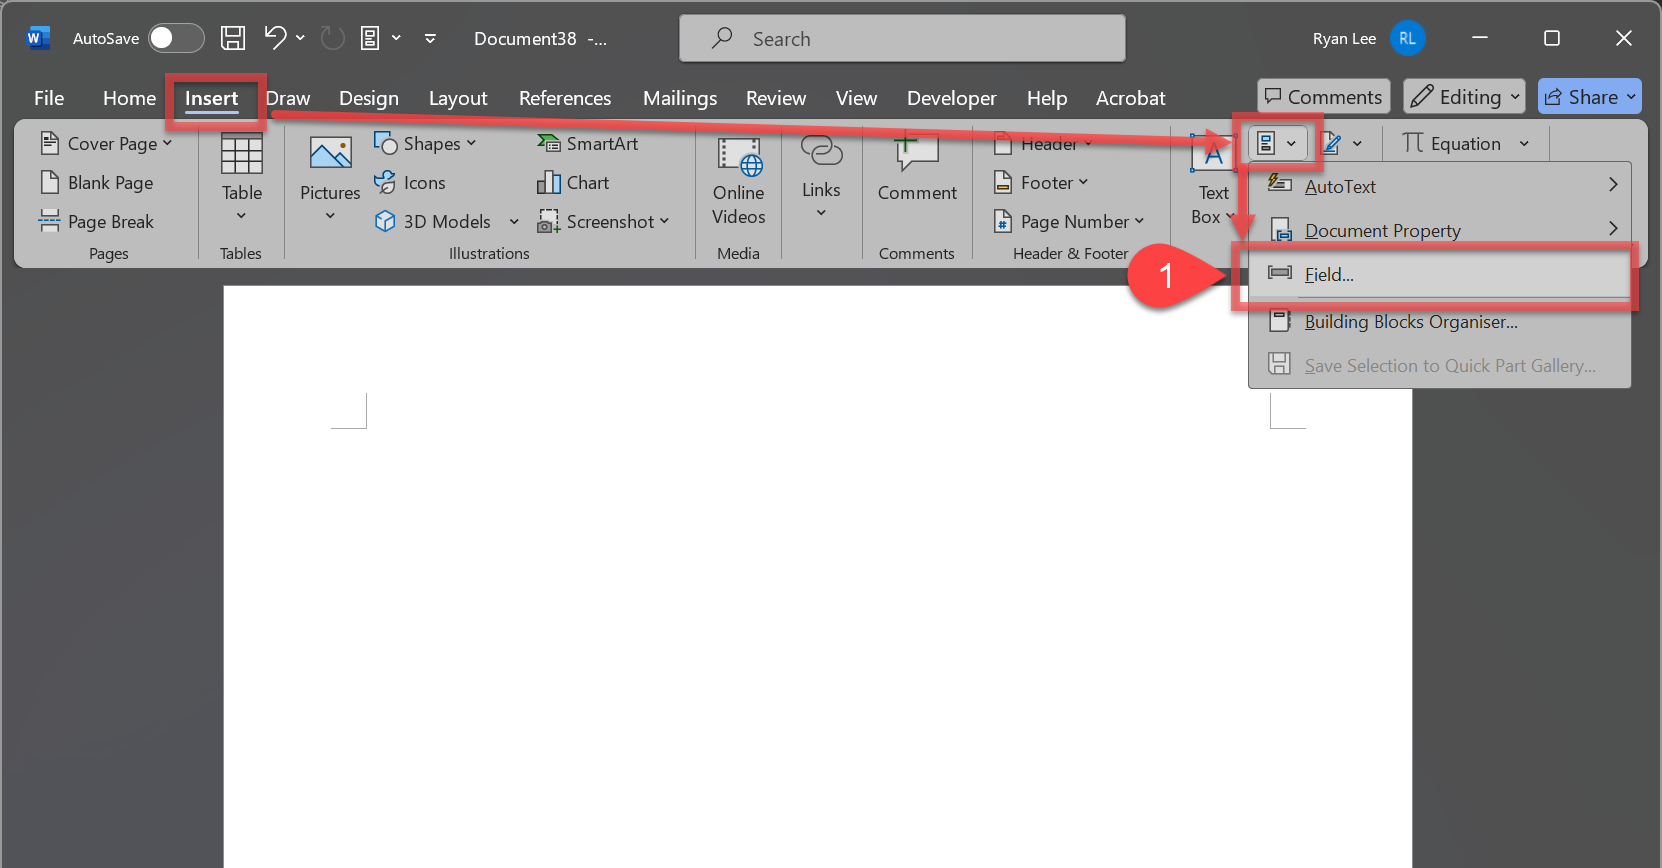
From the Insert tab, select Quick Parts and then on Field. The field properties window will display.
The following step, depends on whether you are inserting a:
-
Single Field that represents a single value (e.g Student First Name). Or;
-
Grid Table that represent a group of structured values in tables, or a Grid/Section template that represents another template that can be embedded in another template.
Insert a Single Field
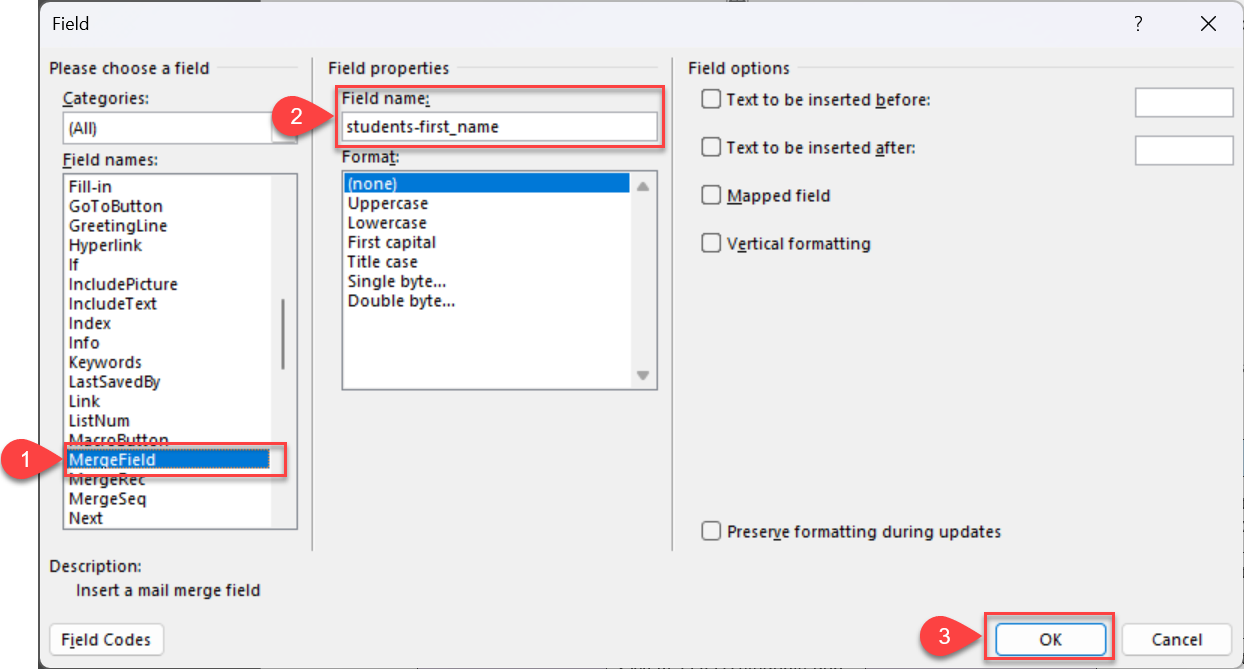
From the Field properties windows:
-
Select MERGEFIELD from the Field names panel.
-
As the Field name, enter the Bookmark (API name) of the field you want to add without any curly brackets.
For example, for the student’s first name, add the Field name asstudents-first_name.
The fields name must match exactly the bookmark (API name) of the field. -
Click OK to insert.
-
You’ll see the field inserted through MERGEFIELD as
{ MERGEFIELD students-first_name }.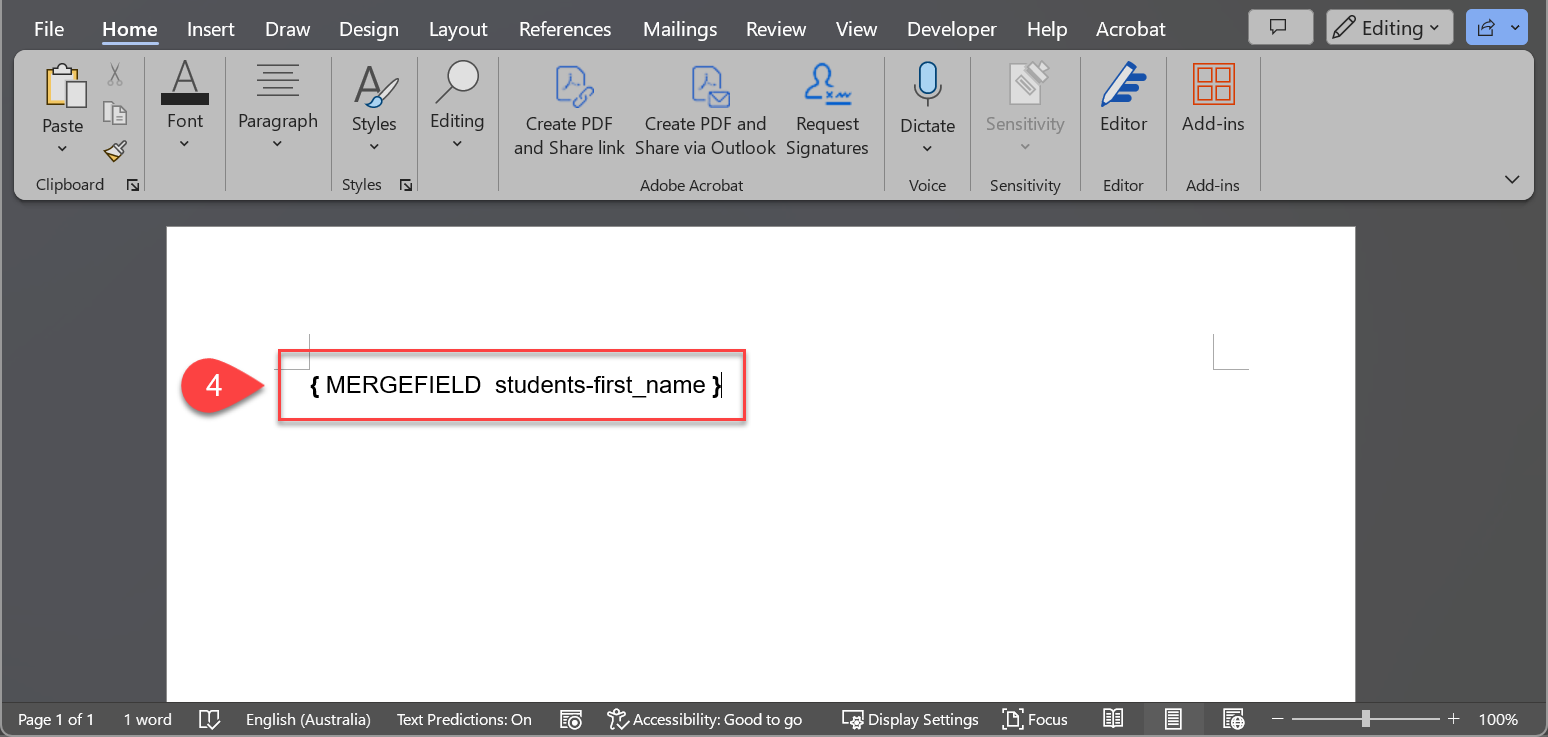
Tip.
To apply formatting, perform calculations, and implement conditional logic through the inserted single fields, you can use Microsoft Word Field Codes.
For detailed information, please refer to this article: Word Field Codes in Word Templates
Insert Grids in Tables
You can insert a Grid in a Table in a Word Document Template in the same way as in HTML Templates. Please refer to the instructions in the link below for details on how to do this: Grids in Tables.
Insert Grid Templates or Section Templates
-
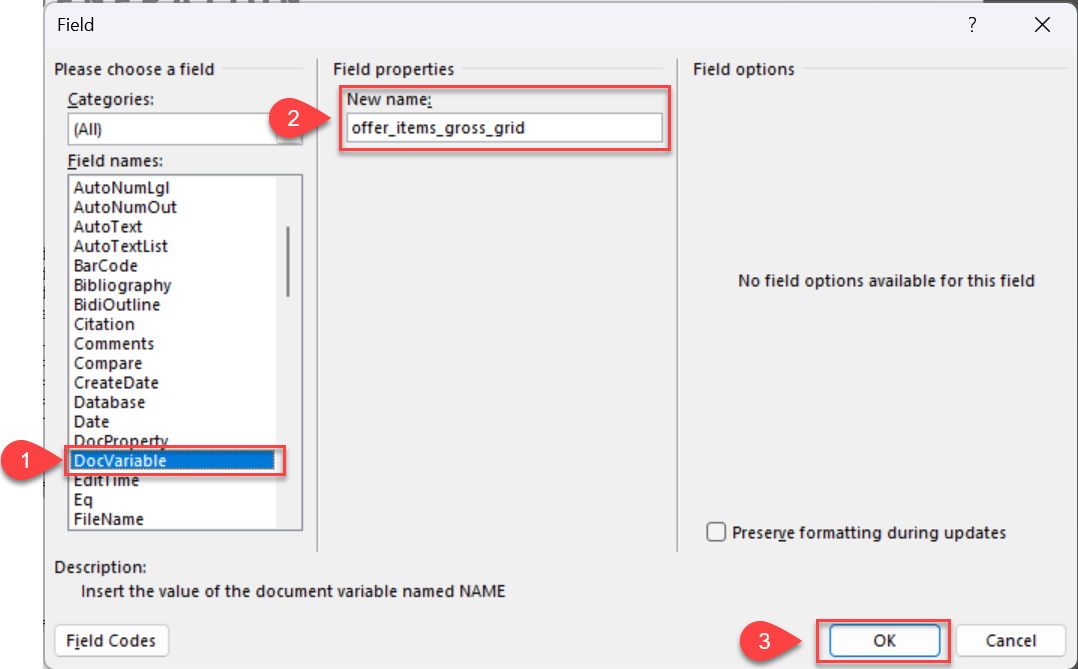
From the Insert tab, select Quick Parts and then click on Field. The field properties window will display. Select DOCVARIABLE from the Field names panel.
-
Enter the API Name of the Grid Template or the Section Template that you’d like to insert in the Word Document Template on the New name field without any curly brackets.
For example, if the API name of the grid that you want to insert isoffer_items_gross_grid, enter that as the name.
The name must match exactly the template’s API name. -
Click OK to insert.
-
You’ll see the field inserted through DOCVARIABLE as
{DOCVARIABLE offer_items_gross_grid}.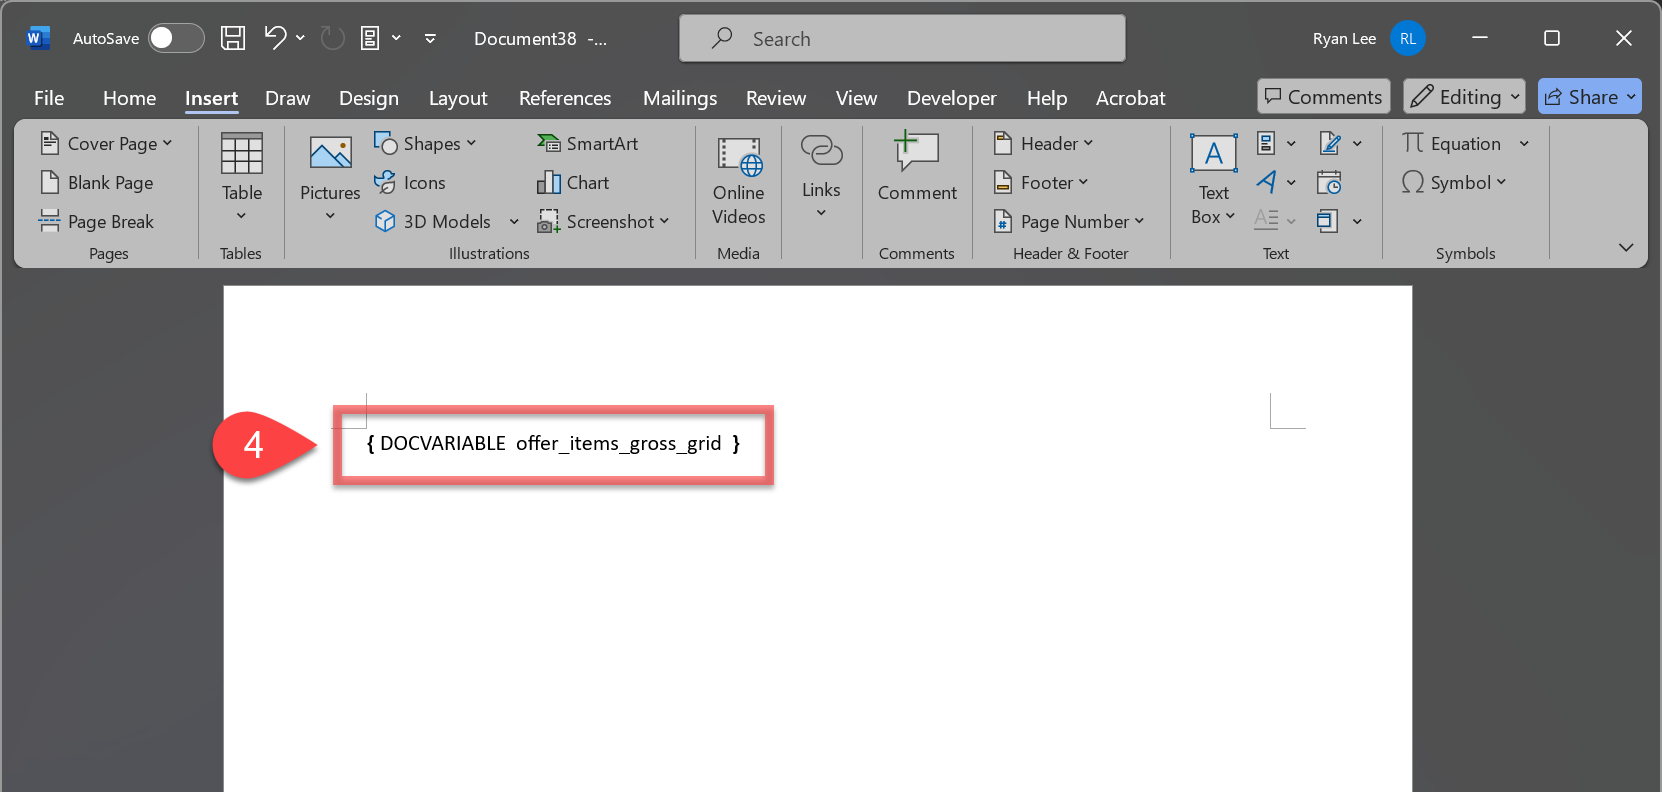
3. Save the Word Document Template
Once you have finished inserting fields into your Word Document Template, you can save the template in ‘.doc' or ‘.docx’ formats.
In eBECAS/EDMISS NextGen, the Word Document Template files must have the .doc or .docx extension.
Upload a Microsoft Word Document Template
When you have the Word file ready, it is time to create the template in eBECAS/EDMISS NextGen.
-
From the Utilities menu, go to Utilities > Templates > Templates and Click New Template at the right top.
-
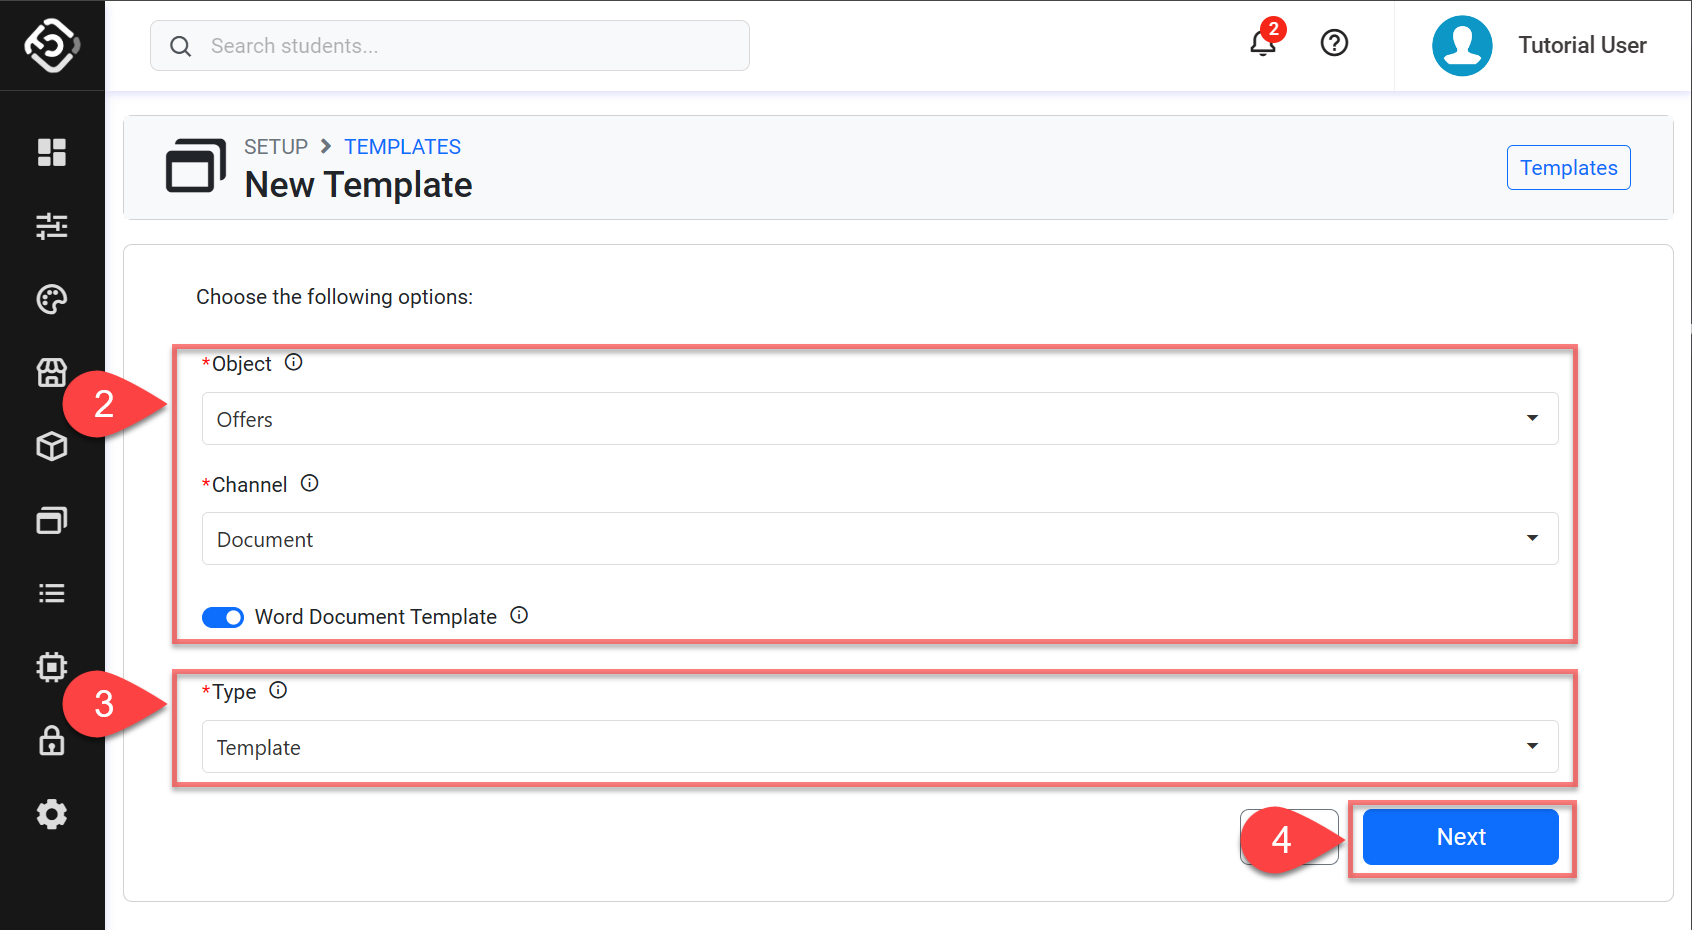
Select the desired object, choose Document as the channel, and enable the Word Document Template option.
Note that Email and SMS templates cannot be created from a Word document. -
Select Template as the type.
Note that Templates of type Section and Grid cannot be created from a Word document. -
Click on Next.
-
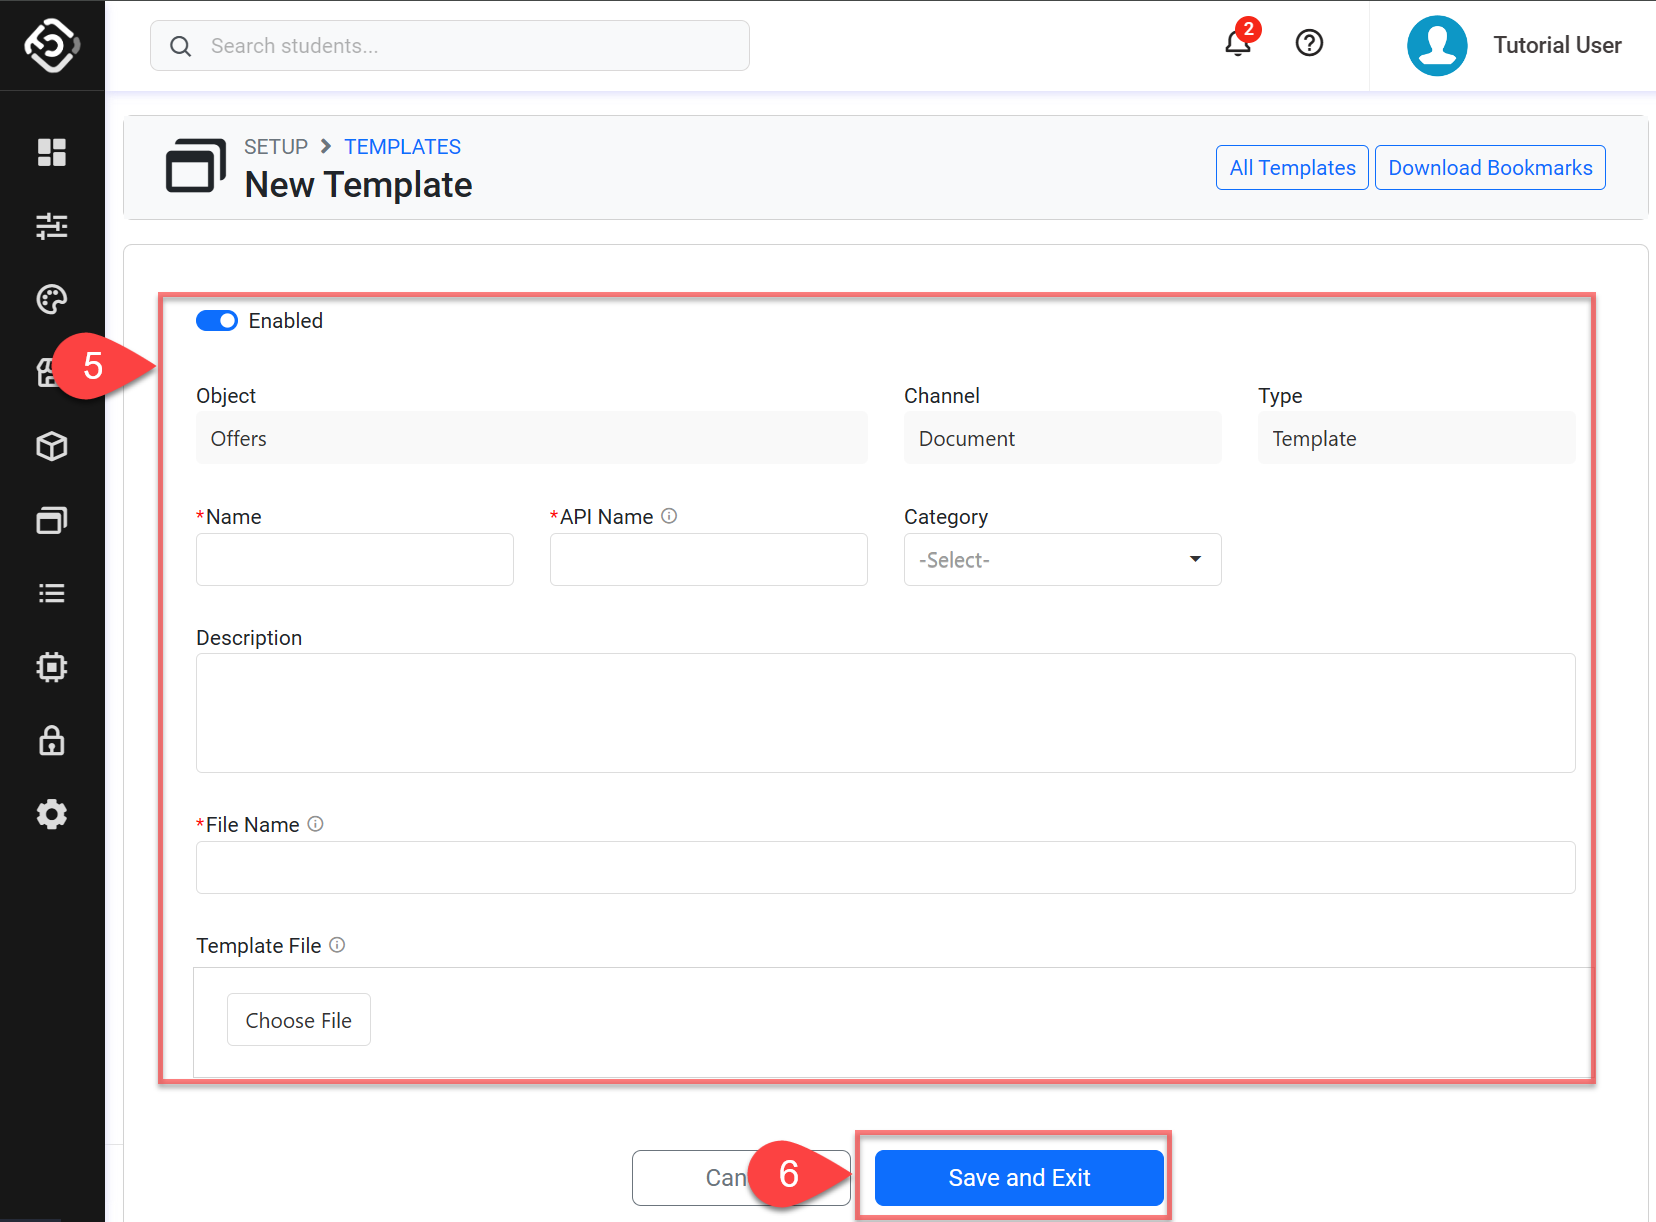
Enter the details and choose the template file to upload.
-
Click Save and Exit to finish.
Example of Creating a Template from a Word File
The following example explains how to create a Word file that can be used as a template in eBECAS/EDMISS NextGen.
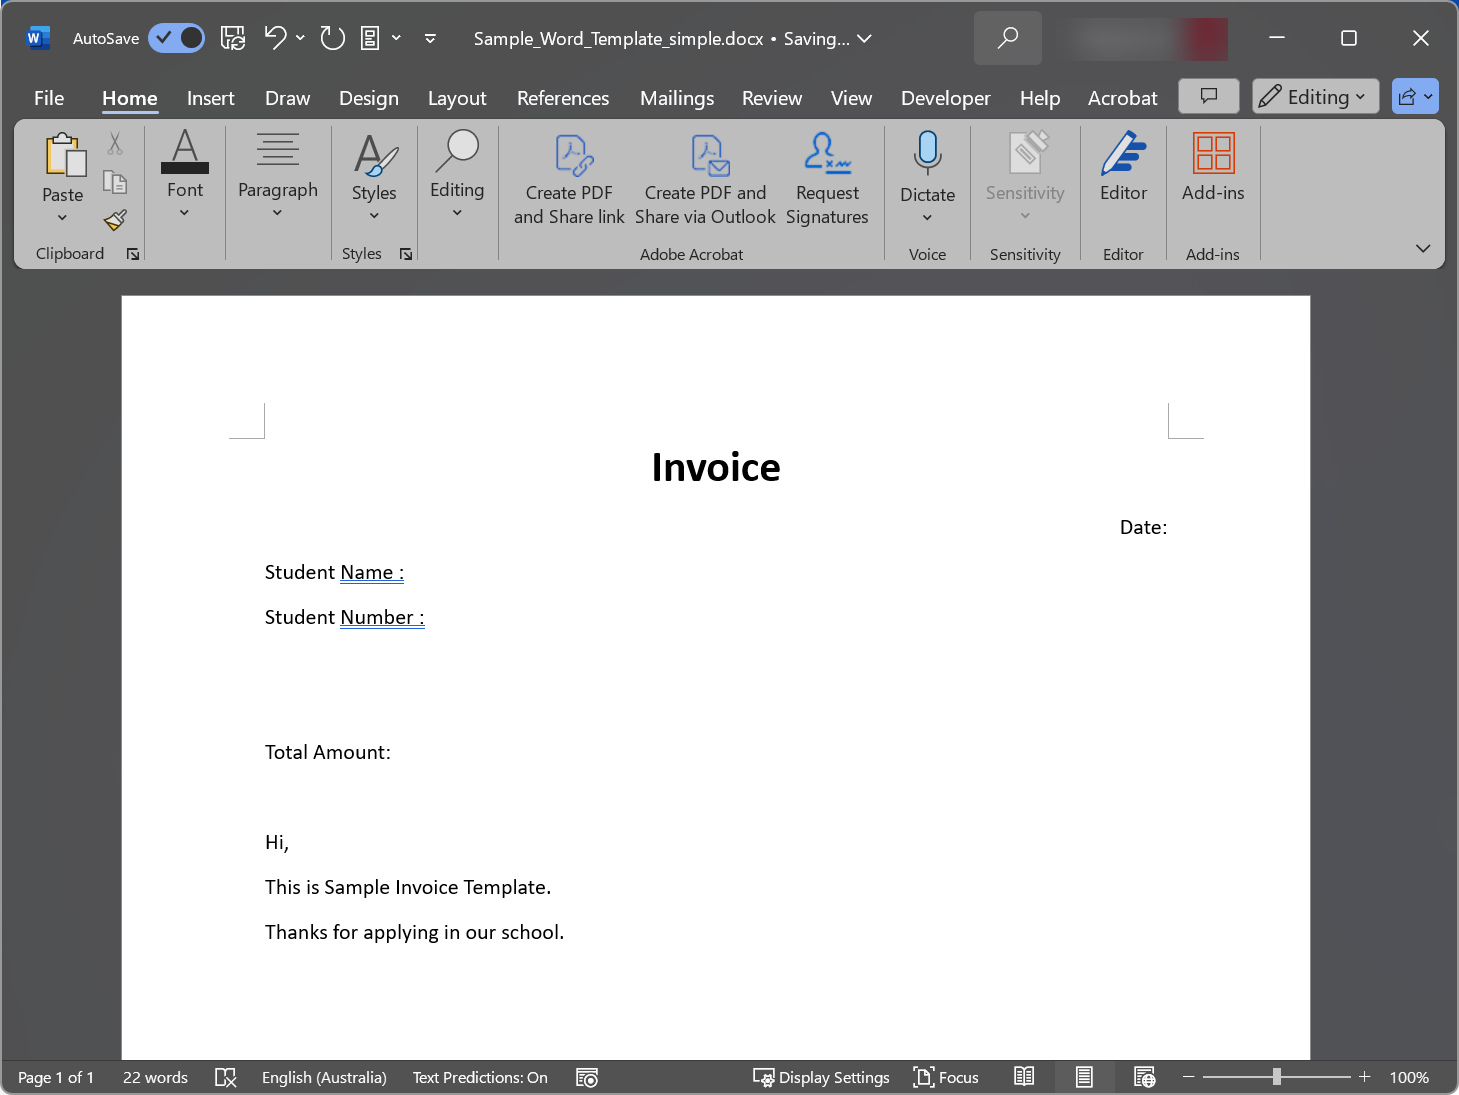
Simple Invoice Template
-
Open a new document in Word.
-
Create the basic layout for the template.
-
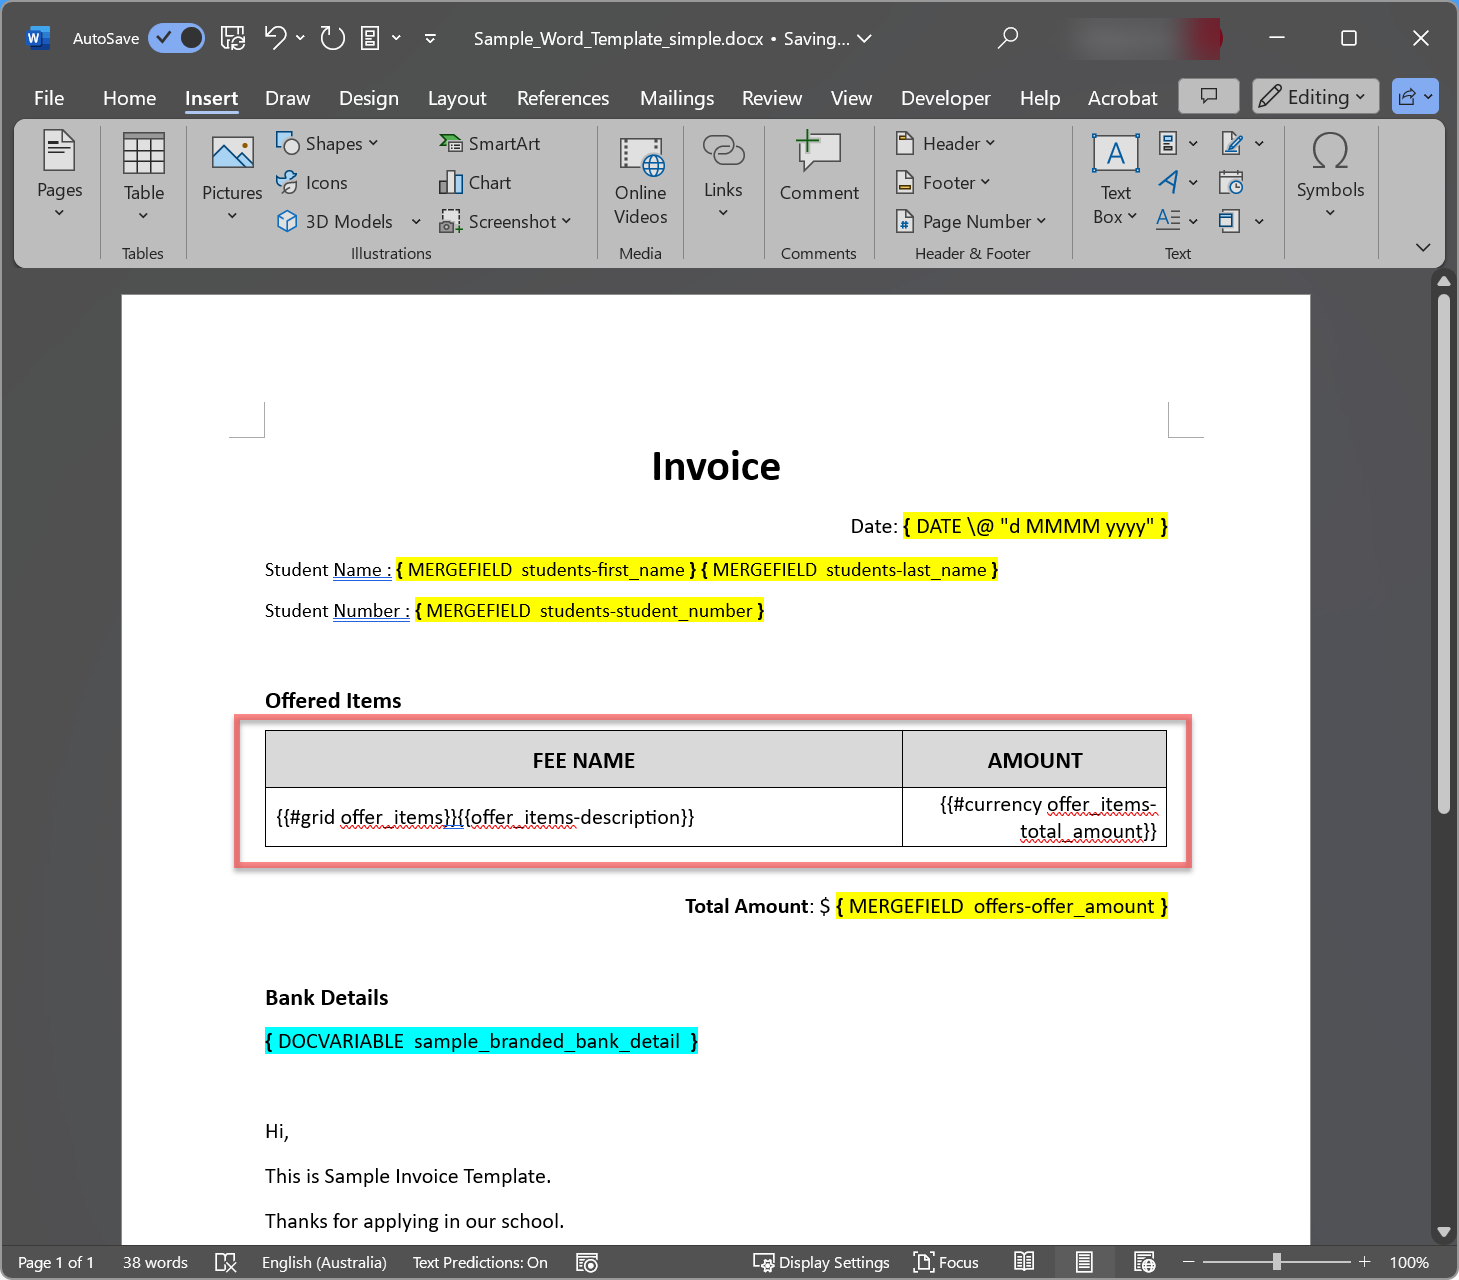
Insert data fields by using
MERGEFIELD, as highlighted in yellow in the screenshot below.For example, to insert the Student First Name field, we need to know the bookmark for that field:
{{students-first_name}}
Next, add the data field in the Word Document Template.To do so, download Bookmarks Lists and copy & paste the bookmarks, or go to Insert > Field, select
MERGEFIELD, enterstudents-first_namein Field name, then click OK.
You’ll see{ MERGEFIELD students-first_name }. -
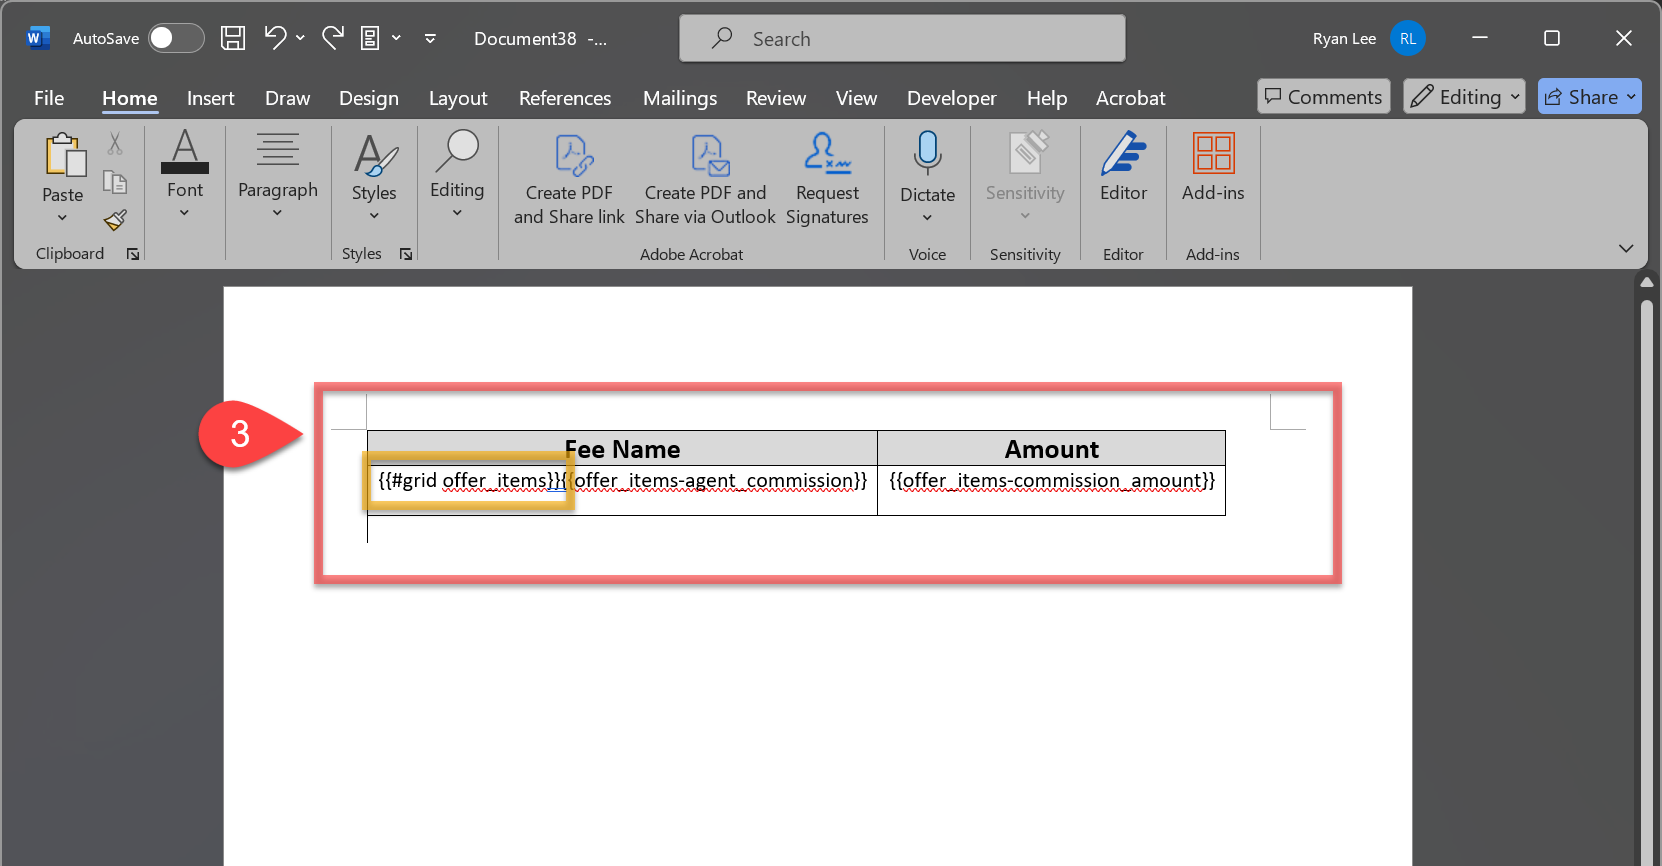
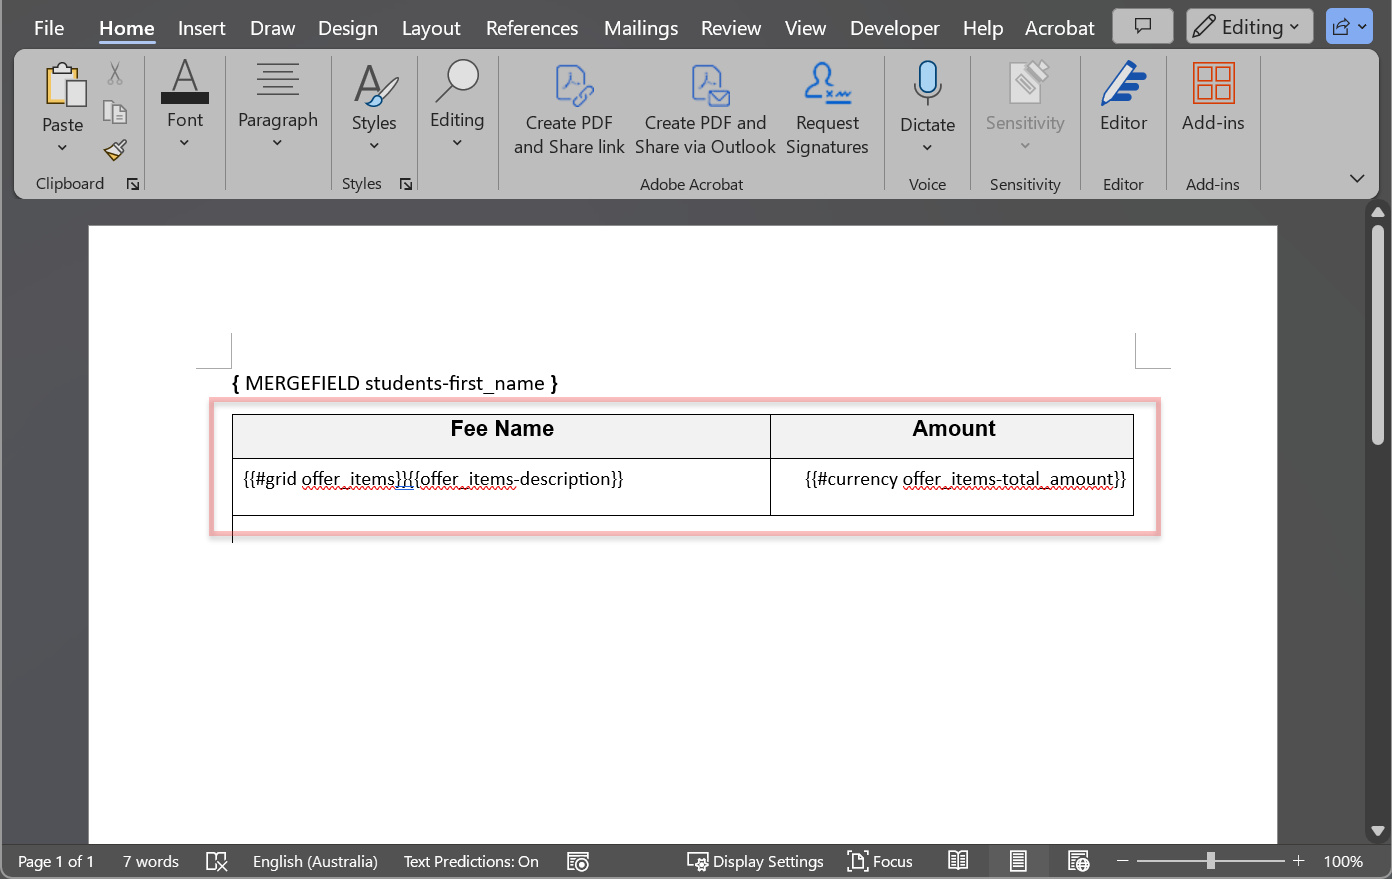
Insert grid tables using a sample grid table from the downloaded Bookmarks List document, or insert a table and use
{{#grid ObjectApiName}}as highlighted in the red box in the screenshot below.
For more detailed instruction, please refer to the article on: Grids in Tables -
Next, we are going to insert a Grid/Section template using
DOCVARIABLE, as highlighted in cyan in the screenshot below.Let's insert a section template (must exist in NextGen) that will display the Bank Details of the college.
Go to Insert > Field, select DOCVARIABLE, and enter
sample_branded_bank_detail(api name of the grid we want to insert) in the New name. Then click on OK.
You’ll see{ DOCVARIABLE sample_branded_bank_detail }. -
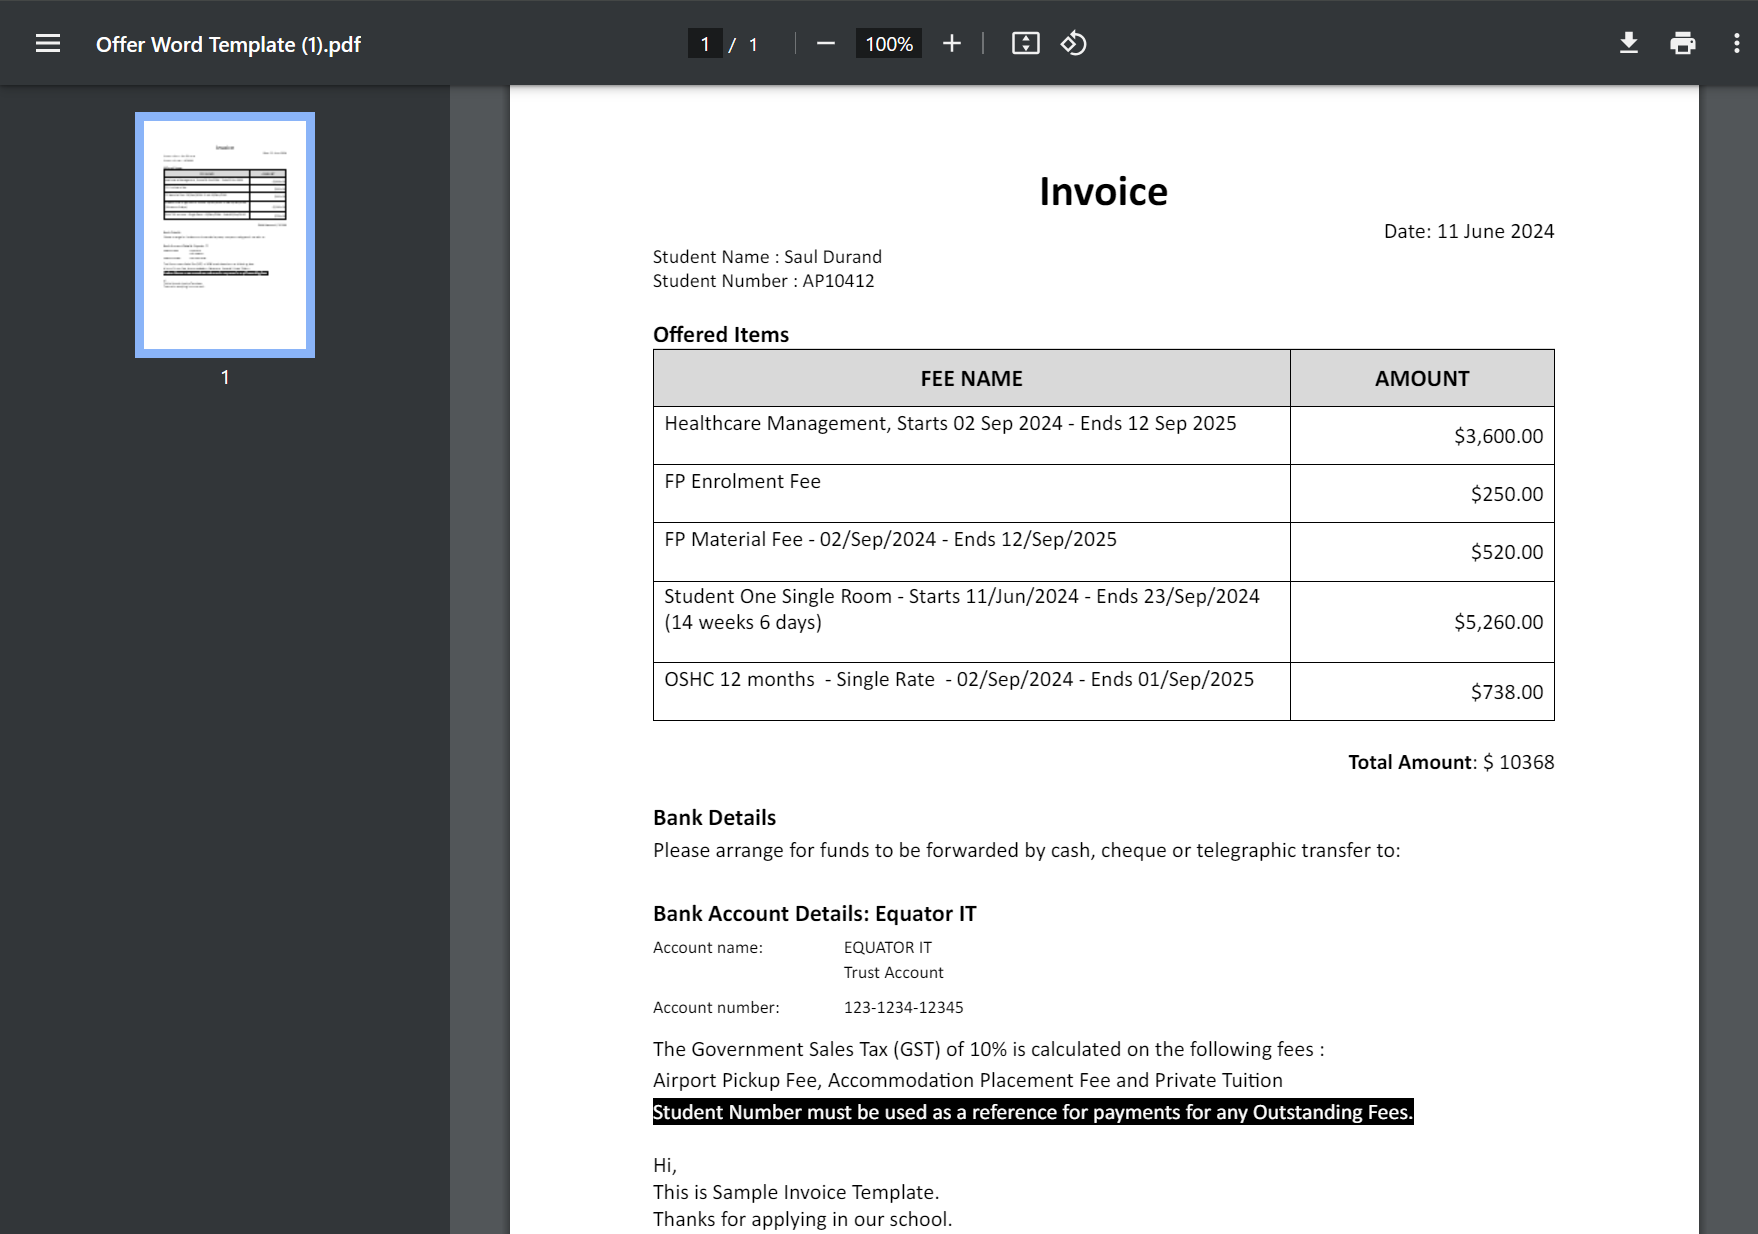
The document will look like this one:
-
Upload the Word Document Template to NextGen templates.
For more detailed instruction, please refer to the above section on: Upload a Microsoft Word Document Template. -
When merging the document on the offer, the result will look like this: