Merge Documents
This article explains how to create documents in formats like PDF and Word, using both static and dynamic data from the system.
The Documents Merge is a feature designed to streamline the creation of documents, ensuring they are accurate and consistent. Whether you are creating static letters, or dynamic documents such as Letters of Offer, invoices, contracts, or any other type of documents, this feature will enhance your productivity and efficiency.
The terms 'Merge a Document' and 'Generate a Document' are used interchangeably.
Overview
Merging Documents simplifies administrative tasks by automating the process of populating documents with specific data. This saves valuable time, ensures accuracy and uniformity in all documents, resulting in a more efficient workflow.
Requirements
To utilize this functionality effectively, the following requirements must be met:
Users must have the necessary permissions to access and use the Merging Documents feature.
Have Documents Templates. For more detail about creating templates, see this article; Templates.
Document Templates
To Merge Documents, document templates must be created first. These templates are used to generate the documents.
Merge Documents
Documents can be merged individually or in bulk.
Merge a Single Document
Go to the record of the entity that you want to merge a document for.
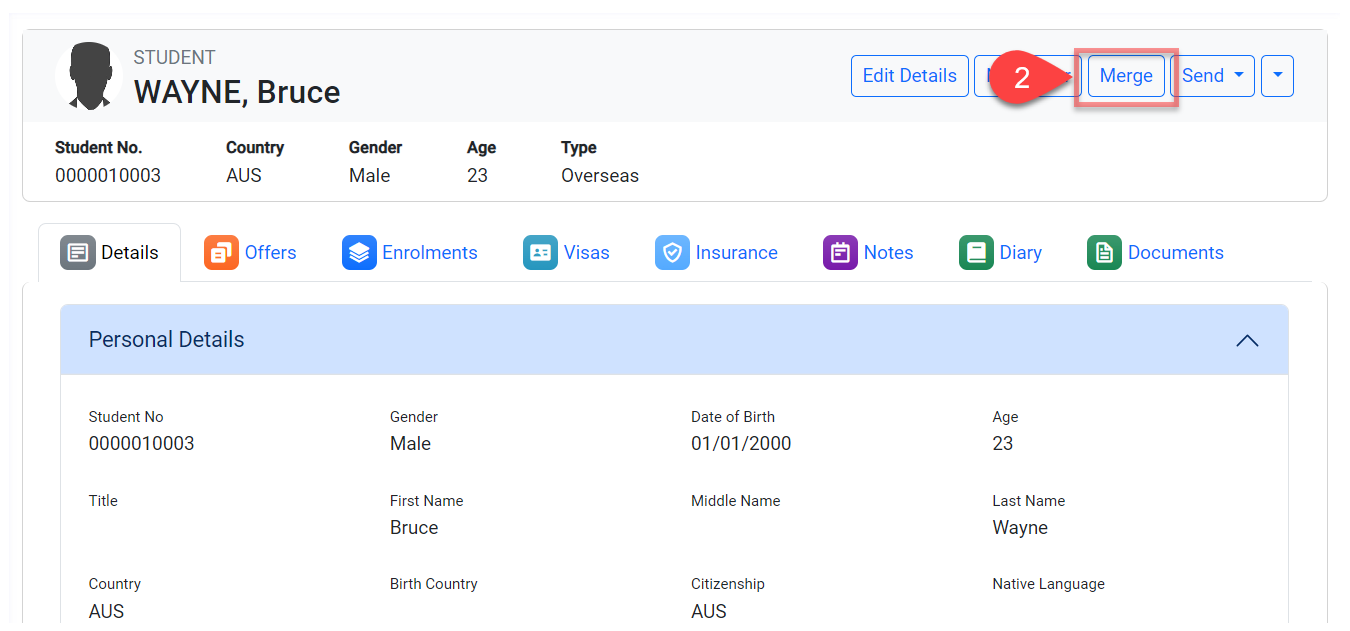
From the header, click on Merge. If you cannot see the button, contact your system administrator to ensure that you have a role with the permissions to merge documents for that entity or object.
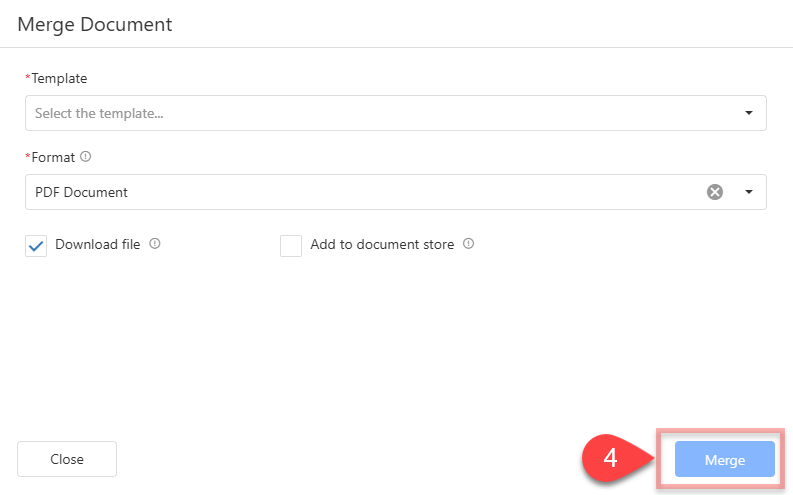
The Merge Document window will show.
Template
Choose the template that you want to use for this merge. Note that only templates with the following settings and attributes will be available to choose from:The template was created for the same entity or object that you are merging the document for (e.g. Students).
The Channel is ‘Document’.
The Type is ‘Template’ .
Format
Select the Format of the document that you want to create.Merge Options
Select the options for the merge process. Note that you must choose at least one option to proceed.Download File: Select this option if you want to download the merged document.
Add to Document Store: Select this option to add automatically the merged document to the entity Document Store.
As of Date
An additional option, As of Date, is available for templates (including attachments) that include bookmarks where values can be calculated based on a specific date (e.g. Enrolment Overdue Fees Bookmarks). This date is used during the merge process to calculate bookmark values as of the selected date.
Click on Merge to start generating the document and wait for the process to complete.
If the Download File option was selected, the file will download automatically.
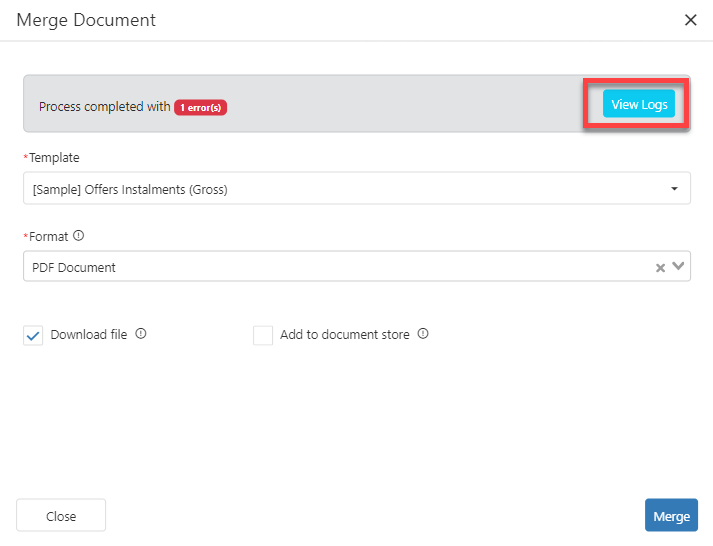
If there are any errors, you will see a message at the top with a button to see the logs of the process. Click on the View logs for the specific details.
Merge Bulk Documents
The maximum number of documents that can be merged at the same time depends on your subscription plan. Contact your system administrator for details.
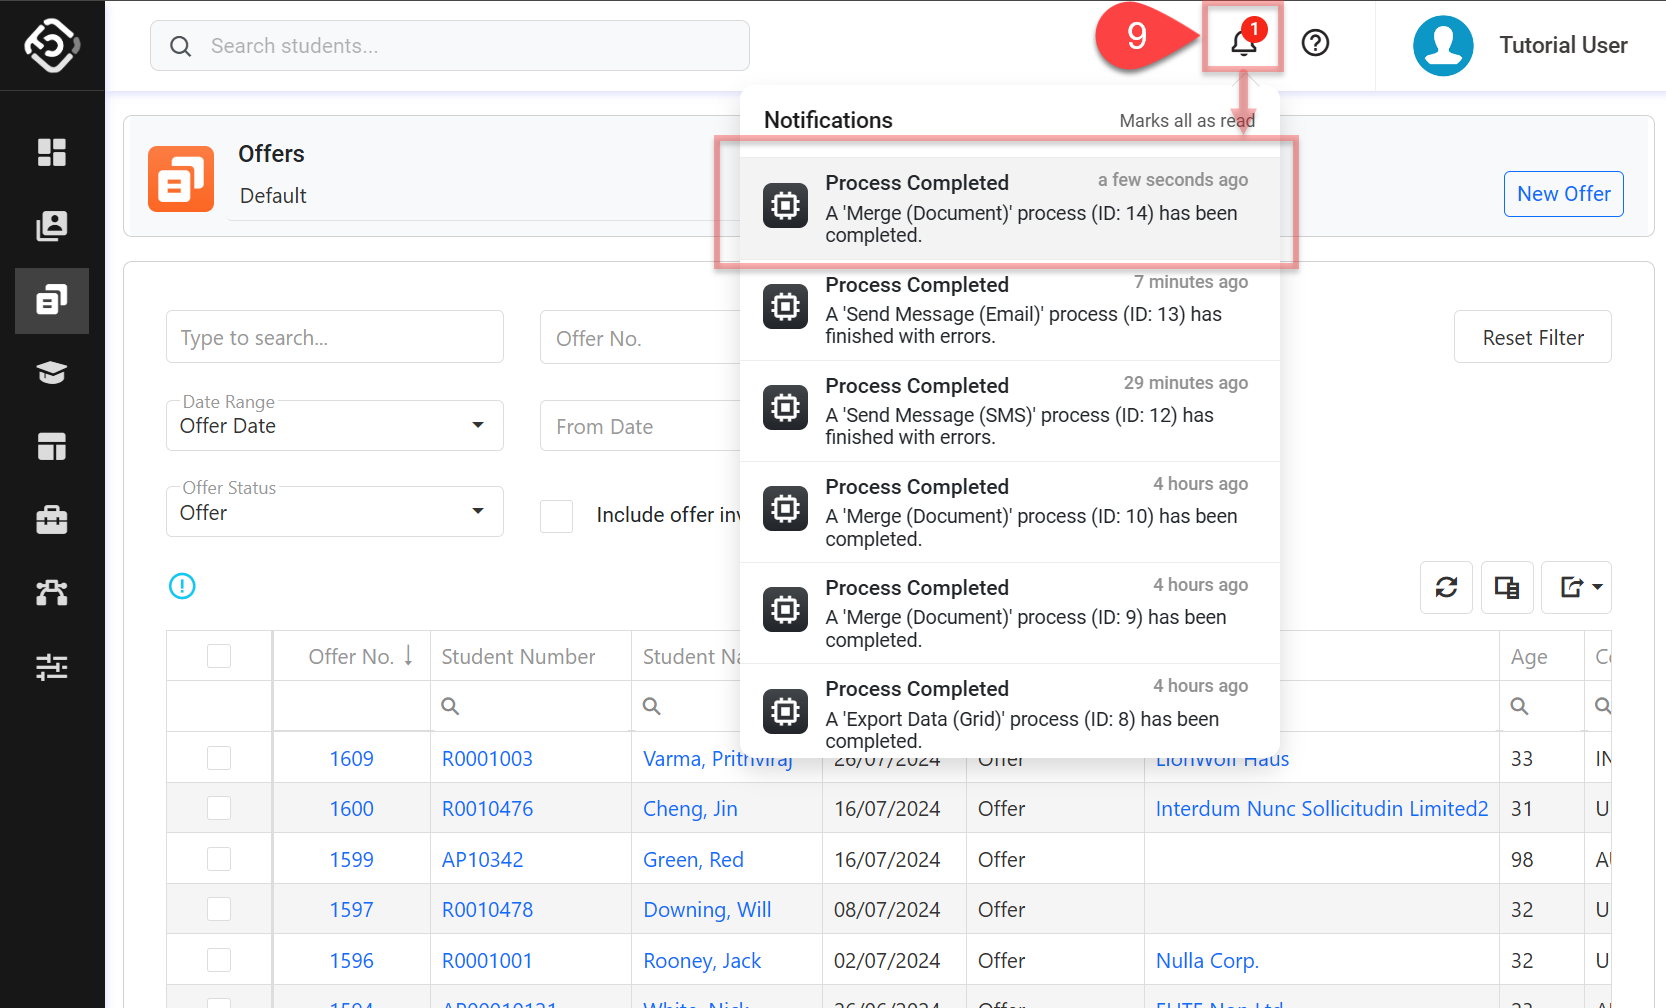
Merge Documents in bulk can be a time consuming task. Thankfully, the App send these email in the background so you can continue using the system while this process completes. Then, once the process is completed, a notification will be sent to the user who initiated the process. Refer to the Processes article for more details.
You can merge records in bulk from the grid of the object that you want to merge the documents for.
To do so:
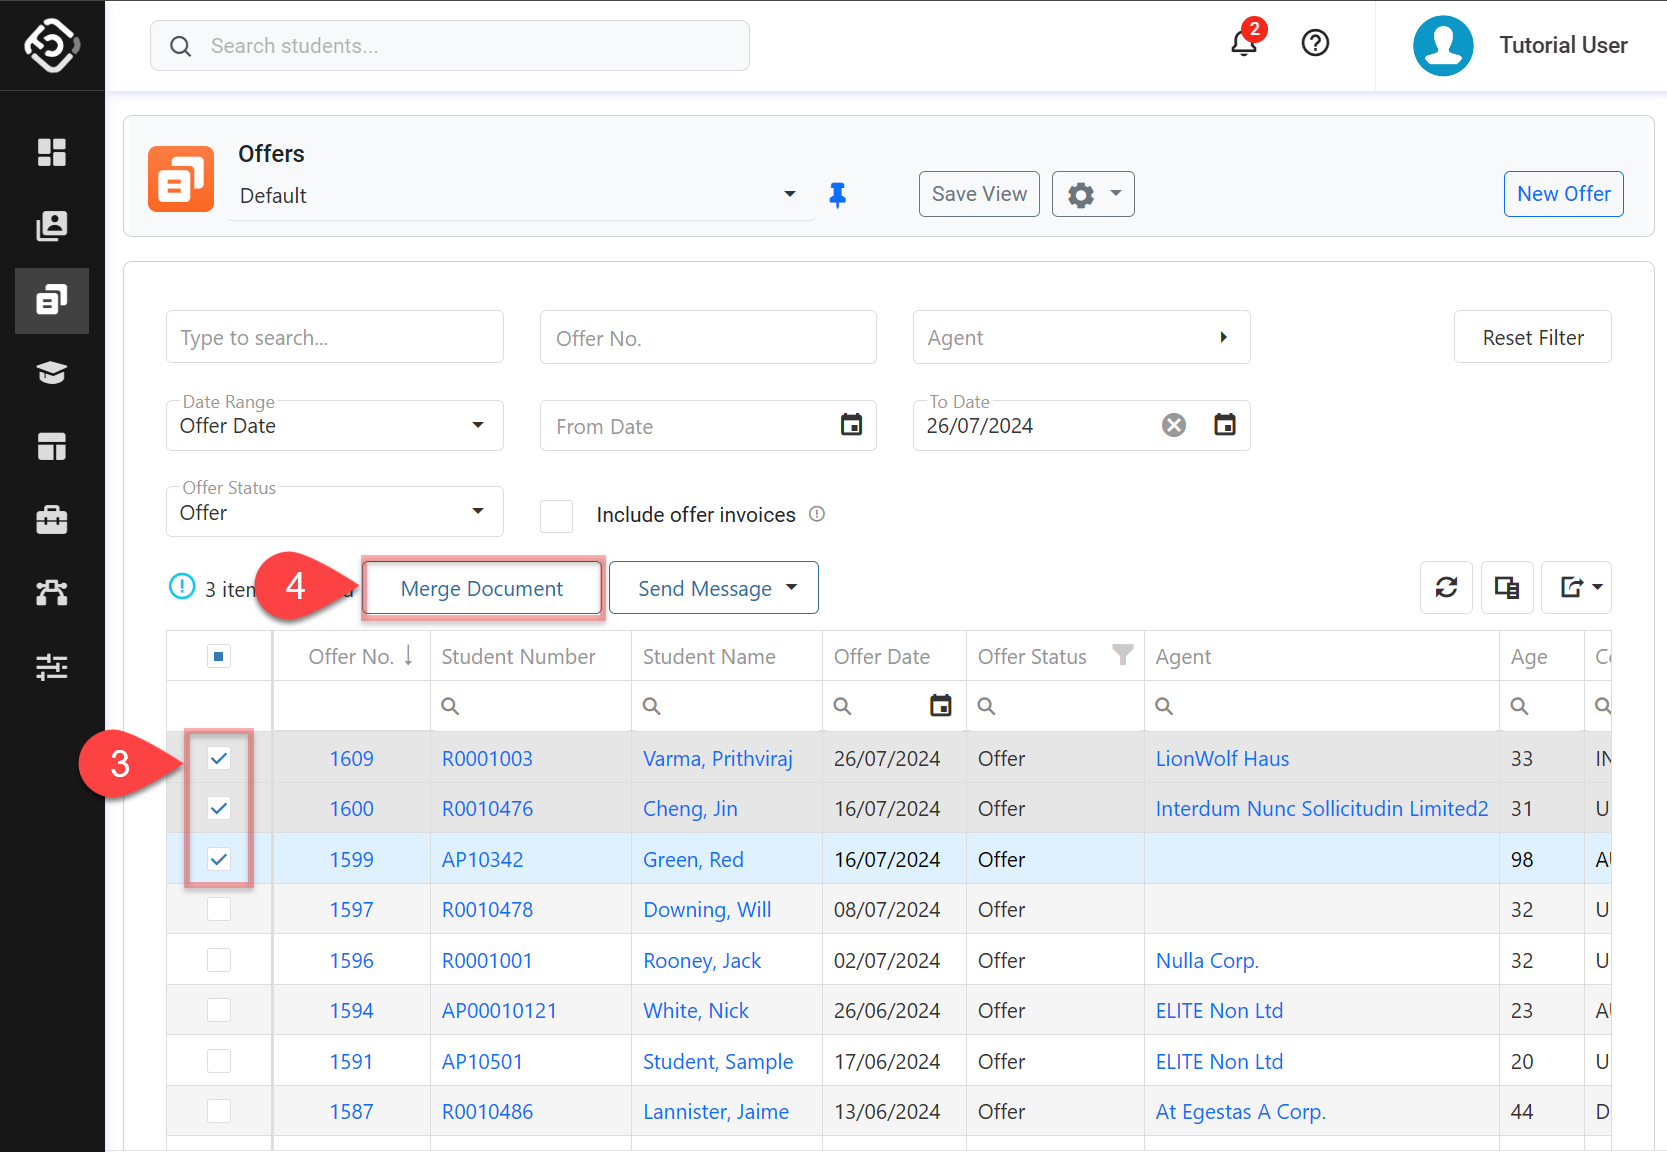
Go to the grid of the object that you want to merge documents for.
Use the filters to locate the records of interest.
Select the records that you want to Merge the documents for.
Above the grid, click on Merge Document. If you cannot see any of these options, contact your system administrator to ensure that you have a role with the permissions to Merge Documents for that entity or object.
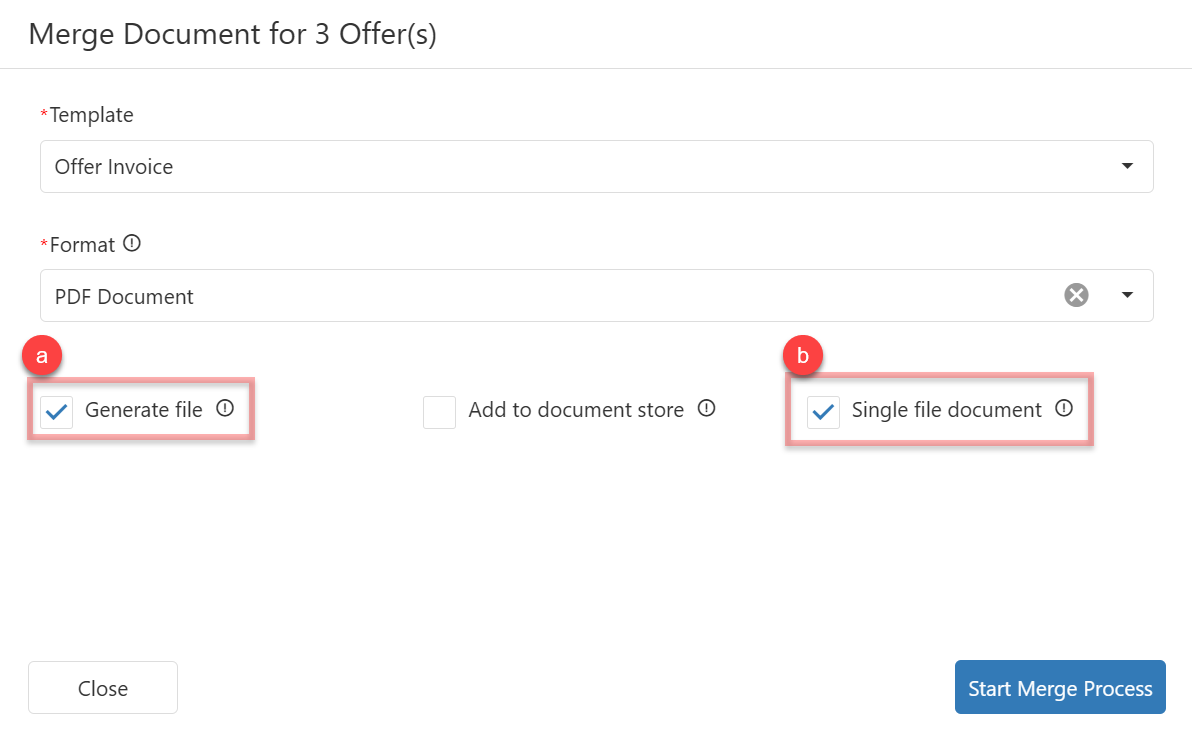
Set the merge options as desired. (refer to the section above: Merge Single Document for more details). Note there is an additional option when merging documents for more than 1 record:
Generate file: Select this option to generate a file with the merged document in Process Details.
For more information, please refer to the following link: Processes.Single file document: Selecting this option will result in generating a single file that combines all the documents together (the document for each record will be separated by a page break). If not selected, all the documents will be compressed into one zip file, with each document remaining separate.
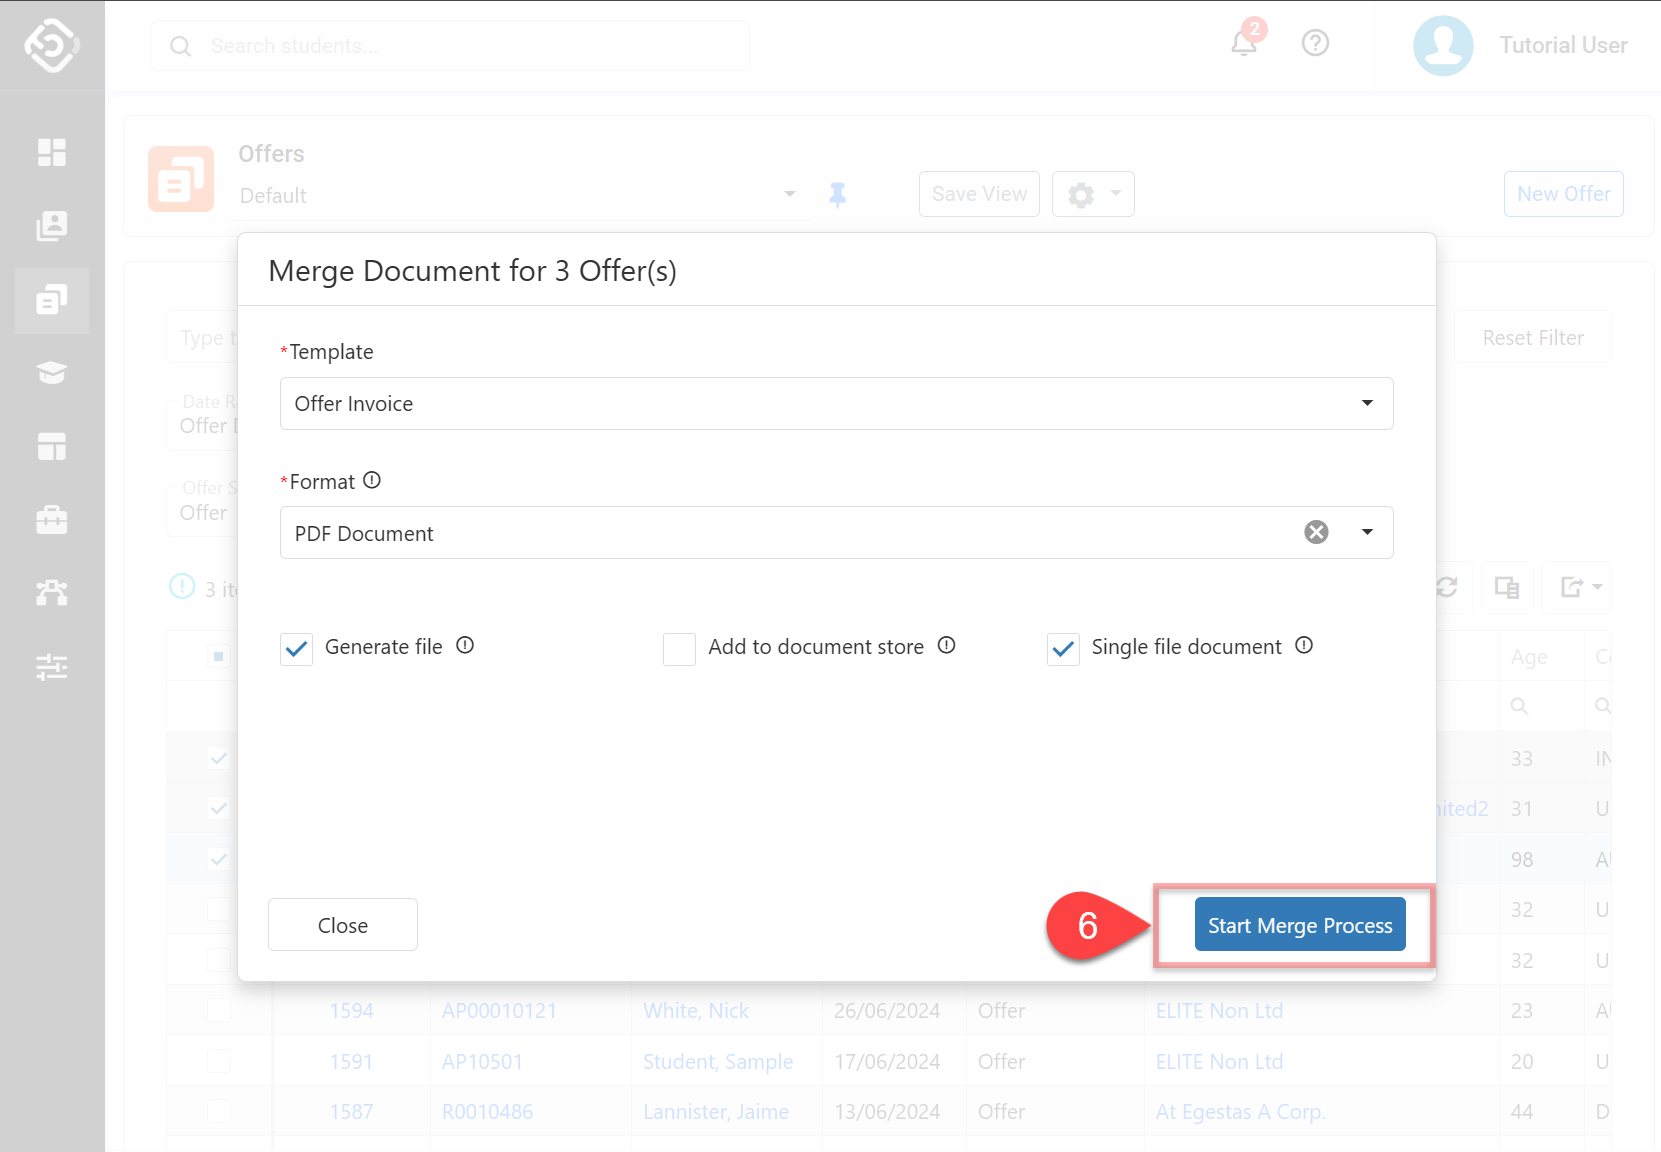
Click on Start Merge Process.
(Optional but recommended) Add a description for the process. The description you provide will help to identify the process.
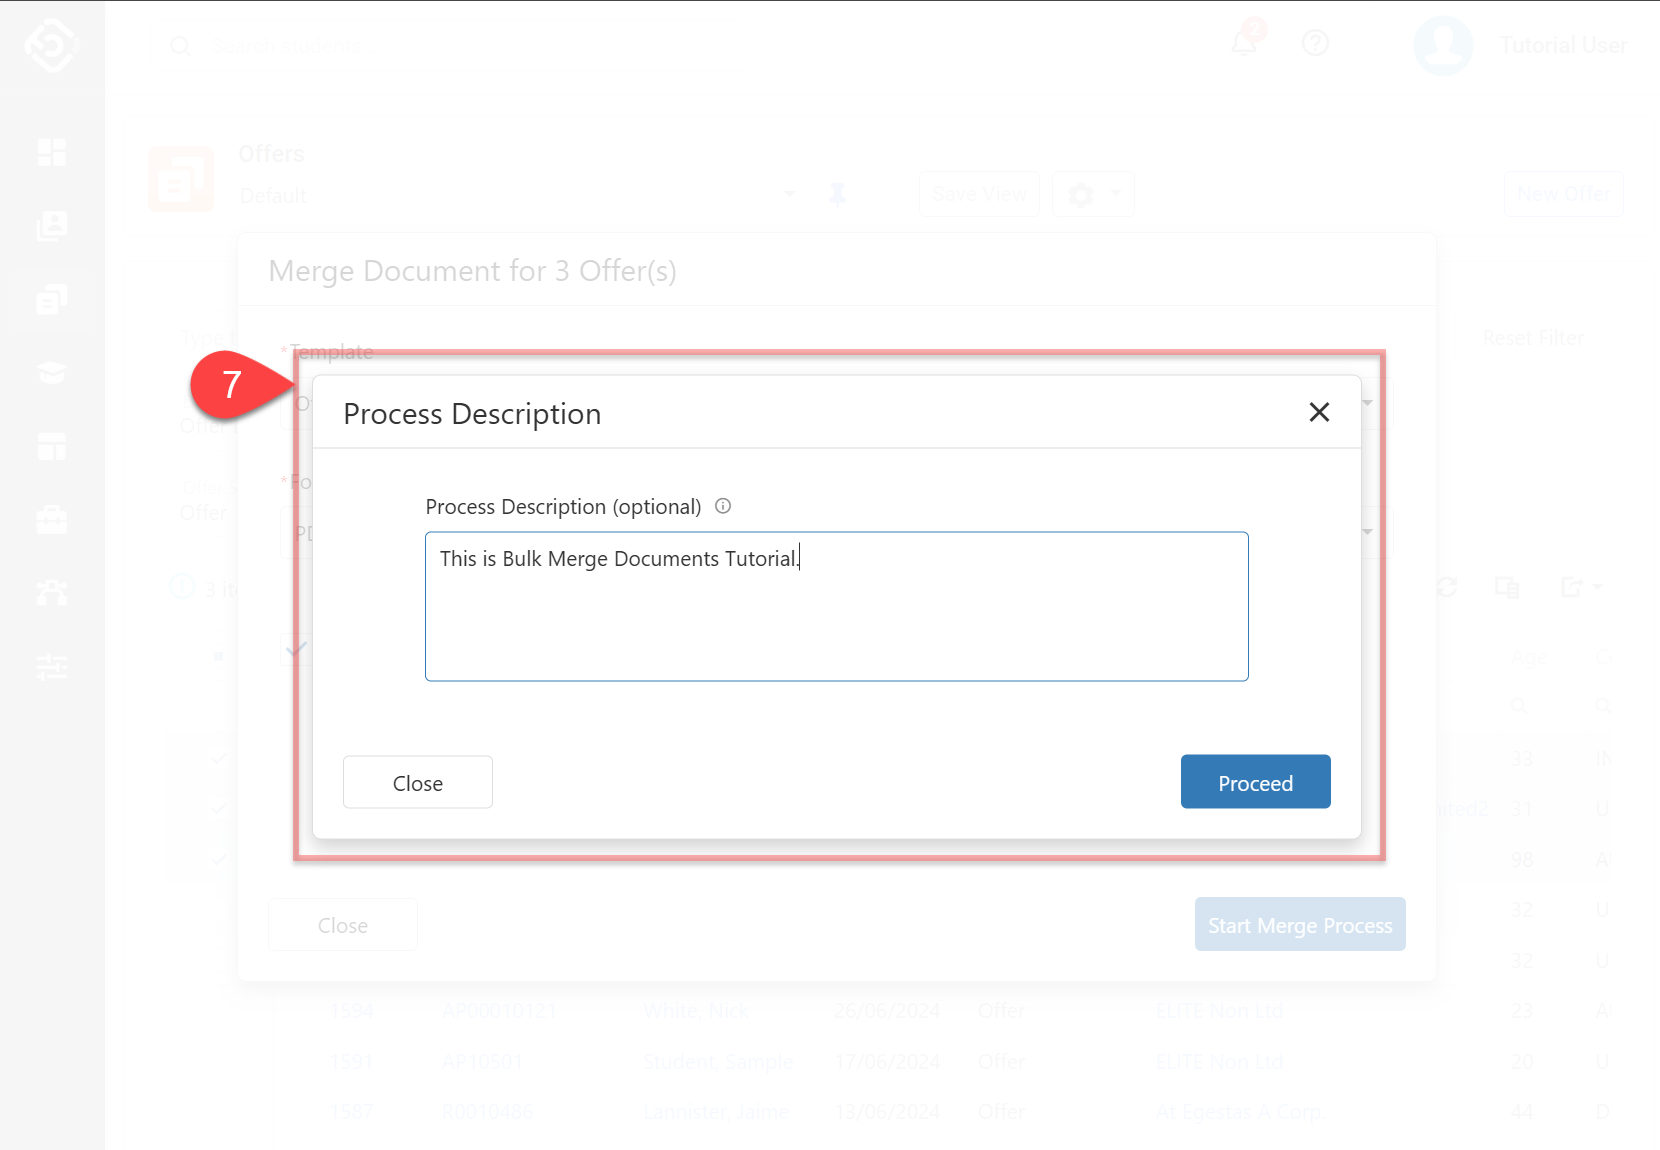
A process is initiated in the background.
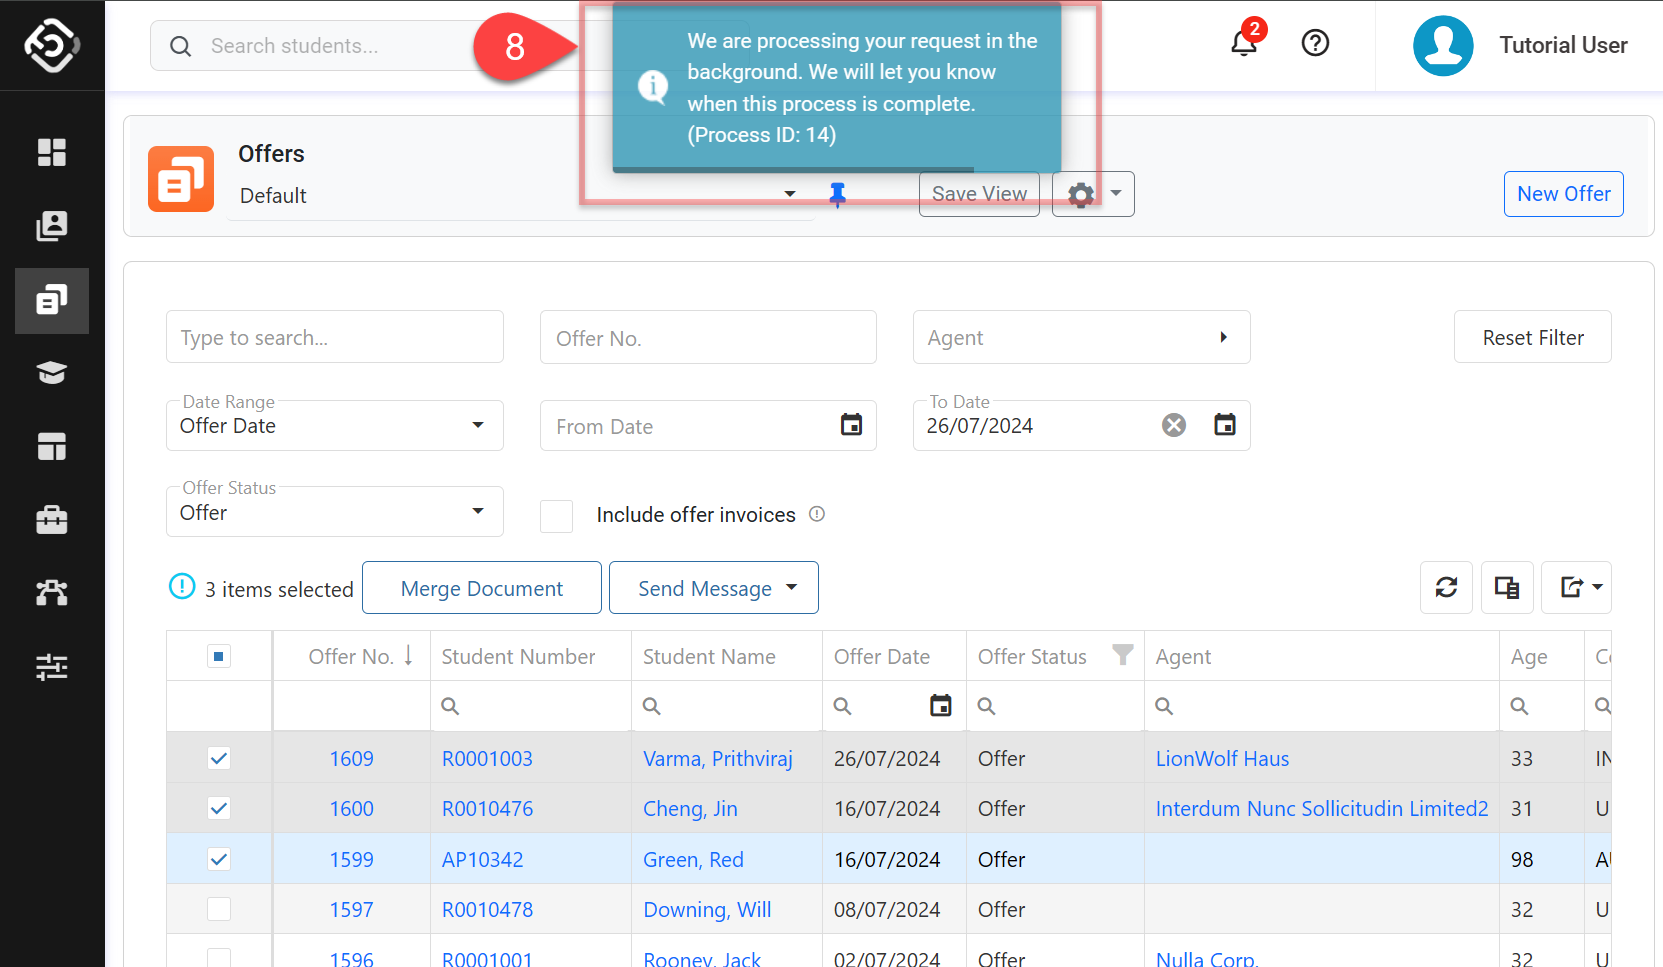
Once the process is complete, a notification will be sent to the user who initiated the process. The user can also check the status from their Processes page.
