
Overview
The Document Store serves as a cloud-based, central repository for documents and files ensuring seamless, reliable and secure access.
Some of the benefits of our cloud-based Document Store are:
-
Accessibility and Collaboration: Your users can access the files from anywhere, at any time, using any internet-enabled device. This flexibility is essential for remote teams or individuals who need to collaborate across different locations and time zones.
-
Data Security: Your files are protected and can only be accessed using eBECAS/EDMISS and by users with the appropriate permissions.
-
Scalability: As your institution grows, so do your storage needs. Our Document store easily scale to accommodate increasing amounts of data.
All the files added to the document store are linked to a record (e.g. a student, agent, lead etc) and can be accessed on the Documents tab of that record.
A powerful feature of the Document Store is the additional details that can be added to each file. A name, a description and a category can be added to provide more context to the files. You can also see when each file was created, the user who created it and how it was created (E.g. by a merge process, by a manual upload, by a student submission, etc.).
View Documents Store
-
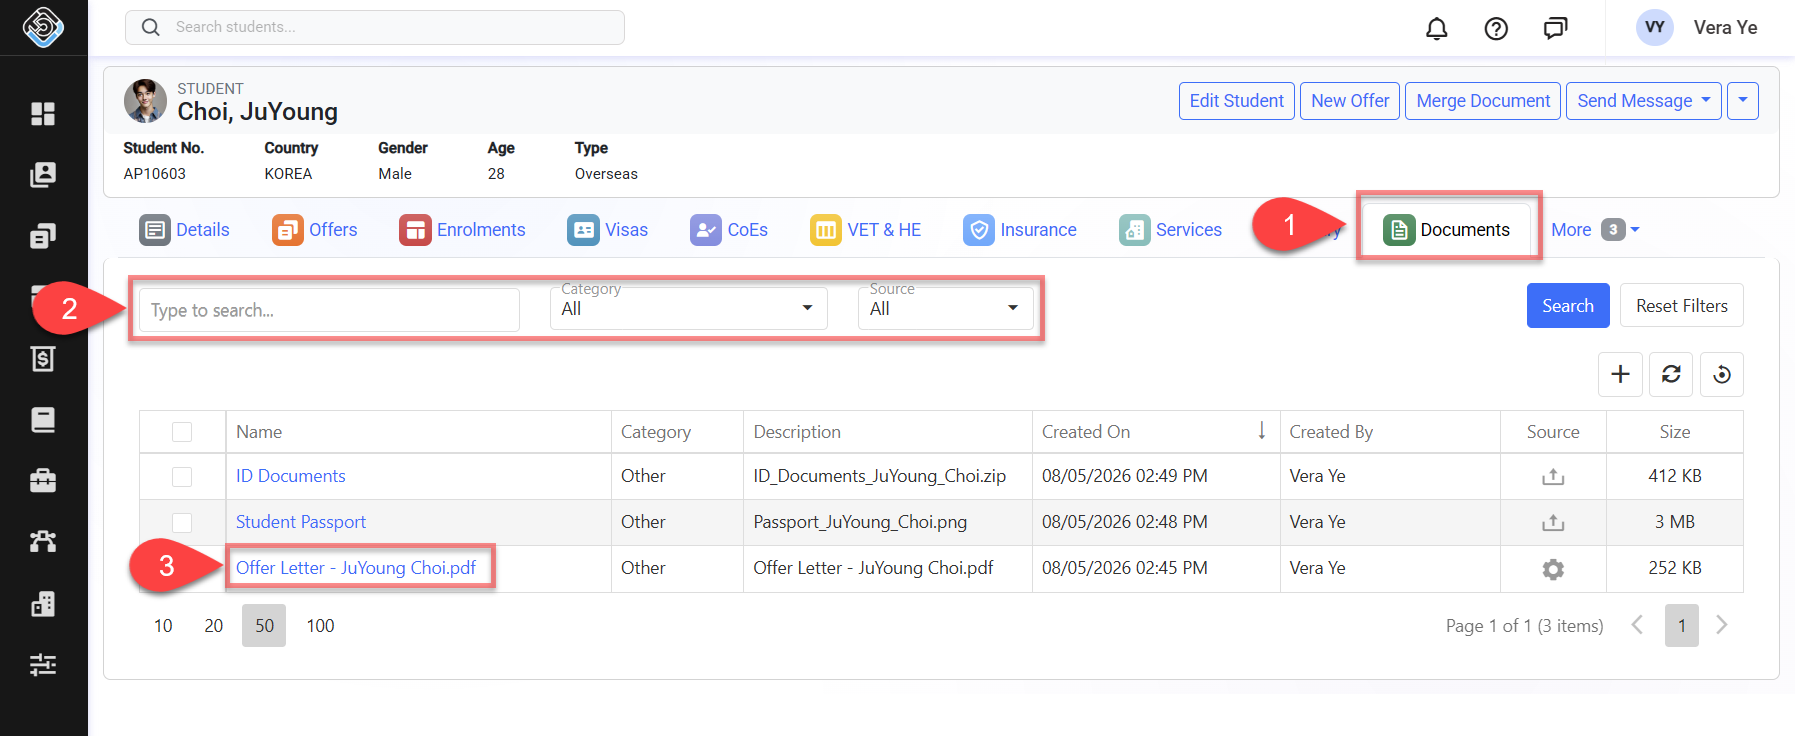
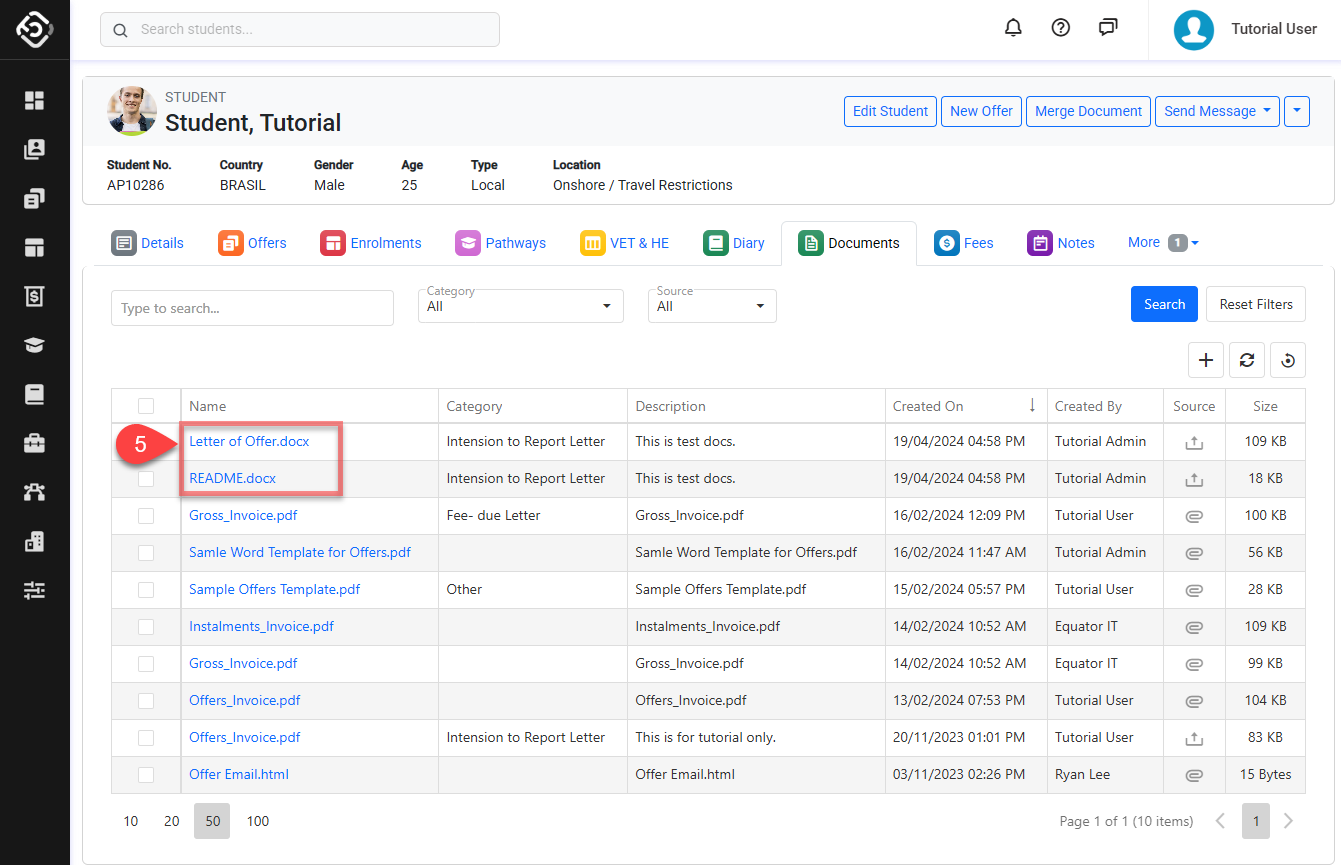
Navigate to the details page of the object's that you want to see the Documents for and click on the Documents tab.
-
You will see the documents for that record on the grid. By default, all of documents of the target object will be displayed in the data grid. Use the Documents Filters to specify the results.
Available options are:-
Quick Search: Searches for documents that include the entered search text in the name.
-
Category: Filters documents with the selected category.
-
Source: Filters documents by their source, indicating how each document was created.
-
Email Attachment: Documents generated from Document Templates and attached when Sending Emails.
-
Upload by User: Documents manually uploaded to the system by a user.
-
Merge Process: Documents generated through the Merge Document process.
-
-
-
To view the document, click on the Name of the entry.
Upload Documents
Considerations for Uploading Documents
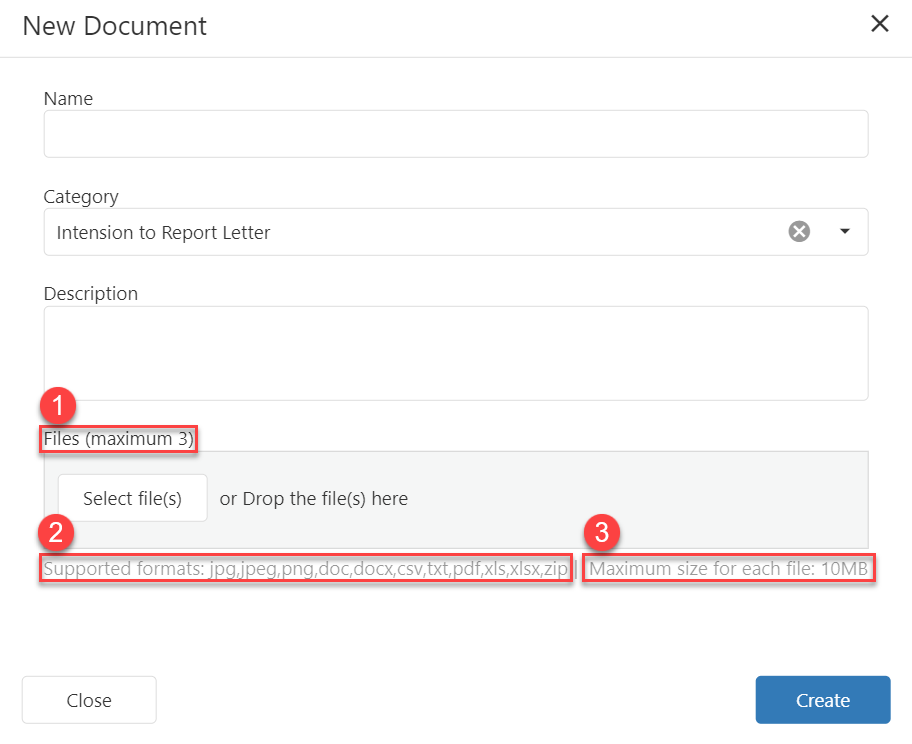
When uploading a new document, the following restrictions apply:
-
Files Maximum Upload Limit: This is the maximum number of files that can be uploaded at once.
-
Supported Formats: jpg, jpeg, png, doc, docs, csv, txt, pdf, xls, xlsx, zip
-
Maximum File Size: This is the maximum size for each file that can be uploaded.
Files Maximum Upload Limit and Maximum File Size depend on your subscription plan. Contact your system administrator for details.
Through Document Uploader
-
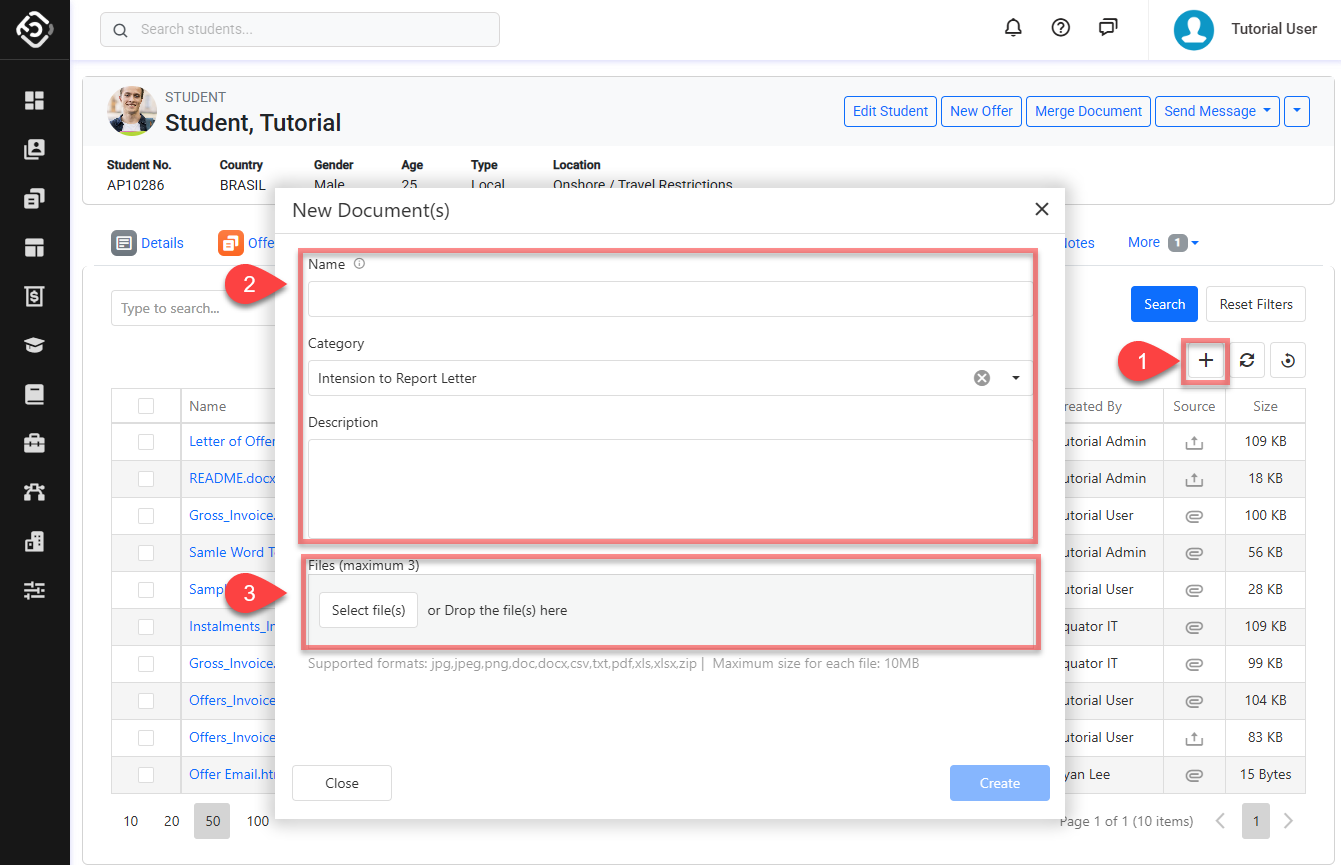
In the Documents tab, click on ➕ icon on the data grid and open the file upload window.
-
Enter the document details.
-
Name: Set the name for the entry/entries.
-
Category: You can choose the category for classifying this entry/entries. In case the category is inactive, it will appear in grayscale and not selectable. To customise the list of available categories, update the values on the relative Document Categories picklist of Documents object.
-
Description: Enter the description for the entry/entries.
-
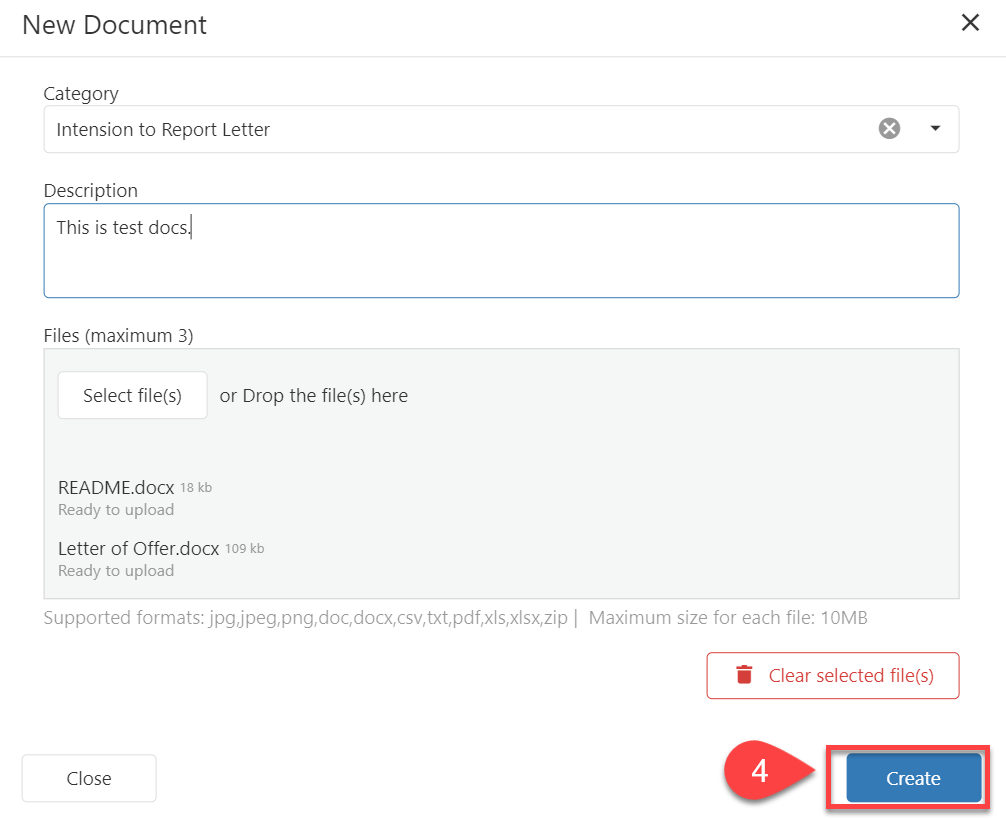
When uploading multiple files at once, the name, category, and description entered will be the same for all the files.
Leave the Name and Description field blank to have the name of the file as the name and description of the document.
-
Click on the Select files(s) button and select files that you’d like to upload. You can also Drag & Drop the files into the Files highlighted area.
-
Once you’re ready to upload, click on the Create button.
-
You can see the uploaded files in the data grid.
Through Document Merge / Send Email
The documents created through the Document Merge or Send Email feature can be saved directly to the Document Store of the respective record.
You can learn more in the following articles: Merge Documents, Send Email.
View or Download Document
Once files are uploaded to the document store, they can be viewed or downloaded at any time from the Document Store.
-
Go to the Document tab of the record that you want to view or download the document from.
-
Locate the document that you’d like to access. Then click on the name of the document in the name column.
-
If the file is a PDF or Image file (jpg, jpeg, png), the file will be displayed in the preview area. You can also use the Download button in the modal to download the file if needed.
For other file types, use the Download button in the modal to download the file.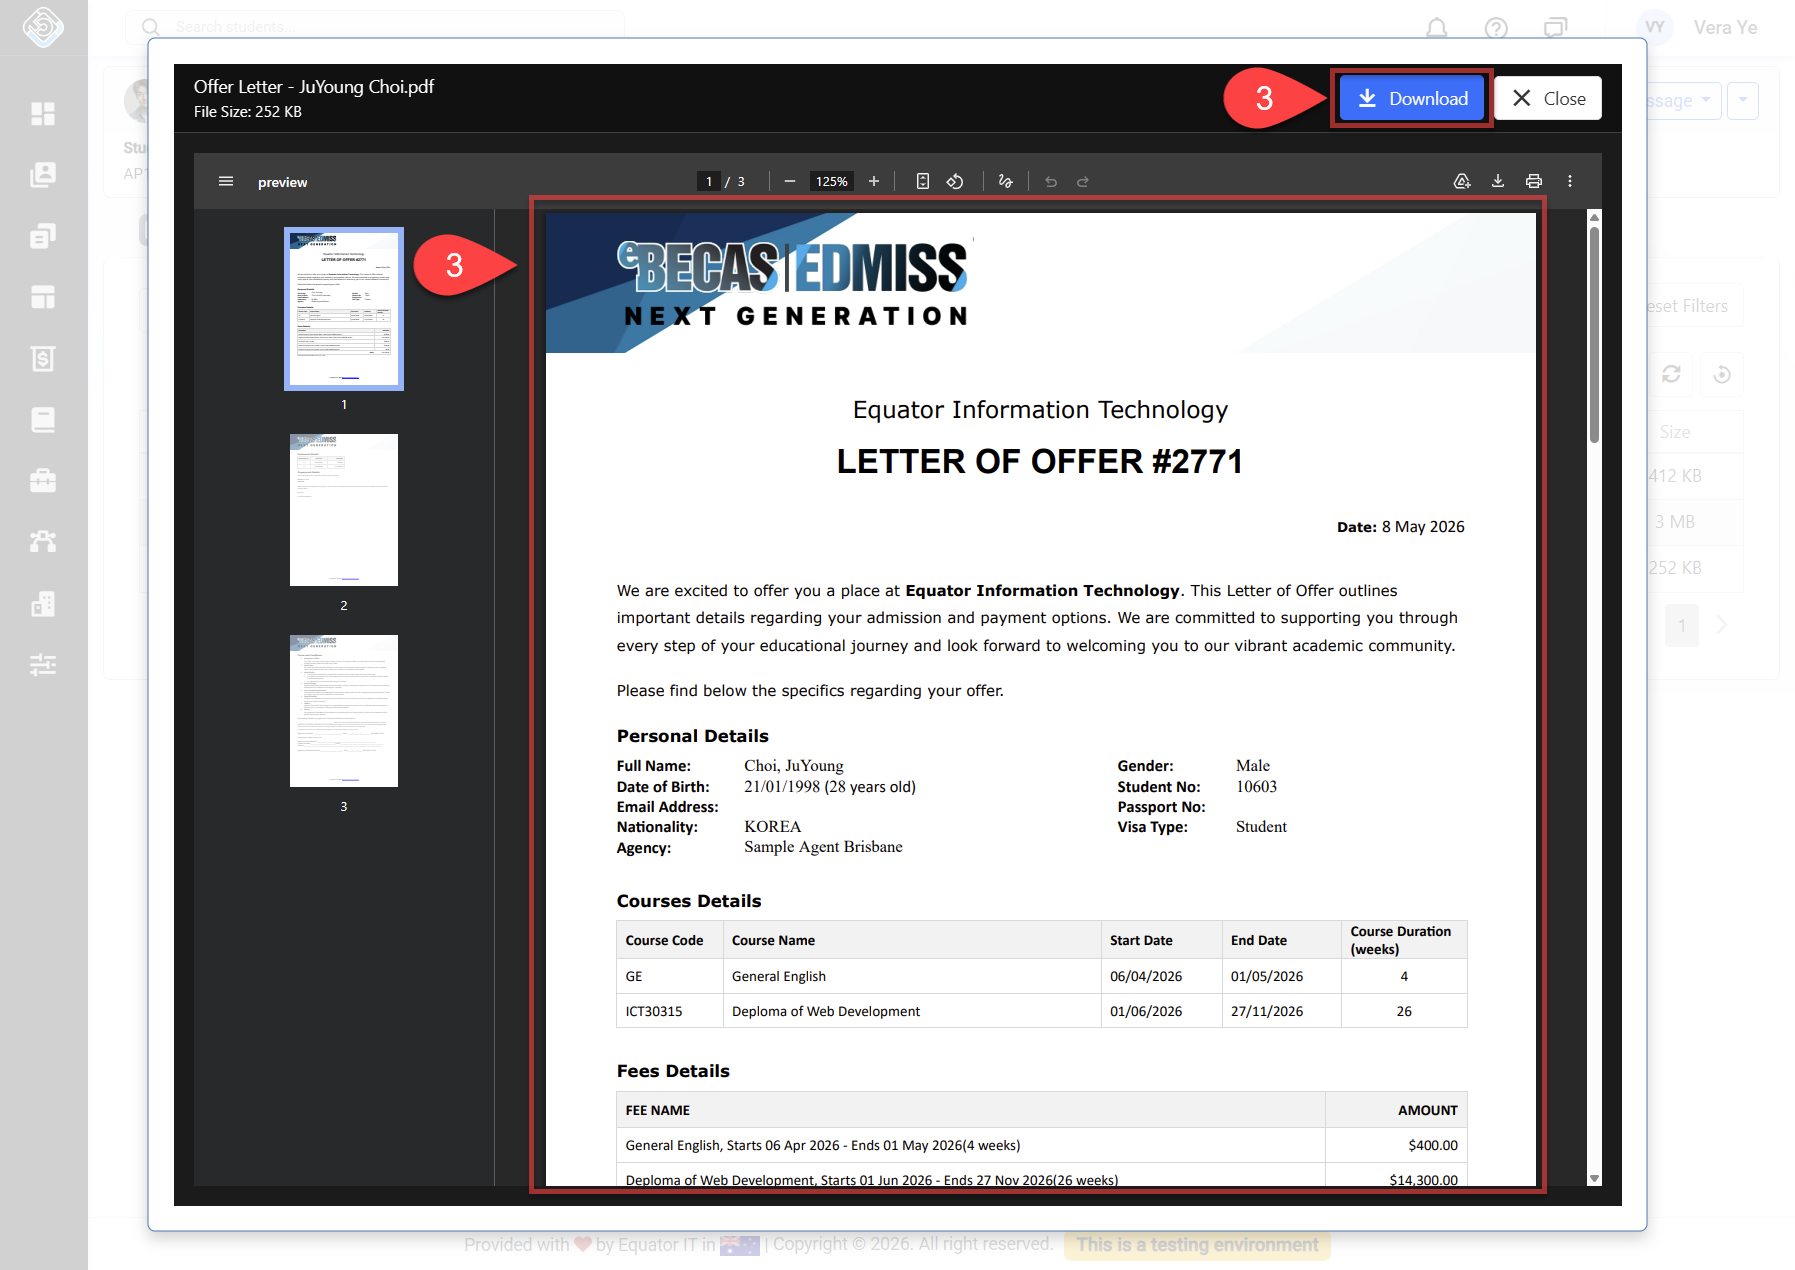
Edit Document Details
The uploaded file cannot be modified; only the details can be updated.
If you need to modify the file, delete the record and upload the document again.
-
Choose the entry you want to edit by selecting the checkbox, then click the Edit button in the Actions Panel, or simply double click on the entry row.
-
Update the details as needed.
-
Click on Save to finish.
Delete Document
-
Go to the Document tab of the record that you want to delete the document(s) for and select the records that you’d like to delete.
-
Click on the Delete button above the data grid.
-
Confirm to delete the selected files.

Troubleshooting