
The Scheduled Payments section in an enrolment allows you to view and track payments scheduled to providers for services related to that enrolment.
View Scheduled Payments for a Single Enrolment
-
Go to the Scheduled Payments tab of the Enrolment of interest.
-
You will see the scheduled payments on the data grid. Through Group by Column option, users can group schedule payment items by different fields. By default, items are grouped by Schedule ID, but you can customise the grouping by selecting another field. Learn more about grid grouping here.
For details about available buttons, refer to this article: Data Grids | Single Grid Composition.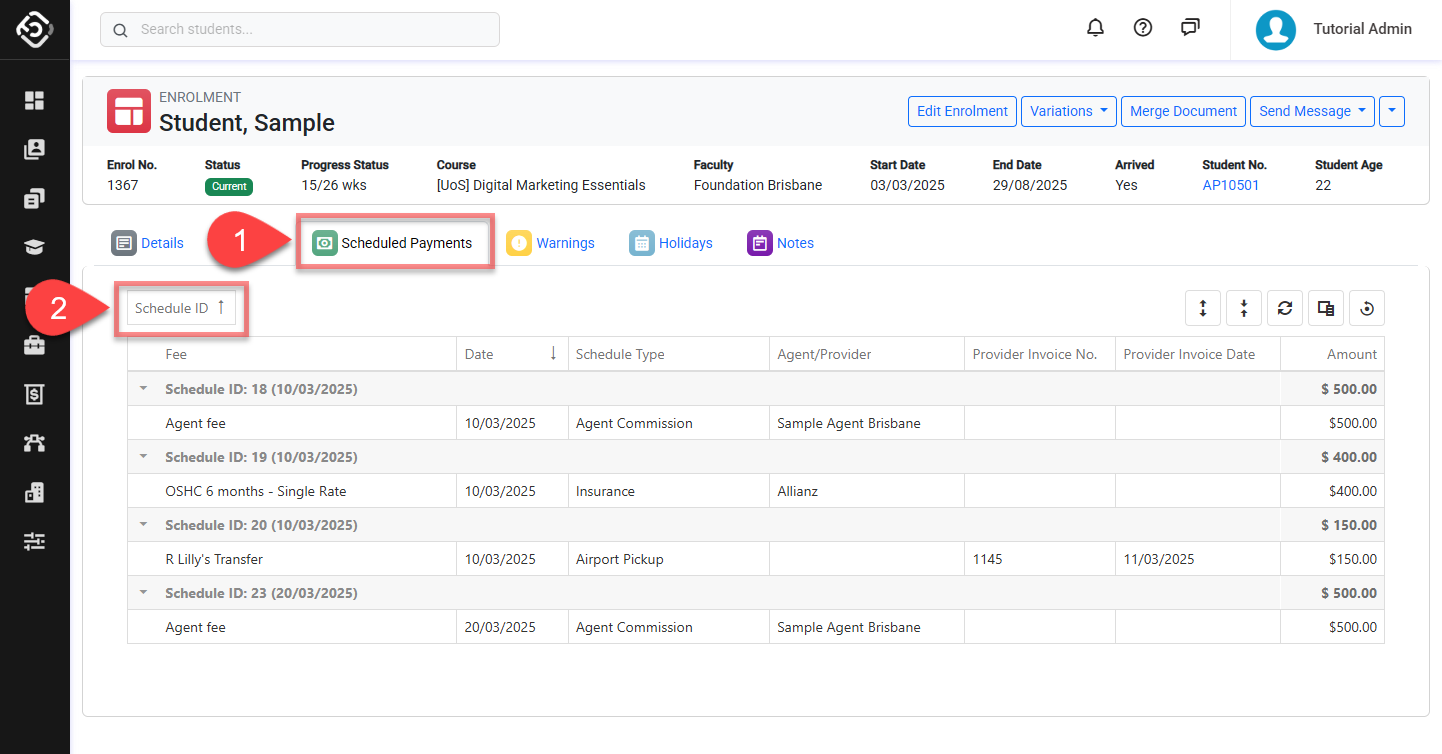
Schedule Agent Commission Payments for an Enrolment
Before creating Scheduled Payments, keep the following points of the linked article in mind: Considerations for Scheduled Agent Commission Payments
To process scheduling agent commission payments for the enrolment, follow the steps below.
Step 1: Open the New Payment Window in Enrolment Scheduled Payments
From the Scheduled Payments tab of the Enrolment of interest, click on New Payment button on the action panel of the Enrolment Scheduled Payments grid.
This opens the New Payment (Agent Commission) window, which consists of the following components:
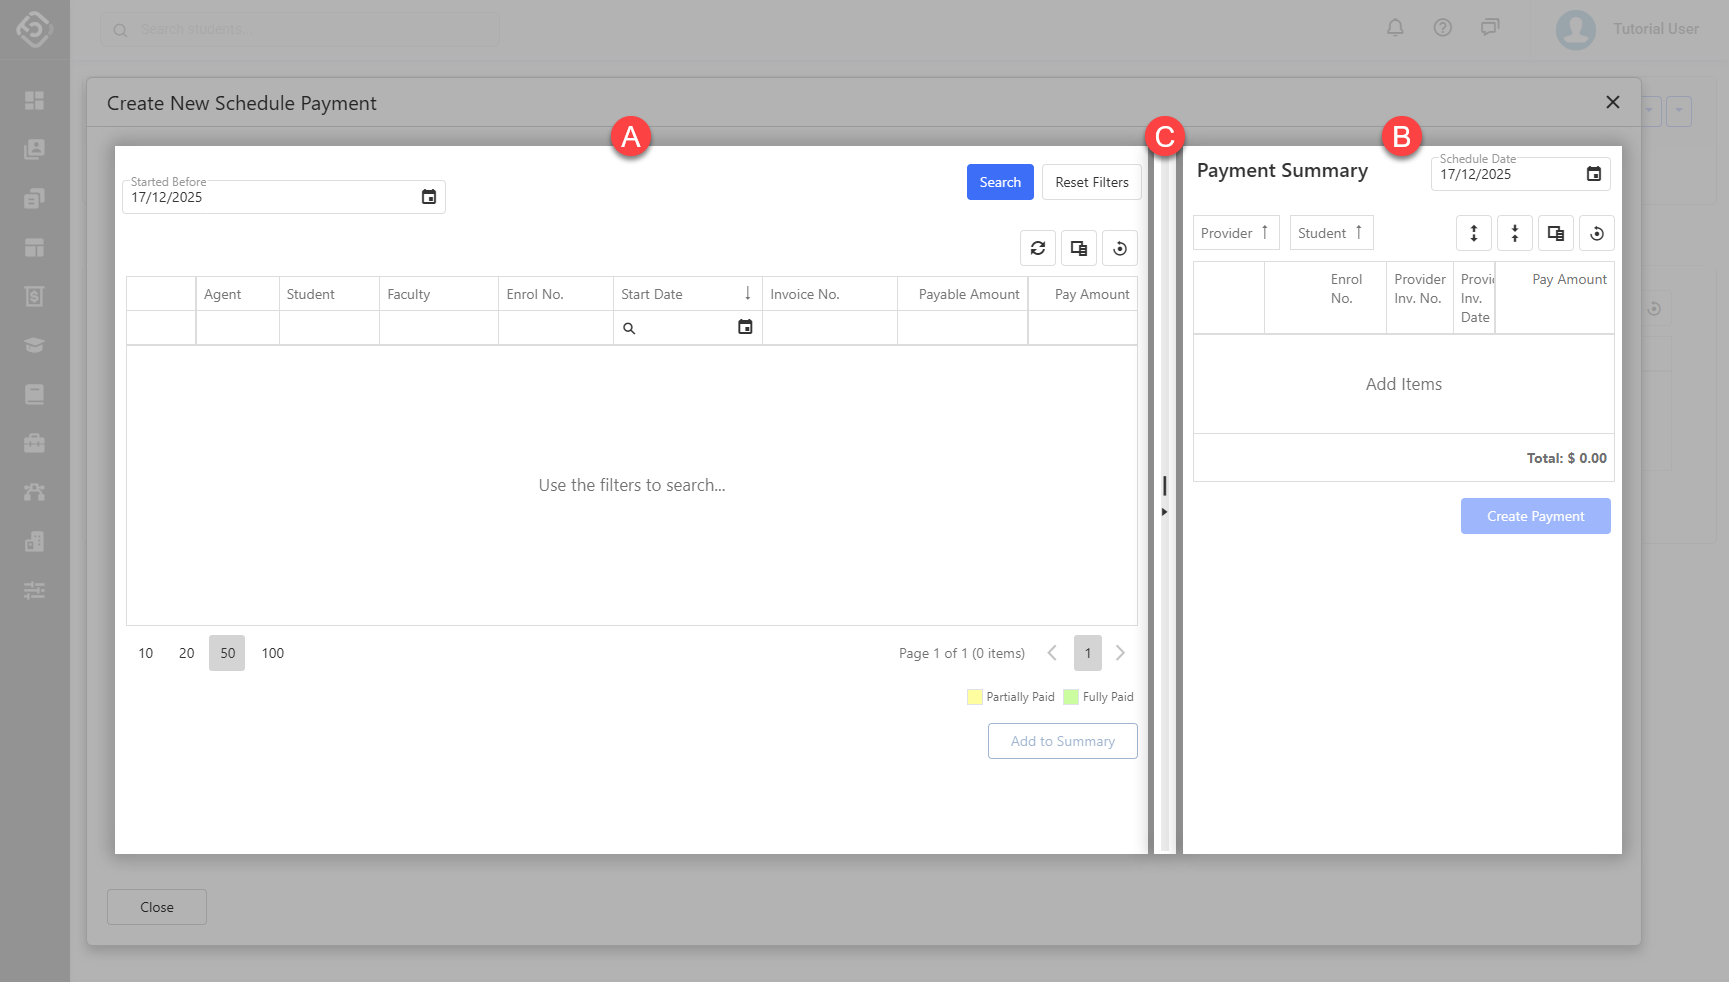
A. Payable Fees Search Panel: From this panel you can search and select the payments that are available to be paid from this enrolment.
B. Payment Summary Panel: This panel displays the payments you have chosen to include in the new Scheduled Payment. You can review the selected payment items here and optionally enter Provider Invoice No. and Provider Invoice Date before finalising the schedule.
C. Panel Divider: You can adjust the layout by resizing the panels or collapsing the summary section as needed while reviewing payments.
Step 2: Search and Select Due Payments
Search Payments
Use the filter to locate the payments that you want to make in this schedule. By default, the filter is set to show the payments available for this enrolment starting on or before today.
The available filter includes:
-
Started Before: Select a date to check whether the selected enrolment has started by that date.
Payments for this enrolment will only be shown if its start date is on or before the selected date.
This prevents payments from being scheduled before the enrolment has commenced.
Scheduled Payments for Study Tours are currently not supported in eBECAS/EDMISS Next Generation. Please use the eBECAS/EDMISS Classic desktop application to manage Study Tours Scheduled Payments.
Select Payments
Once you have located the payment(s) you want to include in this schedule, you can select them in two different ways:
-
Using the checkbox column, select the rows to include and click on the Pay Selected button from the grid’s action panel. This will pay the full amount for the records selected and add them automatically to the summary of the schedule.
-
Manually enter an amount in the Amount field and click Add to Summary at the bottom of the grid.
Once a payment has been added to the Payment Summary Panel, it will no longer appear in the Due Payments Panel.
.gif?cb=7e5e3e719efa8b9160063791731e79df)
Step 3: Review the payments summary
After adding all payments for this schedule, set the Schedule Date (defaults to today) and check the records and amounts in the summary panel. These are the payments and amounts that will be included in the schedule.
If required, enter the Provider Invoice Date and Number for each single record directly in the grid, or multiple records by selecting and clicking on the Edit button on the grid. You can also update these fields after the schedule is created.
Once you have confirmed the payment information, click on Create Payment to generate the Scheduled Payment.
.gif)