This article provides a comprehensive guide on how to send emails directly from the platform, ensuring timely and effective communication.
Overview
Effective communication is very important in maintaining a strong connection with stakeholders, and having the ability to send emails directly from the system to different entities such as students, agents, leads can significantly enhance this process.
Requirements
To use this functionality effectively, the following requirements must be met:
-
Have an active account with a Email Provider that we integrate with (explore the Apps available or contact us for more details).
-
Users must have the necessary permissions to send emails.
Set up an Email Provider
To send emails, you need to have an active and working account with an email service provider. As you will be sending the emails through this service, there may be associated costs depending on the provider and on your usage, so it's important to understand their pricing structure.
We do not charge anything for sending emails.
Once you have set up your account with your chosen email service provider, you need to configure the email service connection by setting up the respective App.
Email Templates
While you can draft email from scratch, we highly recommend creating templates. Templates enable you to craft messages ranging from simple text emails to complex communications with dynamic data. They can be easily accessed and customized before sending, which reduces time spent on messaging and ensures consistent communication.
To learn more about how to utilize and set up templates for your email communications, please refer to the following article: Templates.
Send Emails
Emails can be sent individually or in bulk to entities that represent a person or company. These entities include, but are not limited to: students, agents and leads.
Send Single Email
-
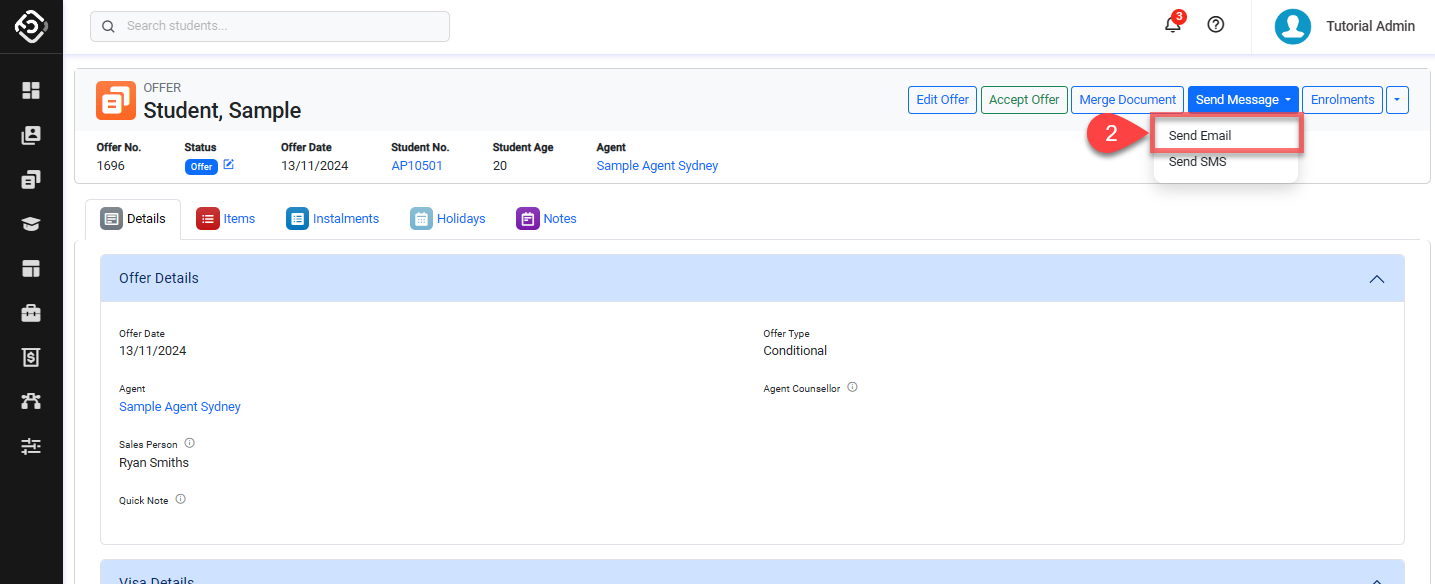
Go to the record of the entity that you want to send the email to.
-
From the header, click on Send Message and then on Send Email. If you cannot see any of these options, contact your system administrator to ensure that:
-
You have a role with the permissions to send emails to that object (Students, Agents etc).
-
The email service provider is set up for your college.
-
-
The Send Email window will show. From this window you will customise, preview and send the email(s).
-
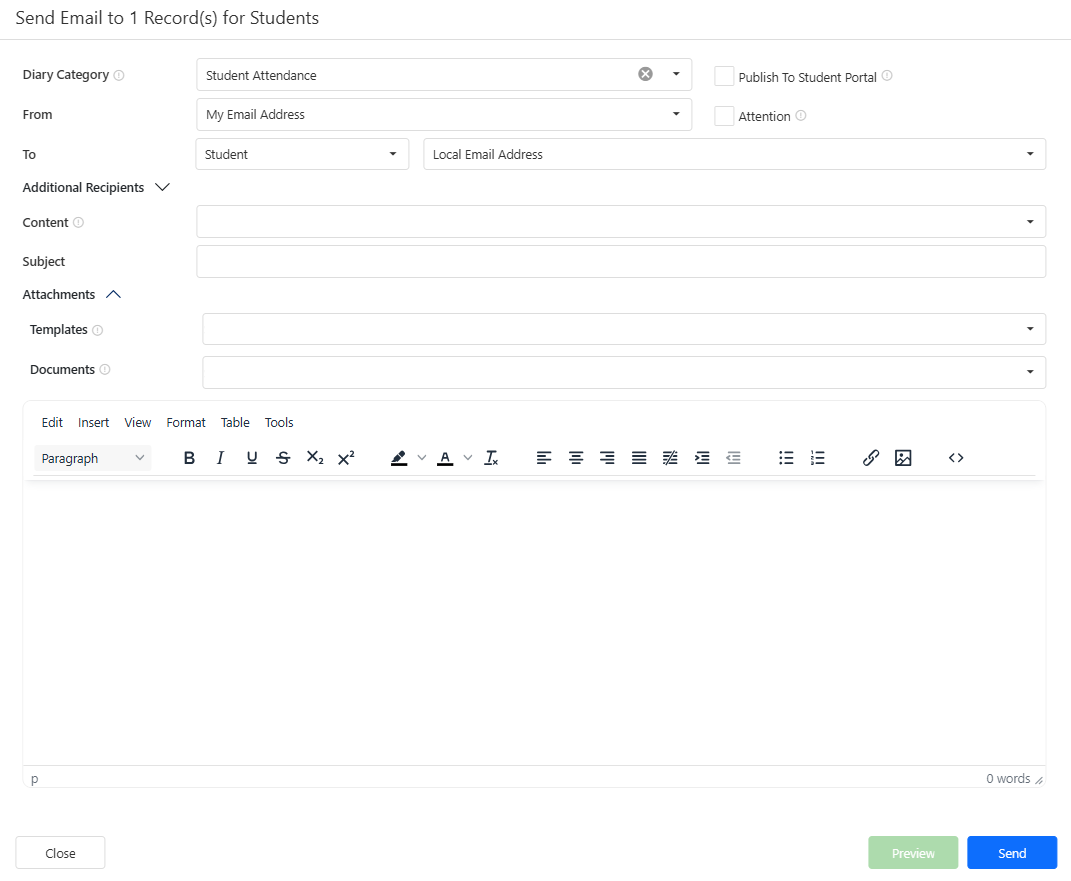
Diary Category
Select the diary category for the diary entry. When sending an email, the message will be recorded as an entry on the Diary of the entity that you are sending the email to (Students, Agents, etc). -
Publish to Student Portal: When the message is sent for objects that relate to the student (E.g. Students, Offers, Pathways). select this option if you want to make this entry available for the student on the Student Portal.
-
From Email
Select the email address to send the email from. -
Attention: Select this option to flag the email as Important.
-
Primary Recipient (To)
Select the primary recipient of the email in the To field. The type of recipient available depends on the object that you are sending the email to. -
Additional Recipients (CC and BCC)
To add recipients in the CC and BCC fields, click on Additional Recipients and select the recipients accordingly.-
BCC myself: Select this option to add yourself to the BCC recipients list.
-
-
Content (optional)
Select a template to automatically prefill the subject and body of the email. -
As of Date
An additional option, As of Date, is available for templates that include bookmarks where values can be calculated based on a specific date (e.g. Enrolment Overdue Fees Bookmarks). This date is used during the merge process to calculate bookmark values as of the selected date. -
Subject
Enter or modify the subject of this email. -
Attachments
-
Templates
You can attach templates to the email. When doing so, the templates selected for the attachments will be merged during the send process. -
Documents
You can attach files stored in the Document Store of the object you are emailing from. Documents can be selected up to 3 per email, and can’t be attached when sending bulk emails.
-
-
Email Body
Enter or modify the body of the email. Use the text editor to format, style, and add links as needed. -
Preview
You can preview the email before sending it.
-
-
Optional Click on Preview button to check how the email will look before you send it.
-
Click on the Send button to Send the email.
-
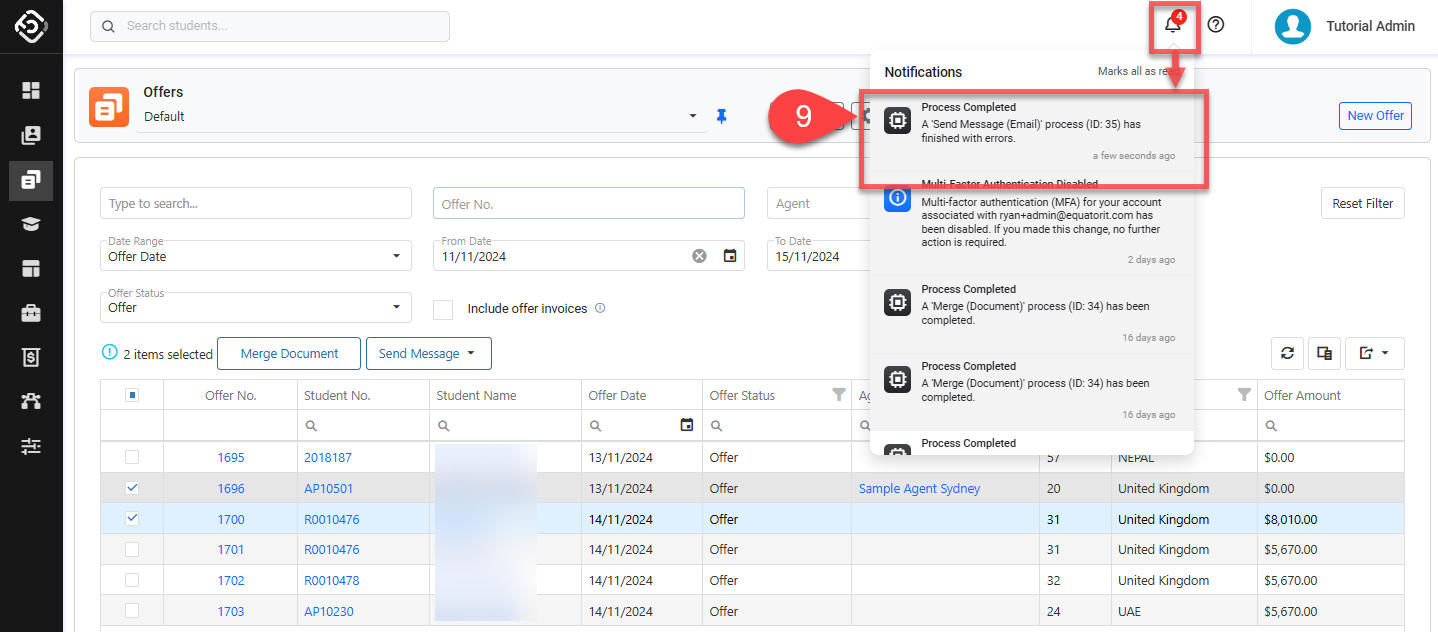
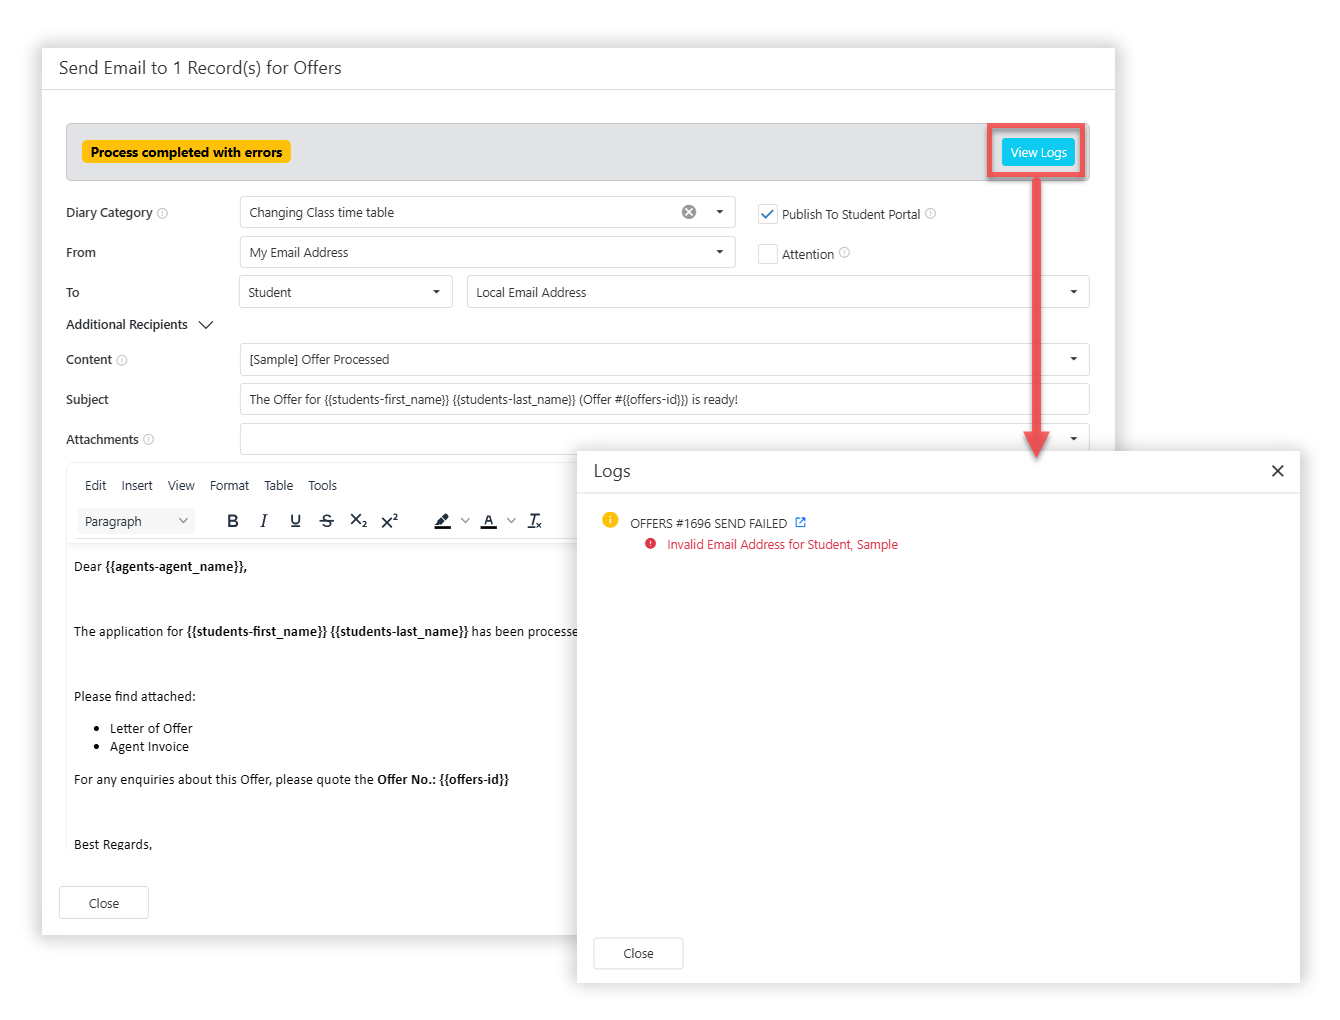
Wait for the process to complete. When it’s done, you can check the logs of the process.
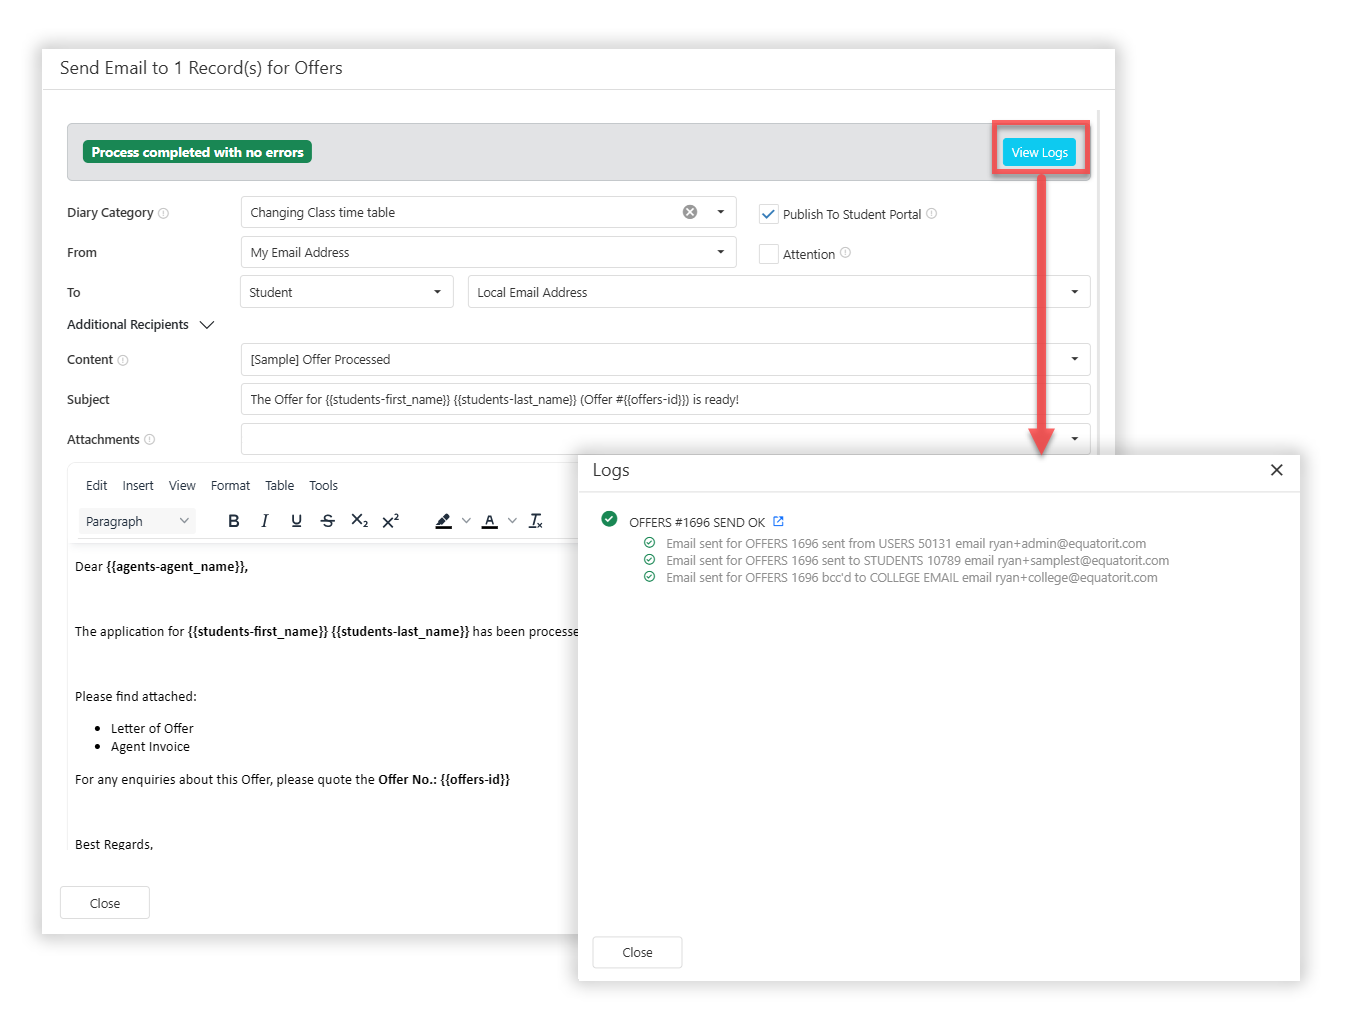
If there are any errors, click on the View logs button for the specific details.
Send Bulk Emails
The maximum number of emails that can be sent at once depends on your subscription plan. Contact your system administrator for details.
Sending bulk emails can be time-consuming. To ensure uninterrupted system use, eBECAS/EDMISS Next Generation sends these emails in the background. Once the process is complete, the initiating user will receive a notification and an email. Refer to the Processes article for more details.
You can send emails in bulk from the grid of the object that you want to send the emails for.
To do so:
-
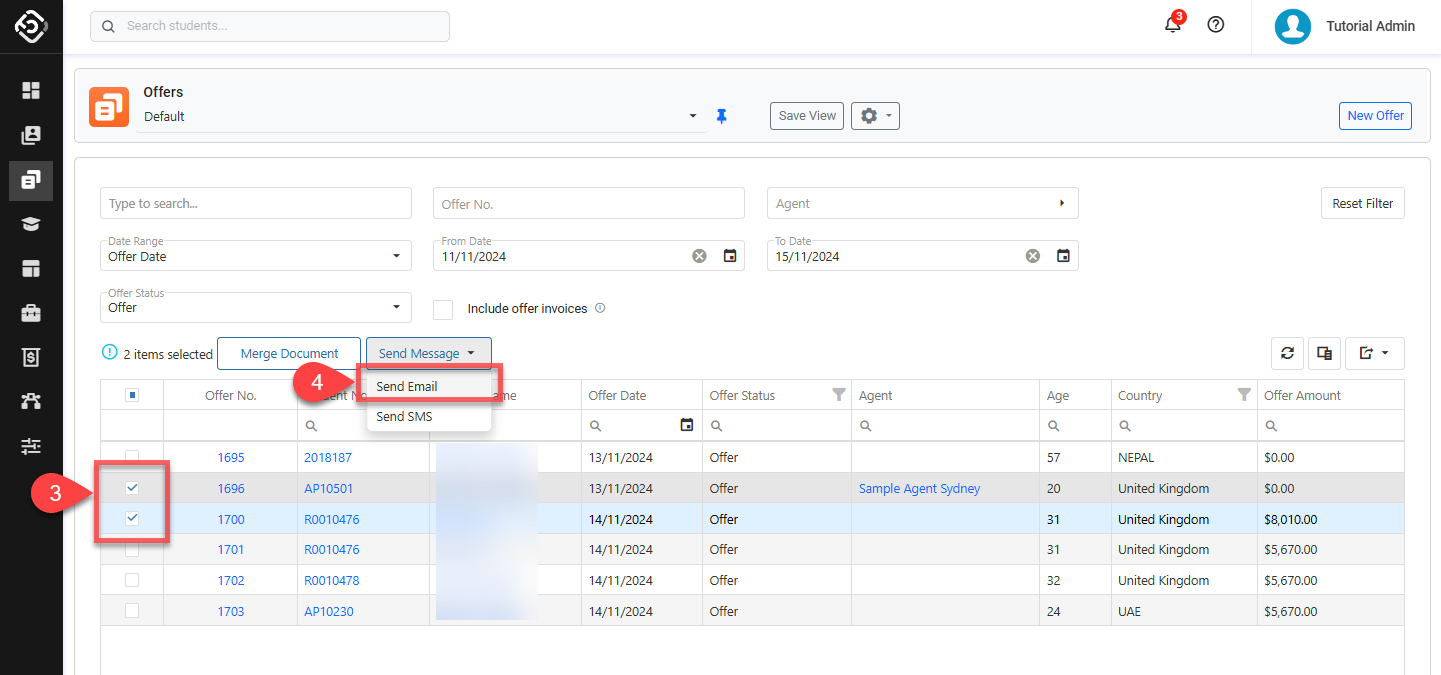
Go to the grid of the object that you want to send the emails for (Students, Offers, Enrolments, etc).
-
Use the filters to locate the records of interest.
-
Select the records that you want to use the send the emails to.
-
Above the grid, click on Send Message and then on Send Email. If you cannot see any of these options, contact your system administrator to ensure that:
-
You have a role with the permissions to send emails to that object.
-
The email service provider is set up for your college.
-
-
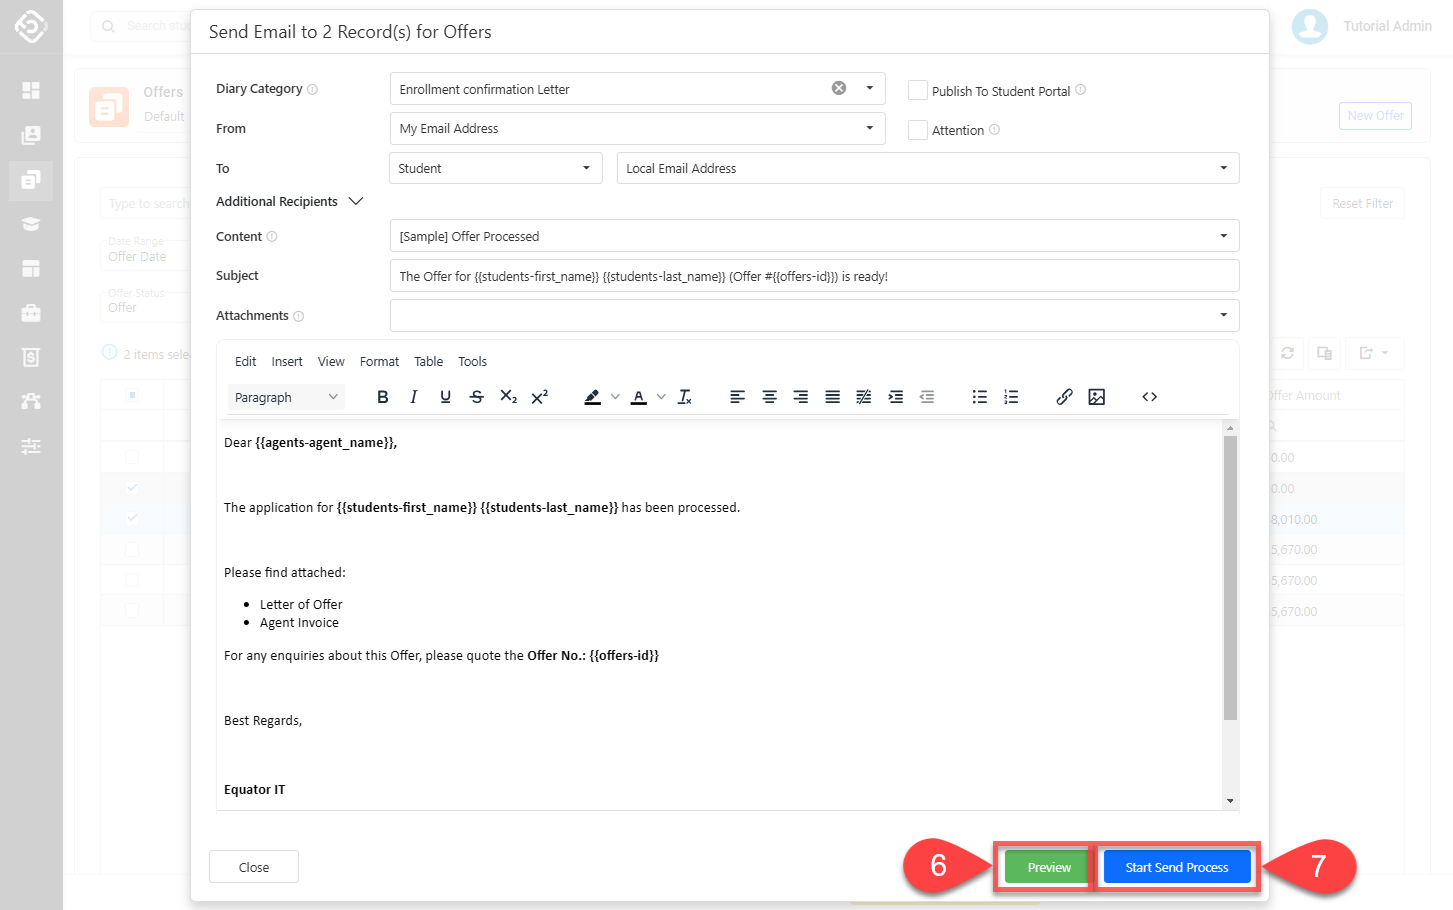
Configure and send the email on the Send Email window. Refer to the section above: Sending Single Email for more details.
-
Optional Click on Preview button to check how the email will look before you send them. If multiple records are selected, the first one will be used for the preview.
-
Click on Start Send Process.
-
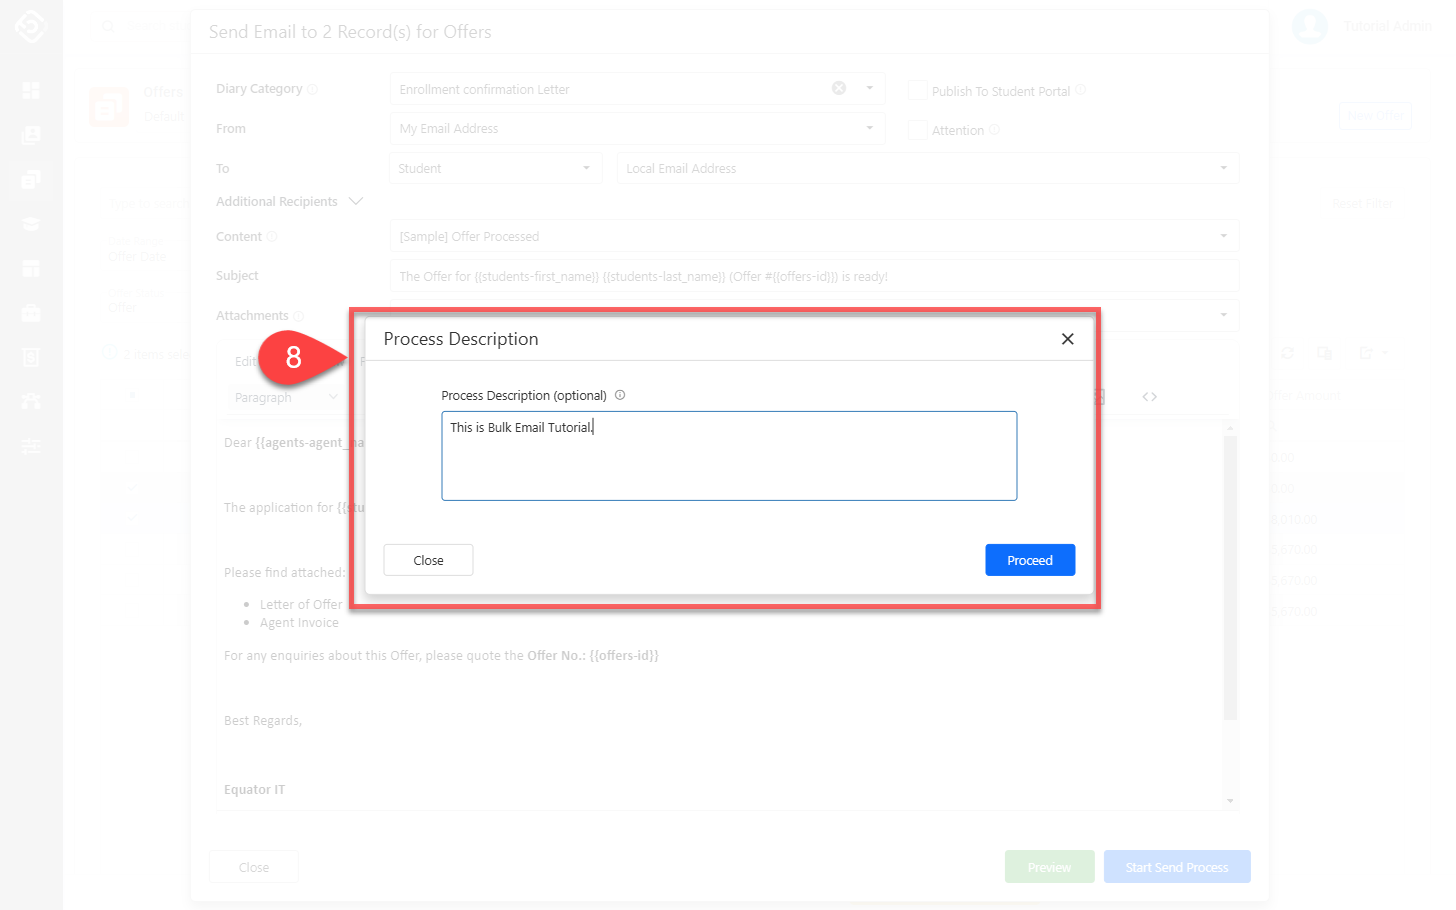
Optional but recommended Add a description for the process. The description you provide will help to identify the process.
-
The Send process will start in the background.
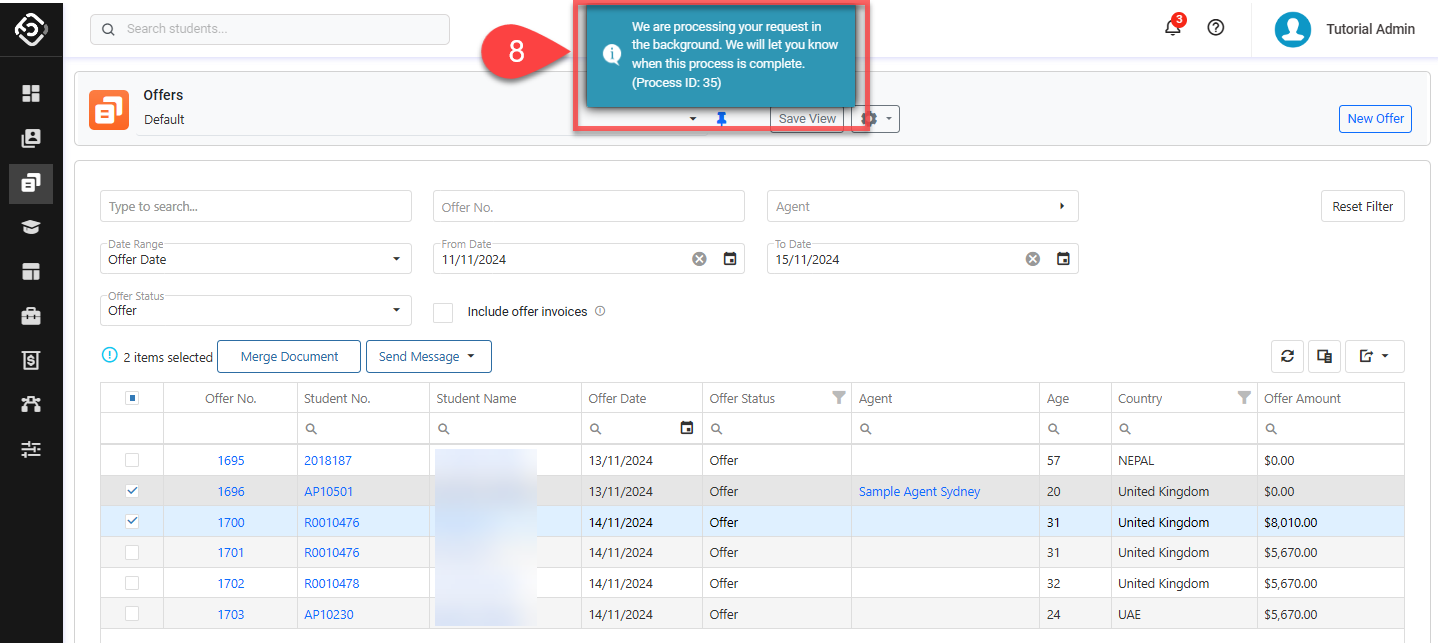
-
Once the process is complete, a notification will be sent to the user who initiated the process. The user can also check the status from their Processes page.