What are Layouts?
Layouts is a feature that allows users to define and customise the arrangement of elements visible on a page.
Let's understand the benefits of layouts with an example:
Maria is a member of the Admissions team. As Admissions, it is crucial for Maria to see and access all the personal details for the students including medical conditions, pre-entry tests. students' contacts etc.
However, Luis, a member of the Marketing team, will find most of this information irrelevant and distracting. Luis does not need to see every single field from the student personal details, but Maria does. So, how can you display the student details in a different way to two different type of users/audience? Yes, with Layouts. You can create one layout for Admissions with all the fields for the students, and another Layout for Marketing with a significant reduced amount of fields.
Each object has a default Layout that is created by the system, and it cannot be modified/deleted.
Custom layouts depend on the object and not all objects allow custom layouts. Also, custom layouts is a feature that is not included in all subscription plans. Contact your system administrator for details.
Create a Layout
The number of layouts that can be created depends on your subscription plan.
Tip
If you're facing difficulties in creating a new layout, consider duplicating an existing one and customising it.
Please refer to the following section for guidance : Clone a Layout.
-
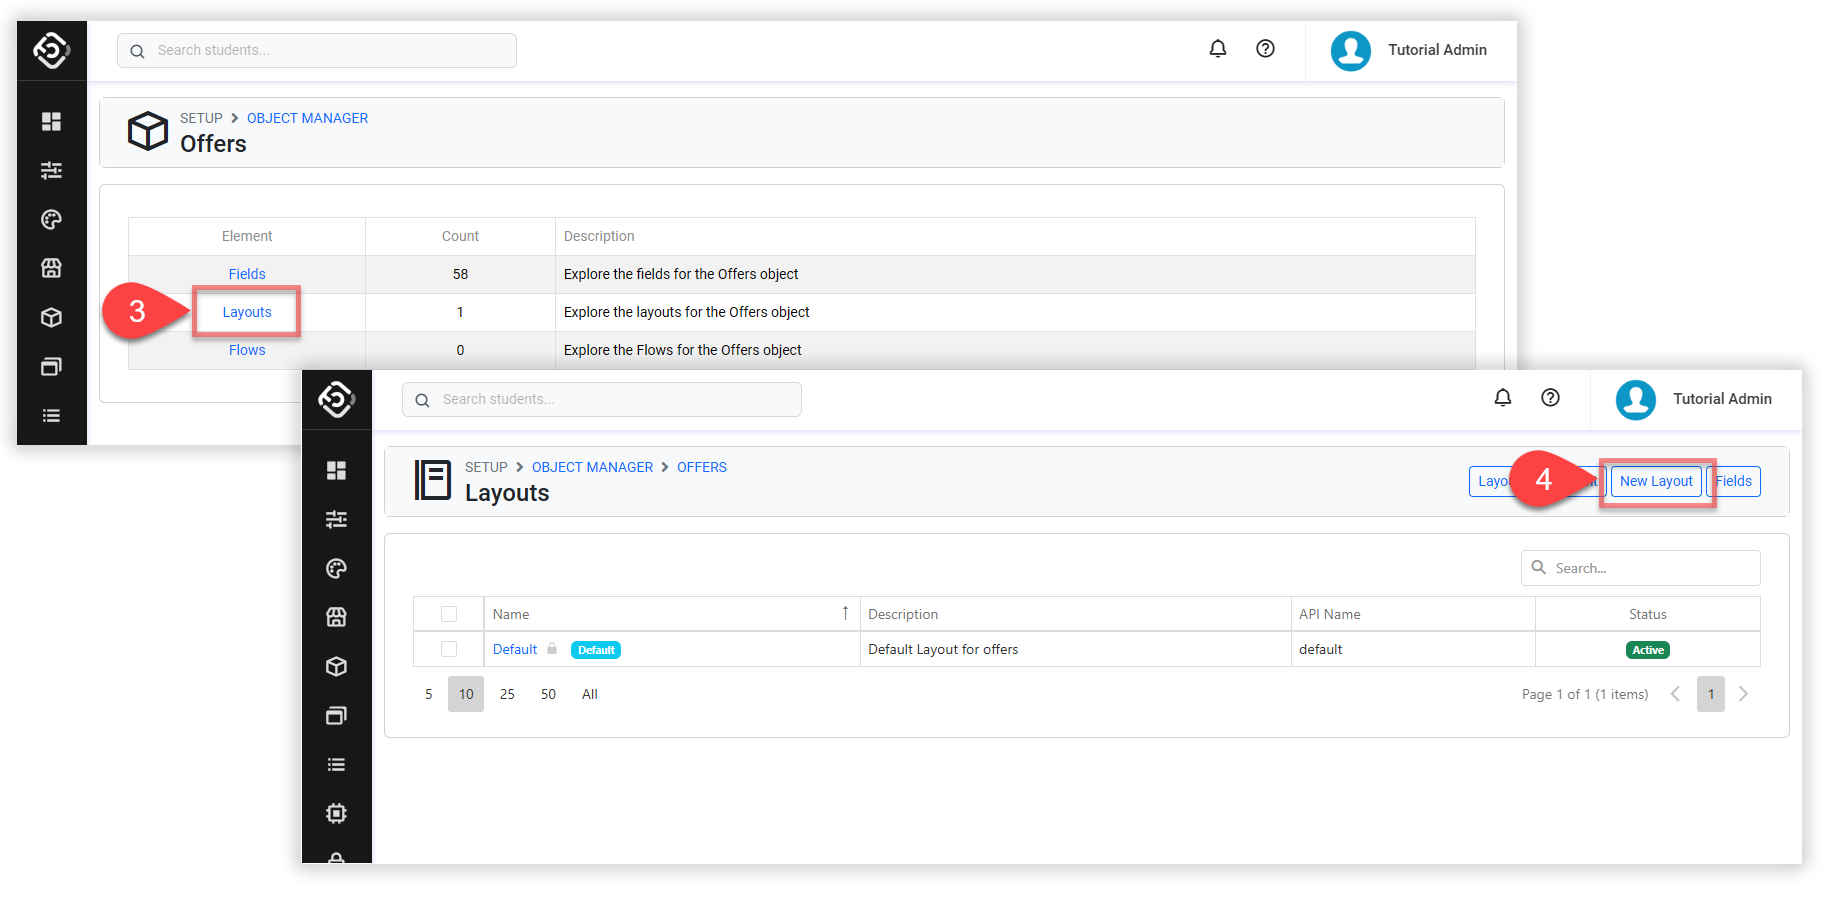
From the Utilities menu, go to Object Manager.
-
Click on the object that you intend to create a layout for.
-
Click Layouts.
-
Click New Layout at the top right.
-
Enter the details and then click Create.
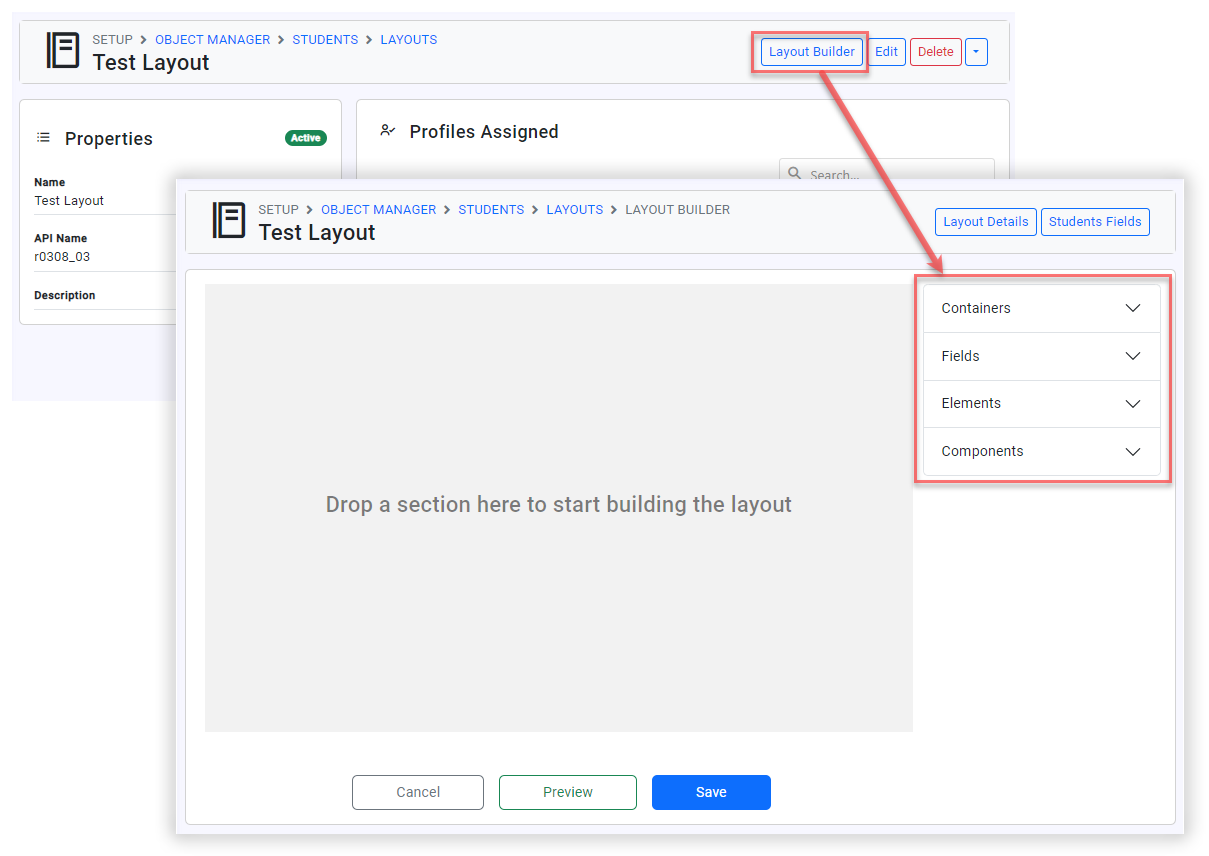
Layout Builder
A layout is made up of multiple elements. These elements determine how the page will look like and what fields and components it will have. Be aware that the fields and components are based on the object that the layout is for.
The elements that make up a layout are:
-
Containers - Containers serve as literal containers to wrap the fields. There are different types:
-
Sections: A section is a container for rows. Each section can have a title and will display as a group of rows on the layout.
-
Rows: A row is literally a row of fields. It determines how many fields can be on a row. A row must be inserted within a section.
-
-
Fields – These are the fields that you can insert into inputs within a row. The * indicates that a value is required for the field (if present in the layout) to create a record. The blue circle indicates that the field must be present in the layout.
-
Elements – An element refers to any non-data field item that can be added to a layout, such as static text. It is useful for displaying simple elements like short consent wordings or other similar components on the user interface, regardless of the data fields.
-
Components – Components consist of pre-made, specialised elements that can be used within the context of a particular object. These components have special logic and elements such as tables.
A component requires a full row with one input space
Follow these steps to customise a layout.
-
From the layout details page, click on Layout Builder at the top right.
-
You must declare sections and rows for fields first. Click containers and drag and drop a section to the canvas.
-
Enter a title for the section.
-
Now, drag and drop Rows in the section you just created. Select the row type according to the number of fields you need in the row.
-
Now, you can insert fields to the layout. Drag and drop Fields, Elements or Components to the inputs. The red asterisk indicates the field is required when creating or updating a record. The blue circle indicates that it must be inserted in the layout.
-
To see the preview of the layout, click on Preview.
-
When it’s ready, Click Save to finish.
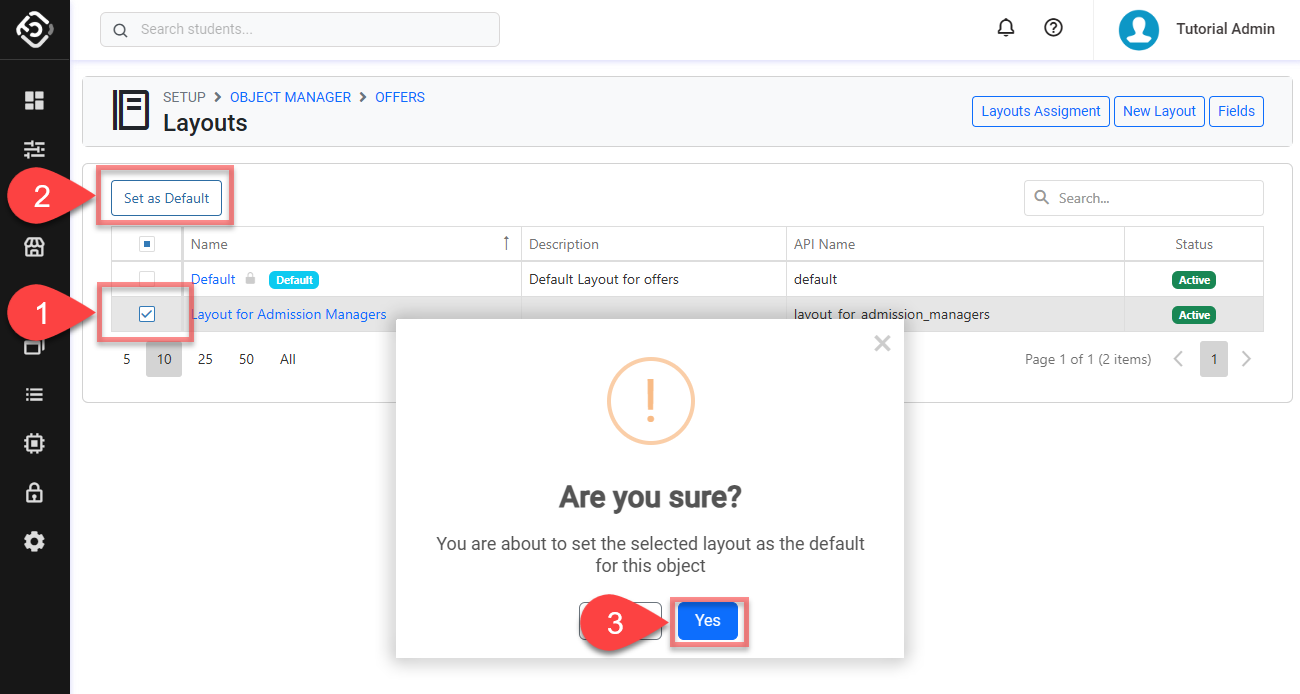
Set a Default Layout
You can set a default Layout for all users. Users who are not assigned a Layout through their Profile will automatically use the default Layout.
-
From the Layouts page, select an active layout that you’d like to make as a default layout.
-
Click on Set as Default button in the grid action panel.
-
Confirm to finish.
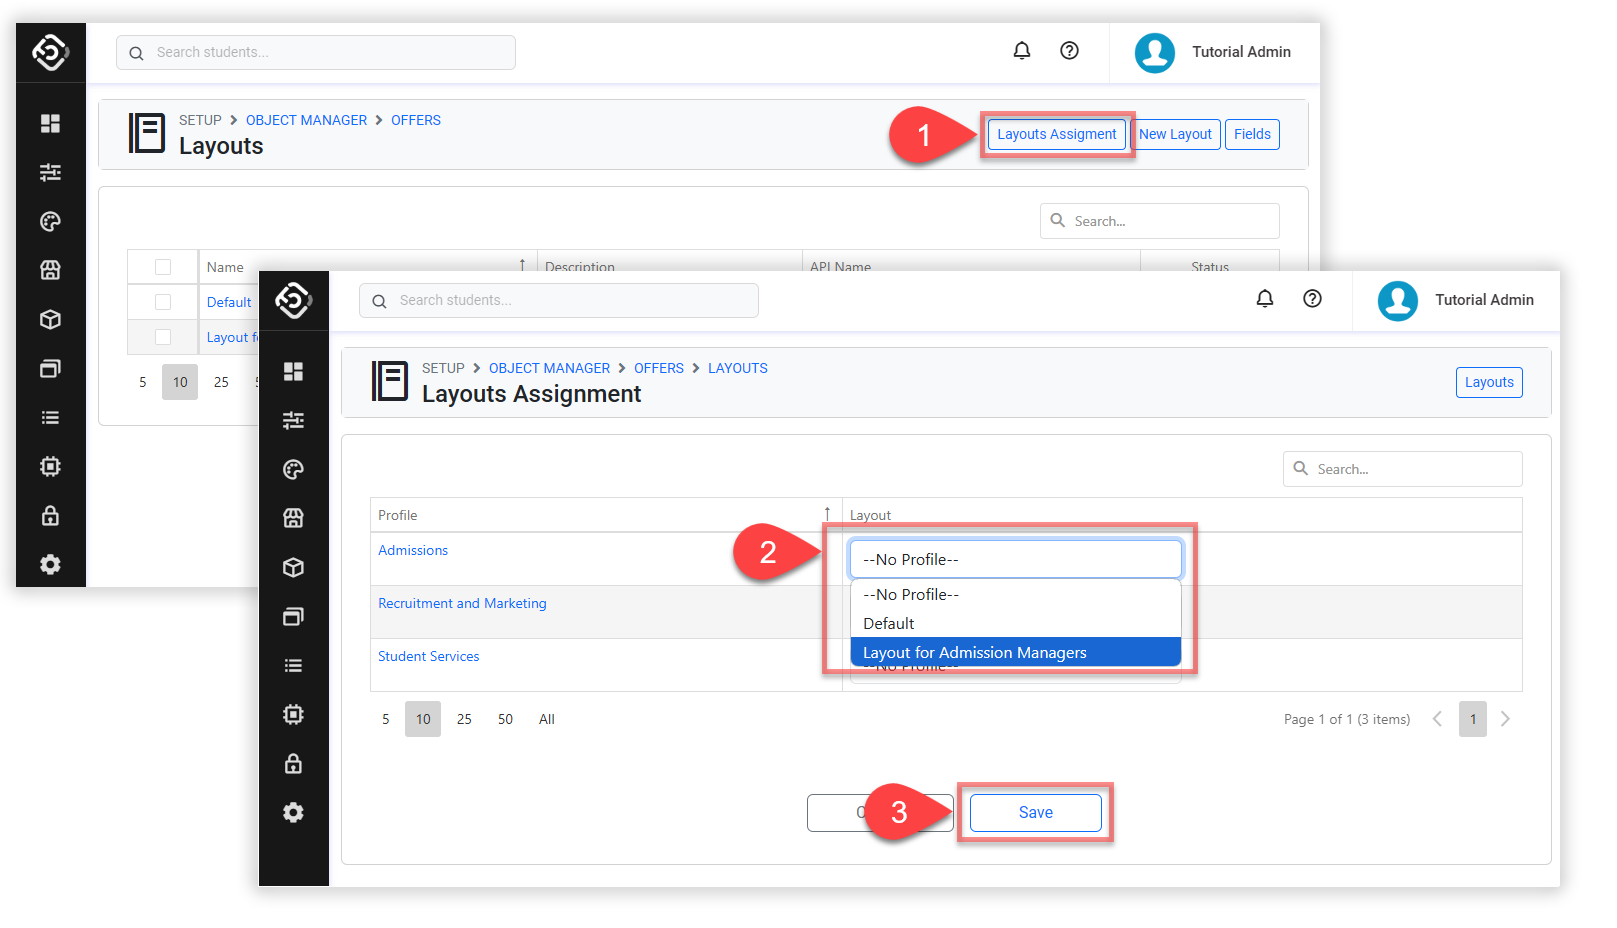
Assign Layouts
To customise the user experience, you can assign specific layouts to different profiles. This allows users with the same profile to see a designated layout instead of the default one.
Before assigning a layout to a profile, you need to create a Profile.
-
From the layout detail page, click on Layout Assignment.
-
Locate the profile that you intend to assign to a layout to and select the layout you want to assign. If no layout is selected, the default layout will be displayed to the respective profile.
-
Click Save to apply. Once layouts are assigned through profiles, users with that profile will use the assigned layout as their default Layout.
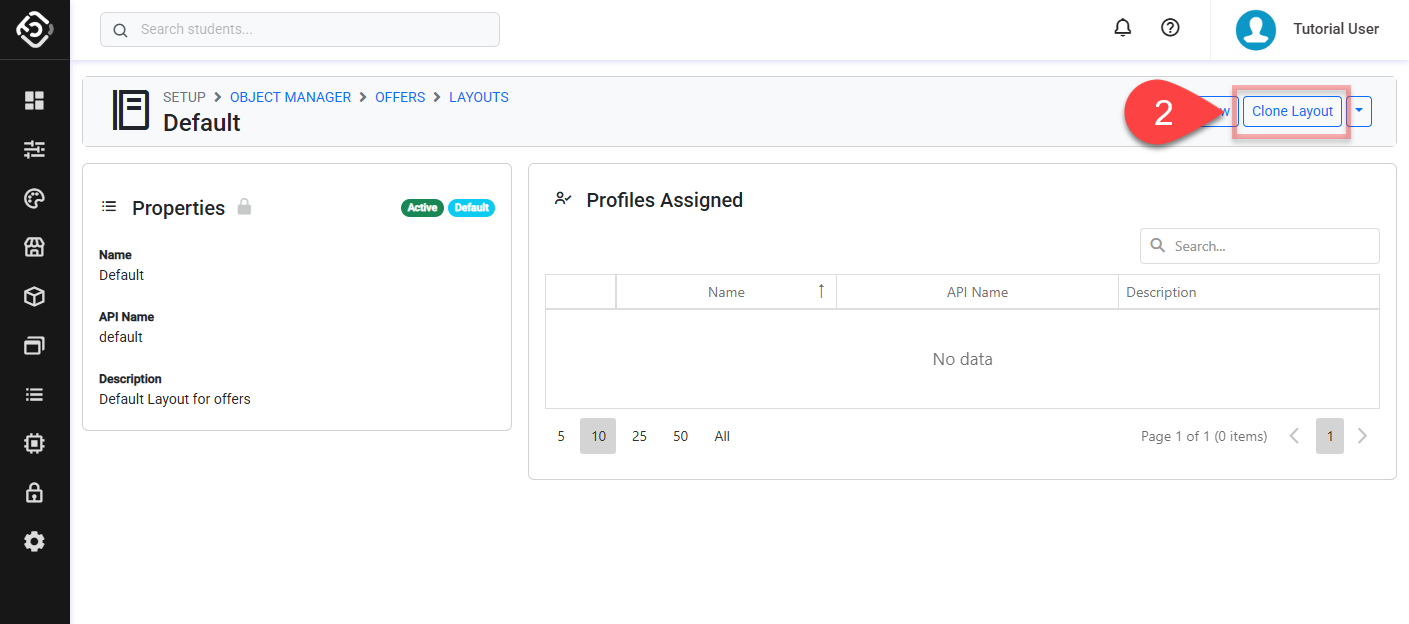
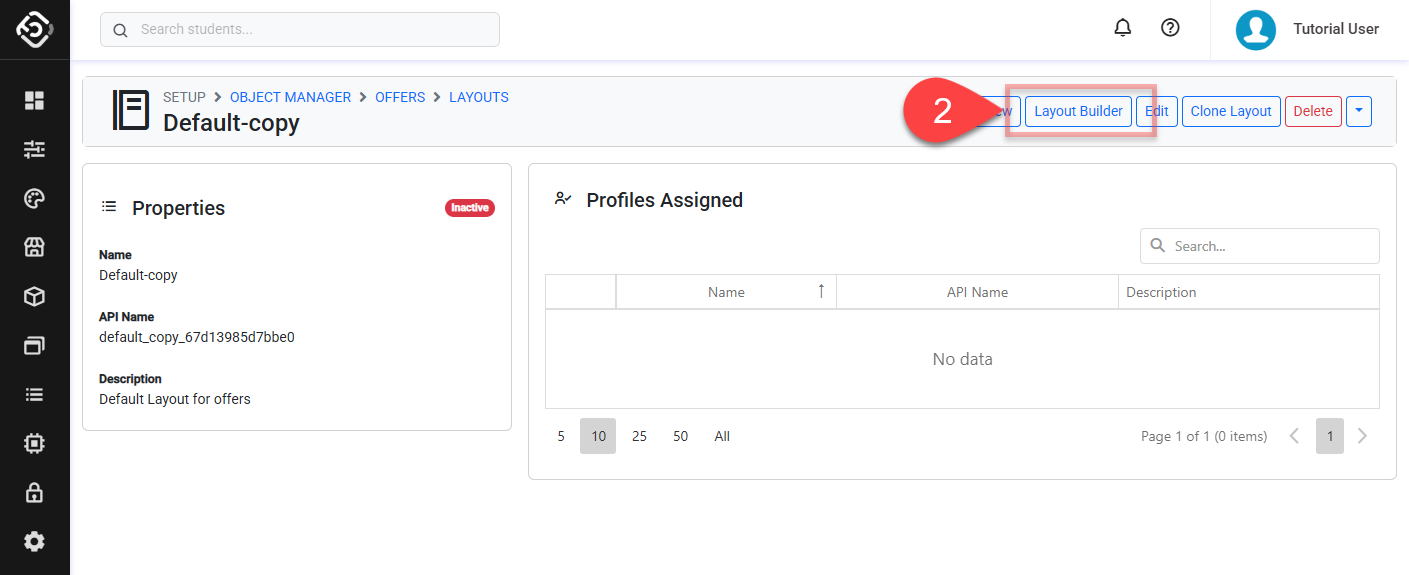
Clone a Layout
Cloning a layout lets you create a new layout using an existing one as the basis. To do so:
-
Go to the layout detail page that you intend to clone.
-
Click on Clone Layout from the top right.
-
A new layout with the suffix '-copy' appended to the name of the original layout will be created. Note the status of the new layout will be Inactive.
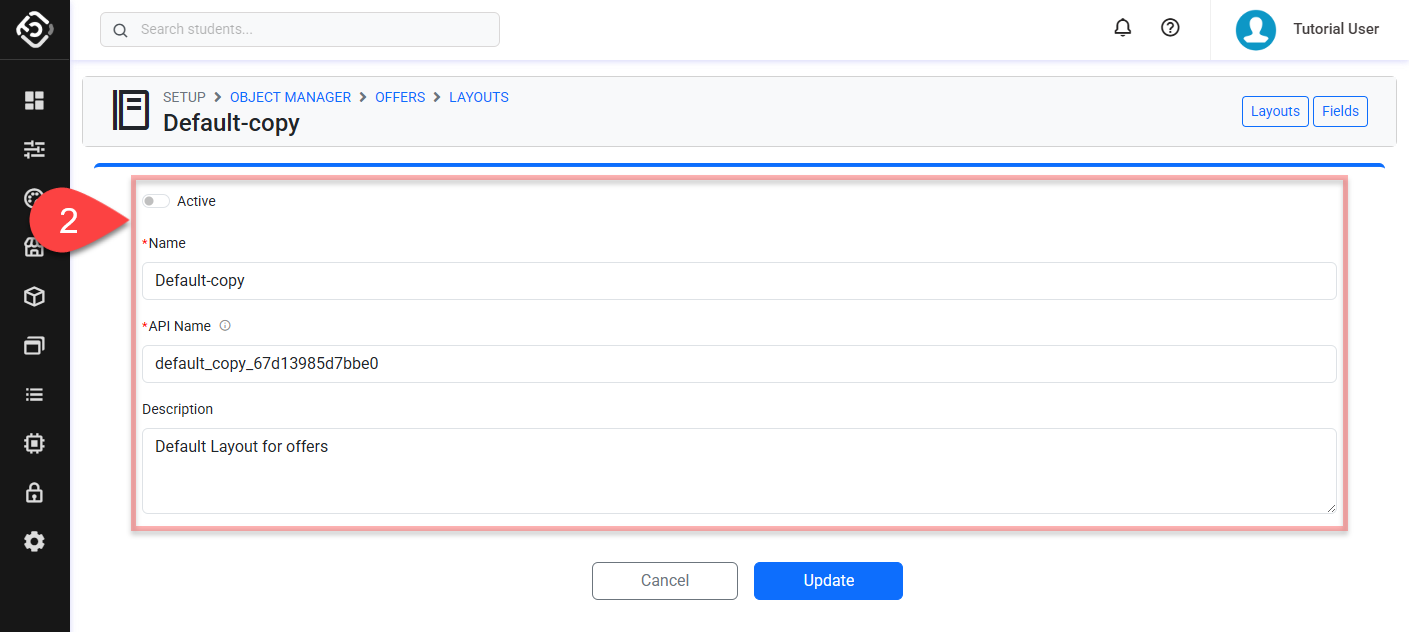
Update Layouts
The Default Layouts cannot be modified.
When modifying a layout, you may choose to update the layout schema, the layout details, or both.
Updating the layout schema
-
From the layout details page, click on Layout Builder.
-
Modify the layout as required. Refer to the Layout builder section above.
Updating the layout details
-
From the layout details page, click on Edit.
-
Update the details as you need.
-
Click Save to finish.
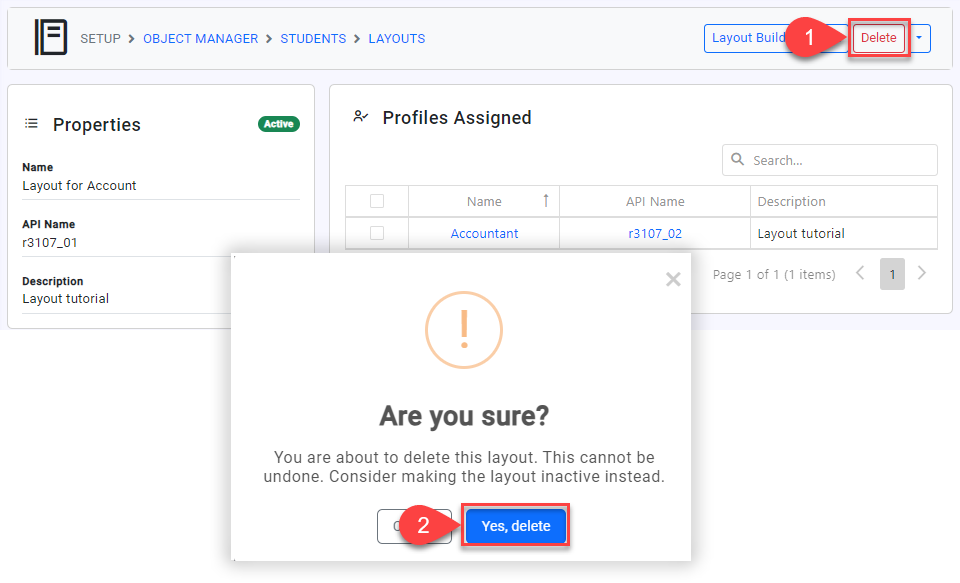
Delete Layouts
Once a layout is deleted, the profile associated with that layout will automatically revert to the Default layout.
-
From the layout detail, click Delete.
-
Confirm.