This article provides guidance on how to manage the visas information for international students.
Monitoring and managing visa information is crucial, and it might be a compliance requirement for institutions with international students. Our system includes a dedicated section for handling visa details for your international students. This feature covers various types of visas, ensuring that visa statuses and associated information remain current and easily accessible.
View Student’s Visas
To view the Visas for a student, follow these steps:
The Visas tab is only displayed for students of type ‘Overseas’.
-
Go to the student that you want to see the Visas for. Make sure the student is of type Overseas.
-
Click on the Visas tab from any of the the student profile pages.
-
You’ll see the Visas details that have been created for the student in the data grid.
For details about available buttons, refer to this article: Data Grids | Single Grid Composition.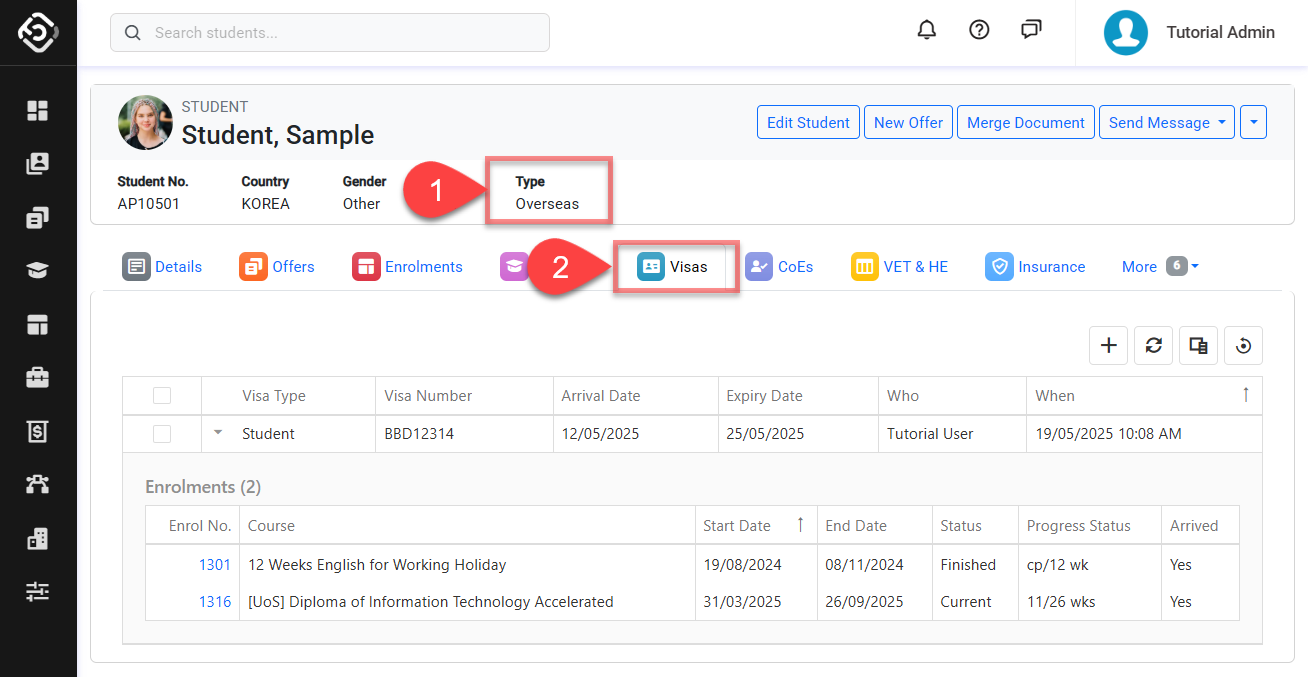
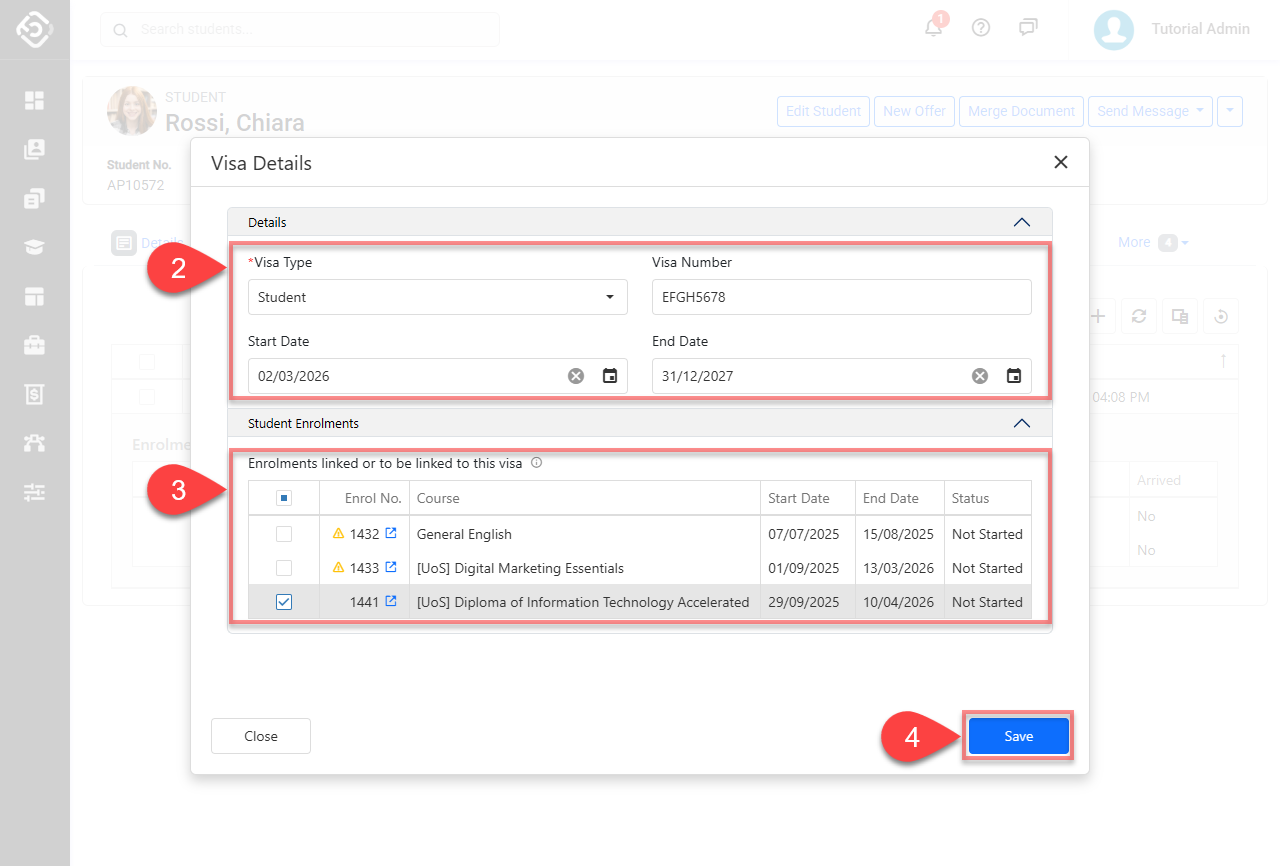
Create a Visa Entry
-
From the Visas tab of the student, click on the Create ➕ icon on the top right of the grid. A pop-up window will display.
-
Enter the student’s visa details. To customise the list of available visa types, update the values on the Visas picklist of Global object.
-
Optional Select the student’s enrolment(s) that the new Visa will be associated with. You can select one or more enrolments to link.
If an enrolment is already linked to another visa, the icon will appear in the Enrol No. column, indicating which visa it is currently associated with. If you select this enrolment, it will be reassigned to the current visa, replacing the existing link.
-
Click Save to finish.
-
The new visa will display as a new record on the grid. You can view the visa details directly in the data grid. To see the associated enrolments, click the small Expand icon next to the entry to expand it.
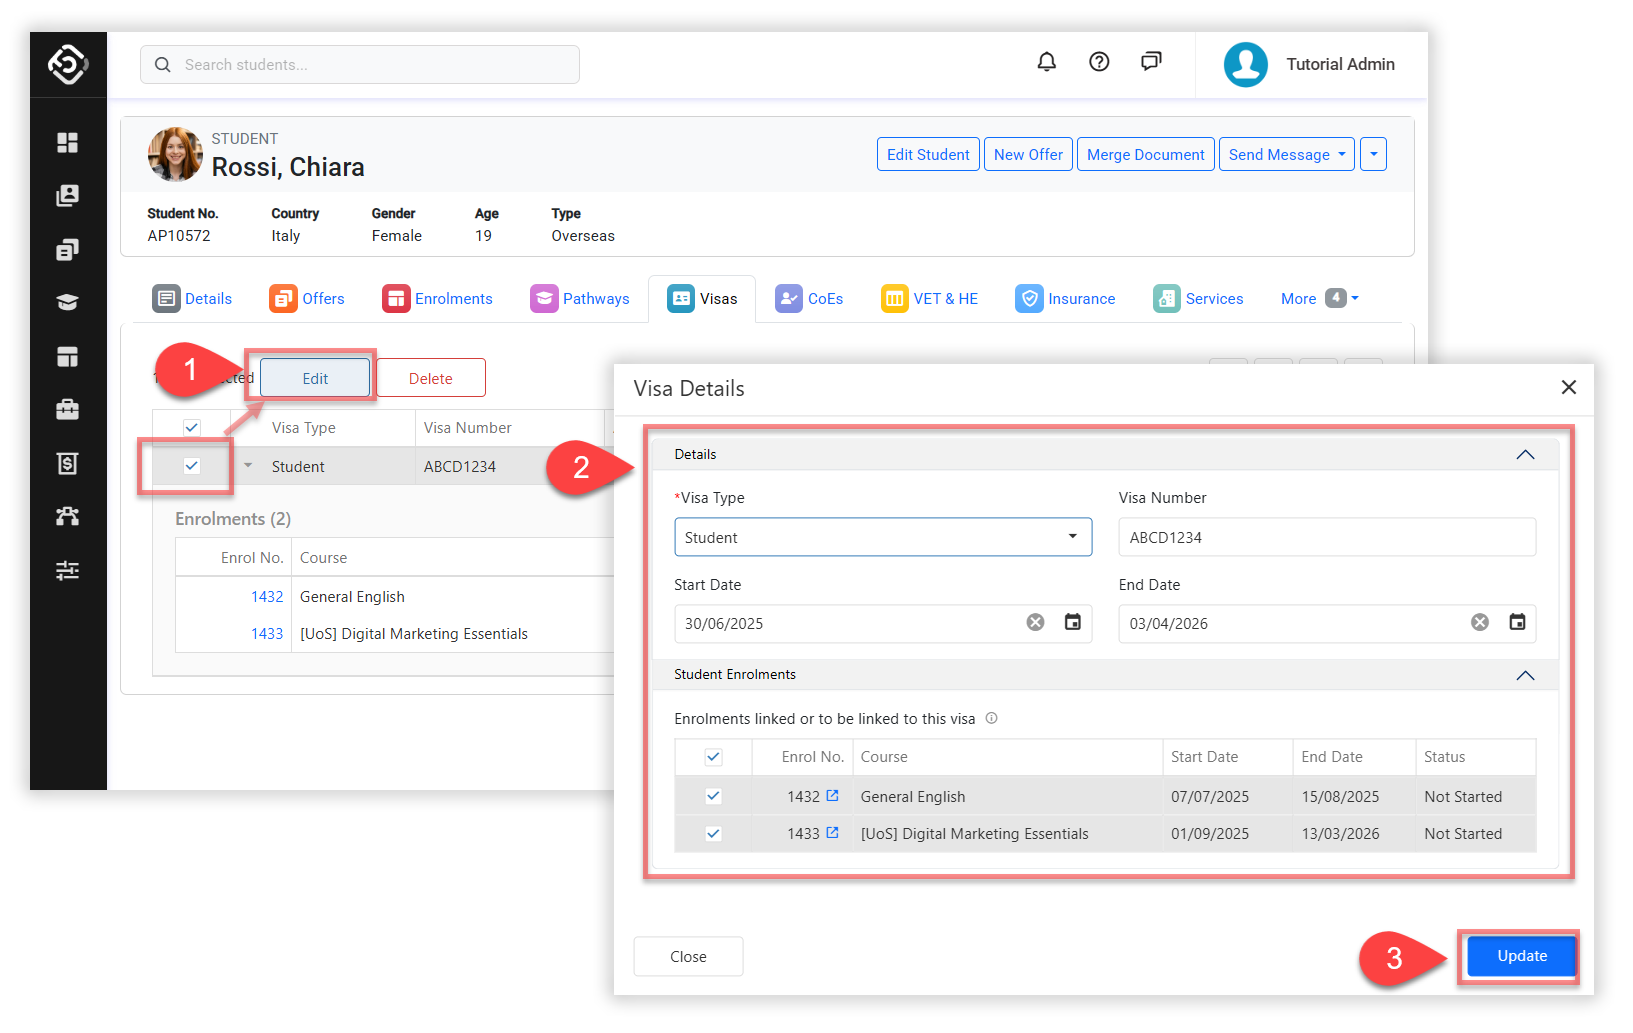
Update a Visa Entry
-
From the Visa tab, select the Visa entry you’d like to update, then click the Edit button in the Grid Action panel, or simply double-click the row. A pop-up window will appear with the Visa details, along with the associated enrolments for the selected record.
-
Update the visa details as required.
Changing the enrolment(s) will automatically reassign them to this Visa, replacing any prior Visa they were connected to.
-
Click Save to finish.
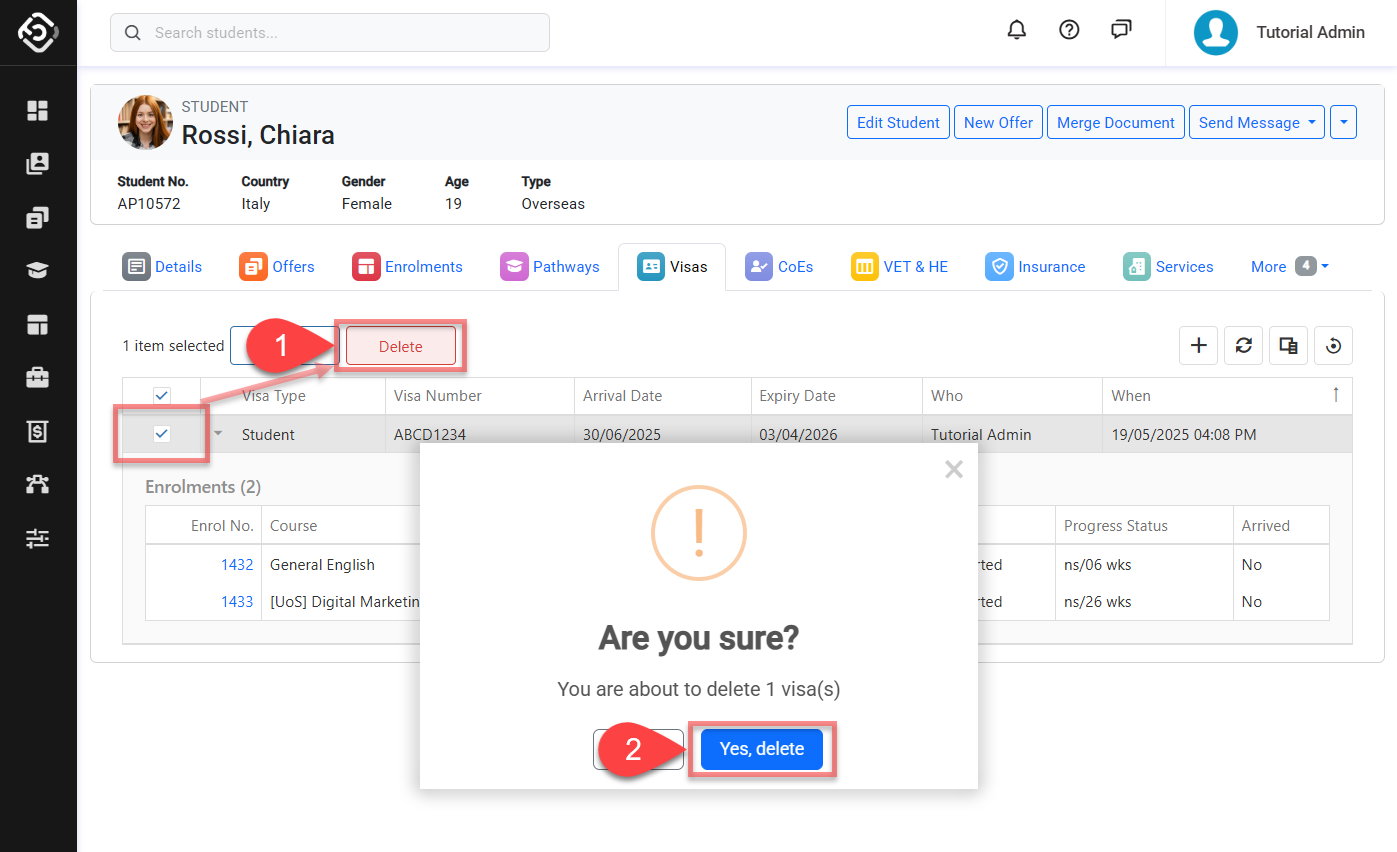
Delete Visa Entries
-
From the Visa tab, select the Visa(s) you’d like to delete.
-
Click Yes to confirm. Make sure you intend this action as it cannot be undone.