Learn how Picklists, the underlying element for fields of type Picklist and Multiselect work.
What is a Picklist
In a nutshell, a Picklist is a list of items that are used by fields of type Picklist and Multiselect.
This article is about the Picklists as the underlying element used by fields. For details about fields, go to this article.
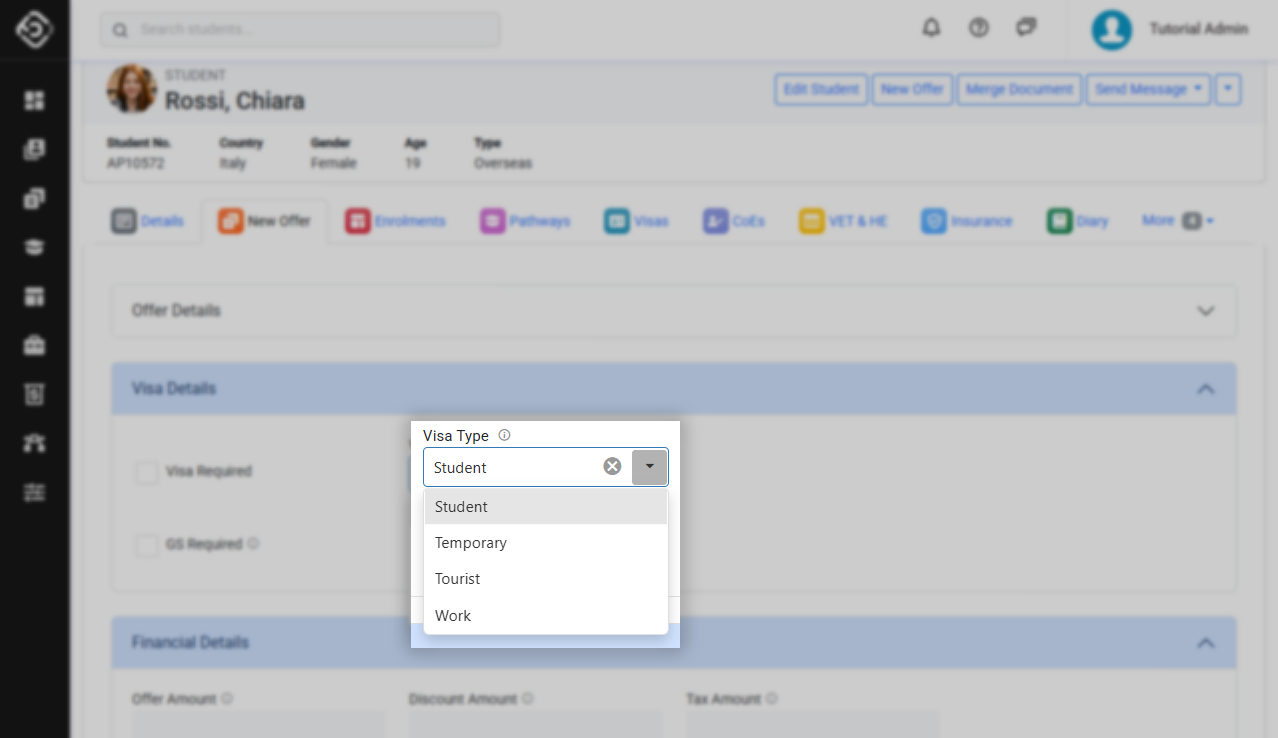
Picklist are useful when you want to collect information in a field but want to limit the options that can be selected. With picklists users can only select one or multiple options from a defined list.
For example, if you want to collect the visa for the students, you will prefer to have a list of options that users can choose from, rather than a free entry text.
Access to Picklists
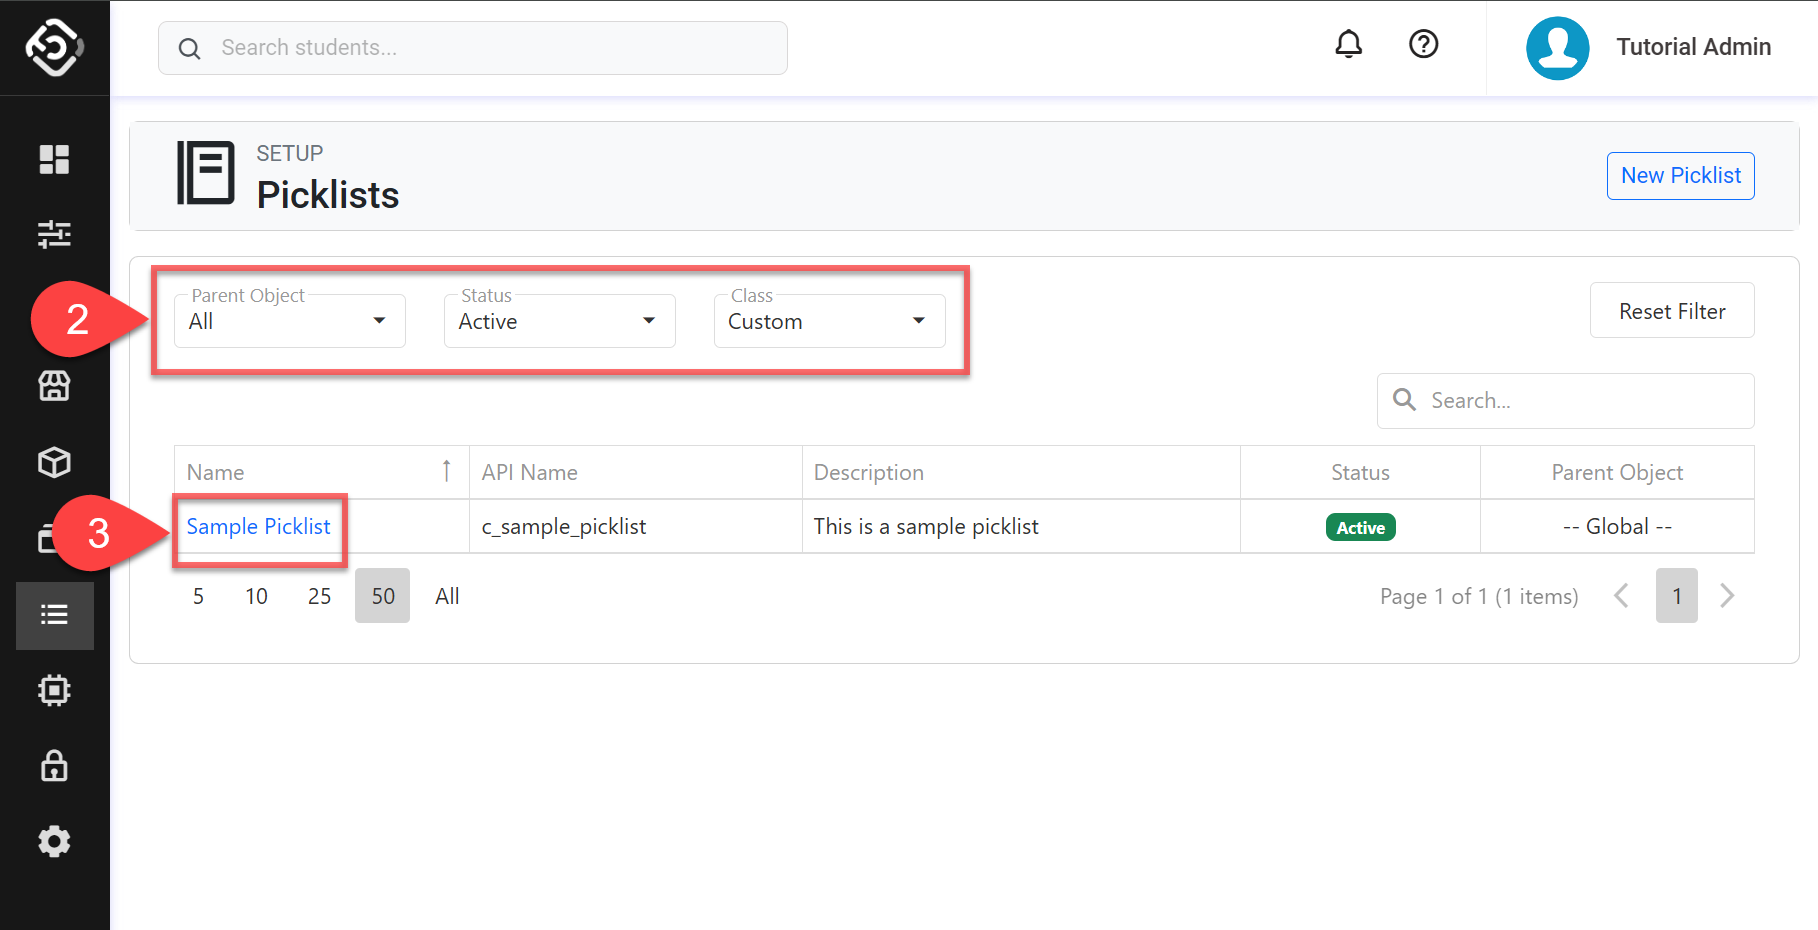
To access Picklists, please follow the steps below:
-
From the Utilities menu, go to Picklists.
-
By default, it displays all Custom Picklists in the data grid. Use the filters available to find the picklist that you’d like to access.
-
Click the picklist that you’d like to view.
Create a Picklist
The number of picklists that can be created depends on your subscription plan.
Picklists can be associated with a Parent object which will determine what the objects can use that picklist. For example, if you associate a Picklist with the Students object, the Picklist can only be associated with fields under the Students object. However, if you need to create a Picklist that can be used by multiple objects, you have the option to not associated with any Parent Object. We call these: Global Picklists.
There are two ways to create a custom Picklist: With and without a field.
Create a Picklist Without a Field
You can create a Picklist that is not associated with any field. This will let you create the underlying picklist but it won’t be of any use until you associated it with a field. You will associate the picklist with a field when you create a field of type Picklist or Multiselect.
-
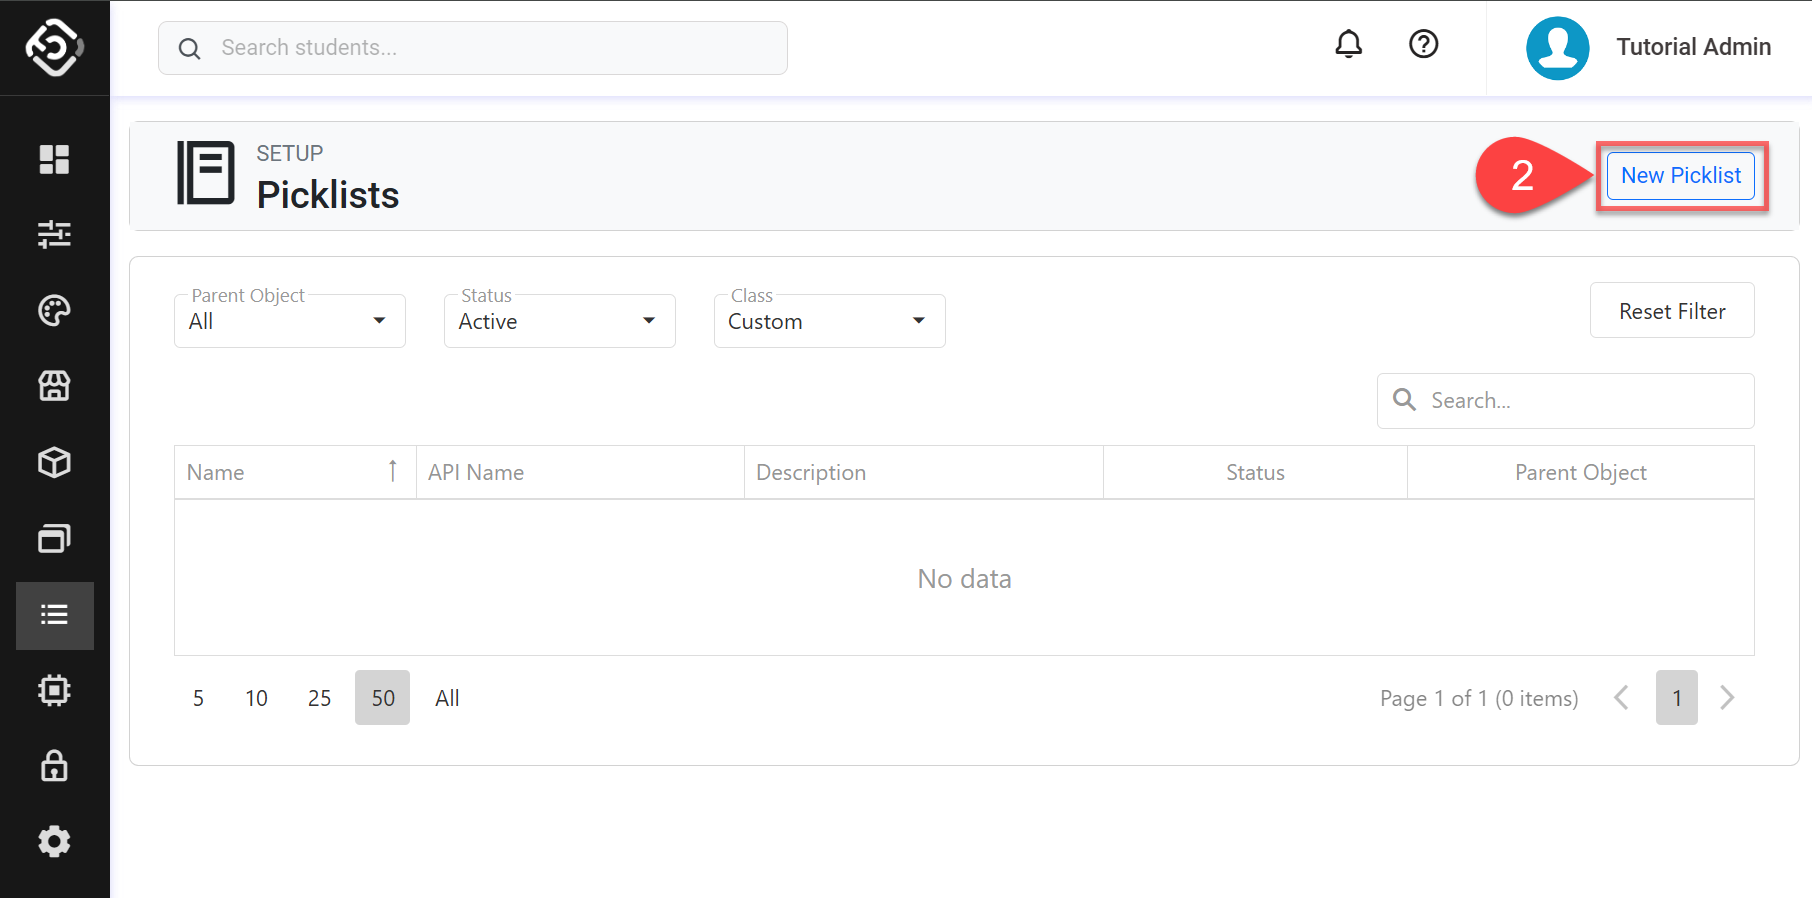
From the Utilities menu, go to Picklists.
-
Click New Picklist on the top right.
-
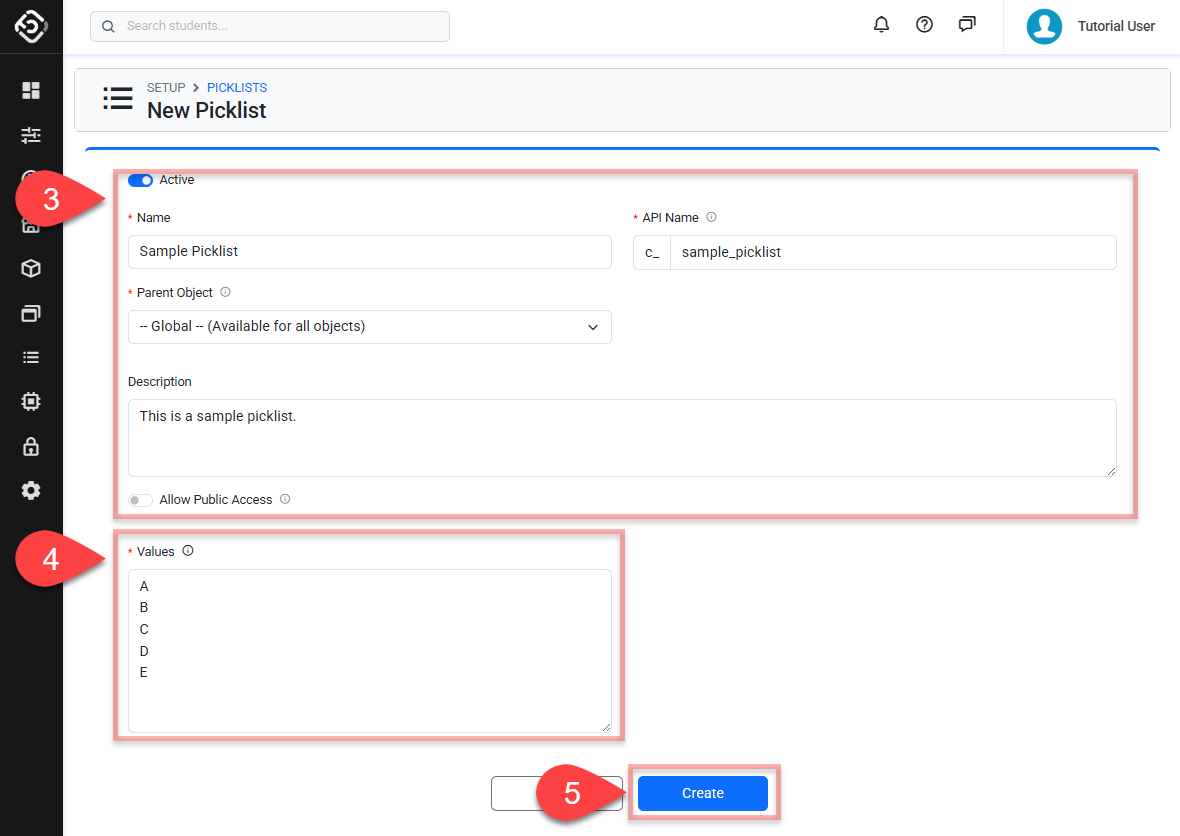
Fill the details.
-
Name: Enter the name to be used for this picklist.
-
API Name: This name is used to identify the picklist in the API. Based on the name you enter, the system will automatically generate the API Name. If needed, change it to your desired API Name. Only alphanumeric characters and the underscore (_) symbol are allowed. The API Name must be unique within the system.
-
Parent Object: Select the primary object to which a picklist is associated in the system.
-
Description: Provide a brief explanation of the picklist.
-
Allow Public Access Equator crm app required : Use this option to make picklists available in public-facing forms, such as Guest Forms. This setting is only available once the Equator CRM App is installed. After installation, users can enable public access for picklists used in the Global, Leads, and Opportunities objects. Picklists without public access enabled will not display any options in public-facing forms.
-
The Equator CRM App is a paid add-on. Contact your system administrator for details.
-
Add the Values.
Enter the values for the Picklist. Each value should be on a separate line. Each item of the list needs to be in a new line. -
Click Create to save and finish.
Create a Picklist with a Field
A Picklist can also be created at the same time when a new field of type Picklist or Multiselect is created.
When you create a picklist using this method, you need to consider the following:
-
The new Picklist will be scoped to the same parent object as for the field you are creating. You cannot create a Global Picklist using this method.
Follow these steps to create the Picklist with a field:
-
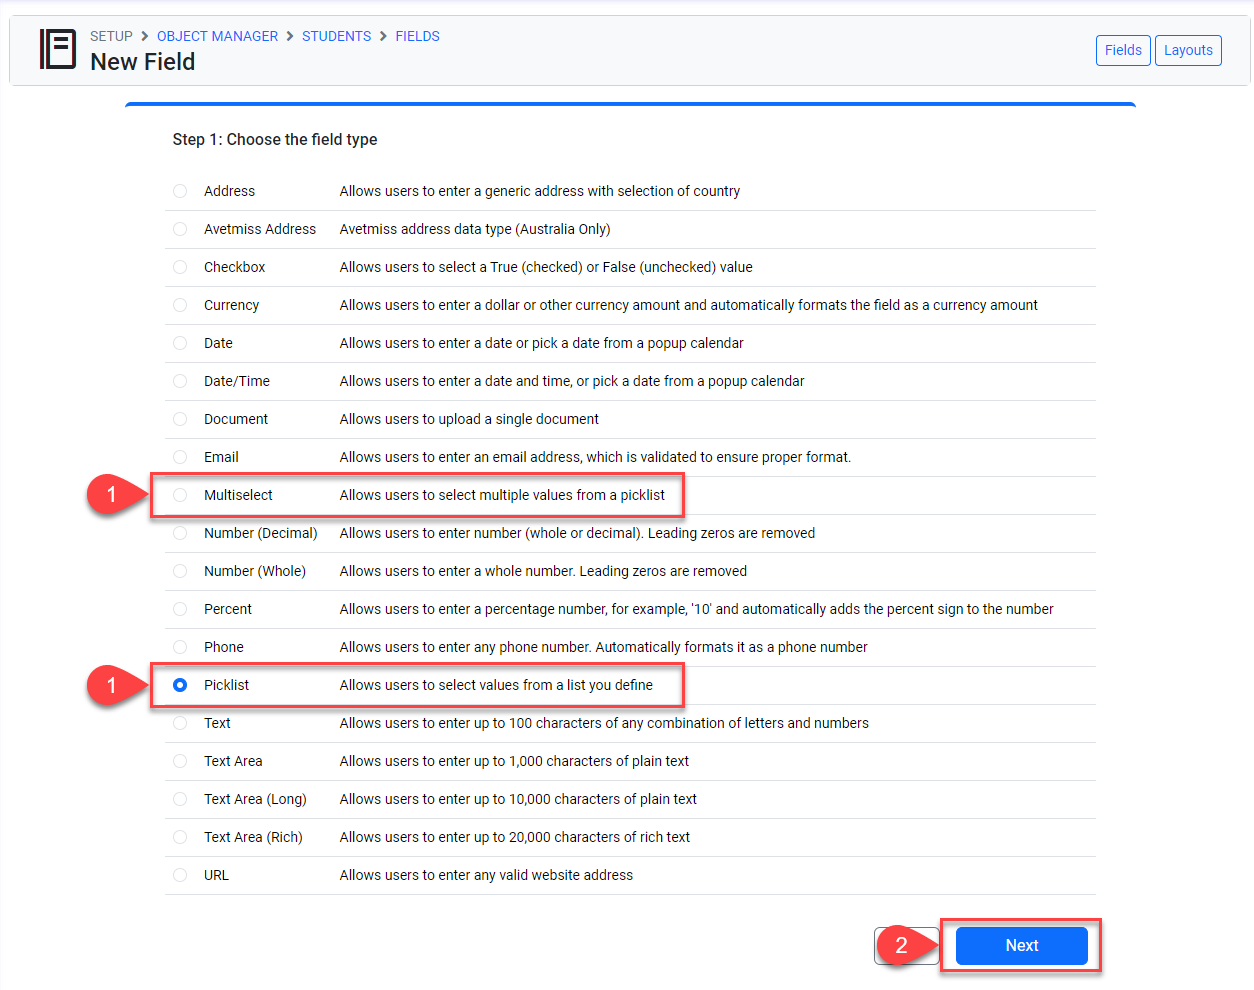
Go to the Create Field page and choose Picklist or Multiselect for the field type depending on your needs.
-
Click Next.
-
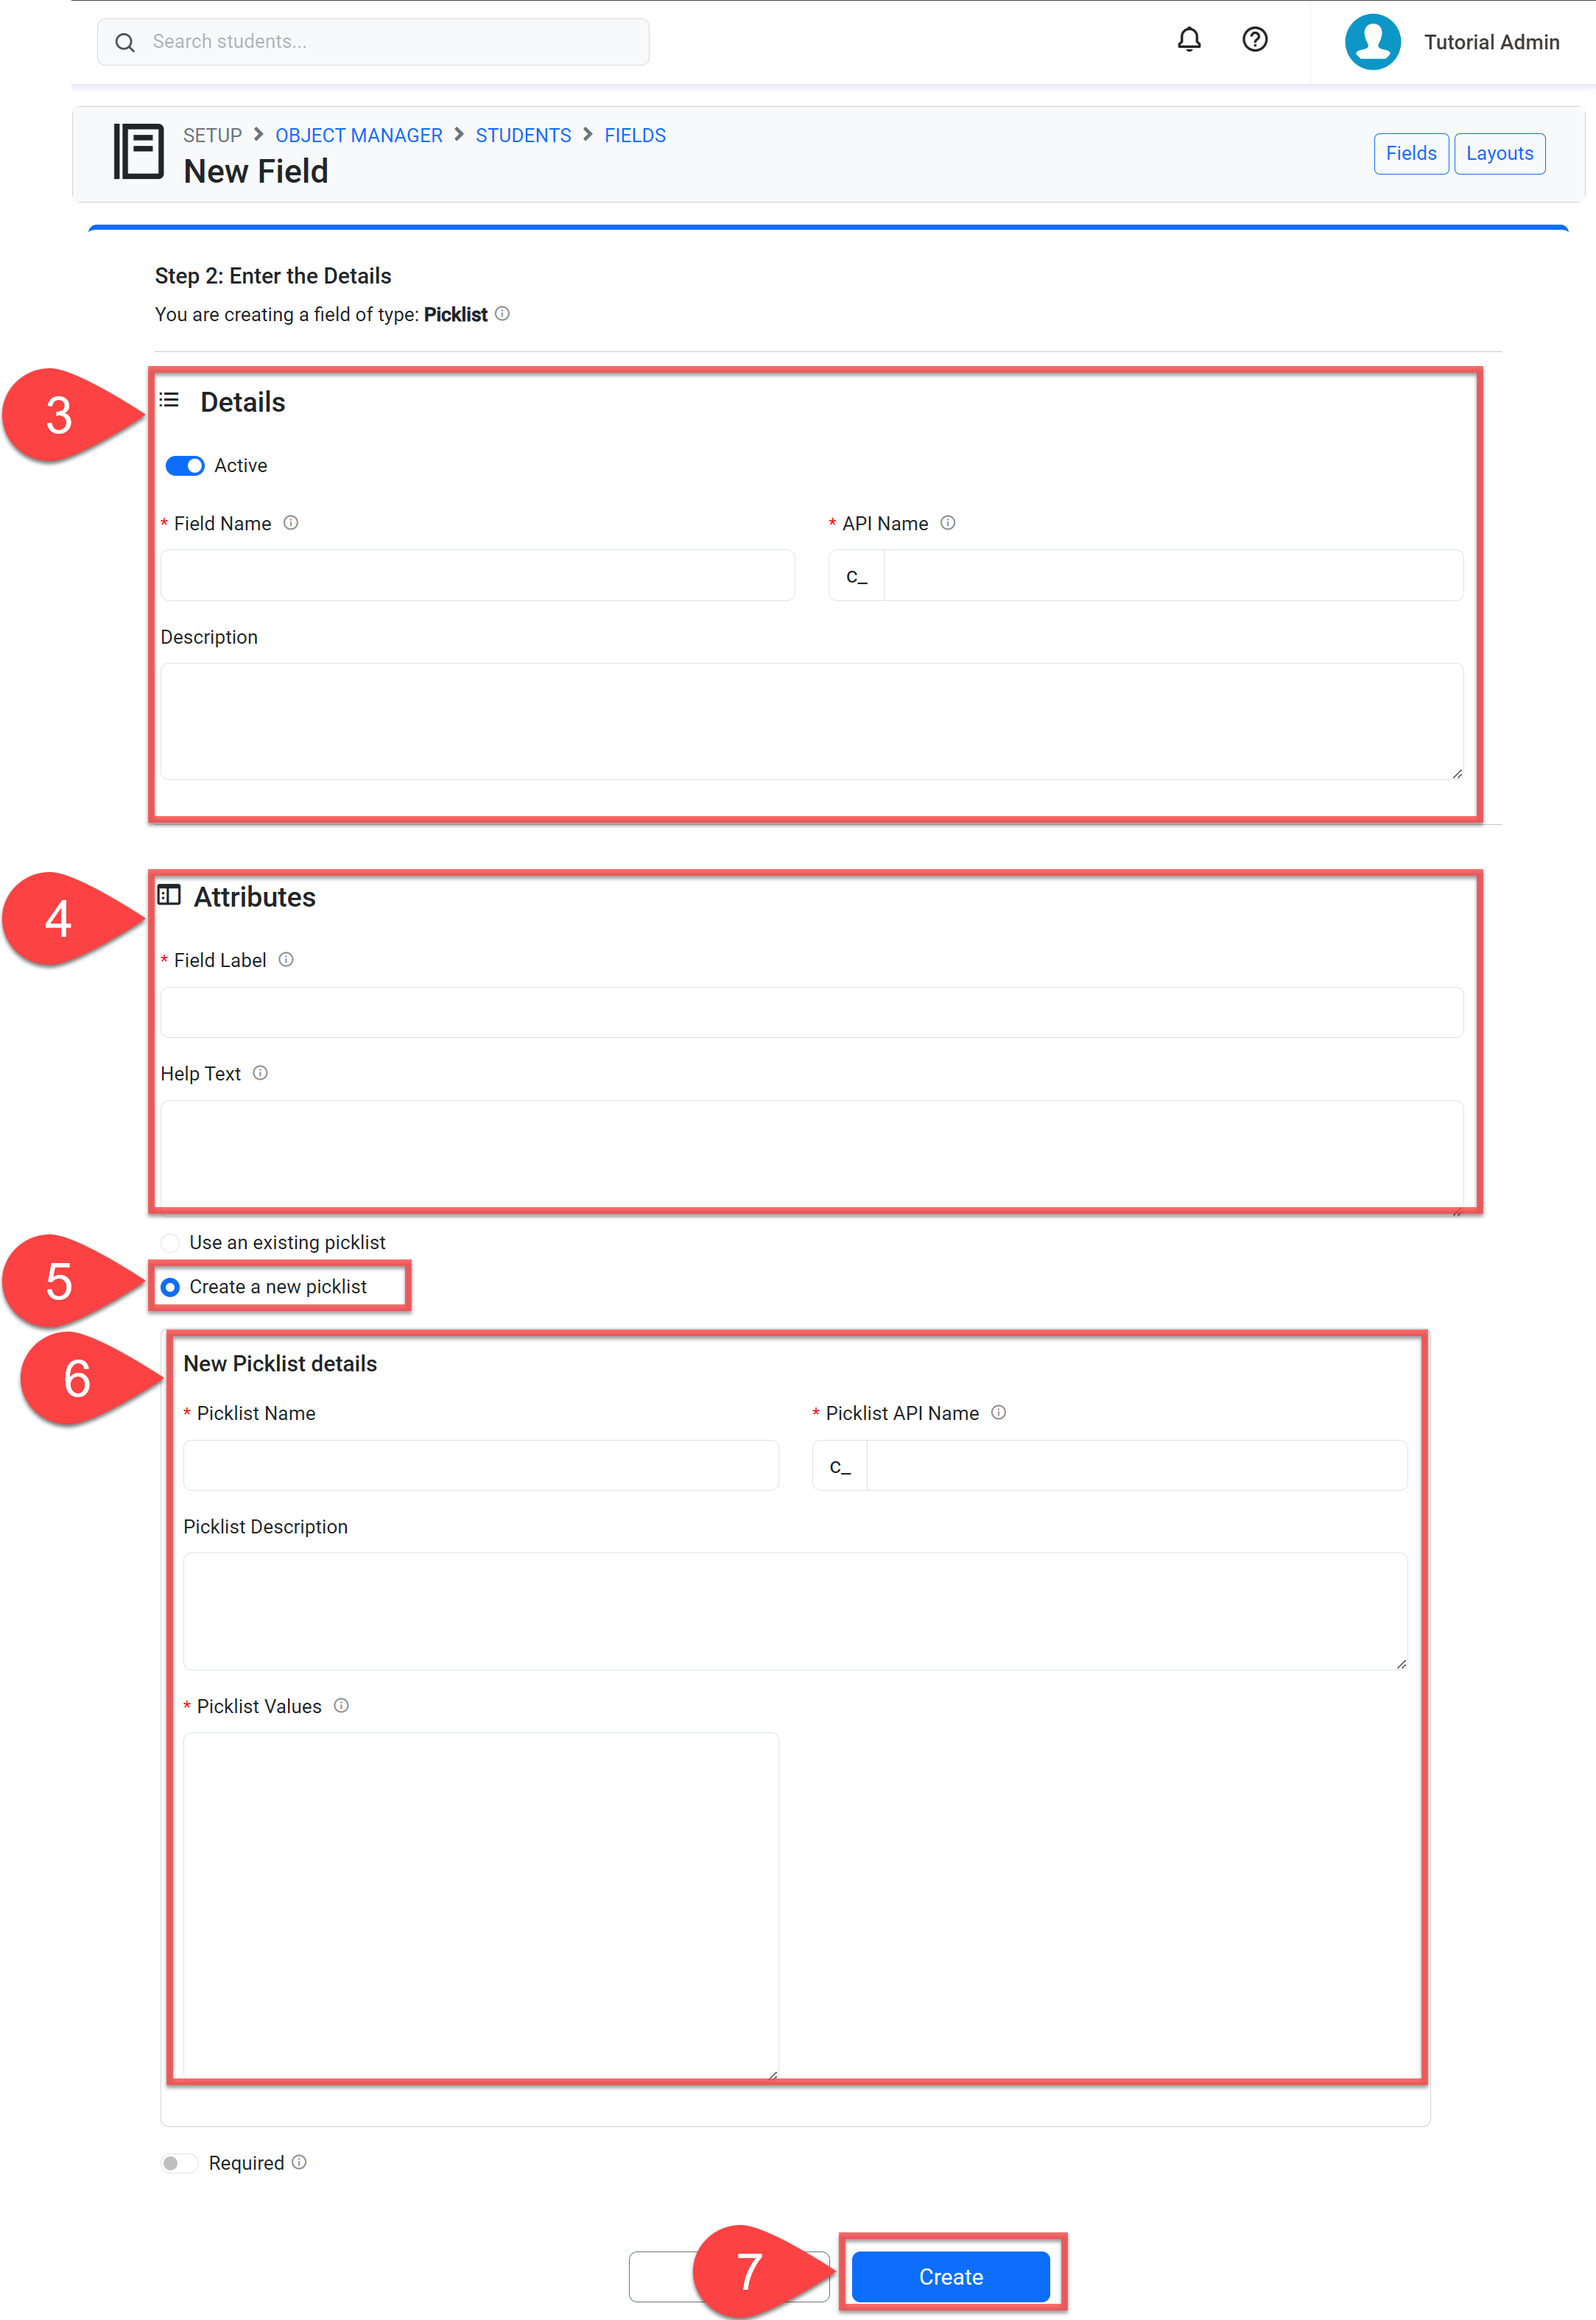
Enter the details in Details section.
-
Enter the details in Attributes section.
-
Select Create a new picklist on the Attributes section.
-
Enter the details for the New Picklist and enter the Values accordingly.
-
Name: Enter the name to be used for this picklist.
-
API Name: This name is used to identify the picklist in the API. Based on the name you enter, the system will automatically generate the API Name. If needed, change it to your desired API Name. Only alphanumeric characters and the underscore (_) symbol are allowed. The API Name must be unique within the system.
-
Parent Object: Select the primary object to which a picklist is associated in the system.
-
Description: Provide a brief explanation of the picklist.
-
-
Click Create to finish.
View a Picklist Usage
To view where a Picklist is being used:
-
From the Utilities menu, go to Picklists.
-
Click the Picklist that you’d like to view usage for.
-
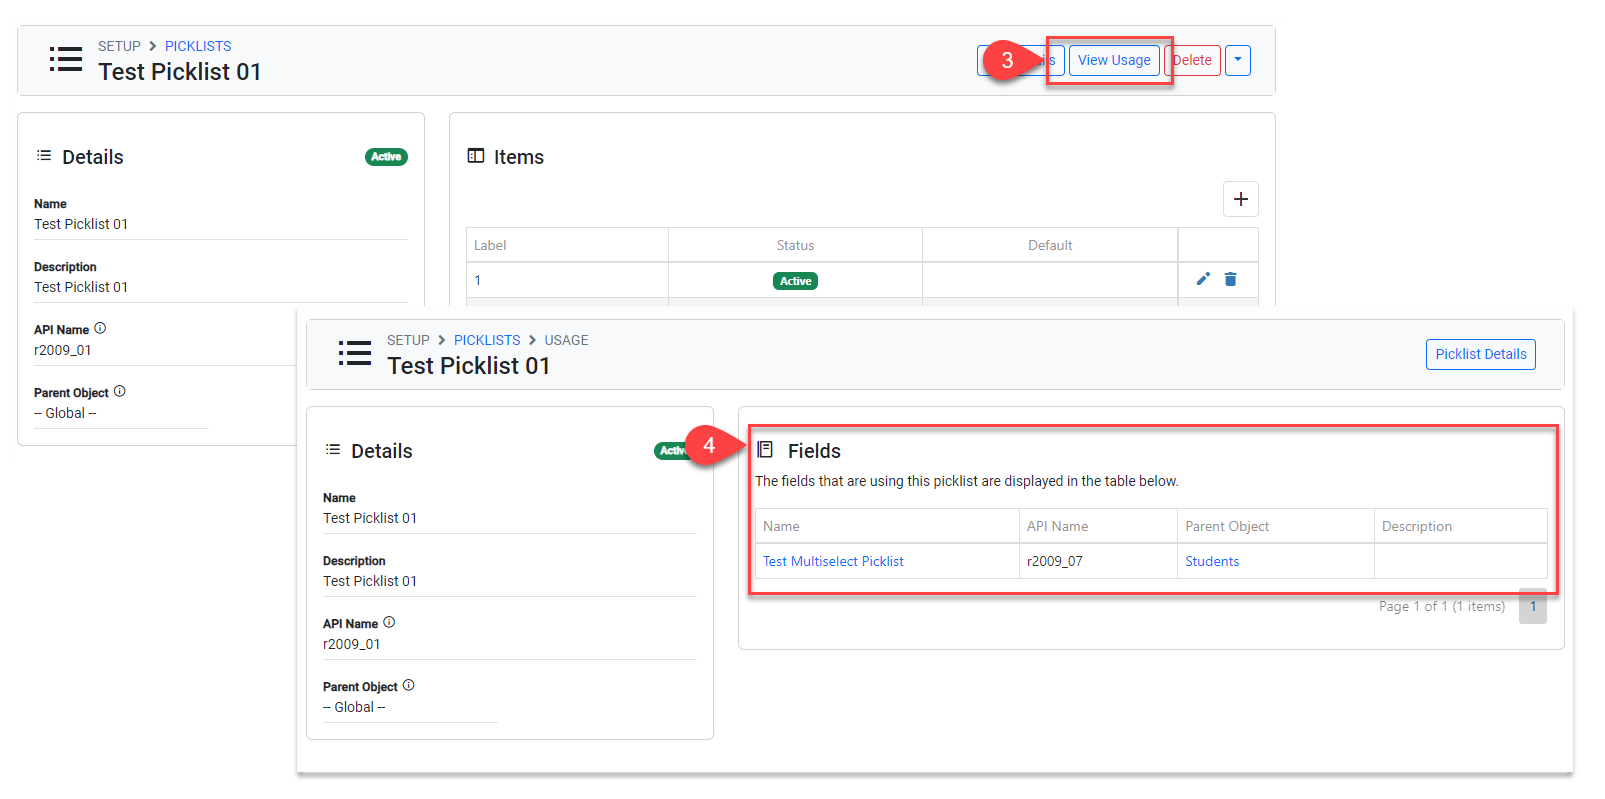
Click View Usage on the top right.
-
You can check where this Picklist is being used.
Update the Picklist Details
-
From the Utilities menu, go to Picklists.
-
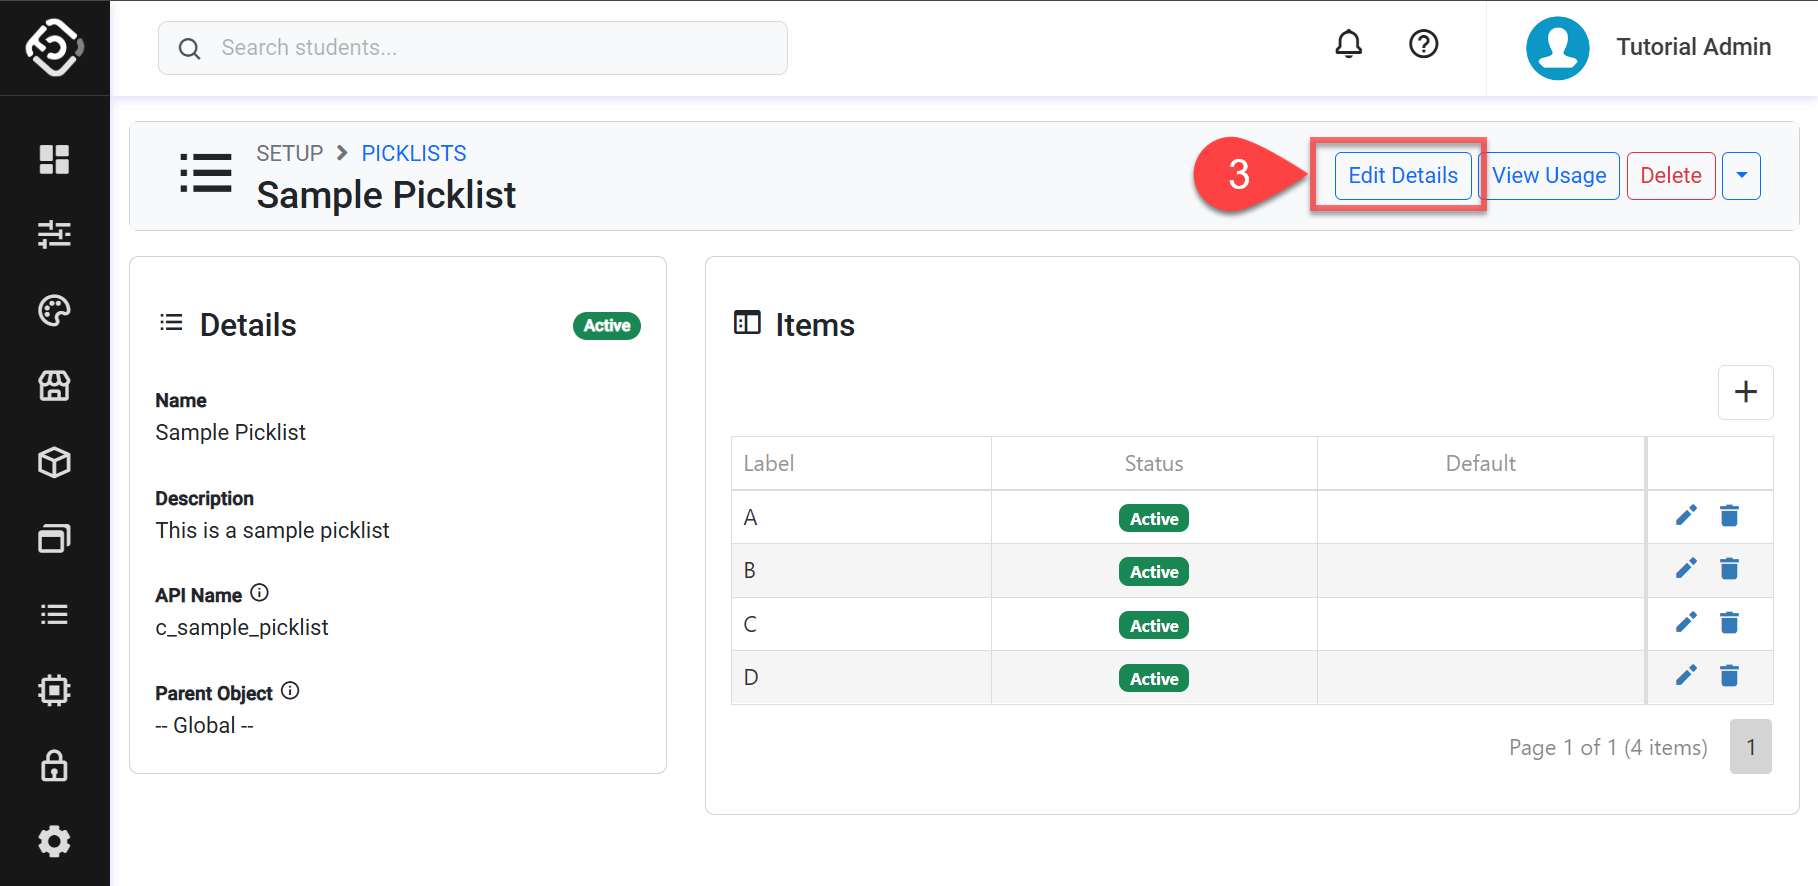
Click the Picklist that you’d like to change.
-
Click Edit Details on the top right.
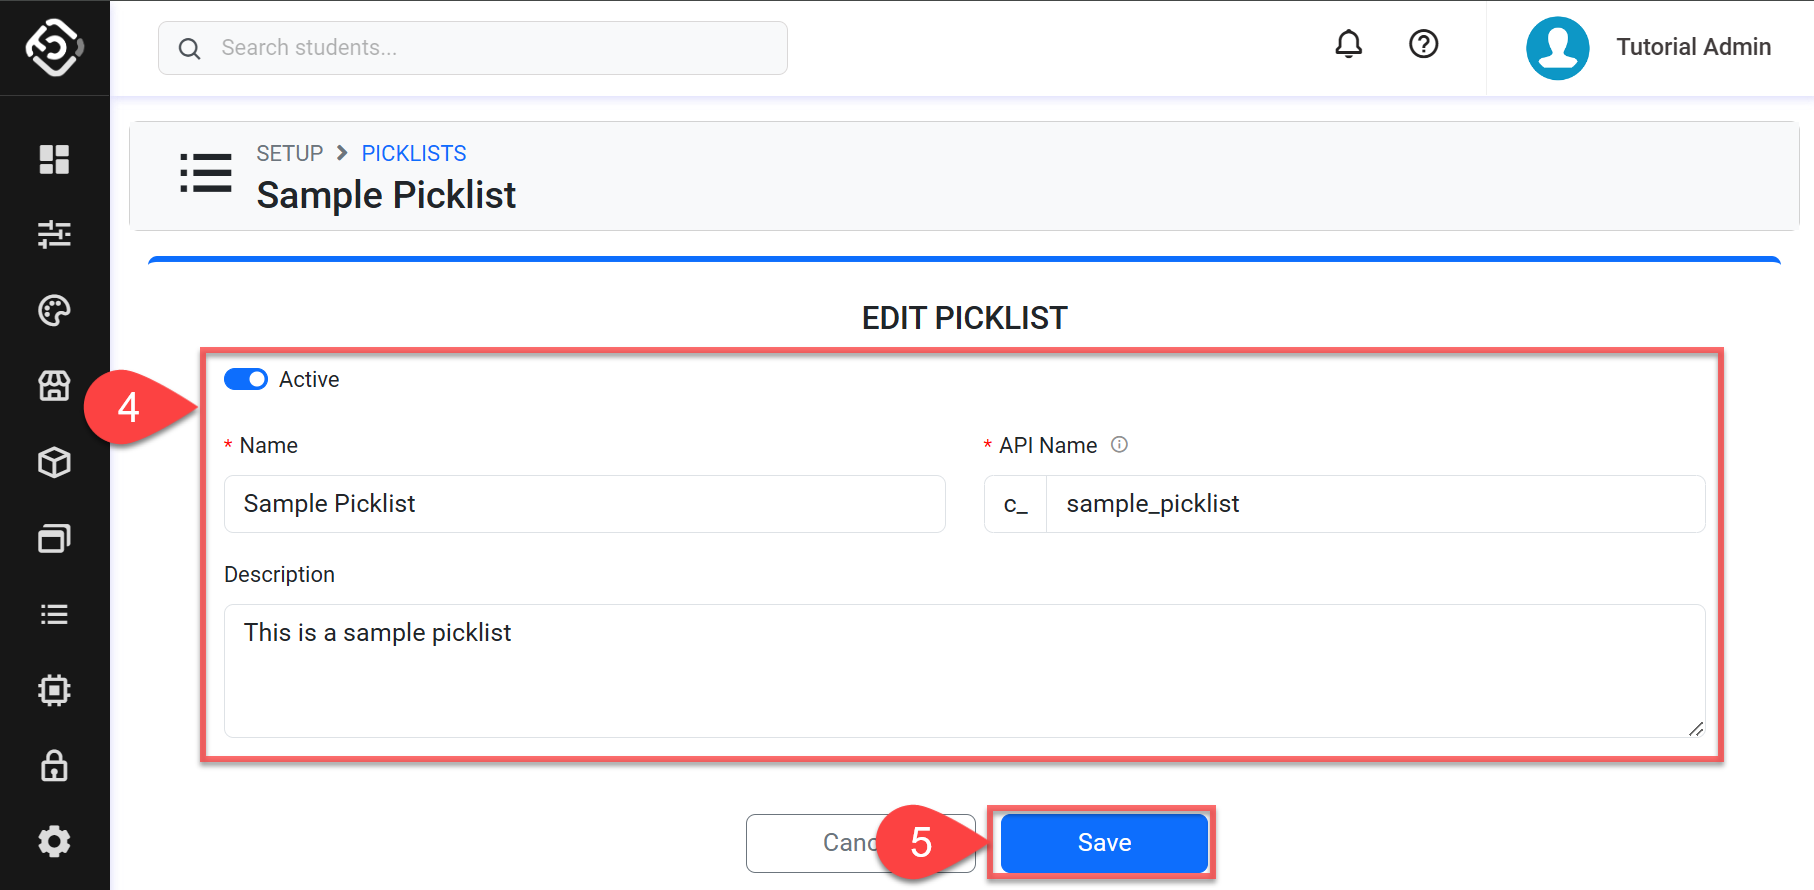
Update the details as you need.
If you plan to deactivate a picklist, you must first remove the Custom Field where it's used. Refer to the sections above: View Fields Usage and Fields: Delete a Custom Field.
-
Click Save to finish.
Update the Picklist Values
After creating a picklist, you can add, edit, or remove values.
Some picklists are system-protected and will not allow you to change any details or values. Some other lists do not allow you to change the details but they allow you to modify the values.
Be aware that updates to the Picklists values are retroactive. This means that the values will change for existing and new records.
-
From the Utilities menu, go to Picklists.
-
Click the Picklist that you’d like to update.
-
Update the Values.
-
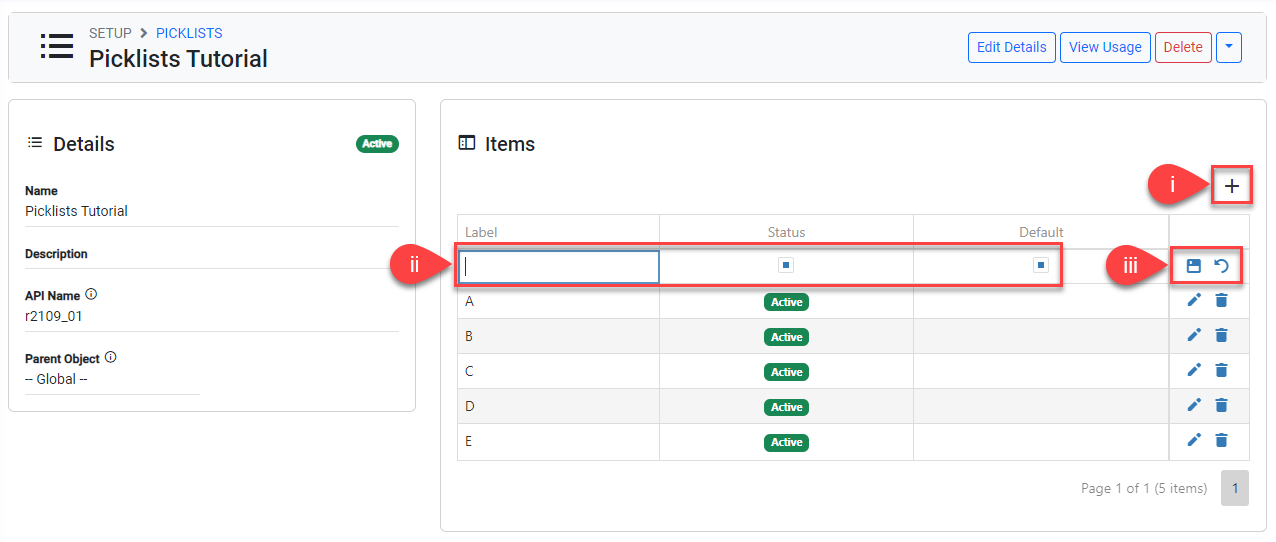
Add
-
Click ➕ icon above the values table.
-
Enter the label, and tick the status checkbox to activate it. If you'd like this value to be the default in the picklist, also tick the default checkbox.
-
Click the Save icon to save, or click the Cancel icon to discard changes.
-
-
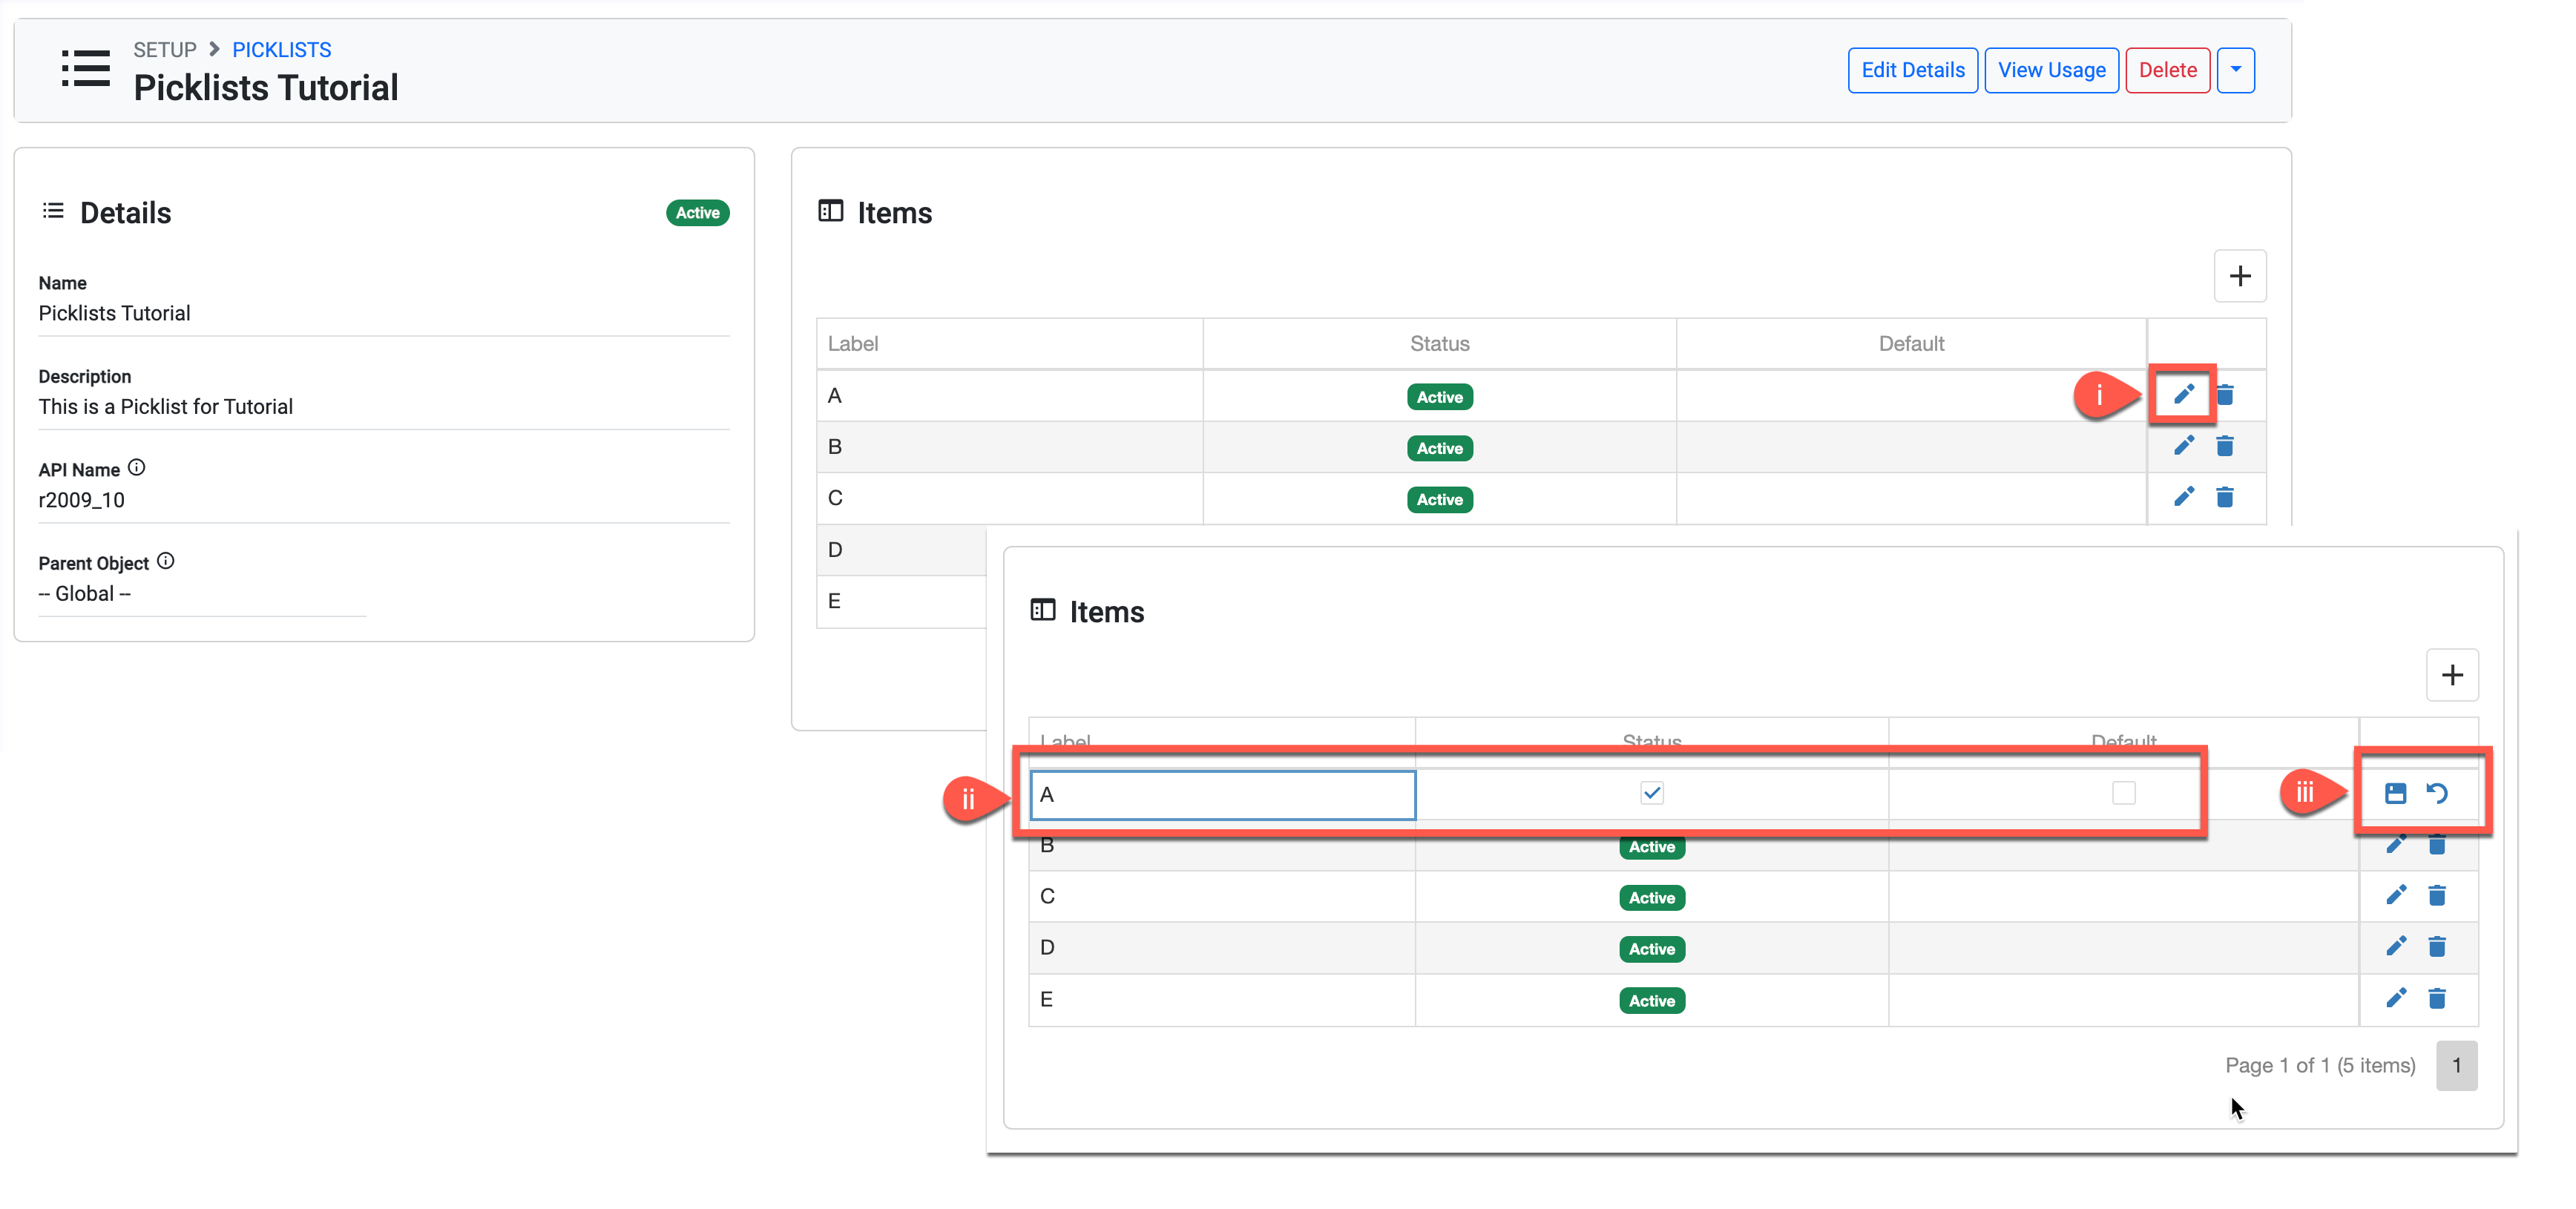
Edit
-
Click the Edit icon on the row of the value you want to modify.
-
Modify the label, the status checkbox and/or the default checkbox as you need.
-
Click the Save icon to save, or click the Cancel icon to discard changes.
-
-
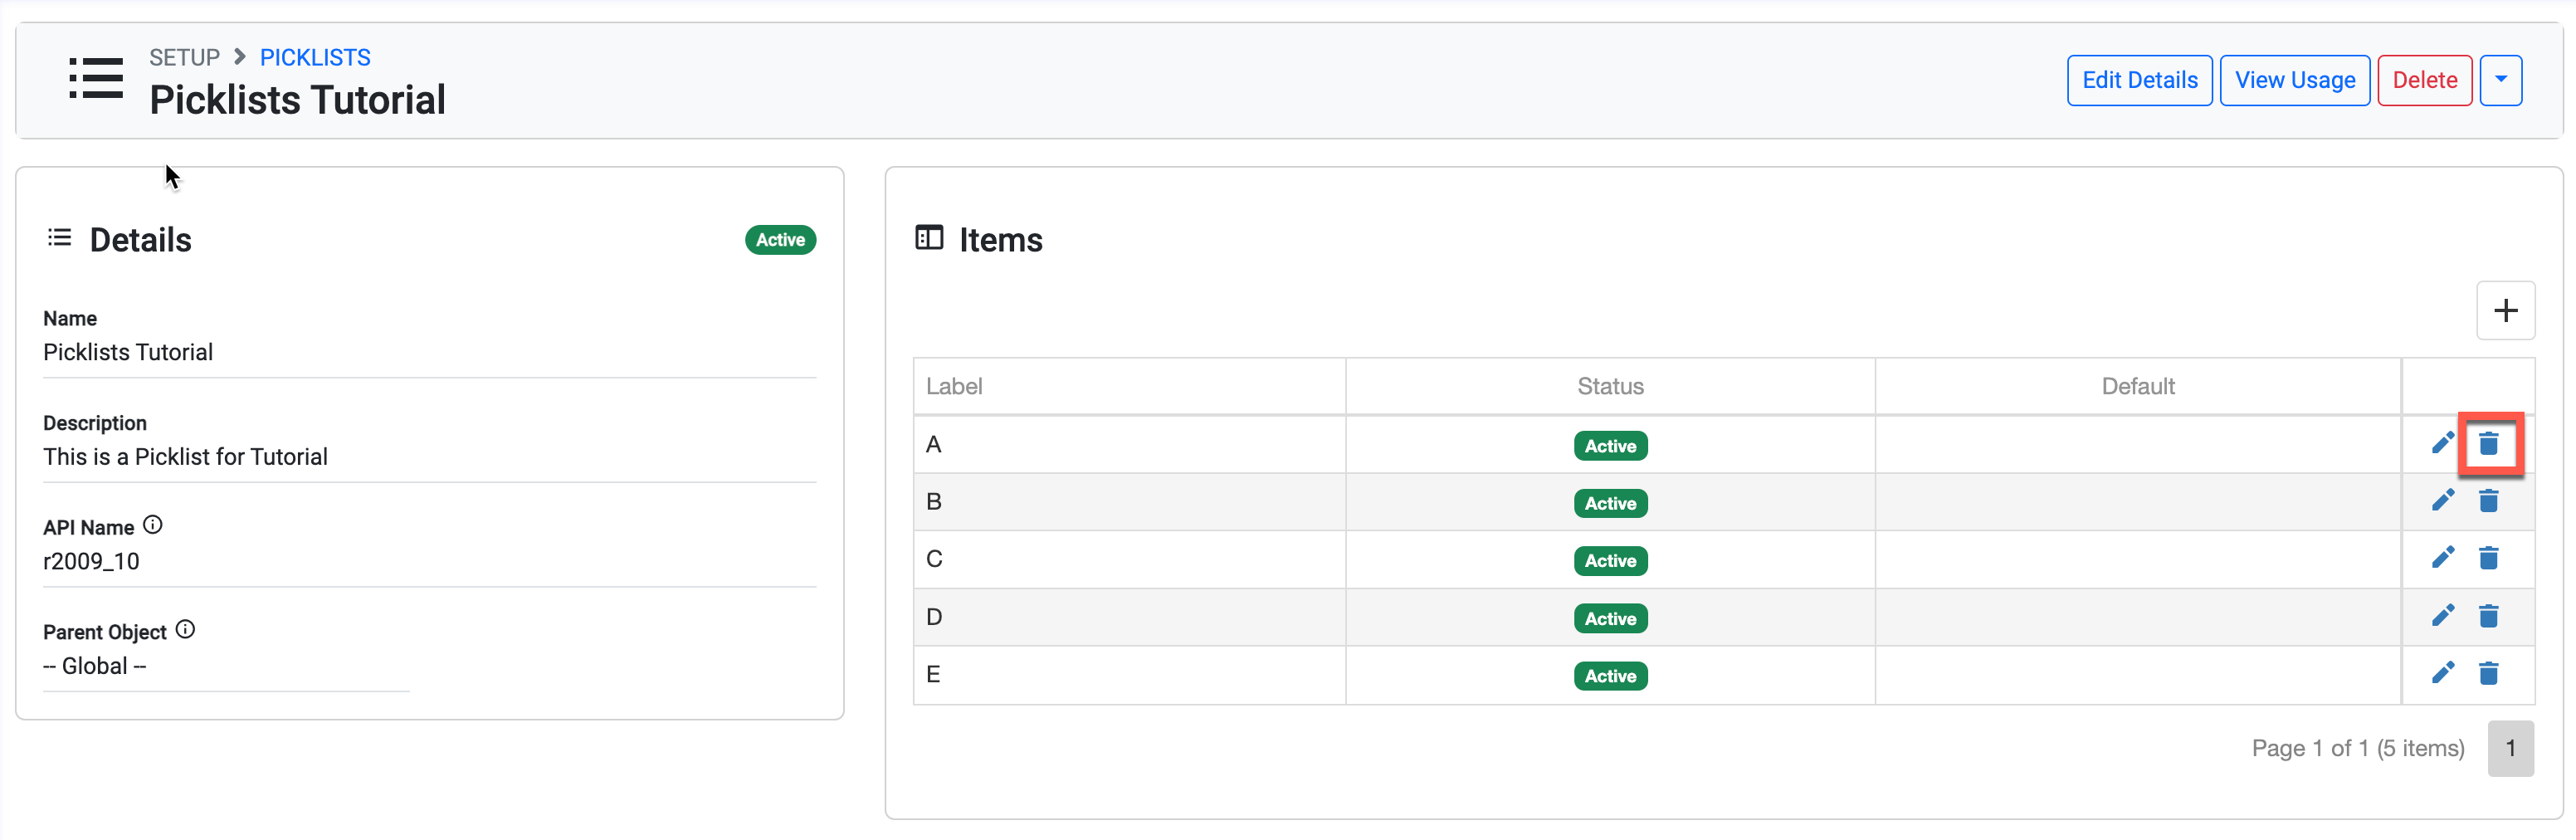
Remove
-
Click the Delete icon at the end of the row of the value you want to remove.
-
-
You can set multiple values as ‘Default’. However, if such a picklist is used on a field of type Picklist (single select), the default value can be any of the values set as ‘Default’.
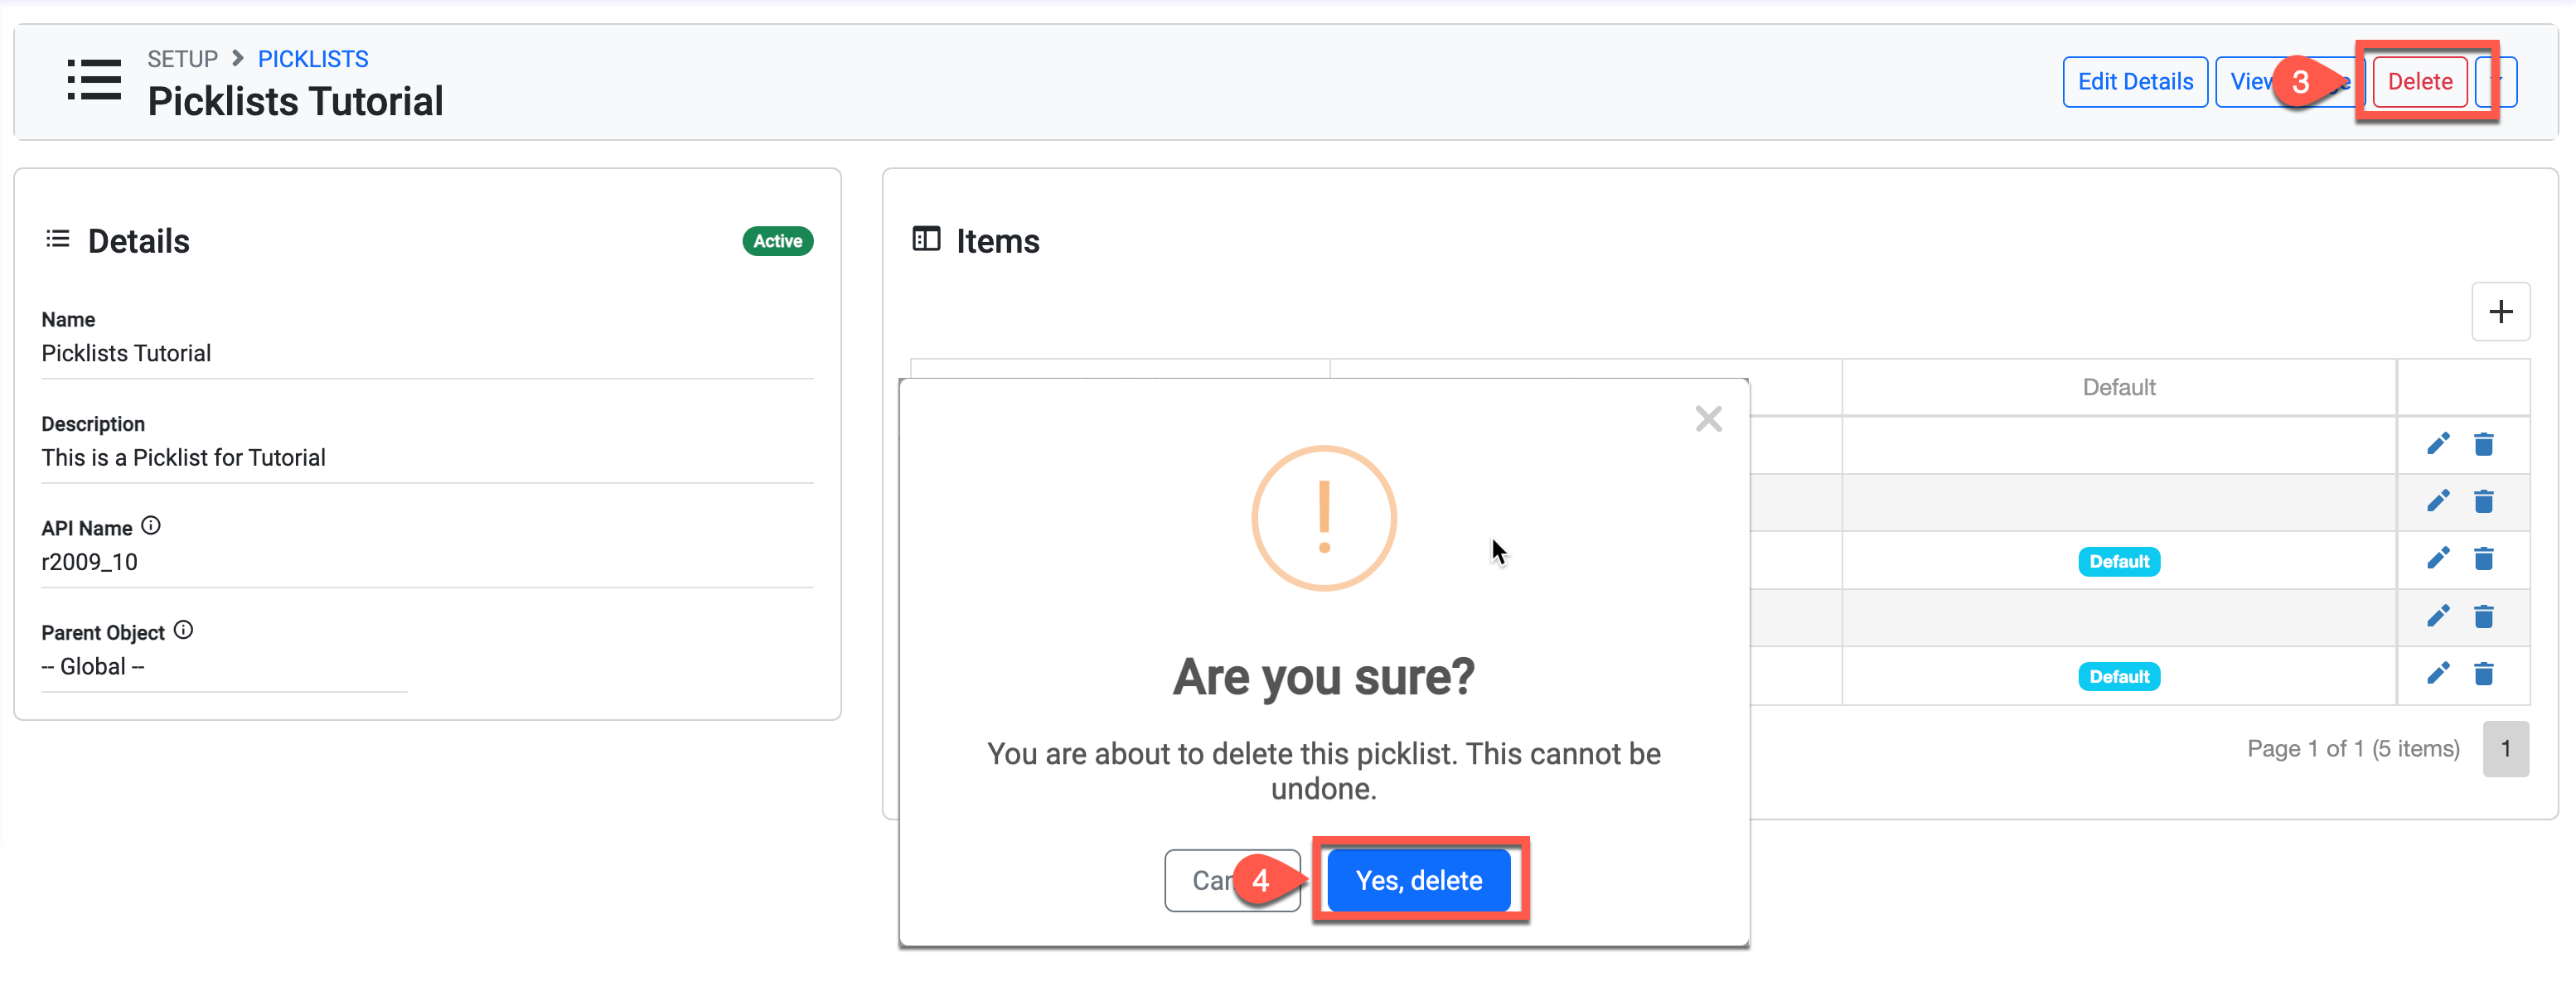
Delete a Picklist
Before you delete a picklist, you must first remove the Custom Field where it's used. Refer to the sections above: View Fields Usage and Fields: Deleting Custom Fields.
-
From the Utilities menu, go to Picklists.
-
Click the Picklist that you’d like to delete.
-
Click Delete on the top right.
-
Confirm to delete.