Discover how to manage receipts efficiently, including creating new receipts, editing existing ones, and the process for deleting receipts when necessary. This guide provides step-by-step instructions and key considerations for each action to streamline your workflow.
Create a Receipt
When entering a receipt, ensure that you record the exact amount received, regardless of whether it differs from the invoiced amount. The amount paid to the college is the amount to be receipted in eBECAS/EDMISS.
Receipts can only be created for enrolments with open invoices, meaning invoices that have outstanding amounts.
To create a receipt:
-
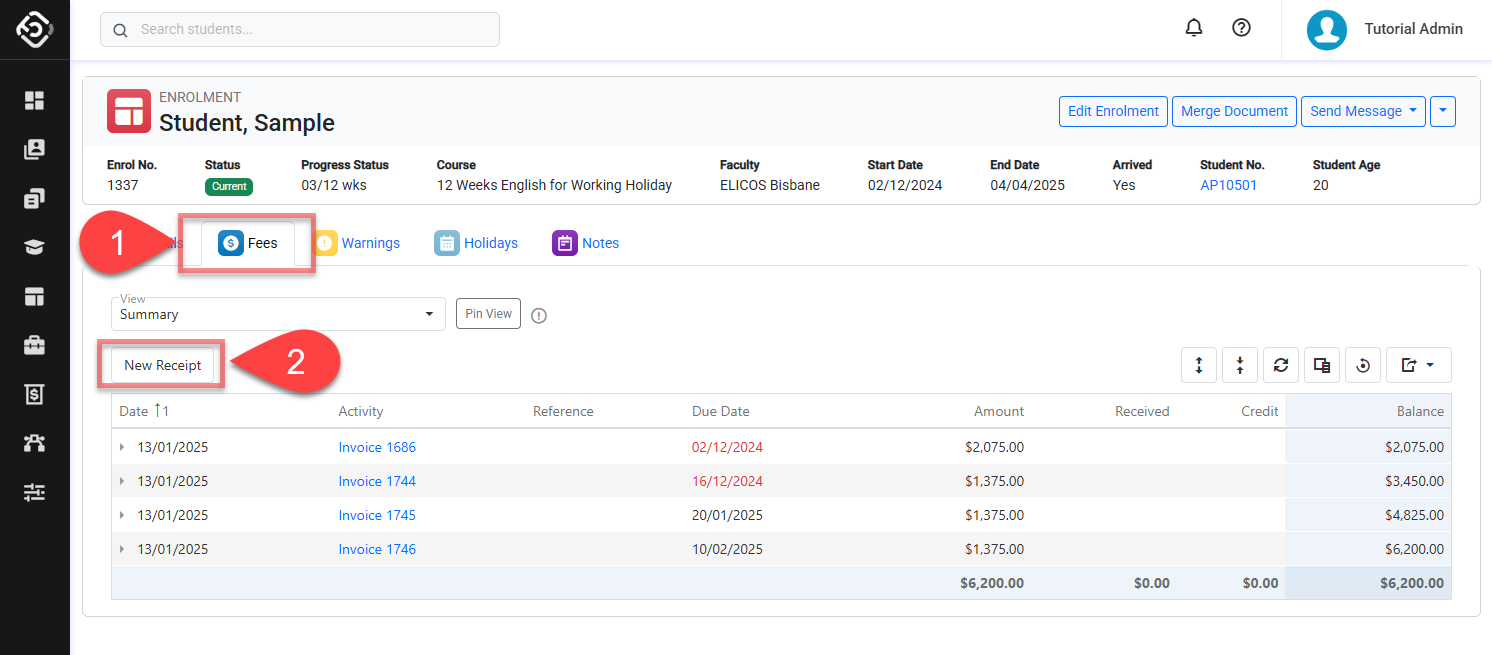
Navigate to the Fees tab on the enrolment that you want to create the Receipt for.
-
Click on the New Receipt button above the Data Grid (this button will not appear if the total balance for this enrolment fee is zero). The receipt wizard will display.
The receipt wizard has 2 steps: Receipt Details and Receipt Allocation
Step 1 - Receipt Details
On this step, you will enter the details for the receipt:
-
Receipt Date: The date this receipt is recorded in the system.
-
Reference No.: A custom reference number.
-
Reference Date: A custom reference date.
-
Bank Account: The bank account where money was received.
-
Payer: The customer who made the payment. If no payer is selected, the system will automatically set the student as the payer for this receipt.
-
Receipt Items: A list of the payments that are part of the receipt. To add a payment, click the + button to add a new row to the grid.
Enter the details of the payment and then press Enter. Add more payments if required. -
Click the Next button to proceed to the second step.
Step 2 - Receipt Amount Allocation
In this step, you will allocate the payment to the relevant invoices and their specific items as needed.
This screen has the following sections:
Receipt Details
A summary of the receipt details previously entered, including:
-
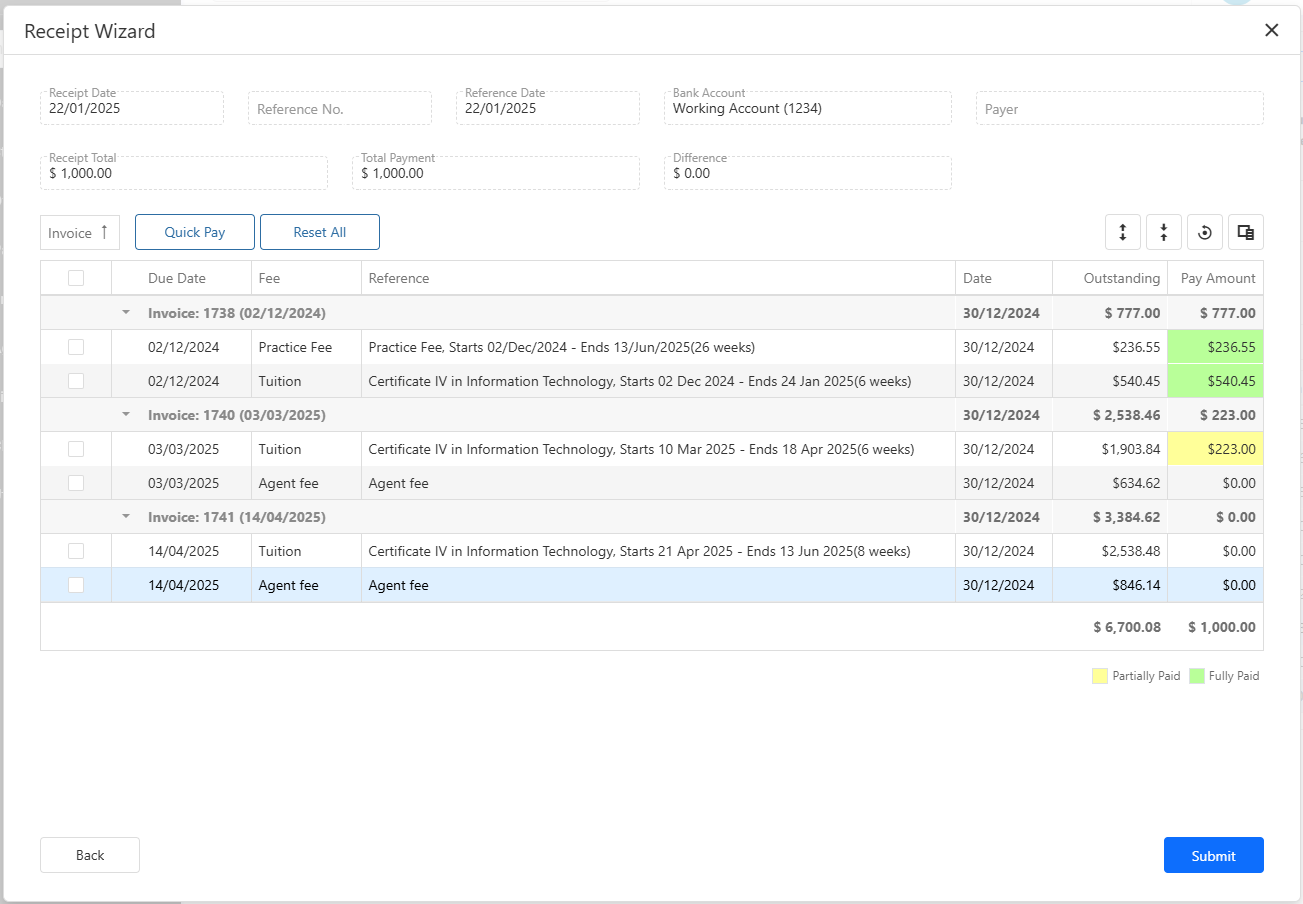
Receipt Total: The total sum of payments included in the receipt, representing the maximum amount available for allocation.
-
Total Payment: The total amount currently allocated to the invoices.
-
Difference: The difference between the Receipt Total and the Total Payment. This different must be zero to be able to save the receipt. An exception is when there is an overpayment (view the section overpayments below).
Receipt Allocation Grid
If you are unfamiliar with Data Grids, you can learn more in this article: Data Grids
The grid shows enrolment invoices and their items eligible for receipt allocation.
Various options and methods are available to allocate payments effectively.
The grid includes the following features:
-
Group by Column: This feature allows you to group invoice items by different fields. These groups are particularly useful for performing bulk actions like Quick Pay. By default, items are grouped by invoice, but you can customise the grouping by selecting another field. Learn more about grid grouping here.
-
Quick Actions: A set of actions that you can perform on invoices for applying pay amount.
-
Quick Pay: Automatically allocates the receipt total amount to the displayed items in order from top to bottom, up to the Outstanding Amount. Adjusting the order of the items allows you to customise how Quick Pay allocates the amounts.
-
Reset All: Resets the allocated Pay Amounts.
-
-
Pay Selected: Select the items to pay using the checkboxes, then click Pay Selected. This will allocate the full Outstanding Amount to the selected items.
-
Reset Selected: To clear the payment allocated to selected items, select the items and click Reset Selected.
-
Double-Click on Group or Row: Double-click an item to pay it in full. To pay all items in a group in full, double-click the group row.
-
Enter Pay Amount Manually: To manually enter the payment amount, click on the Pay Amount cell for the item of interest and enter the desired value.
-
Full or Partial Payment Conventions: When an item is paid in full (Pay Amount = Outstanding Amount), the cell on the Payment Amount gets a green background. For partial payment, it gets a yellow background.
-
Review the payments. Once everything is correct, click on the Submit button to create the receipt.
Overpayments
Overpayments, though uncommon, occur when the amount received exceeds the amount due.
An overpayment can only be recorded for an enrolment if no outstanding amounts remain on any of the enrolment invoices to which the additional amount can be allocated.
To record an overpayment, create a receipt as outlined in the section above: Create Receipt. After allocating payments to fully cover all invoice items, any unallocated amount will automatically be recorded as an overpayment.
Edit a Receipt
Only a few details can be modified on a receipt. For more extensive updates, the receipt must be deleted and recreated.
There are 2 ways to edit a receipt:
Edit Receipt from the Enrolment Fees page
-
Go to the Fees tab of the Enrolment of interest.
-
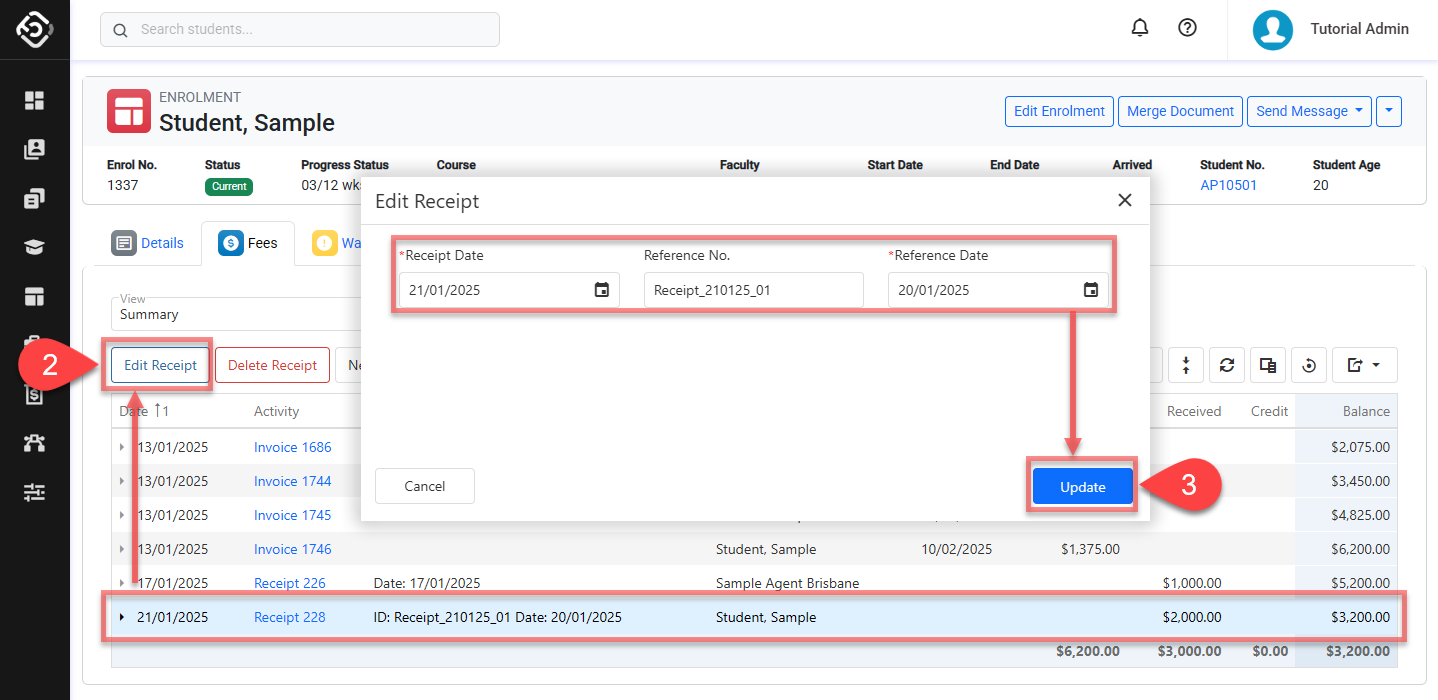
Click on the Receipt that you’d like to edit. Then click on the Edit Receipt button in the grid action panel.
-
Modify the details as required and click on Update to save the changes.
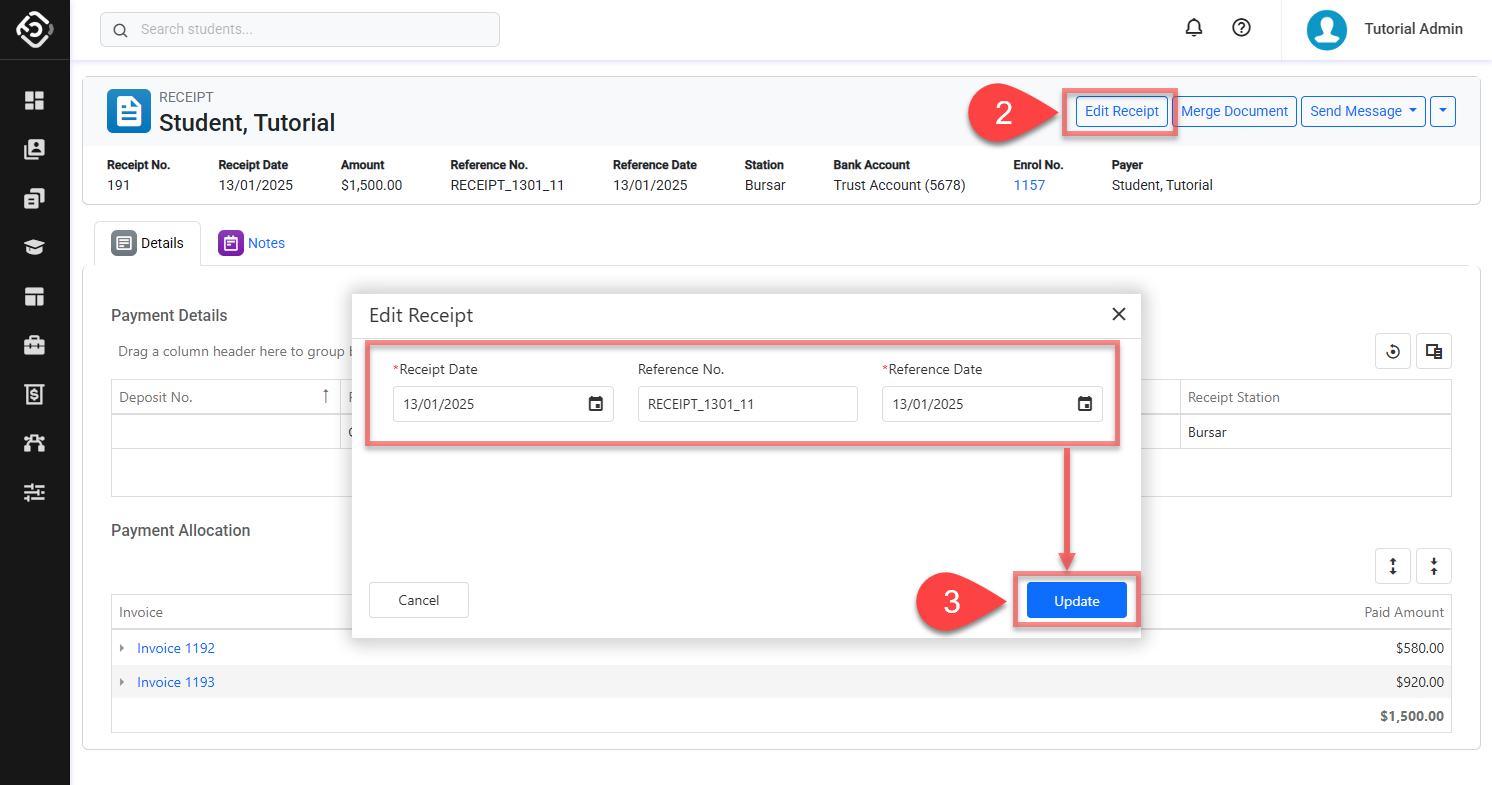
Edit Receipt from the Receipt Details Page
-
Go to the details page of the receipt of interest.
-
Click on the Edit Receipt button at the top right of the screen.
-
Modify the details as required and click on Update to save the changes.
Delete a Receipt
A Receipt cannot be deleted if any part of the amount recorded under the Receipt has been:
There are 2 ways to delete a receipt:
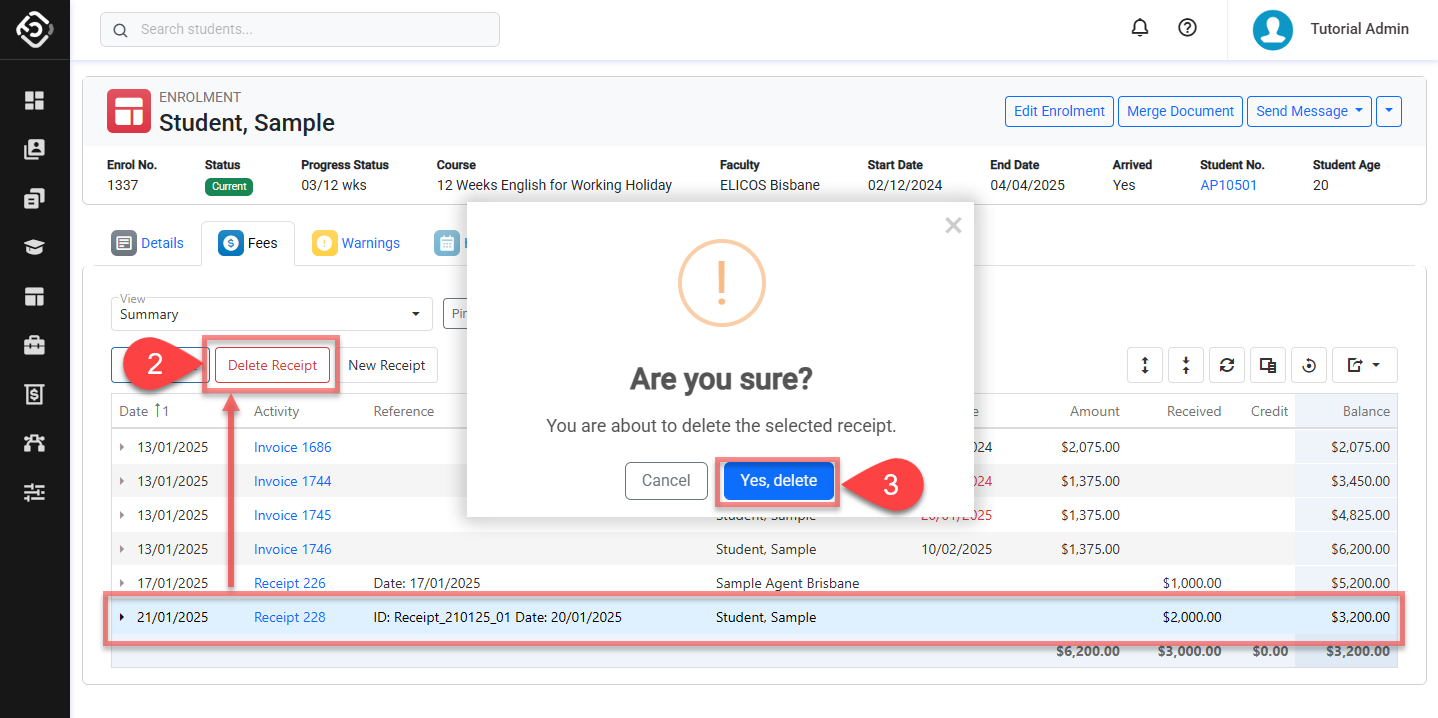
Delete Receipt from the Enrolment Fees Page
-
Go to the Fees tab of the Enrolment of interest.
-
Click on the Receipt that you’d like to delete. Then click on Delete Receipt button in the grid action panel.
-
Confirm to delete.
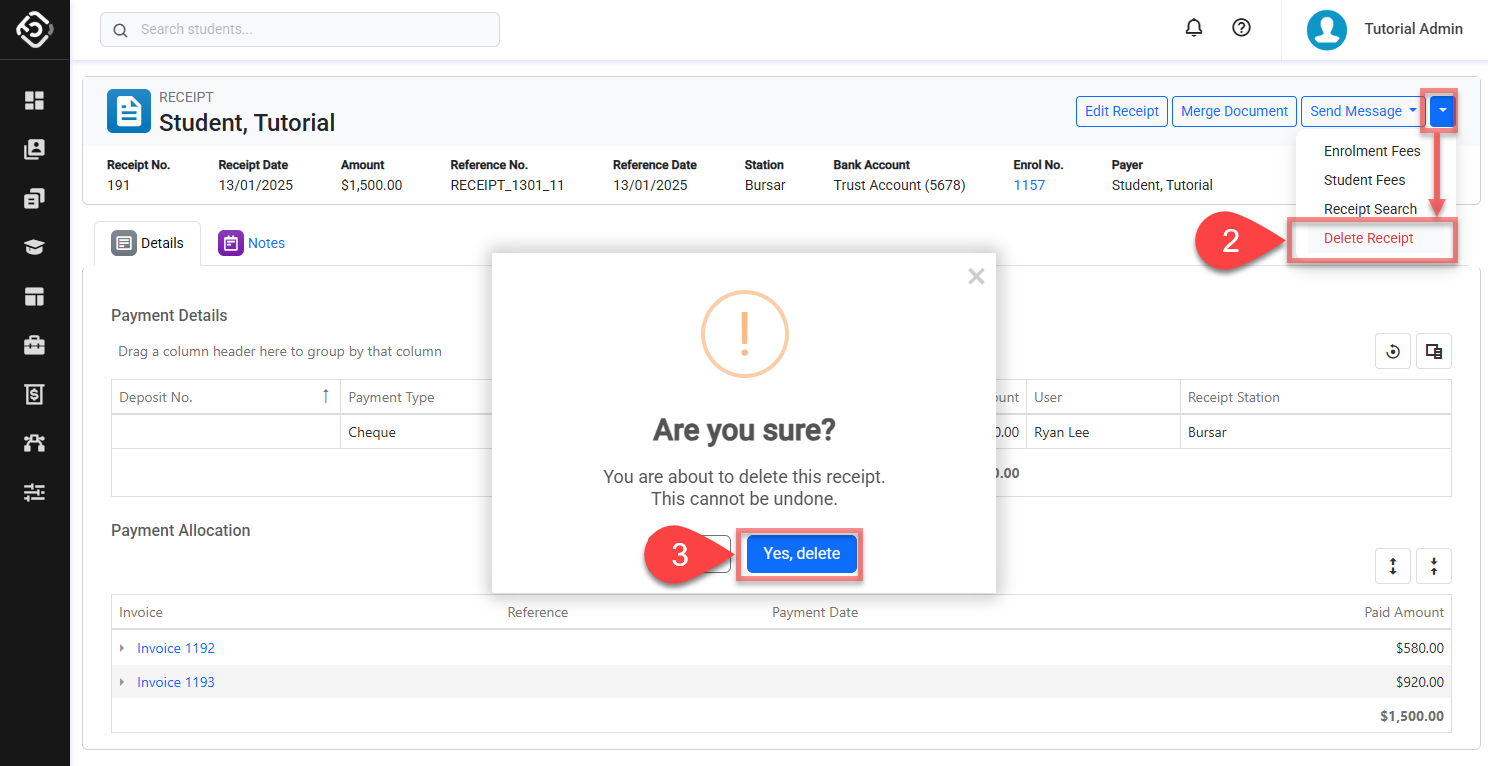
Delete Receipt from the Receipt Details Page
-
Go to the details page of the receipt that you want to delete.
-
Click on the Dropdown button located at the top right and click on Delete.
-
Confirm to delete.