
Overview
A Grid in a Table is a method to display a set of related records in a table (tabular) format in a template. this is the simplest, quickest, and most practical method to display structured data. It is particularly useful for presenting data sets such as Offer Items, Instalment Plans, etc, in a structured way.
.png?cb=eef74949bdf10e6a8cf977f3ec65bf12)
How Grid in Tables Work
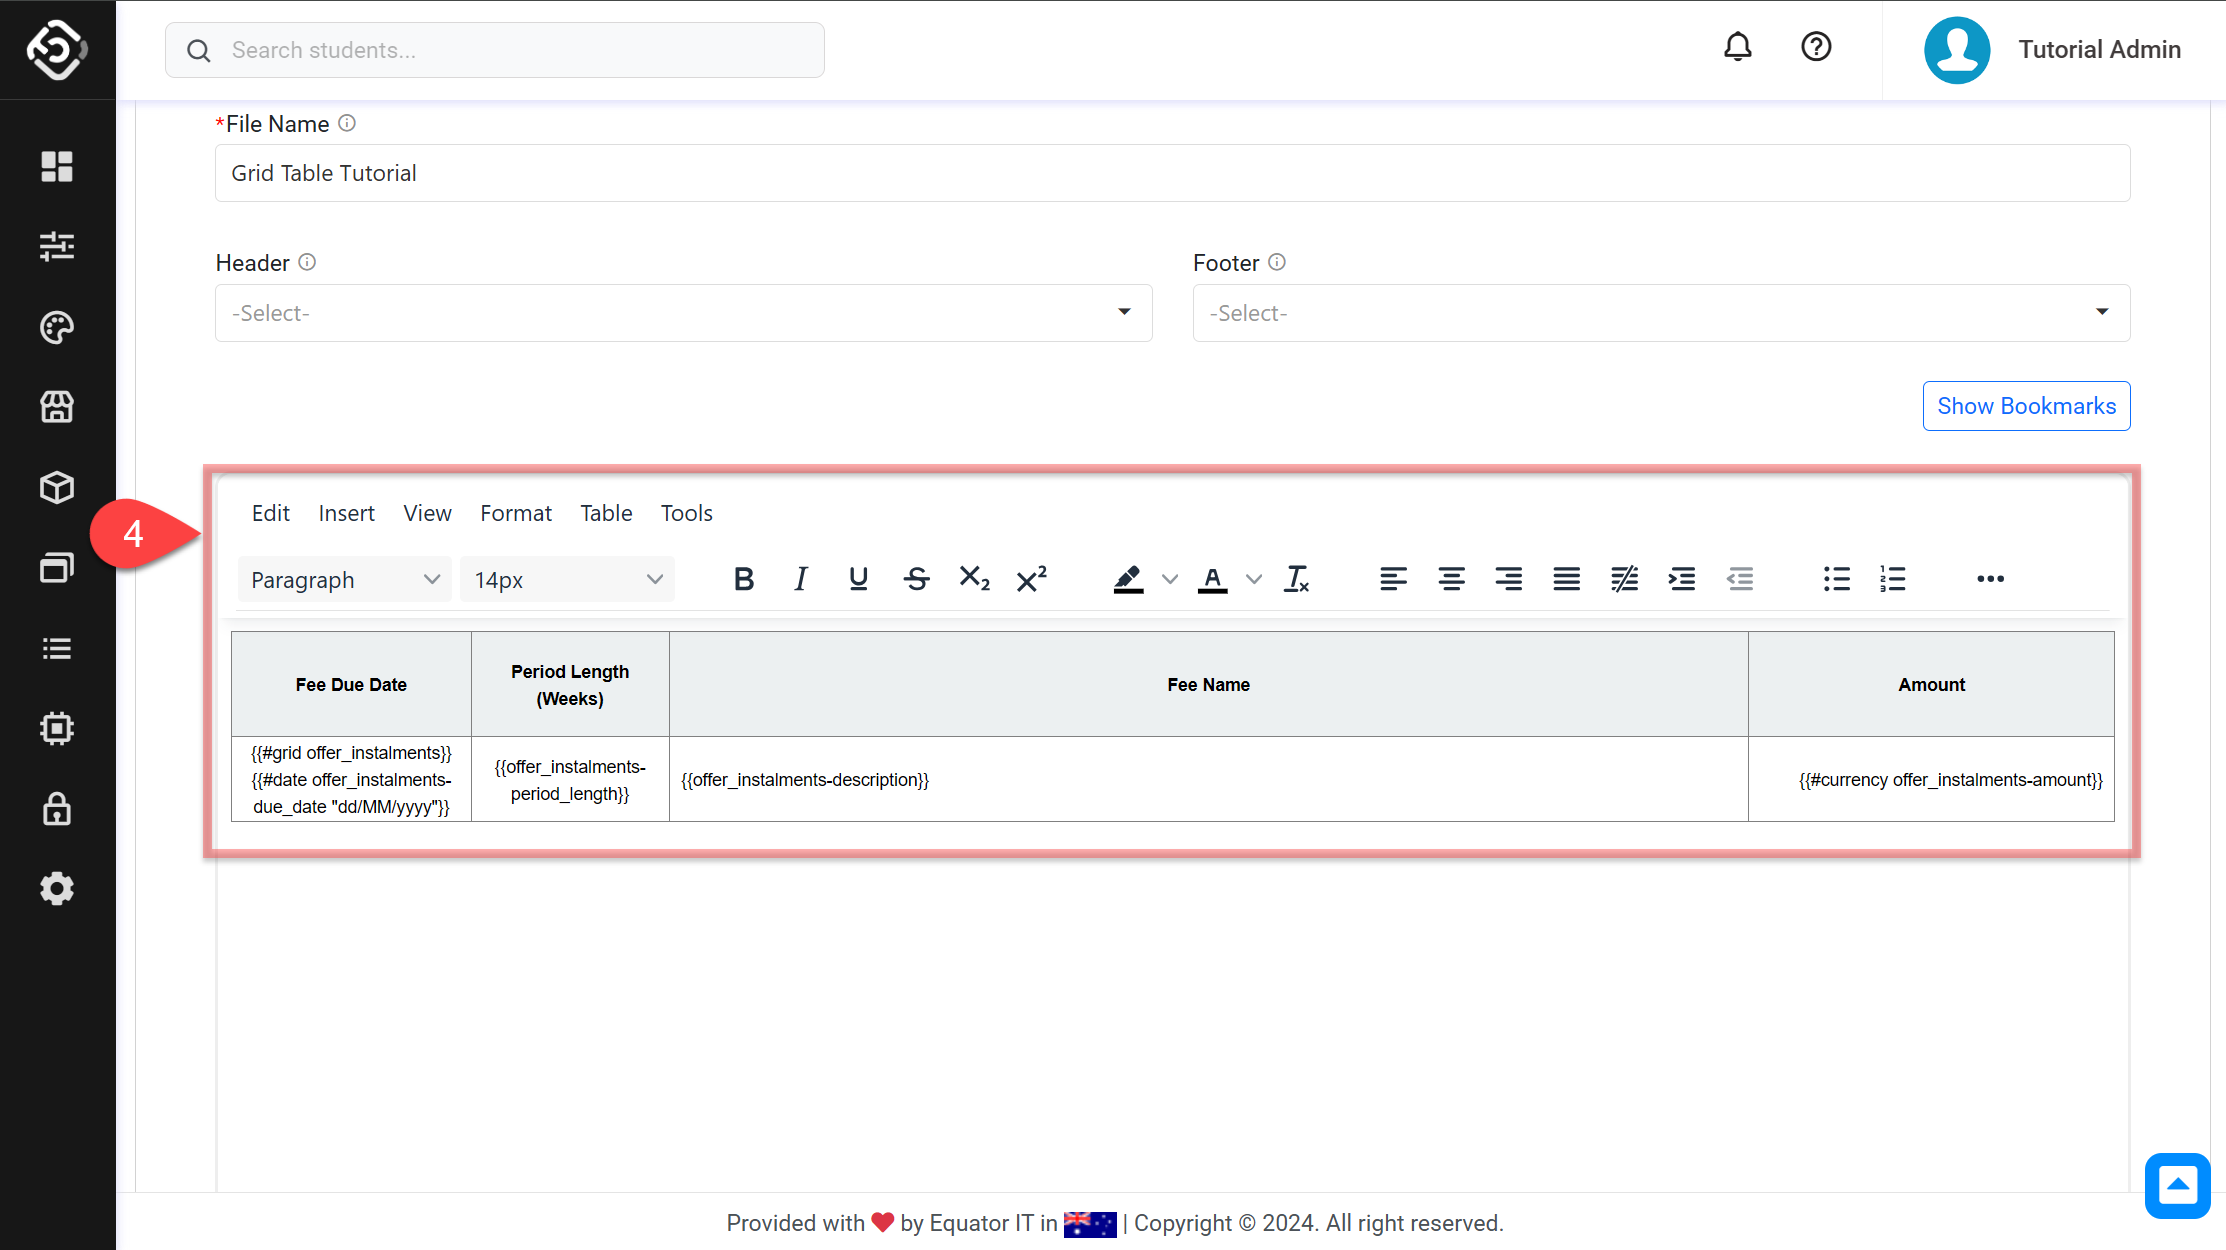
Grids in Tables uses a table to display data as rows. Each record in a data set, is added to the table as a new row.
A Grid in a Table consists of two rows:
-
Column Header Row: It’s used to define the headers for each column of the table. Each cell represents the header for each column and a column, represents a field on the record.
-
Repeating Row: This row defines the dynamic content of the table
-
The first cell on this row must start with the helper
{{#grid ObjectApiName}}to indicate it is a dynamic table. -
Each cell (including the first one, after the
#gridhelper) contains a grid field bookmark corresponding to its column. During the merge process, these grid field bookmarks are replaced with their respective data.
-

How to Insert Grid tables
-
First, you need to insert a table into your template. This table can have as many columns as you need, but it must have only two rows.
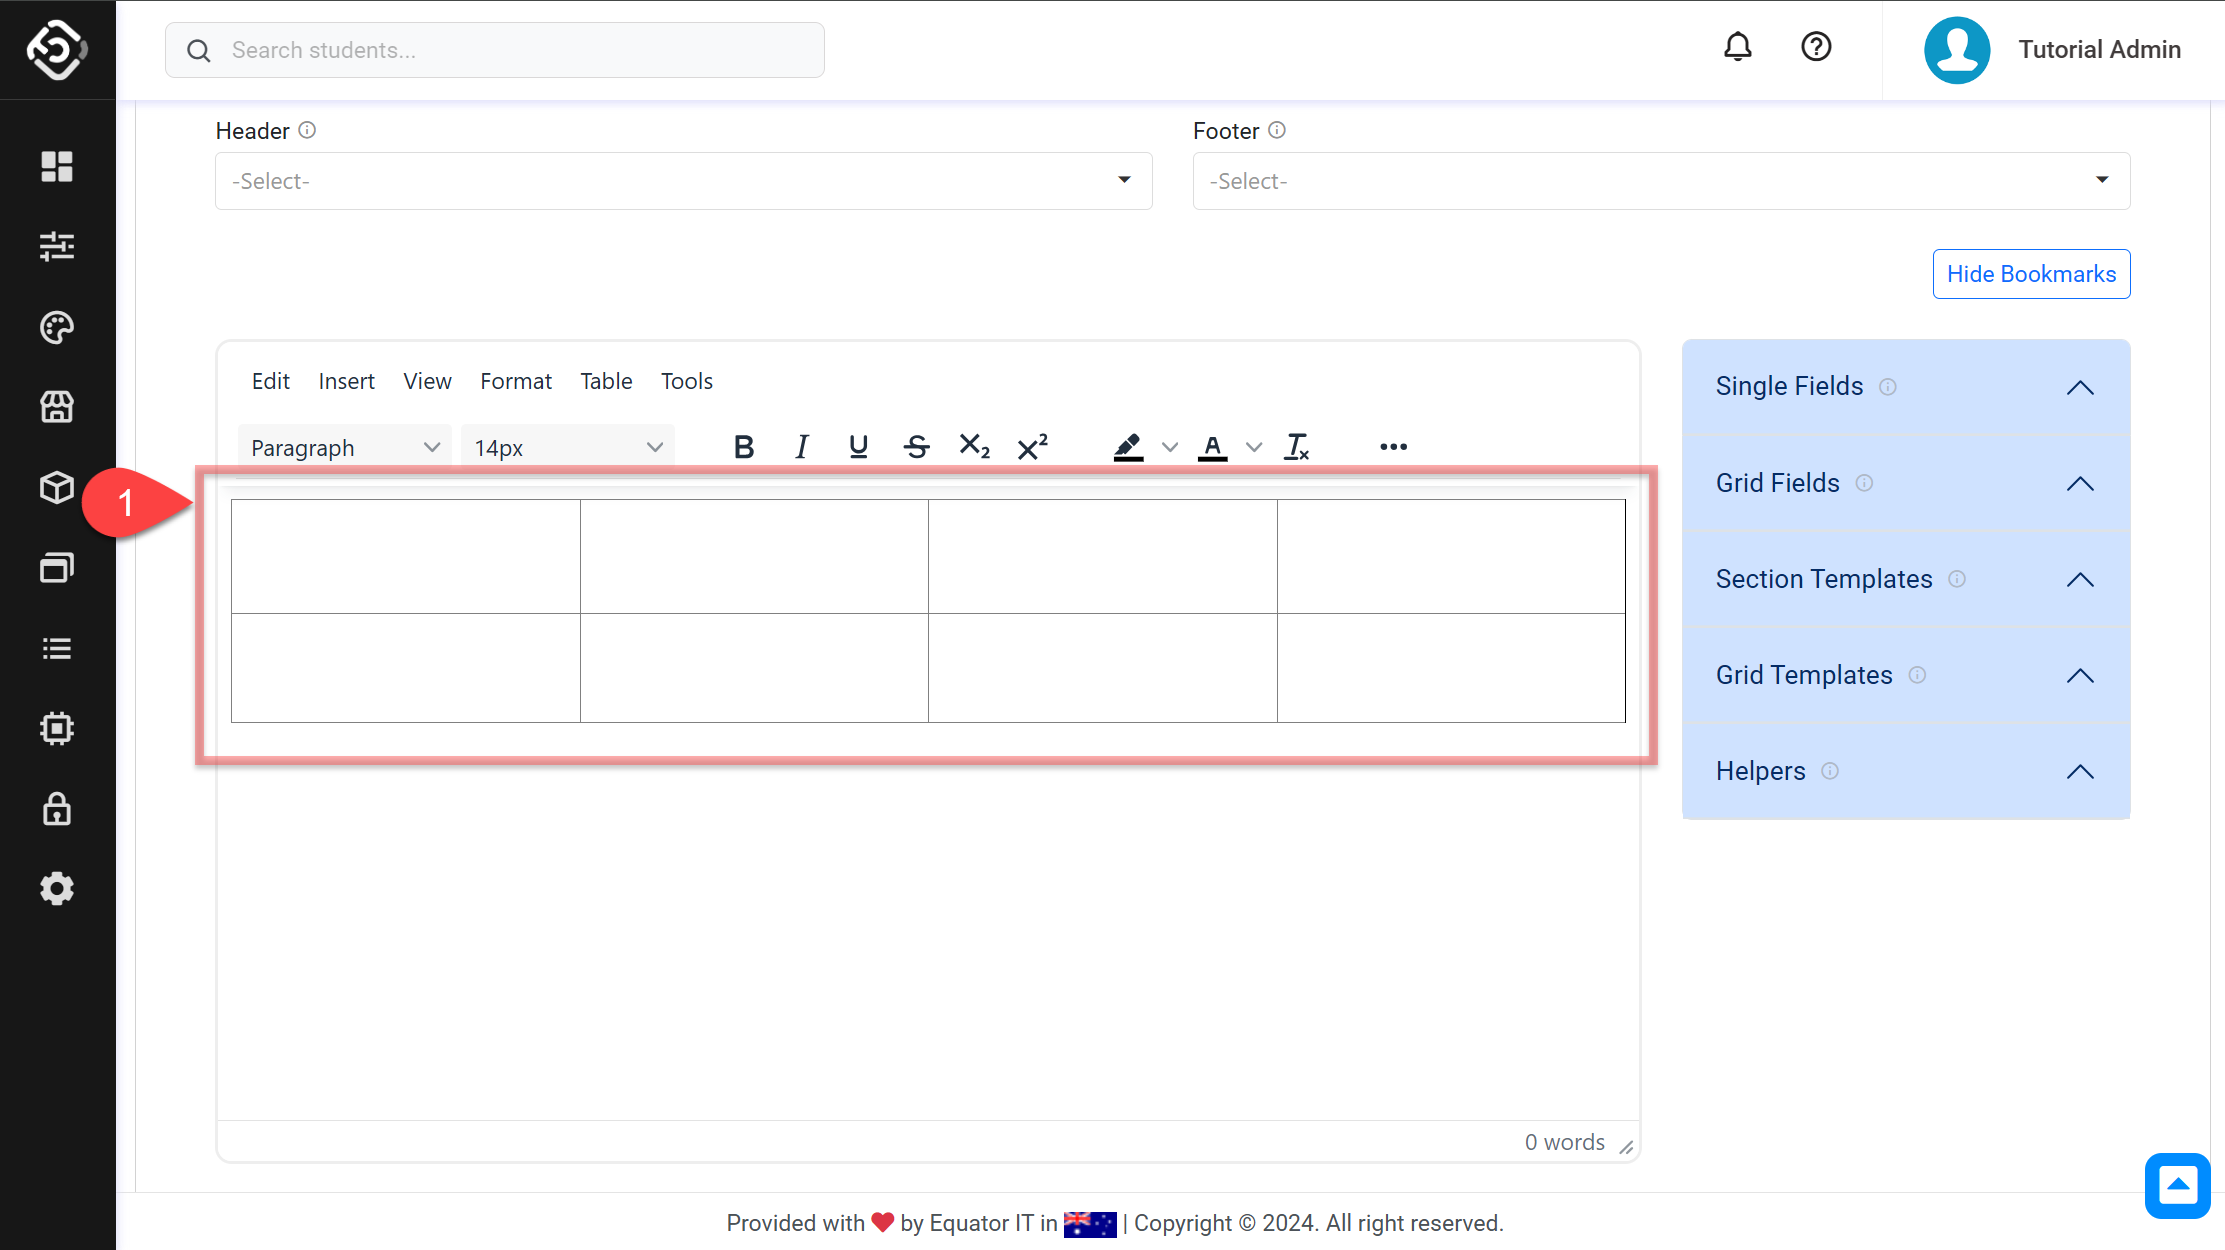
-
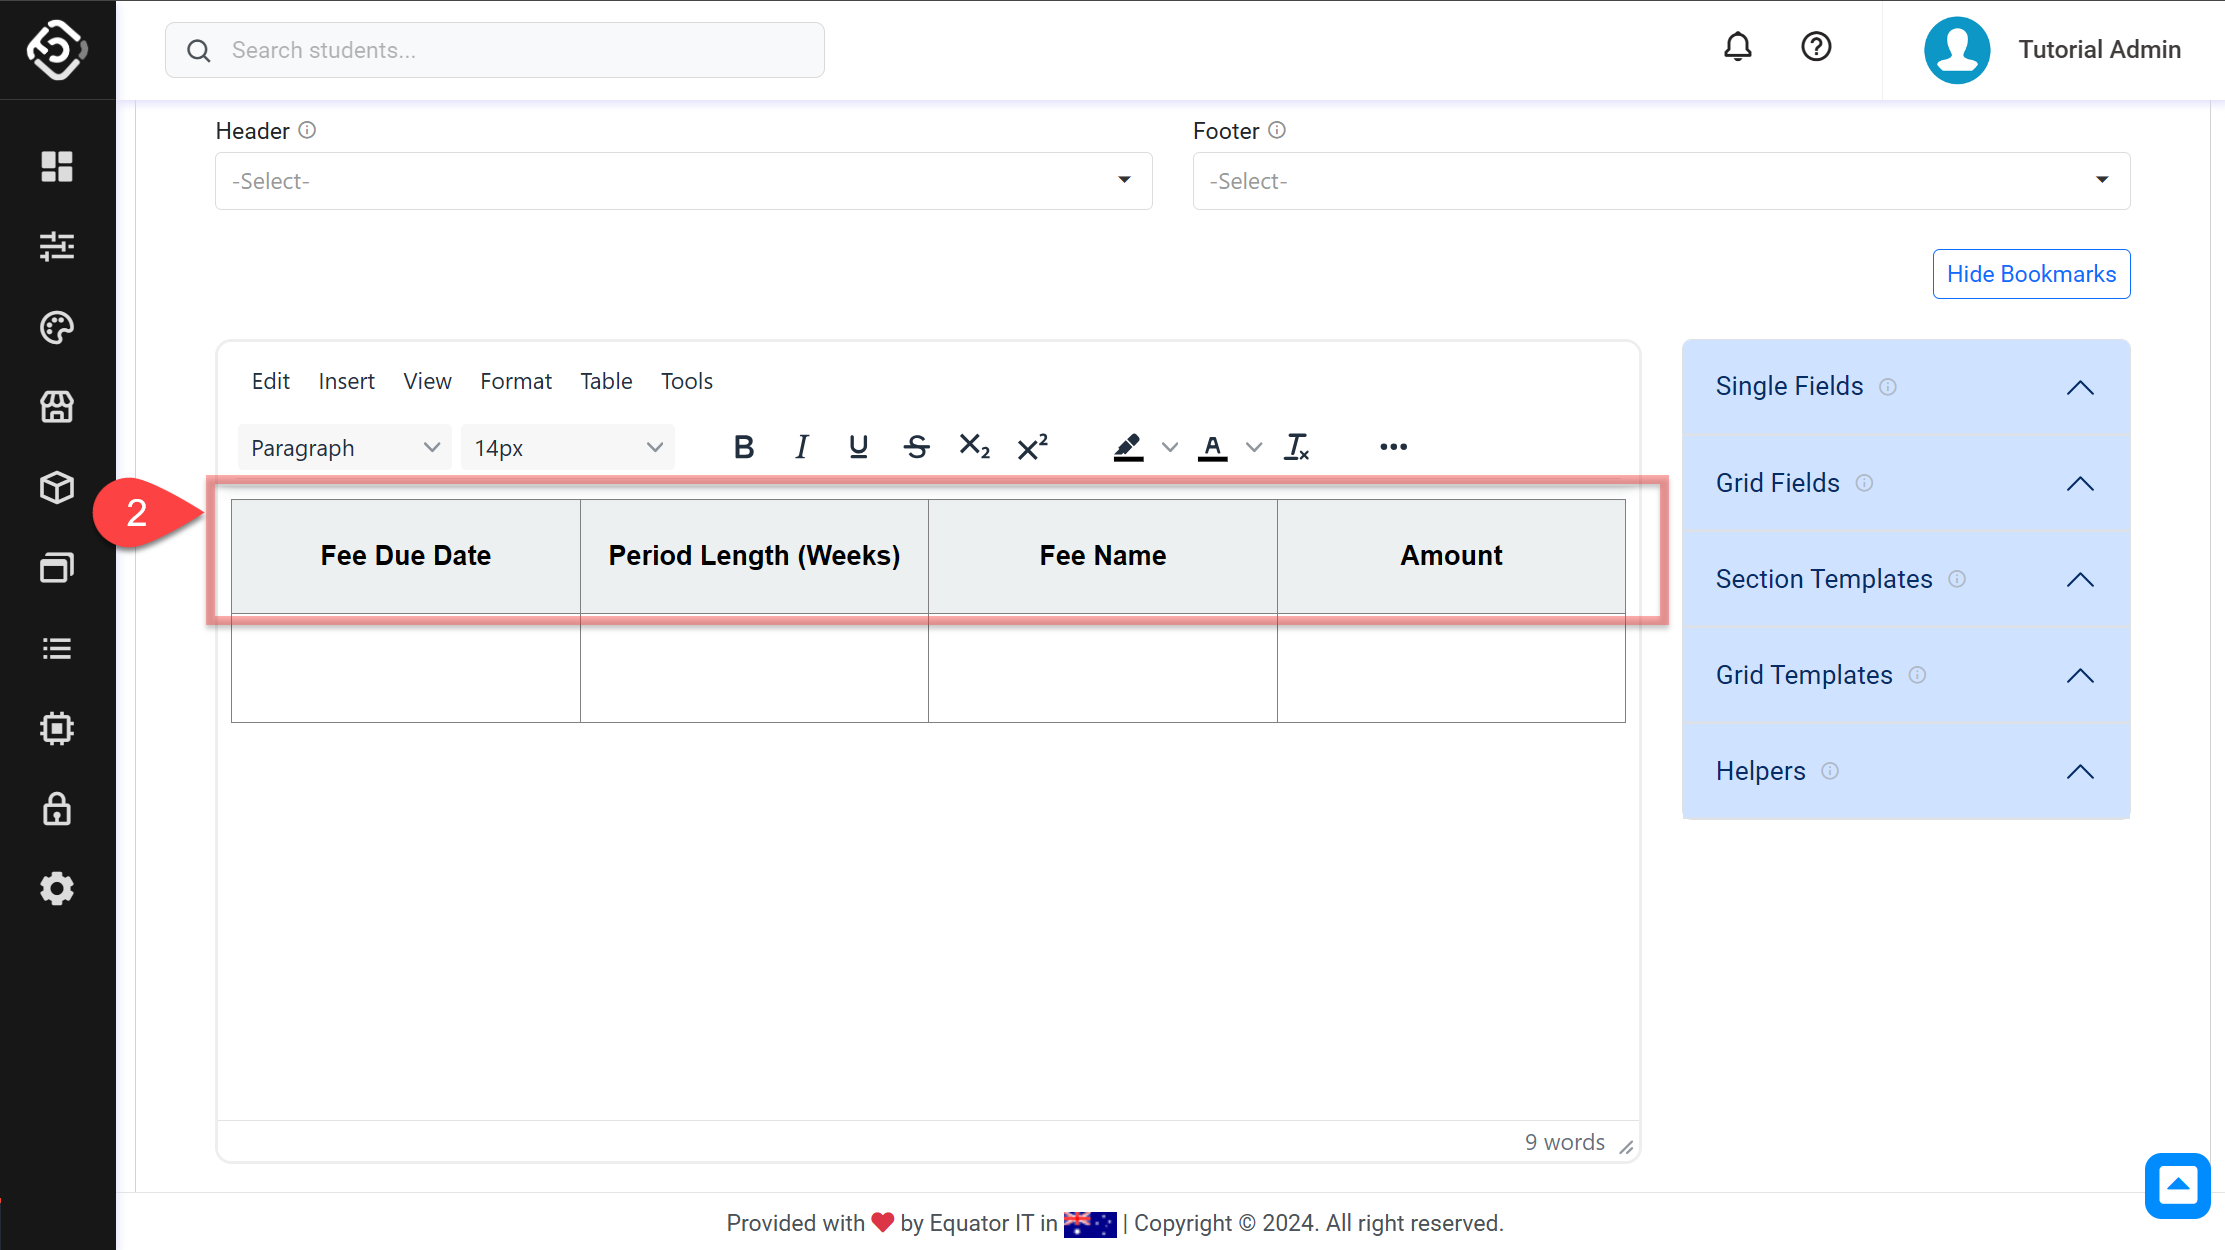
The first row of the table is reserved for the headers of each column. These headers should indicate what kind of data each column represents.
-
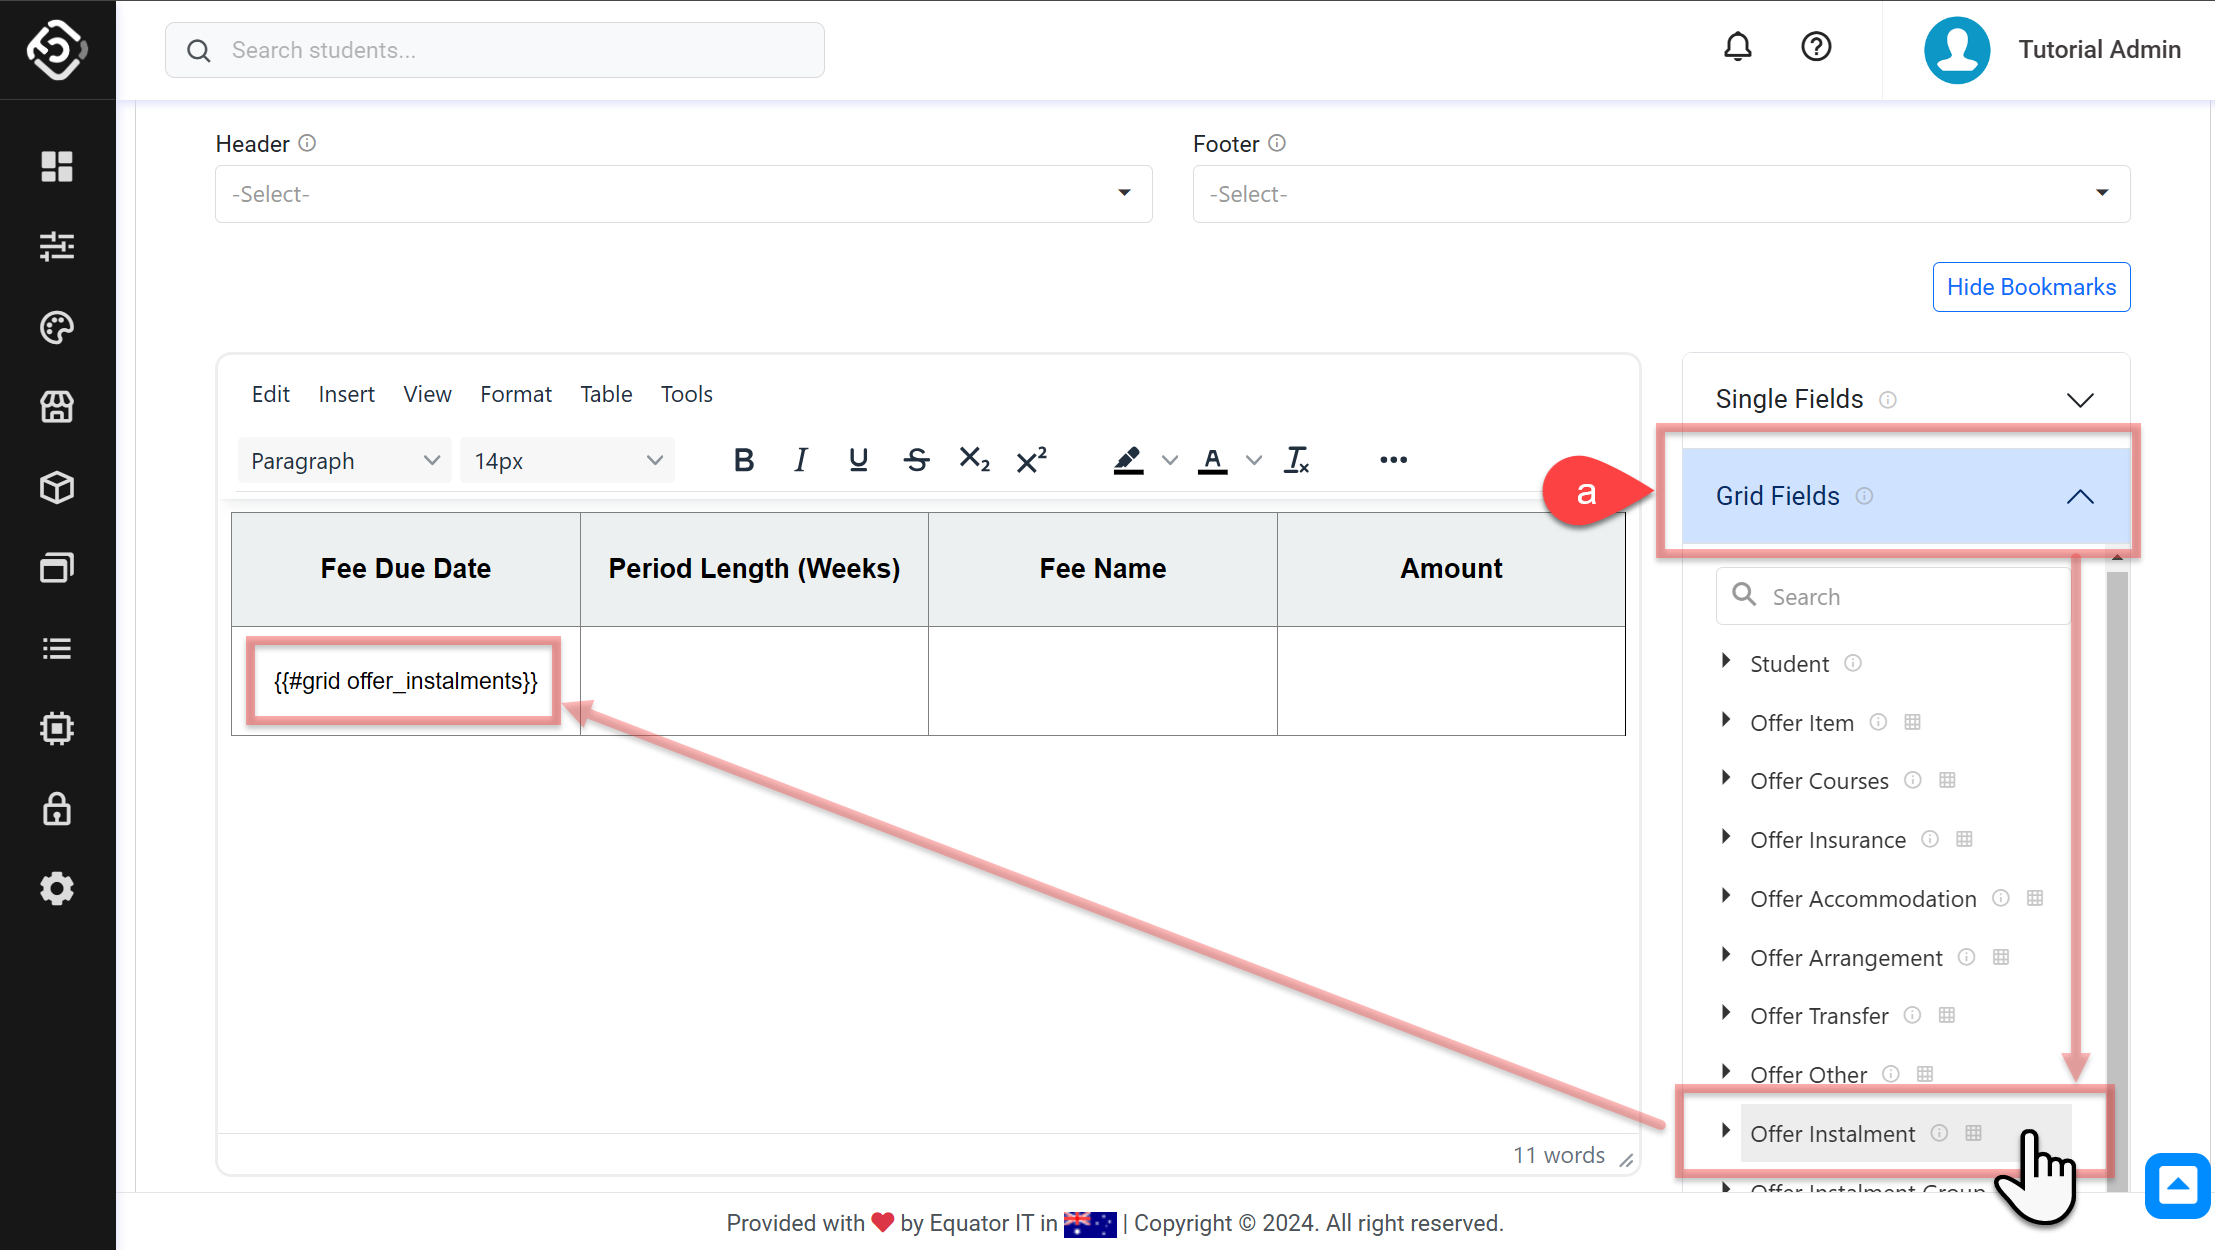
Declare the second row as a repeating row using the
{{#grid }}helper and place a grid field bookmark in each cell.-
The first cell in the second row declares the start of the grid using the syntax
{{#grid ObjectApiName}}. You can easily insert it by clicking on the desired grid item on the Grid Fields section on the bookmarks menu. Grid items are indicated by a table icon (
-
ObjectApiName: This is the API name of the object that you want to iterate though. The records that the table will have will belong to this object.
-
-
Each cell in this row specifies a field bookmark using the syntax
{{ObjectApiName-FieldApiName}}. Move the text cursor to each cell and find and click the appropriate Grid Field Bookmark for each column.-
ObjectApiName-FieldApiName: These are the grid field or fields that will be inserted into the template by iterating through each record on the Object defined in the
#gridhelper. They should be placed on each cell.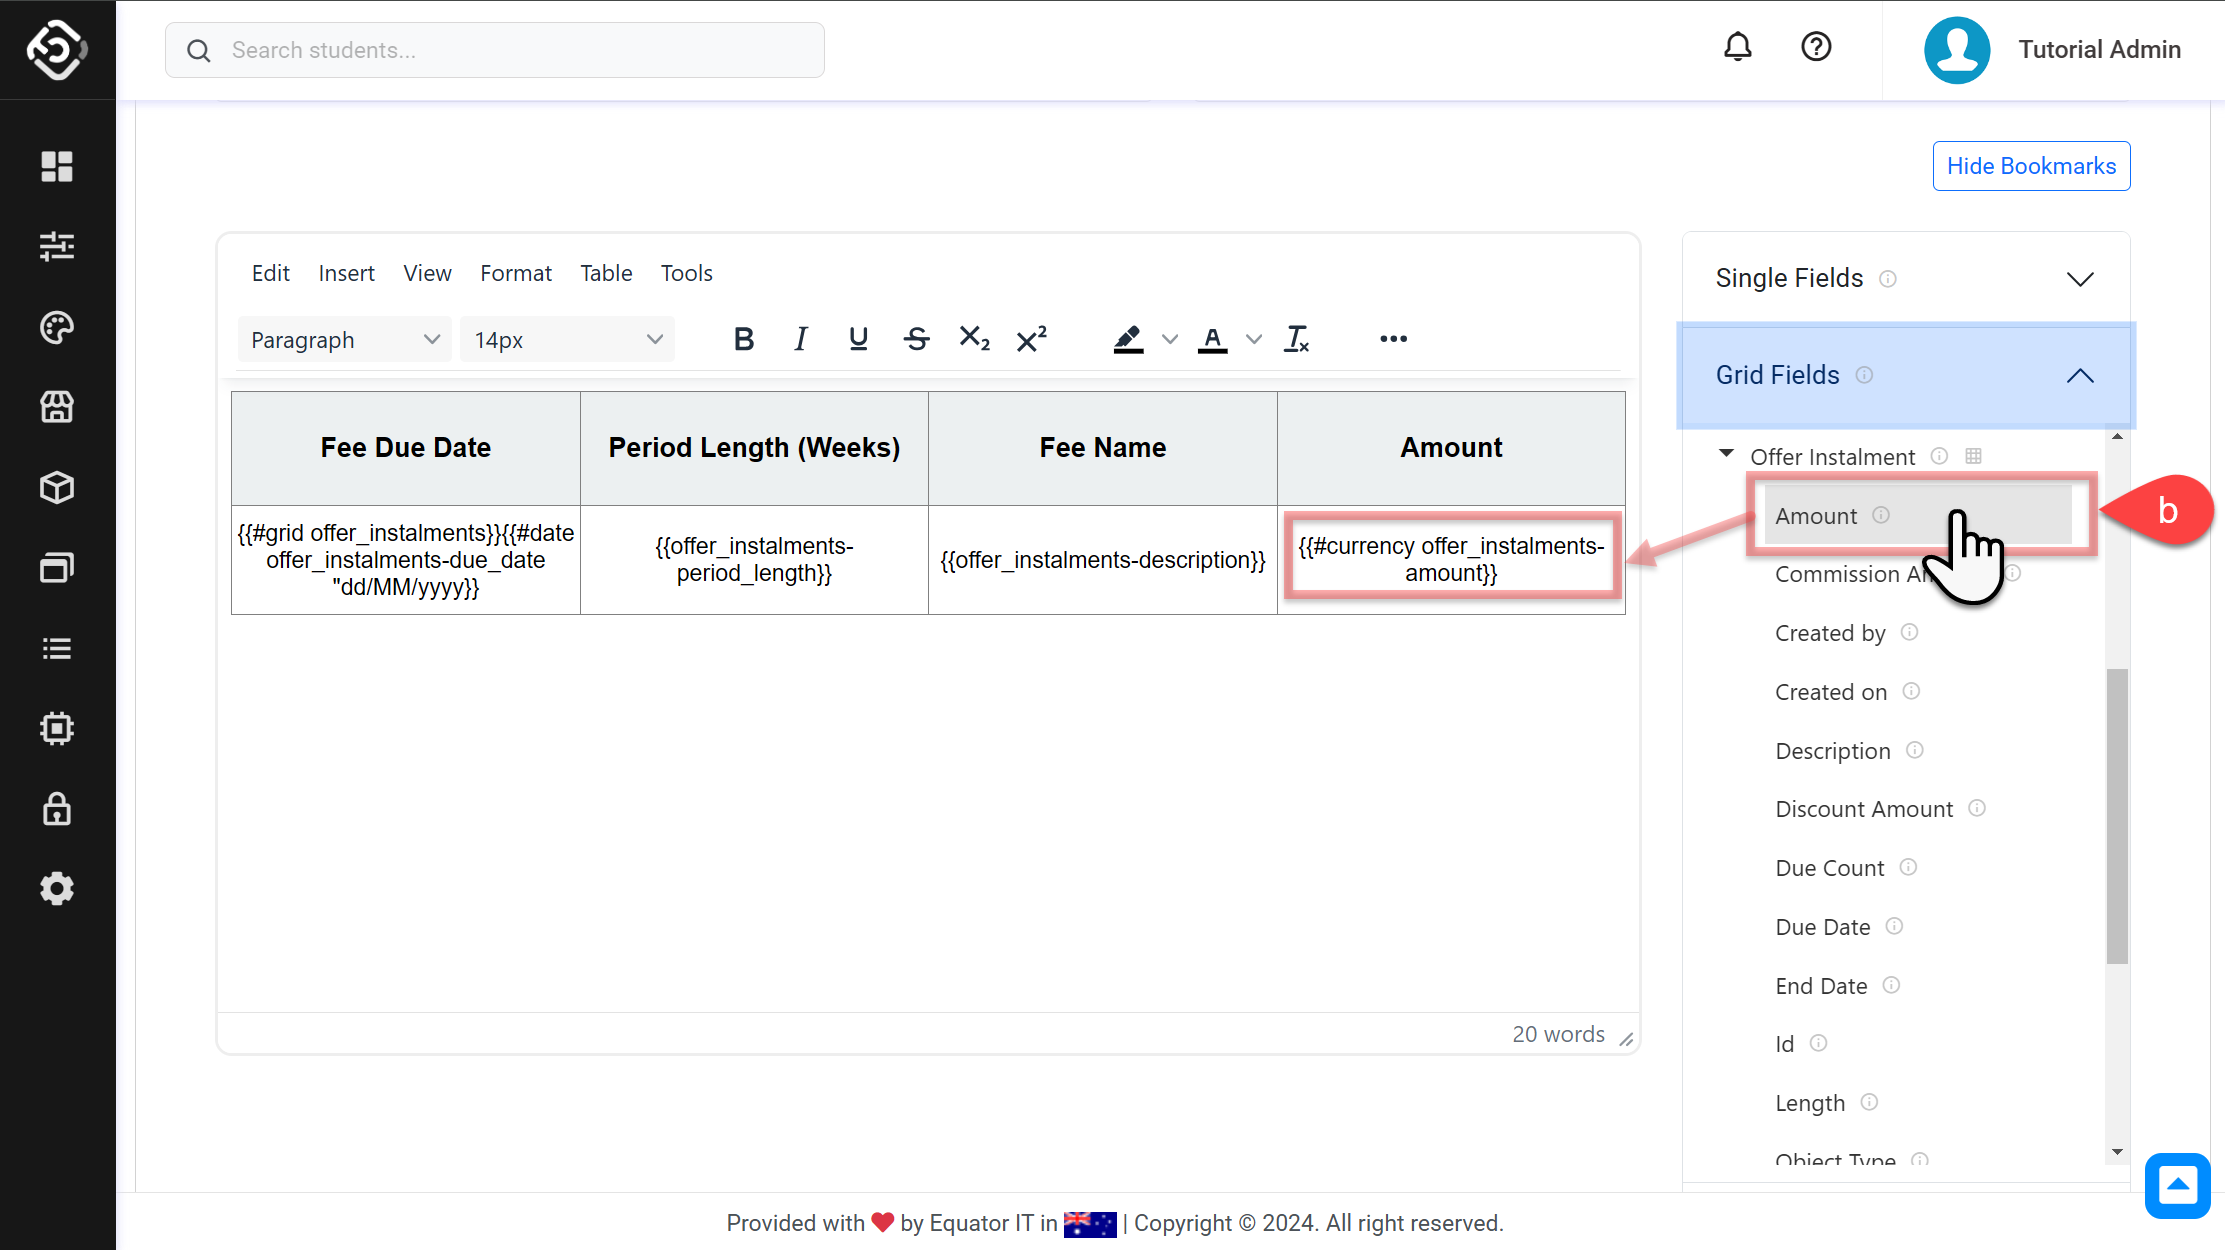
-
-
-
Customise the table by applying the desired styles, such as text alignment and cell width.
Sort the Grid Table
advanced
You can customise the sort order of a Grid Table by specifying a field to sort by, instead of using the grid’s default sort order. If your template uses a Grid Template with Grid Wrapper helper, refer to this article for instructions: Sort the Grid with Grid Wrapper
To sort in a Grid Table:
-
Locate the first cell where
{{#grid … }}is used. -
Inside the
{{#grid …}}tag, insertsortimmediately after theObjectApiName. -
After
sort, define the following parameters in order:-
SortingCriteriaFieldApiName: The API name of the field used for sorting. This field must belong to theObjectApiNamedefined in the grid. -
SortingDirection: Determines the sort order. Useascfor ascending ordescfor descending. -
CriteriaTypeoptional : Specifies how to interpret the values inSortingCriteriaFieldApiName.-
NUMBER: Interprets the values as numbers (e.g. 2, 1, 11, 10 will be sorted as 1, 2, 10, 11). -
Not specified: If left out, values will be treated as text (e.g. 2, 1, 11, 10 will be sorted as 1, 10, 11, 2).
-
-
-
For an example, see Example 3 in the Grid Table Examples section.
Grid Table Examples
Example 1 - Student Contact Confirmation
In the following example, we are creating a simple template with a table to list all the student contacts. As a student can have multiple contacts, using a Grid on a Table is the easiest option to achieve this.
Note on the second row, we have added the #grid helper with the ObjectApiName as:
{{#grid student_contacts}}
This part indicates, we are going to loop over all the records on the student_contacts object.
Then, we have added the following bookmarks on each column:
-
student_contacts-nameThis is the name for the Student Contact -
student_contacts-mobileThis is the mobile for Student Contact
As we are iterating over the student_contacts object, the table will have as many rows as contacts the student has.
Input
Hi, Student!
We’re sending this email to confirm your emergency contact.
|
Name |
Mobile |
|---|---|
|
{{#grid student_contacts}}
|
{{student_contacts-mobile}} |
Please let us know, if there’s anything incorrect.
Best Regards,
Output
Hi, Student!
We’re sending this email to confirm your emergency contact.
|
Name |
Mobile |
|
John Doe |
0412123456 |
|
Jane Doe |
0498987654 |
|
Ryan Doe |
0411222333 |
Please let us know, if there’s anything incorrect.
Best Regards,
Example 2 - Enrolment Warnings
The following example displays the all the warnings issued in an enrolment.
Note the definition of the #grid helper to define the object that we are going to iterate over:
{{#grid enrolment_warnings}}
Input
Dear {{students-first_name}} {{students-last_name}},
The below is the warnings that issued to your enrolment up to {{#now "dd MMMM yyyy"}}.
|
Category |
Entry Date |
Who |
Current Attendance |
Overall Attendance |
|
{{#grid enrolment_warnings}}{{enrolment_warnings-warning_category}} |
{{#date enrolment_warnings-entry_date "dd/MM/yyyy"}} |
{{enrolment_warnings-created_by}} |
{{enrolment_warnings-current_attendance}}% |
{{enrolment_warnings-overall_attendance}}% |
If you have any further questions or need clarification, feel free to reach out.
Best Regards,
Output
Dear Tutorial Student,
The below is the warnings that issued to your enrolment up to 29 May 2024.
|
Category |
Entry Date |
Who |
Current Attendance |
Overall Attendance |
|
First Warning Letter - CP/Attendance |
12/05/2024 |
Ryan Lee |
96% |
98% |
|
Second Warning Letter - CP/Attendance |
23/05/2024 |
Stewart Sutton |
92% |
97% |
|
Intention to Report CP/Attendance |
28/05/2024 |
Tutorial Teacher |
83% |
94% |
If you have any further questions or need clarification, feel free to reach out.
Best Regards,
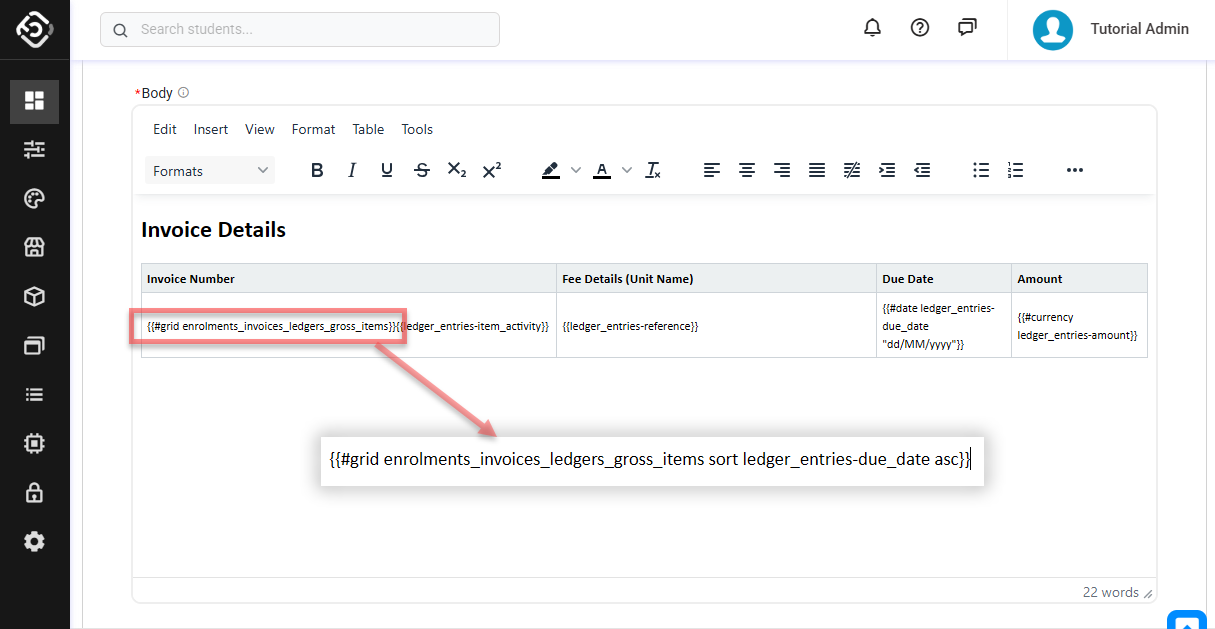
Example 3 - Invoice Details Sorted by Due Dates
The following example displays the all the invoices with invoice items sorted by Due Dates instead of the system default - Invoice Number.
{{#grid enrolments_invoices_ledgers_gross_items sort ledger_entries-due_date asc}}
|
Invoice Number |
Details |
Due Date |
Amount |
|
Invoice 1550 |
Tuition 1 |
12/05/2024 |
$1,200 |
|
Invoice 1551 |
Tuition 2 |
23/05/2024 |
$1,200 |
|
Invoice 1552 |
Tuition 3 |
28/05/2024 |
$1,200 |
|
Invoice 1553 |
Tuition 4 |
31/05/2024 |
$500 |
{{#grid enrolments_invoices_ledgers_gross_items sort ledger_entries-due_date desc}}
|
Invoice Number |
Details |
Due Date |
Amount |
|
Invoice 1553 |
Tuition 4 |
31/05/2024 |
$500 |
|
Invoice 1552 |
Tuition 3 |
28/05/2024 |
$1,200 |
|
Invoice 1551 |
Tuition 2 |
23/05/2024 |
$1,200 |
|
Invoice 1550 |
Tuition 1 |
12/05/2024 |
$1,200 |
While Grids in Tables can cover most use cases for displaying dynamic tables, Grid Templates offer more flexibility and customization but requires a more advanced knowledge of the system and basic knowledge on the HTML language. Learn more about Grid Templates.