
Overview
Grid templates are designed to create not only grid tables but also more complex structures that fulfill a broader range of design requirements. Additionally, users can embed the created grid template into other non-grid templates, simplifying updates significantly.
Creating grid templates require basic knowledge of HTML syntax. If you are not comfortable with HTML, it is recommended to use Grids in Tables instead.
How Grid Templates Work
Grid templates use a grid wrapper to define content that will be repeated, once per record, within a defined data set . During the merge process, entries are iterated over, and the specified content area are created repeatedly.
This means it can generate rows by iterating records in dataset, or even repeat a section as needed.
Grid templates require two parts:
-
Grid Wrapper: A grid wrapper is a container that holds the structure to be created repeatedly.
-
Content Area: Within a grid wrapper, a content area is defined to dictate how each section or component should appear within the section.
The following is the basic syntax for the grid template.
    {{#each ObjectApiName}}               <-- Opening Grid Wrapper

        {{ObjectApiName-FieldApiName}}    <-- Content Area

    {{/each}}                             <-- Closing Grid Wrapper
Let’s analyse each part:
-
{{#each}} ... {{/each}}: This is the grid wrapper which declares that the area between
{{#each}}and{{/each}}is for looping. Anything inserted in this area will be repeated from the first to the last record. For example, if an offer has 10 items, it will loop 10 times (once per record).
You can insert a grid wrapper easily using the Grid Wrapper Helper from the Helpers section on the Bookmarks menu. For detailed instructions, please refer to the following article : Template Helpers. -
ObjectApiName: This is the API name of the object that you want to iterate through.
-
ObjectApiName-FieldBookmark: This is the grid field or fields that will be inserted in the template by iterating through each record on the grid object defined in the loop. These field should be placed between {{#each}} and {{/each}}.
How to Create Grid Templates
-
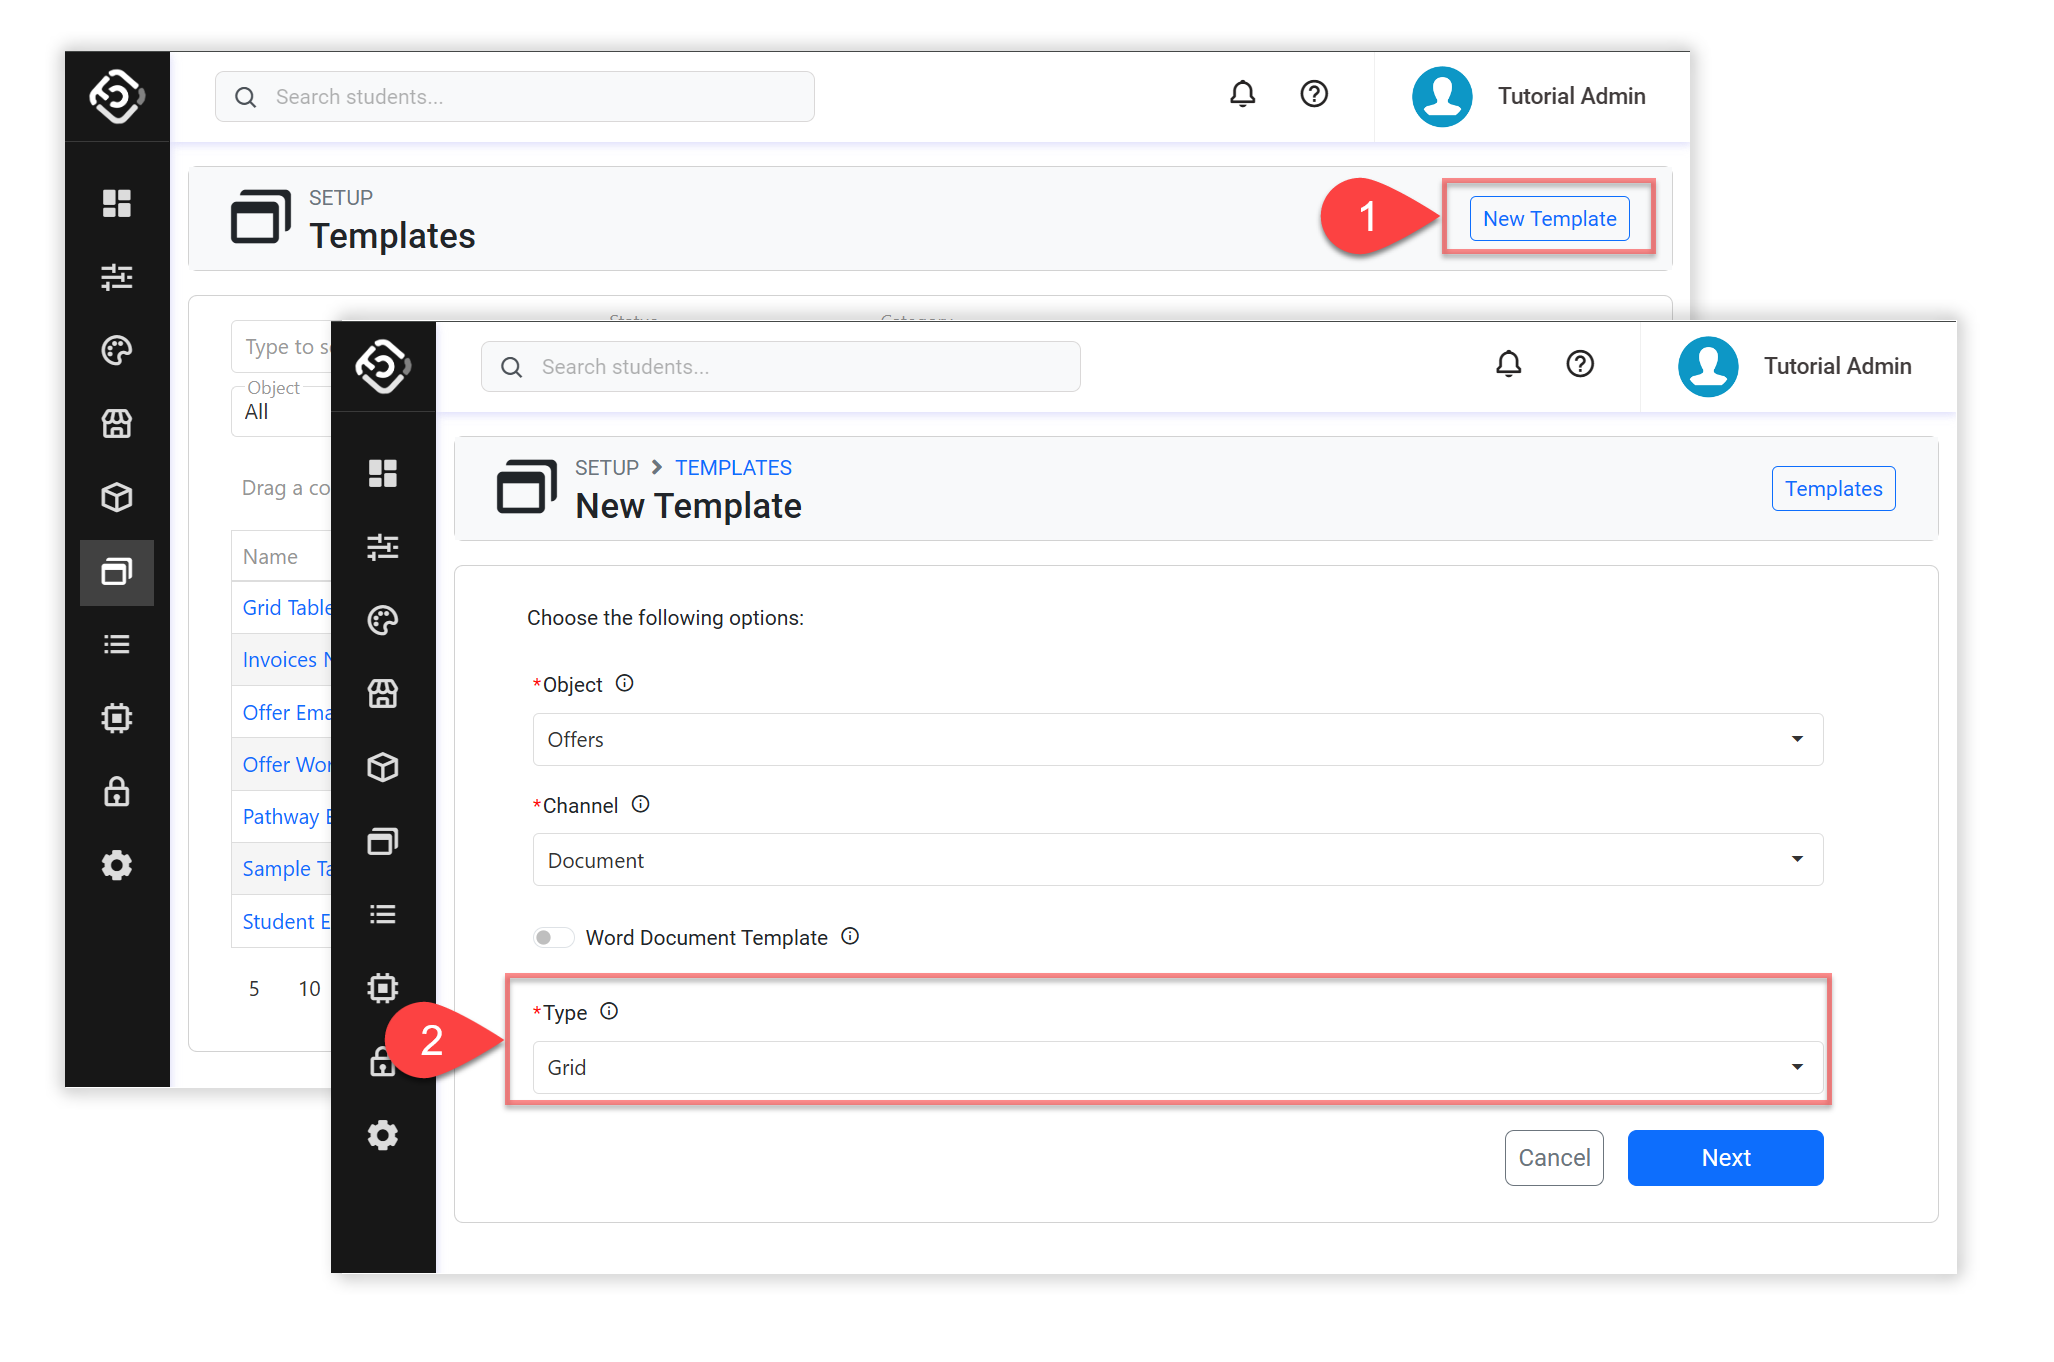
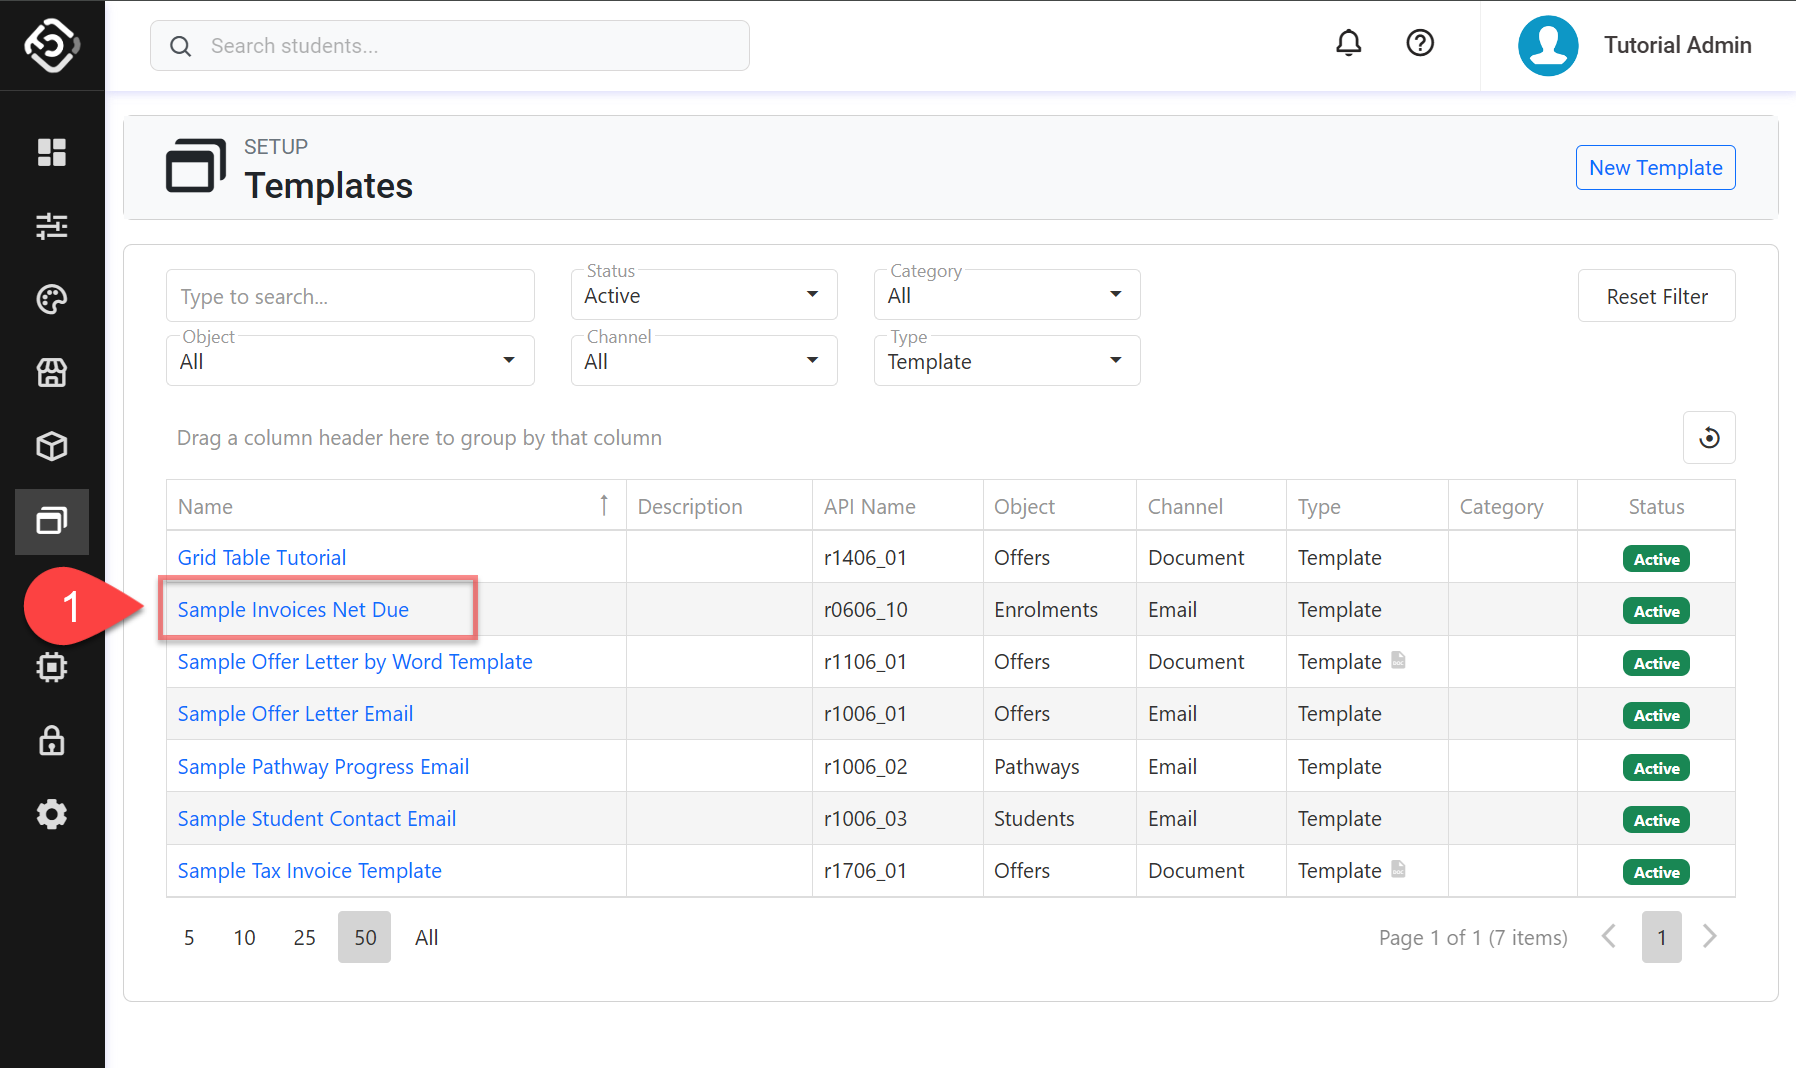
From the Utilities menu, Go to Utilities > Templates > Templates, and click on New Template at the top right.
-
Select desired Object and Channel, and make sure you select Grid in Type. Then, click on Next.
-
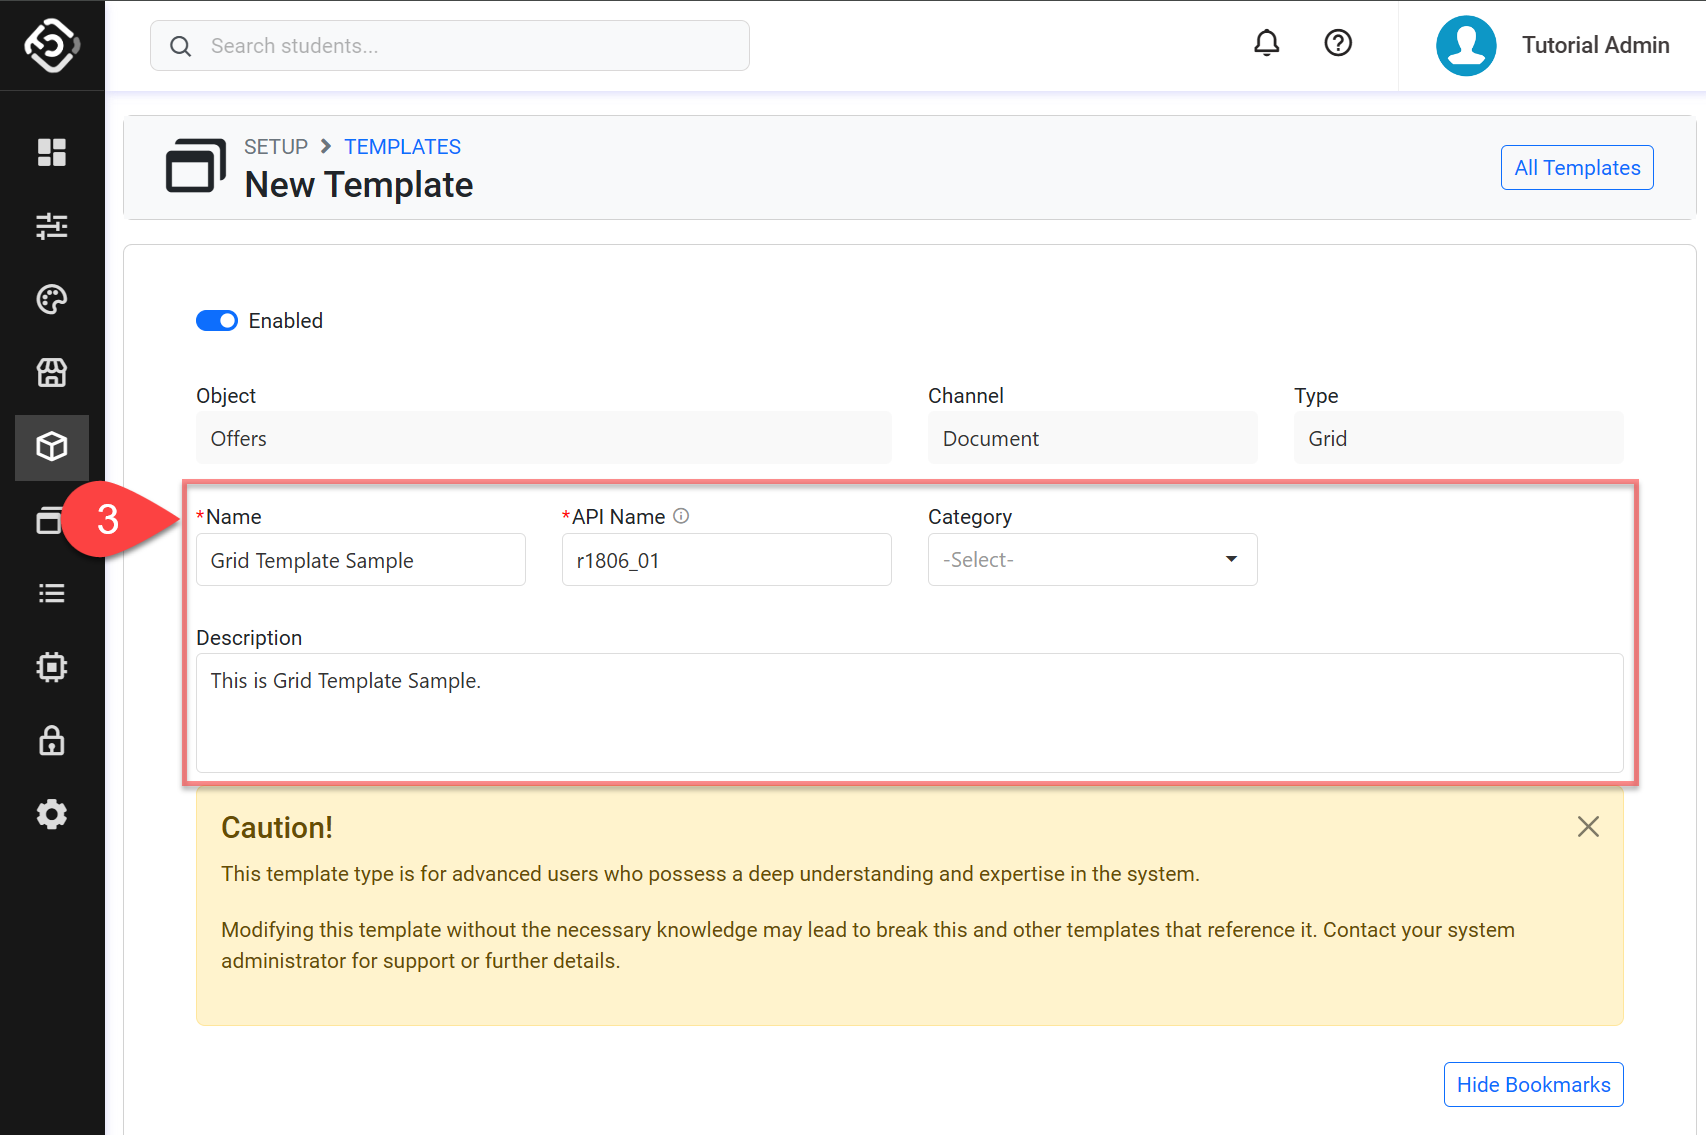
Enter the details of the grid template.
-
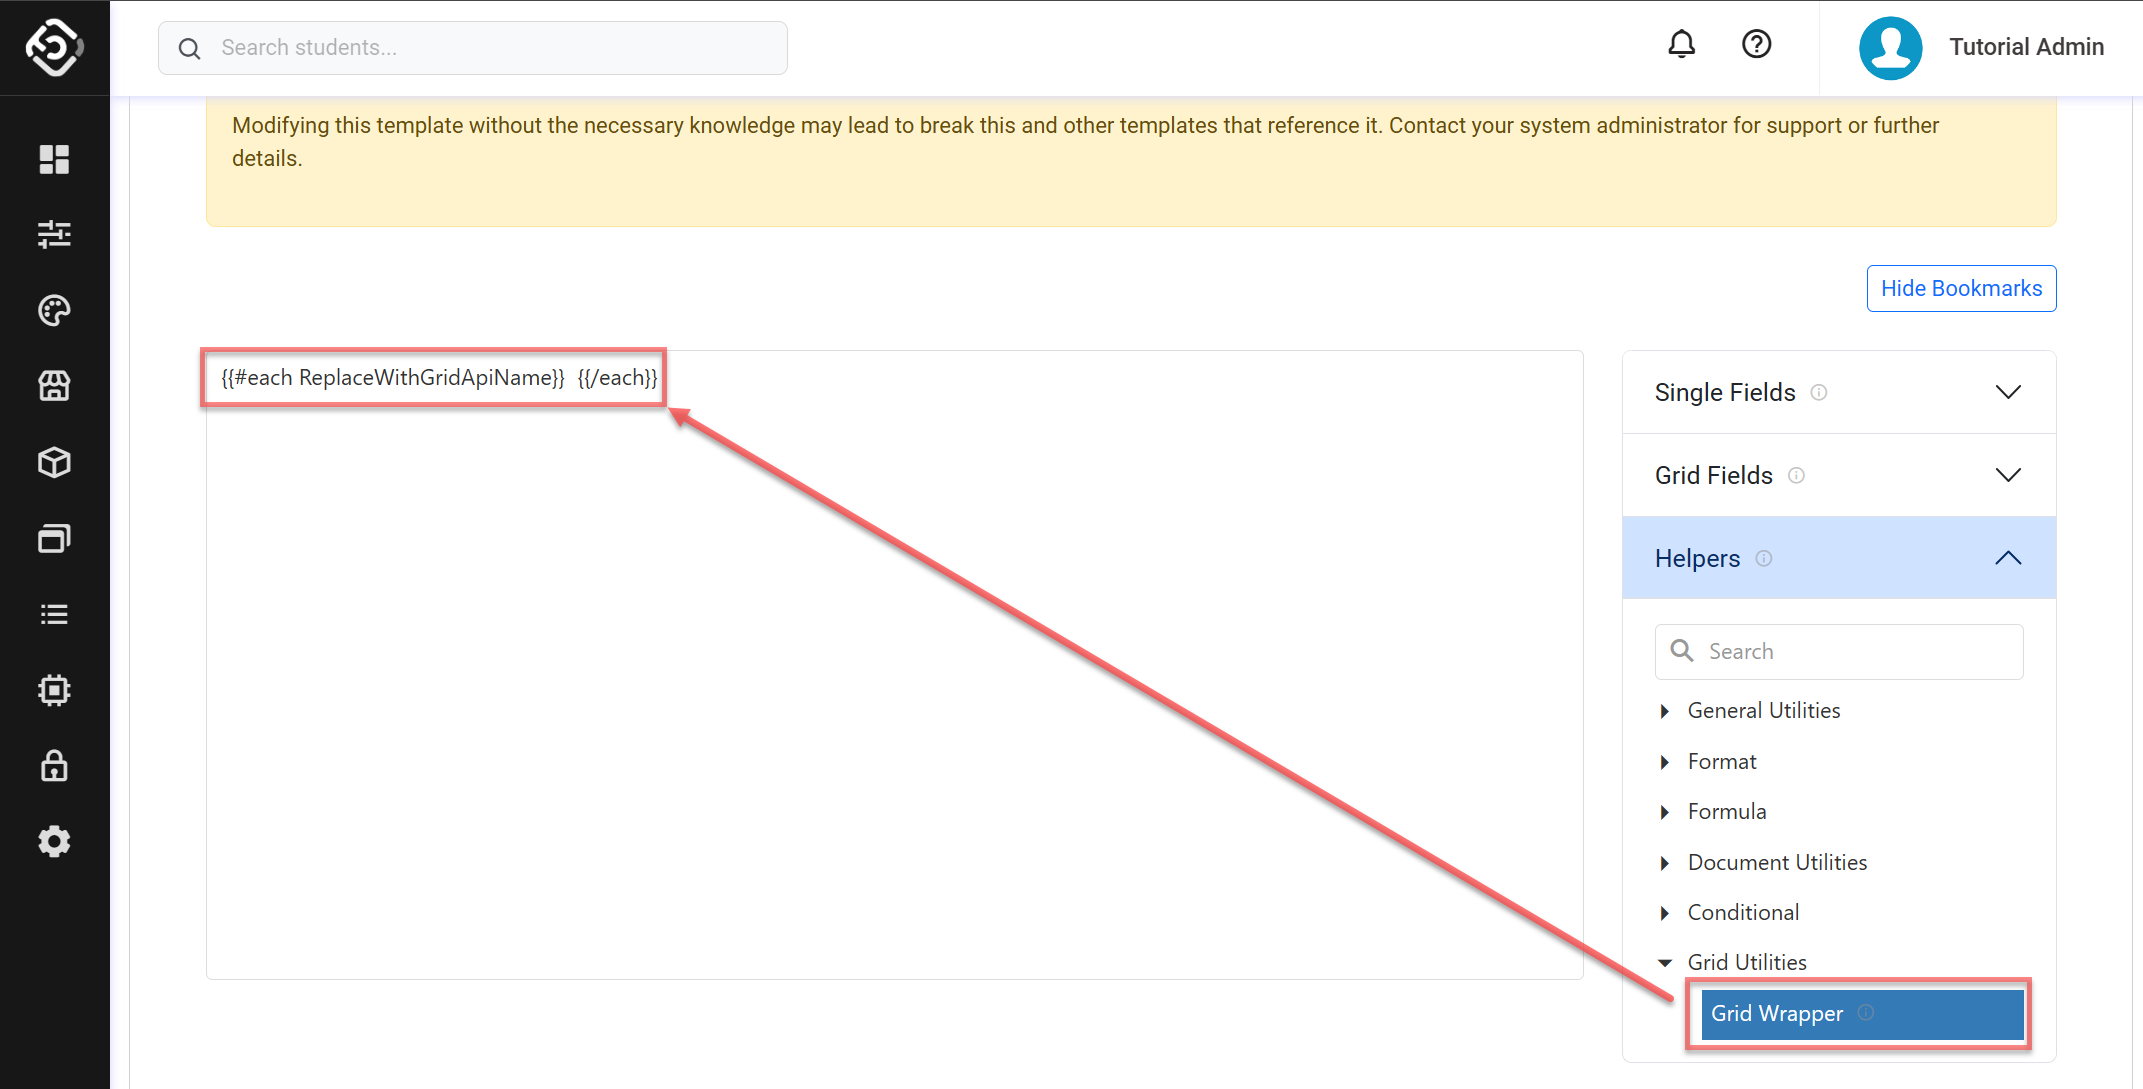
Click on Helper > Grid Utilities > Grid Wrapper in the Bookmarks menu to insert Grid Wrapper.
-
Replace
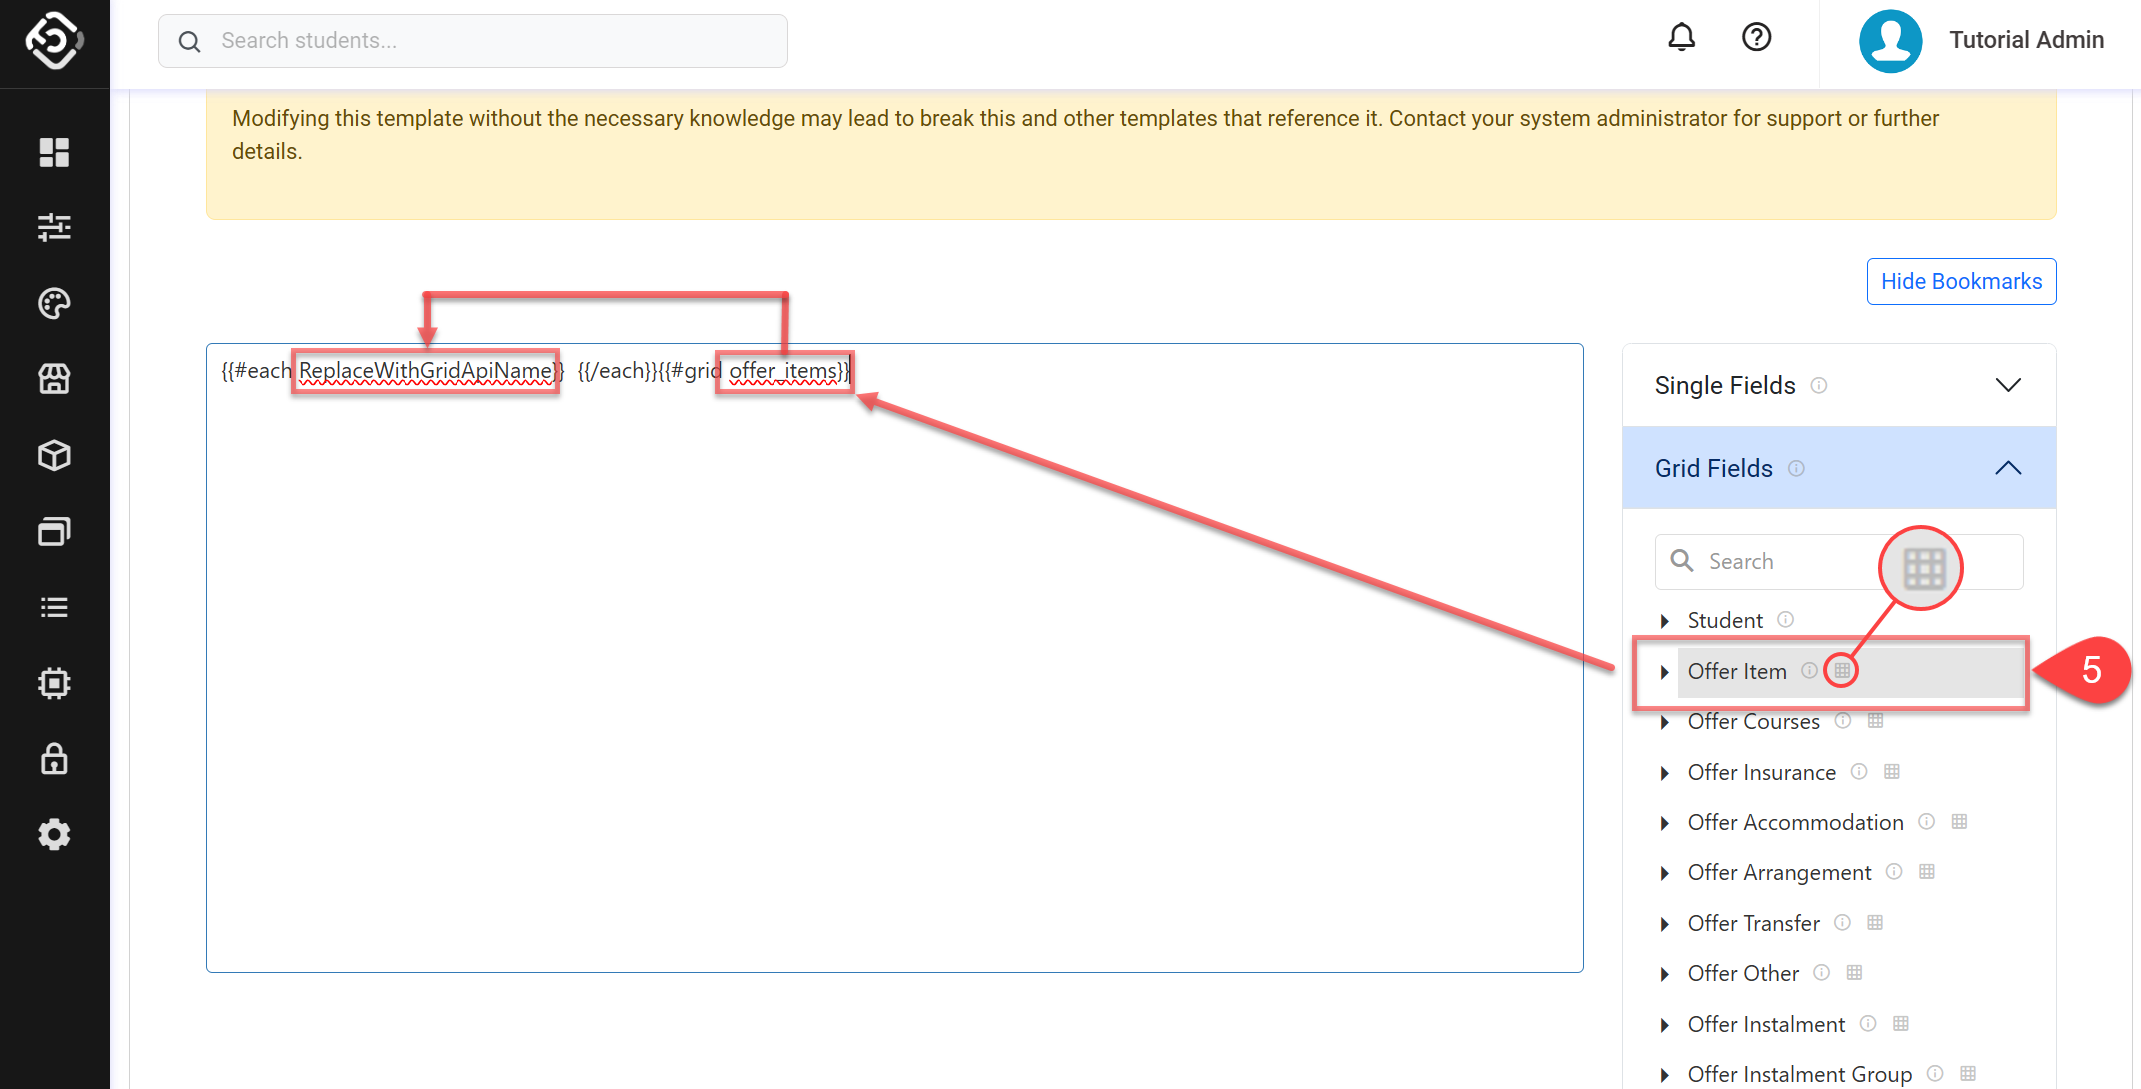
ReplaceWithGridApiNamewith the desired grid API.
You can check the Object Api Names by clicking on the desired grid item in Grid Fields from the Bookmark menu. Grid items are indicated by a table icon(
-
Enter the content you want to repeat between
{{#each}}and{{/each}}.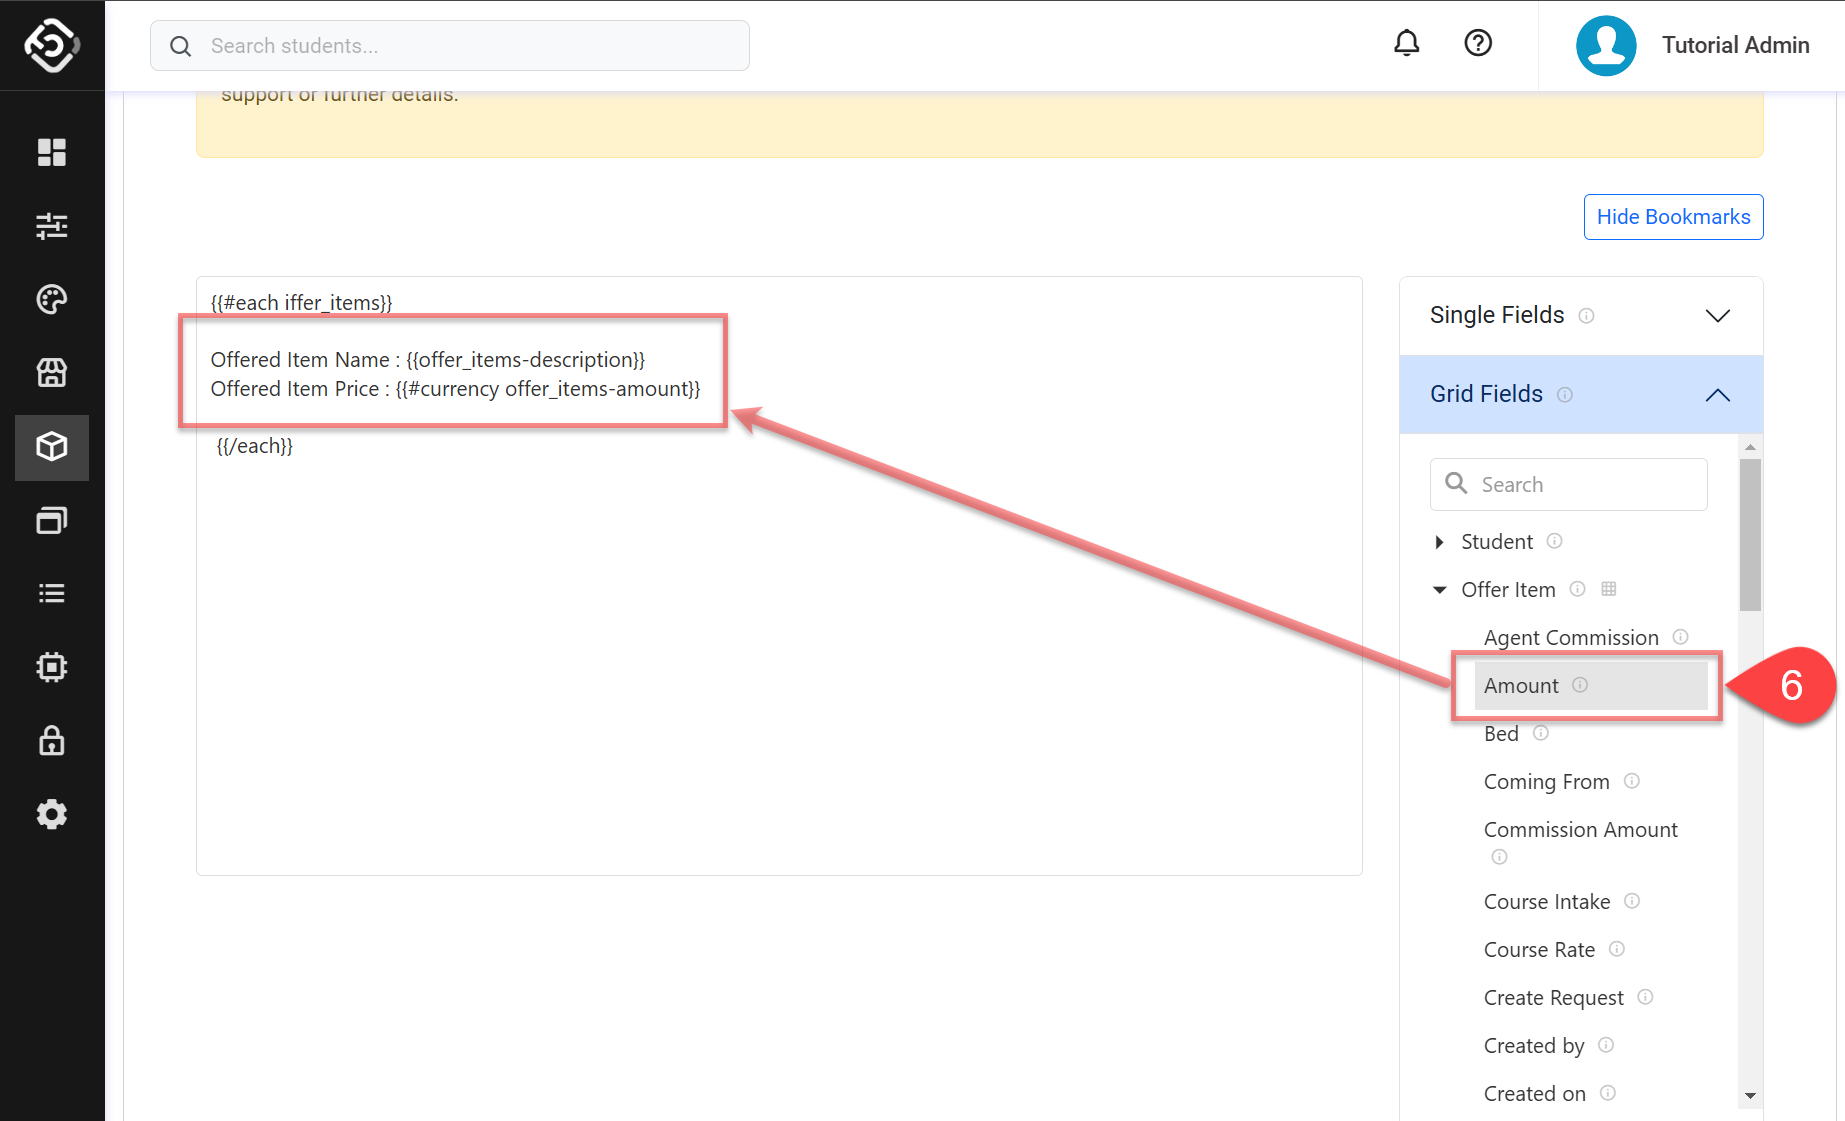
-
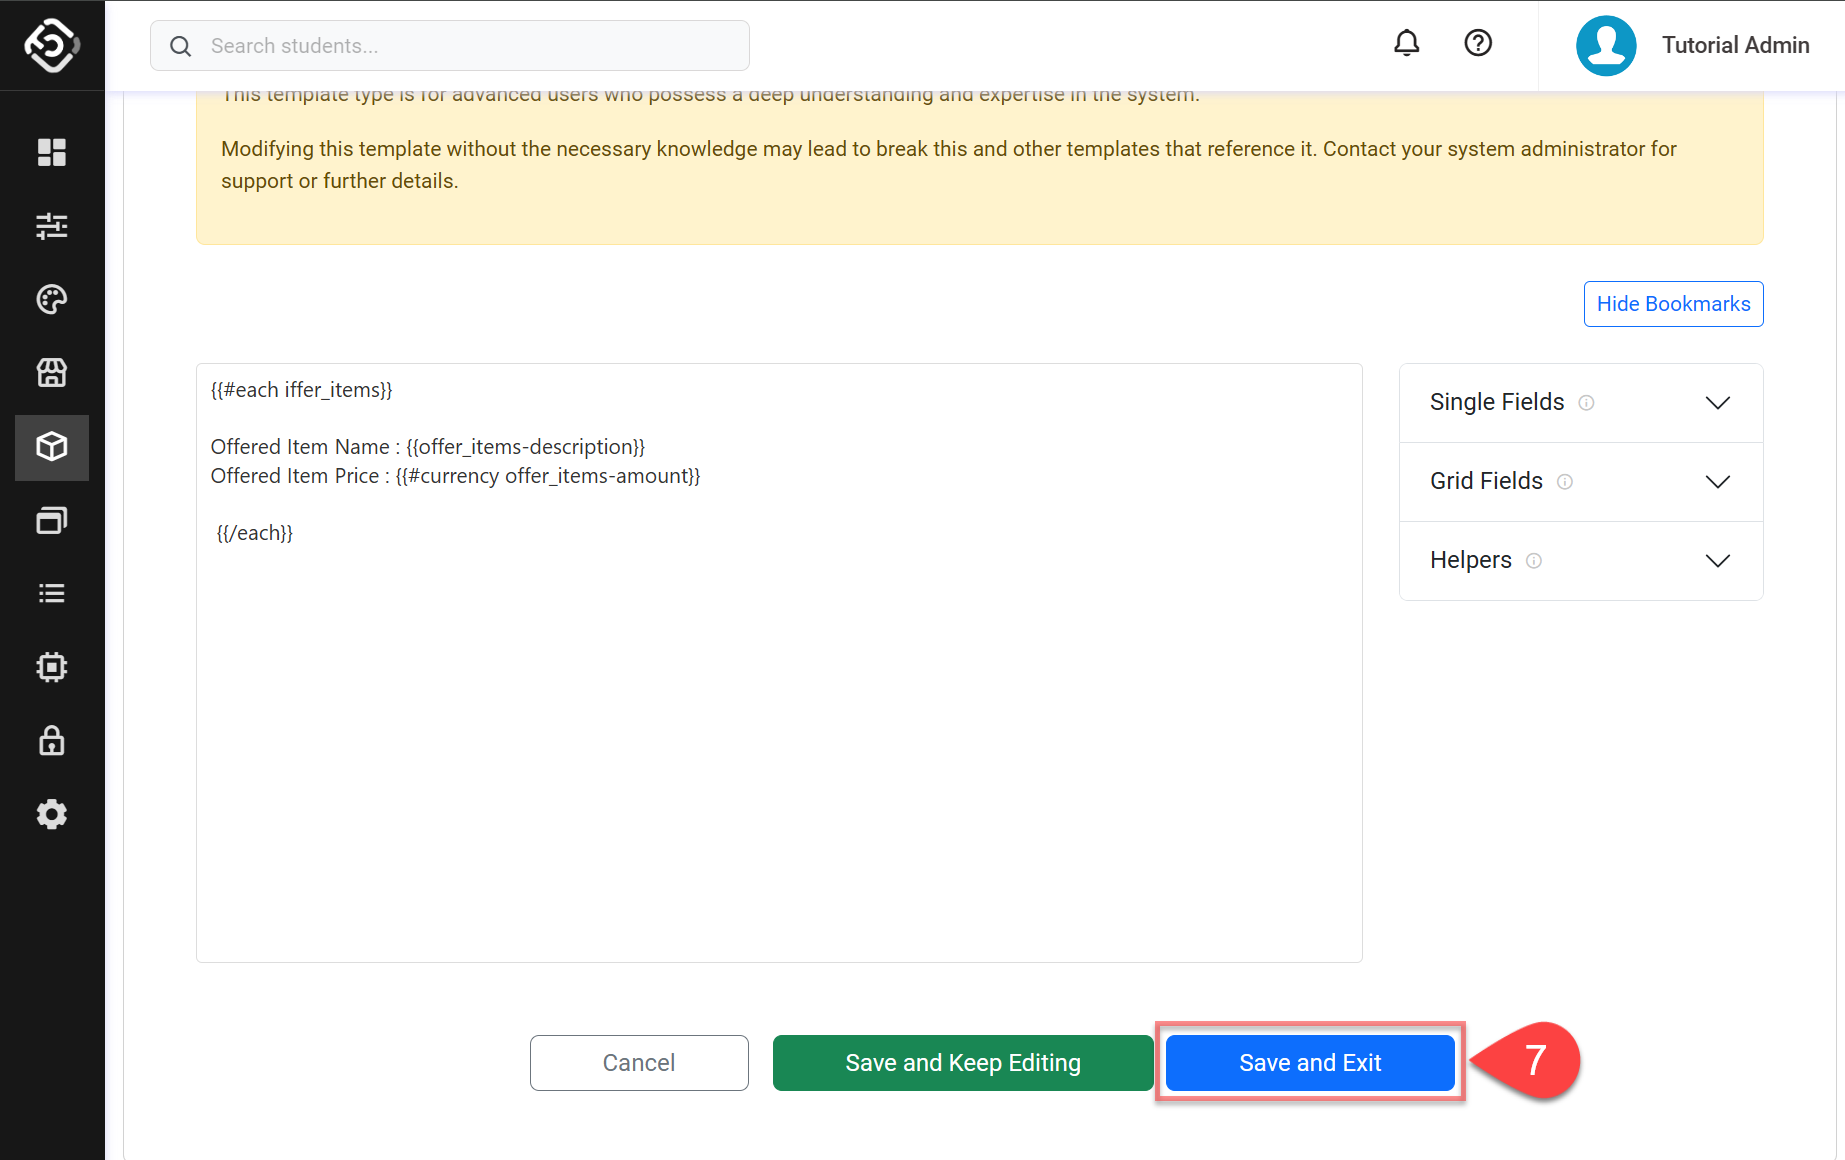
Click on Save and Exit to finish.
Sort the Grid with Grid Wrapper
advanced
You can customise the sort order of a Grid using Grid Wrapper by specifying a field to sort by, instead of using the grid’s default sort order. If your template uses a Grid Table, refer to this article for instructions: Sort the Grid Table
-
Locate where the Grid Wrapper (
{{#each… }}) is used. -
Replace
eachtoeach_sort. -
After the
ObjectApiName, define the following parameters in order. Make sure all parameters are inserted within quotes (','):-
'SortingCriteriaFieldApiName': The API name of the field used for sorting. This field must belong to theObjectApiNamedefined in the Grid Wrapper. -
'SortingDirection': Determines the sort order. Use'asc'for ascending or'desc'for descending. -
'CriteriaType'optional : Specifies how to interpret the values inSortingCriteriaFieldApiName.-
NUMBER: Interprets the values as numbers (e.g. 2, 1, 11, 10 will be sorted as 1, 2, 10, 11). -
Not specified: If left out, values will be treated as text (e.g. 2, 1, 11, 10 will be sorted as 1, 10, 11, 2).
-
-
-
For an example, see Example 3 in the Grid Template Examples section.
How to Insert Grid Templates
-
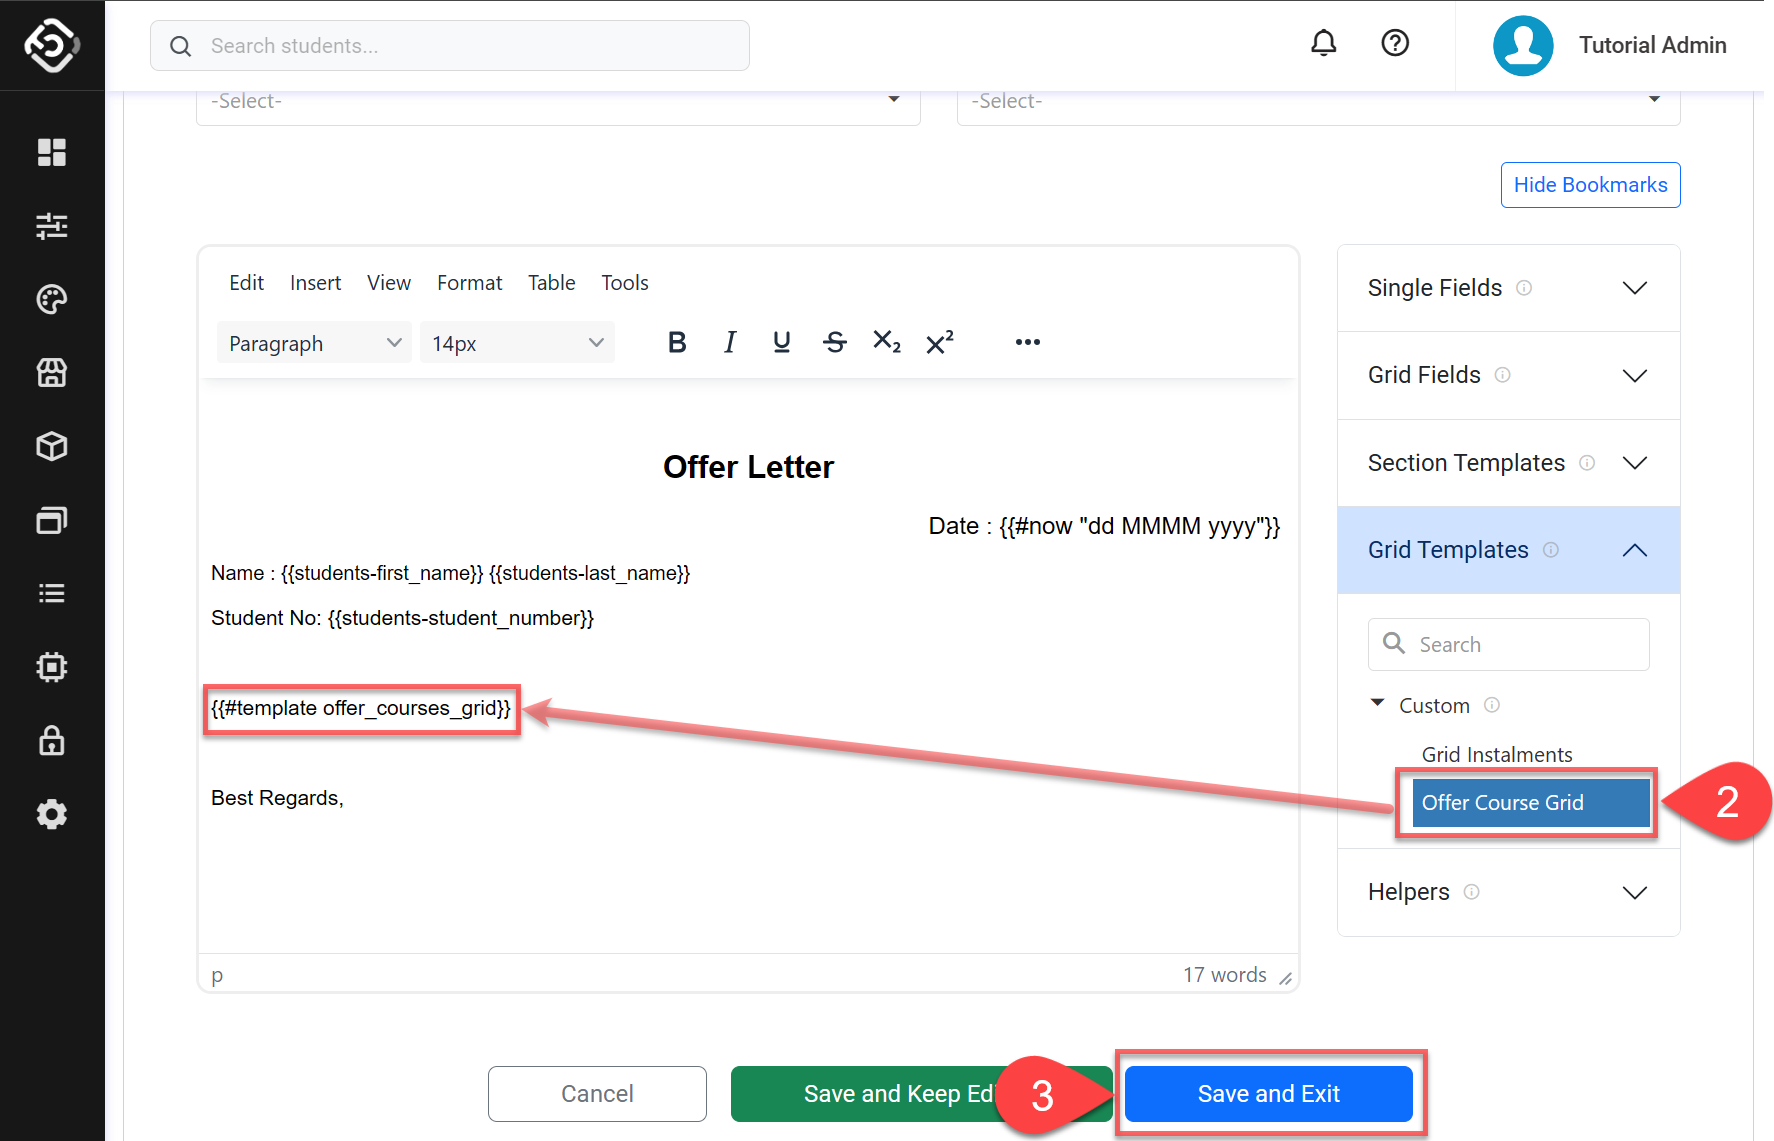
From the Utilities menu, Go to Utilities > Templates > Templates, and click on the template you’d like to insert grid templates.
-
Move the text cursor to where you’d like to display the grid template, and click on the name of the grid template from the Grid Templates menu in Bookmarks.
-
Click on Save and Exit to finish.
Grid Template Examples
Example 1 - Student Contact Confirmation
Input
            Hi, Student!
            We're sending this email to confirm your emergency contact.
            {{#each student_contacts}}

            Name : {{student_contacts-name}}
            Mobile : {{student_contacts-mobile}}

            {{/each}}
            Please let us know, if there's anything incorrect.
Output
Hi, Student!
We’re sending this email to confirm your emergency contact.
Name : Jone Doe
Mobile : 0412123456
Name : Jane Doe
Mobile : 0498987654
Please let us know, if there’s anything incorrect.
Example 2 - Student Contact Confirmation with HTML formatting
Input
            <div>
              <p>Hi, Student!</p>
              <p>We're sending this email to confirm your emergency contact.</p>
              <table>
                <thead>
                  <tr>
                    <td>Name</td>
                    <td>Mobile</td>
                  </tr>
                </thead>
                <tbody>
                  {{#each student_contacts}}
                  <tr>
                    <td>{{student_contacts-name}}</td>
                    <td>{{student_contacts-mobile}}</td>
                  </tr>
                  {{/each}}
                </tbody>
              </table>
              <p>Please let us know if there's anything incorrect.</p>
            </div>
Output
Hi, Student!
We’re sending this email to confirm your emergency contact.
|
Name |
Mobile |
|
John Doe |
0412123456 |
|
Jane Doe |
0498987654 |
Please let us know, if there's anything incorrect.
Example 3 - Invoice Details Sorted by Due Date
Input
<table>
  <thead>
    <tr>
      <td>Invoice Number</td>
      <td>Details</td>
      <td>Due Date</td>
      <td>Amount</td>
    </tr>
  </thead>
  <tbody>
    {{#each_sort enrolments_invoices_ledgers_gross_items 'ledger_entries-due_date' 'asc'}}
          <tr>
            <td>{{ledger_entries-item_activity}}</td>
            <td>{{ledger_entries-reference}}</td>
            <td>{{#date ledger_entries-due_date "dd/MMMM/yyyy"}}</td>
            <td>{{#currency ledger_entries-amount}}</td>
          </tr>
    {{/each}}
  </tbody>
</table>
Output
|
Invoice Number |
Details |
Due Date |
Amount |
|
Invoice 1550 |
Tuition 1 |
12/05/2024 |
$1,200 |
|
Invoice 1551 |
Tuition 2 |
23/05/2024 |
$1,200 |
|
Invoice 1552 |
Tuition 3 |
28/05/2024 |
$1,200 |
|
Invoice 1553 |
Tuition 4 |
31/05/2024 |
$500 |