
Overview
In a nutshell, the Fees Views (often referred in this documentation as ledgers views) are used to display a collection of related financial transactions. These views are available in different areas of the system and let you easily view, create and edit these financial transactions.
Fees Views
There are multiple views available for exploring and managing fees, each with a unique structure and display format. These options provide flexibility, allowing you to choose the view that best fits your needs. You can seamlessly switch between these views for easier navigation.
All views organise the entries in chronological order, meaning the earliest transactions appear at the top, and as you scroll down, the entries become progressively more recent. The most recent transactions, based on the transaction date, are displayed at the bottom of the list. This allows for a clear timeline of transactions, helping you track the flow of entries over time.
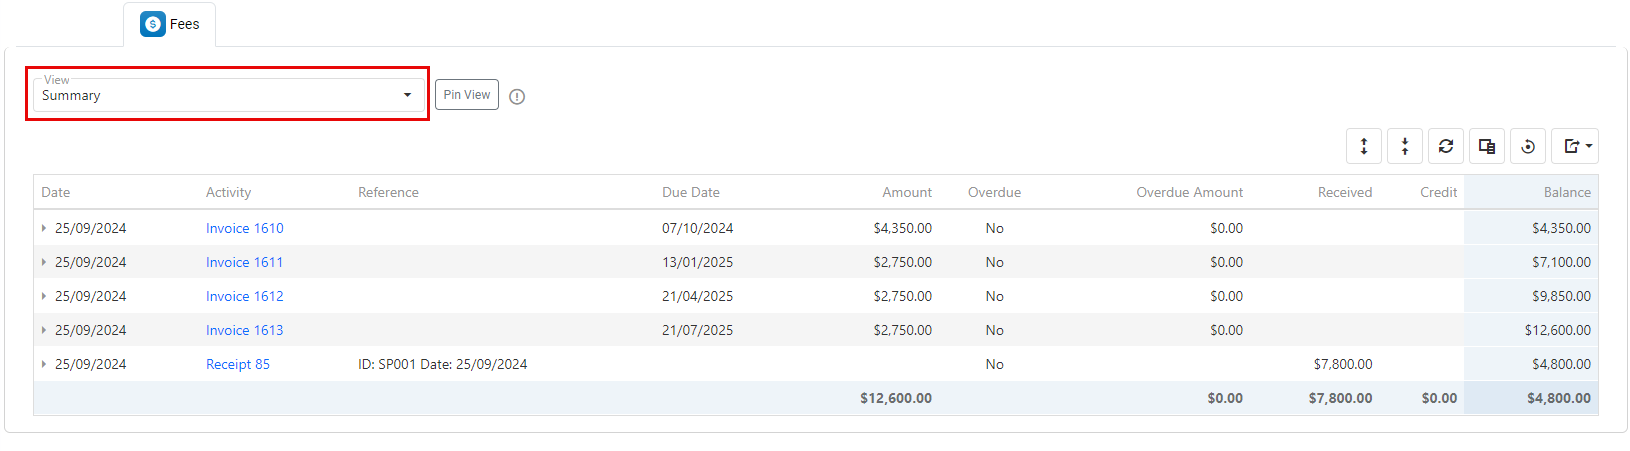
Summary View
This view shows a summary of all financial transactions (invoices, receipts, credits, transfers, etc) as separate entries.
-
Invoices are displayed as entries and the invoices items as separate sub-entries. Tax and Agent Commission items are also displayed as sub-entries under the respective invoices. The invoice amount is added to the balance.
-
Receipts are displayed as entries and the items that the receipt applied to as sub-entries. The receipt amount is subtracted from the balance.
-
Credits are displayed as entries. The credit amounts are shown in the Credit column and are subtracted from the balance.
-
Transfers and Refunds are displayed as entries. The amounts for these entries are shown as negative values in the Received column.
The balance displayed is a running balance showing the amount owed at the time of the each entry. Invoices add to the balance owed while receipts and credits subtract.
Transactions View
This view is similar to the summary view, but it does not display the Agent Commission and Tax items as separate items under the invoices. Instead, this view has additional columns to display the Agent Commission and Tax alongside the relevant items they apply to.
Additional columns are available in this view including:
-
Net Amount
-
Commission Tax
The balance displayed is a running balance showing the amount owed at the time of the each entry. Invoices add to the balance owed while receipts and credits subtract.
Invoices View
This view only shows the invoices transaction. Each invoice is an entry and the invoice items (including Agent Commission and Tax) are displayed as sub-entries.
The relevant receipts and credits are included for each entry on the Received and Credit columns respectively.
Unlike the Summary and Transactions views, the balance on this view is for just that invoice (not a rolling balance) and is the amount owed (less credits and receipts).
Invoices (Transactions) View
This is a combination of the Invoices and Transactions views. It only shows the invoices, like the Invoices view but it displays the Agent Commission and the Tax on the same line as the item they are for, like in the Transactions view.
As in the Transactions view, it has additional columns with more details about the Net and Gross amounts.
As in the Invoices view, the balance is for just that invoice (not a rolling balance) and is the amount owed (less credits and receipts).
Access the Fees Views
The Fees Views are context-aware, meaning the information displayed adapts based on where you access them from. These views can be accessed in the following locations:
-
Student Fees: In this context, the financial transactions displayed are for all the enrolments for a particular student. View the article Student Fees for more details.
-
Enrolment Fees: In this context, the financial transactions displayed are only for a particular enrolment. View the article Enrolment Fees for more details.
-
Invoices: In this context, the financial transactions displayed are only for a particular invoice. View the article Invoice Details for more details.
Switch Between Fees Views
Switching between the views is very easy.
From the views selector, choose the view that you want to switch to.
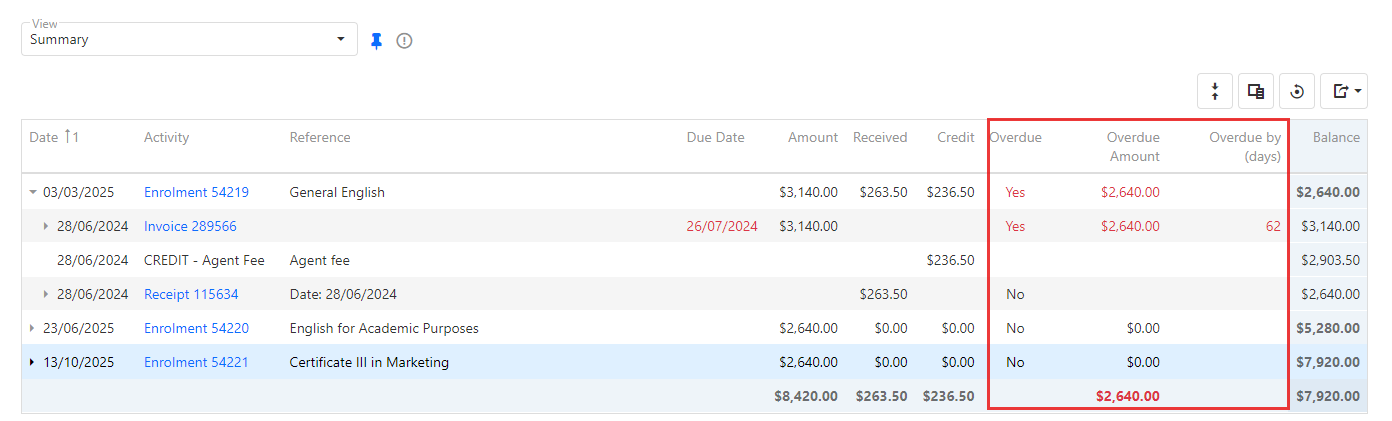
Pin a Fees View
When you Pin a view, this view will be preselected when you come back to the same page.
To Pin a view:
-
Select the view that you want to pin.
-
Click on the Pin View button, next to the view selector.
-
Confirm you want to pin the current view.
When a view is pinned, a pin icon will display next to the view selector indicating that view is pinned.
When navigating between objects using links on the fees grid, the current view in use will override the pinned view. For instance, if you are viewing Student Fees in the Summary view and click on an enrolment in the grid, the same Summary view will display for the enrolment, regardless of your pinned view. This ensures a seamless navigation experience between objects.
Customise a Fees View
As with any other grids, you can customise the grid by adding or removing columns using the column chooser, and re-ordering the columns to suit your needs best. Learn more about Customising Grids.
Hide Fully Written-Off Invoices
Enrolment Fees views only
The Hide Fully Written-Off Invoices option hides invoices that have been completely written off, along with their associated credit write-off transactions. This helps declutter the fees view for enrolments with multiple written-off invoices.
This is a display-only option — the hidden entries are not removed from the system. They remain available in the audit trail and reports.

View Overdue Fees
Keeping track of overdue fees is effortless:
-
Go to the Fees for the object of interest:
-
Student Fees: To view all overdue fees for a student
-
Enrolment Fees: To view all overdue fees for an enrolment
-
Invoice Details: To view the overdue fees for an invoice.
-
-
Select your preferred Fees View.
-
Customise the grid, by adding any of the following columns:
-
Overdue: To see whether an entry is overdue (enrolment and invoice entries only).
-
Overdue amount: To see the overdue amount (enrolment and invoice entries only).
-
Overdue by: To see the number of days an invoice has been past due (invoice entries only).
-
Enrolments and invoices with overdue amounts will have the due date and the above values highlighted in red.
Export Data
You might need or find useful to export the data from the grids. To do so:
-
Select the View you want to export
-
Customise the view as required
-
Click the Export button in the top-right corner of the grid, then choose the desired format to export the data.
-
The file will automatically download after a few seconds.
Note that the exported file also includes the amounts for the groups so a simple SUM of all the values in a column will include duplicated values.