Managing offers efficiently is crucial to a successful admission process. In this article, you can learn how to manage offers.
Considerations for Managing Offers
-
All offers created manually have the default status ‘Offer’.
-
Offers that do not contain any course items will proceed as an Offer-Invoice that will be attached to an existing enrolment.
-
After an offer is accepted/converted, nothing in the offer can be modified.
-
Before starting creating offers, it is recommended to create Agents and update the related picklists (e.g. Offer Types, Visas). In this way, the data required for the offers, is available in the form.
-
When creating an offer with an agent, you can also select an Agent Contract. This ensures only the commissions linked to that contract are available for the offer.
-
The visa field in the offer is an indication for the visa (if any) the student is applying for. Selecting this visa does NOT create a visa entry on the student profile. To create a visa entry for the student, see this article: Student Visas.
-
By default, the Enrolment Booking Date is set to the date the offer is accepted. If required, users can select a Custom Booking Date during the offer acceptance process.
Create an Offer
There are multiple ways to create an offer:
-
From the Offer Search Page: Using this method, you can search and select the student that the offer is for.
-
From the Student Profile Page: This method will automatically select the student for the offer.
Create an Offer from the Offers Search Page
-
From the Main menu, go to Offers.
-
Click on New Offer at the top right.
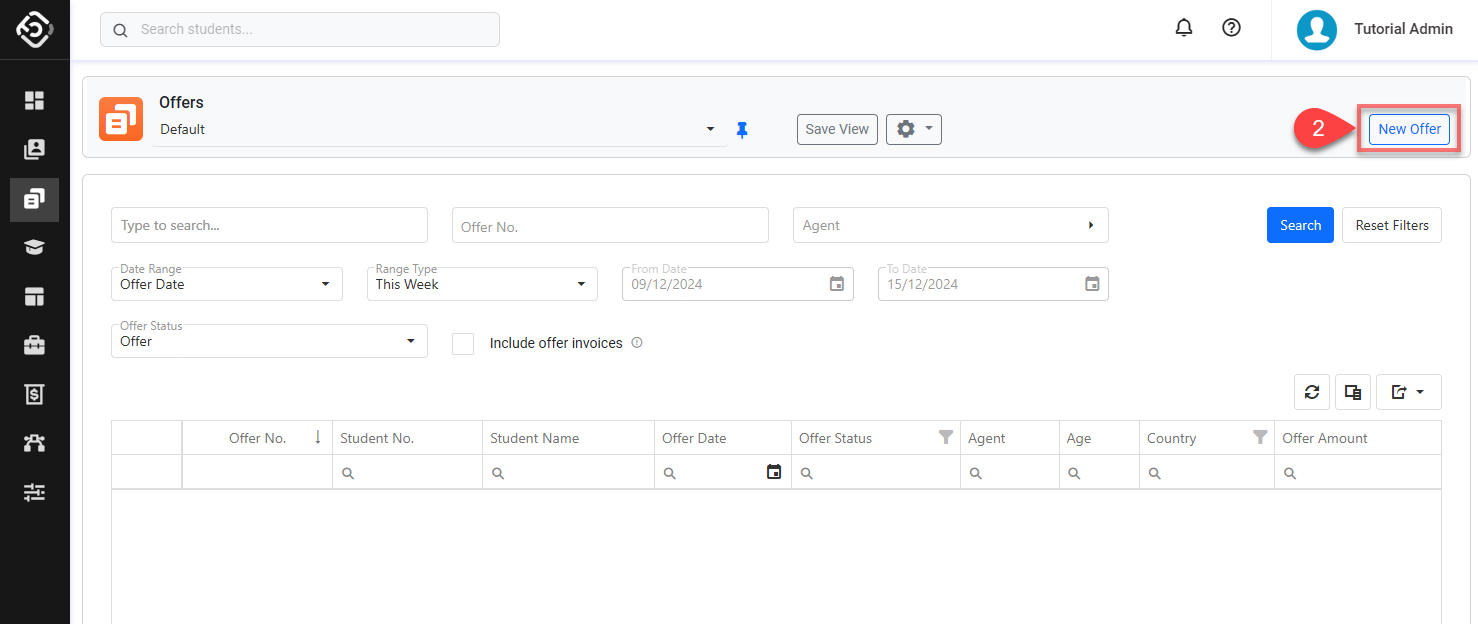
-
Enter the Offer Details. You can search a student by their name or student number.
-
Click on Save to finish.
-
You’ll be redirected to the offer details page.
Create an Offer from the Student Profile Page
-
Go to the details page for the student that you intend to create the offer for.
-
Click on New Offer at the top right.
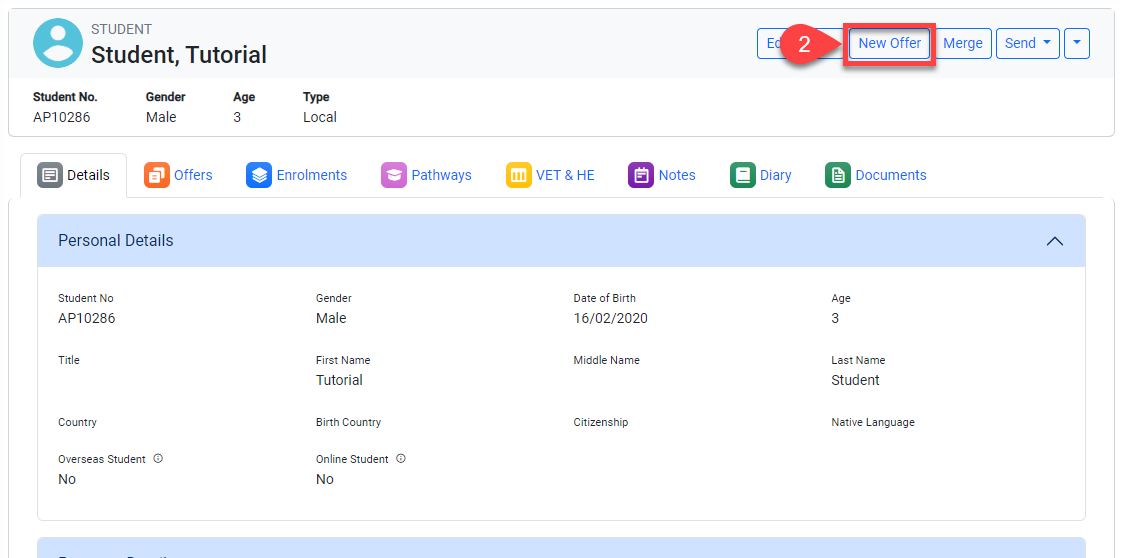
-
Enter the Offer Details.
-
Click on Save.
-
You’ll be redirected to the offer details page.
Create an Offer from a Student’s Offers Tab
-
Go to Students > Offers tab of the student that you intend to create the offer for.
-
Click on the Create button located at the top right of the grid.
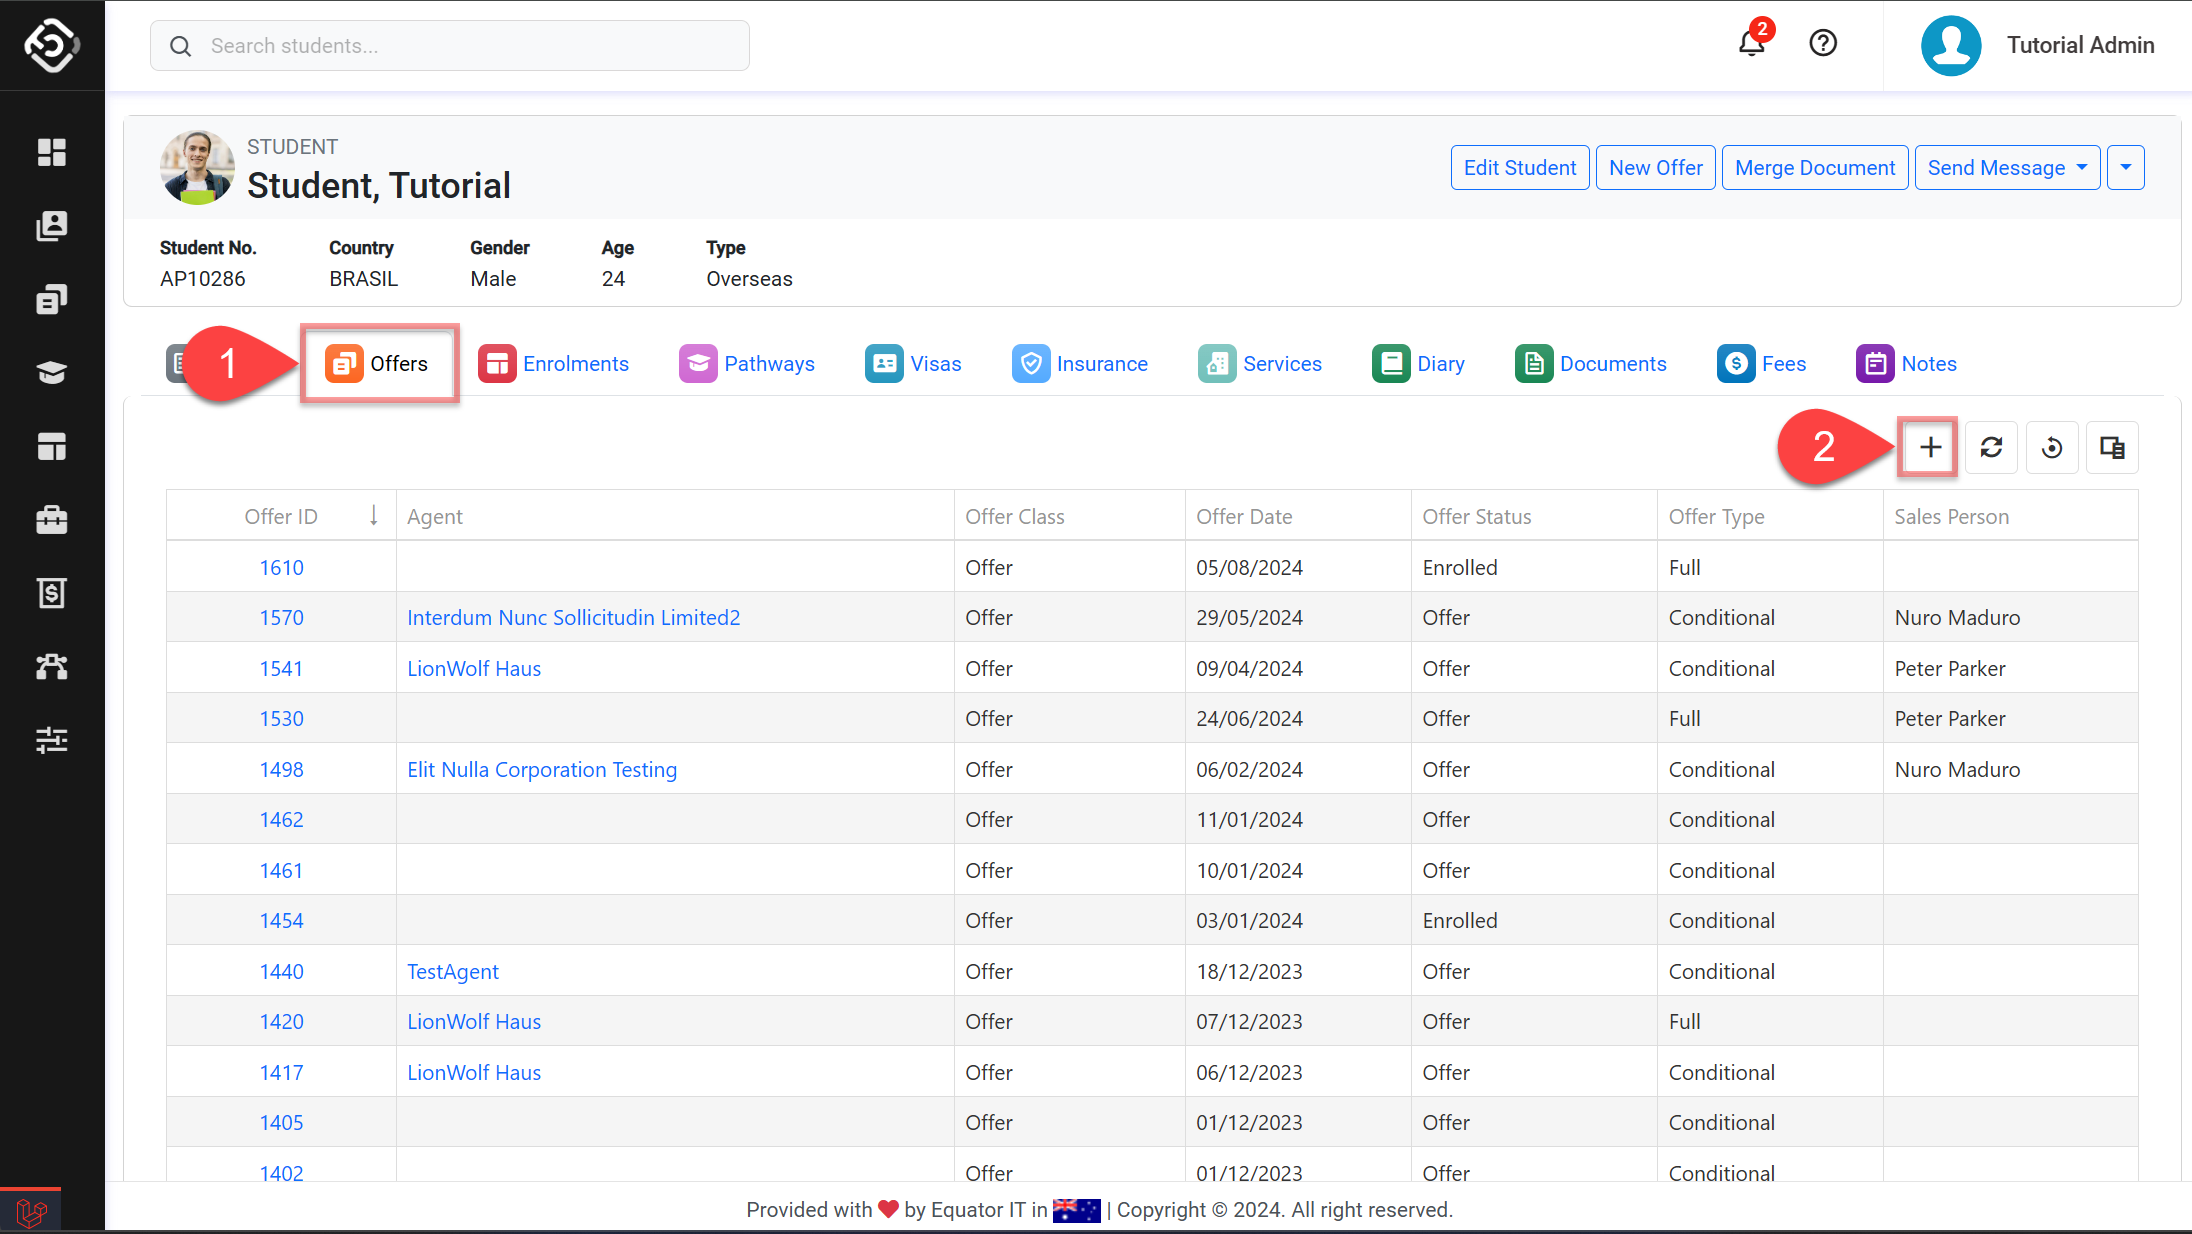
-
Enter the Offer Details.
-
Click on Save.
-
You’ll be redirected to the offer details page.
Clone an Offer
Cloning an offer allows you to easily create a new offer that contains the same information as an existing one that is not in Cancelled status. When you clone an offer, the system creates a new offer with the following components copied from the original:
|
Component |
Cloned |
|---|---|
|
Offer details (all fields such as Agent and Agent Contract, even if expired) |
|
|
Items (all item details, including their original dates and billing rates) |
|
|
Instalments (all instalment details, including amounts, due dates, and prepayment flags) |
|
|
Holidays |
|
|
Notes |
|
To clone an offer:
-
Go to the offer you want to clone.
-
Click Clone Offer from the Action Panel.
-
Search for and select the student for the cloned offer, then click Submit.
-
Once the process is complete, you will be redirected to the new offer details page. The cloned offer is created in Offer status with today’s date as the offer date.

Edit Offers Details
Considerations for editing offers details
-
It is not possible to update the offer details after it has been accepted/converted.
-
Changing the agent or agent contract on an offer with existing course items will reset the commission for these items to $0. You will need to update all course items in the offer (and their respective instalments) to apply the new commission.
-
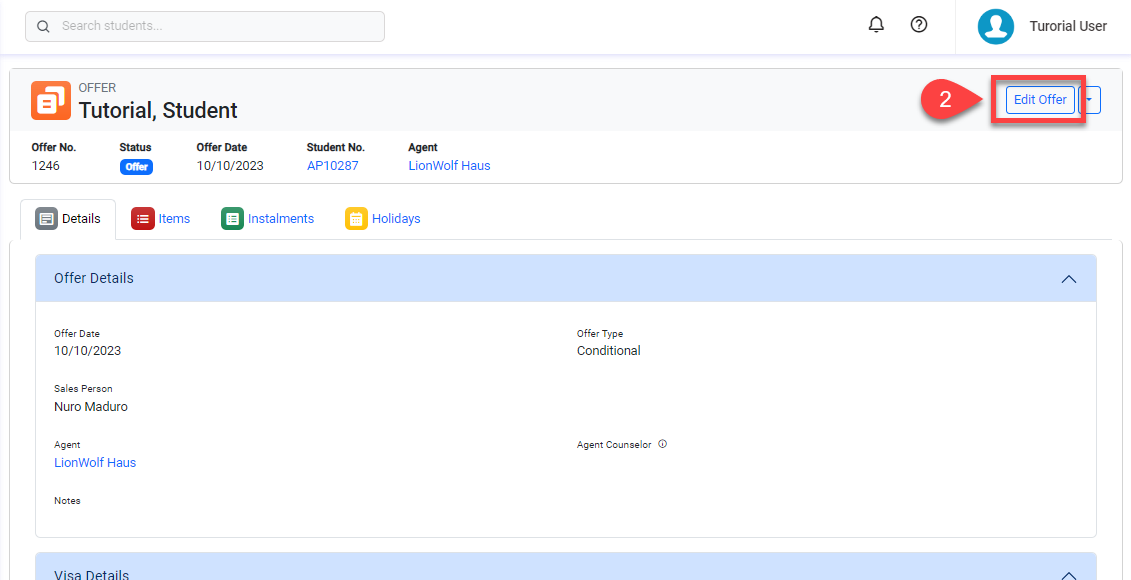
Go to the offer of interest.
-
Click on the Edit Offer button at the top right.
-
Edit the details as required.
-
Click on Save to finish.
Change Offer Status
The offer status indicates on what stage of the enrolment process, the student is at. Before we explore how to update the offer status, let’s explore what statuses are available.
Offer statuses
-
Application: This is very first status on the enrolment process. It can be used to indicate that an application has been received but it requires review or it is not ready to progress to the next status: Offer.
-
Offer: The Offer status indicates an application has been processes and products and services have been formally offered to the student.
-
Enrolled: This status indicates that an offer has been accepted or converted. When an offer is accepted, the corresponding enrolments and invoices are created, and the offer is locked to prevent further changes.
-
Cancelled: This status indicates the student, agent or college have cancelled or withdrawn the offer. When an offer is cancelled, you must specify the reason. You can customise the list of reasons by updating the values on the Cancel Reason picklist of Offers object. Typically these reasons may be administrative error, visa refusal, withdrew request, went to another College or any other reason you would like to identify in reports. The Cancelled status may also represent instances where the offer has lapsed due to no feedback or acceptance from the student or agent, and the Course has passed (this can be scheduled automatically for offers with passed course start dates in setup.
Now that we know what each offer status mean, let’s see how to change the offer status:
-
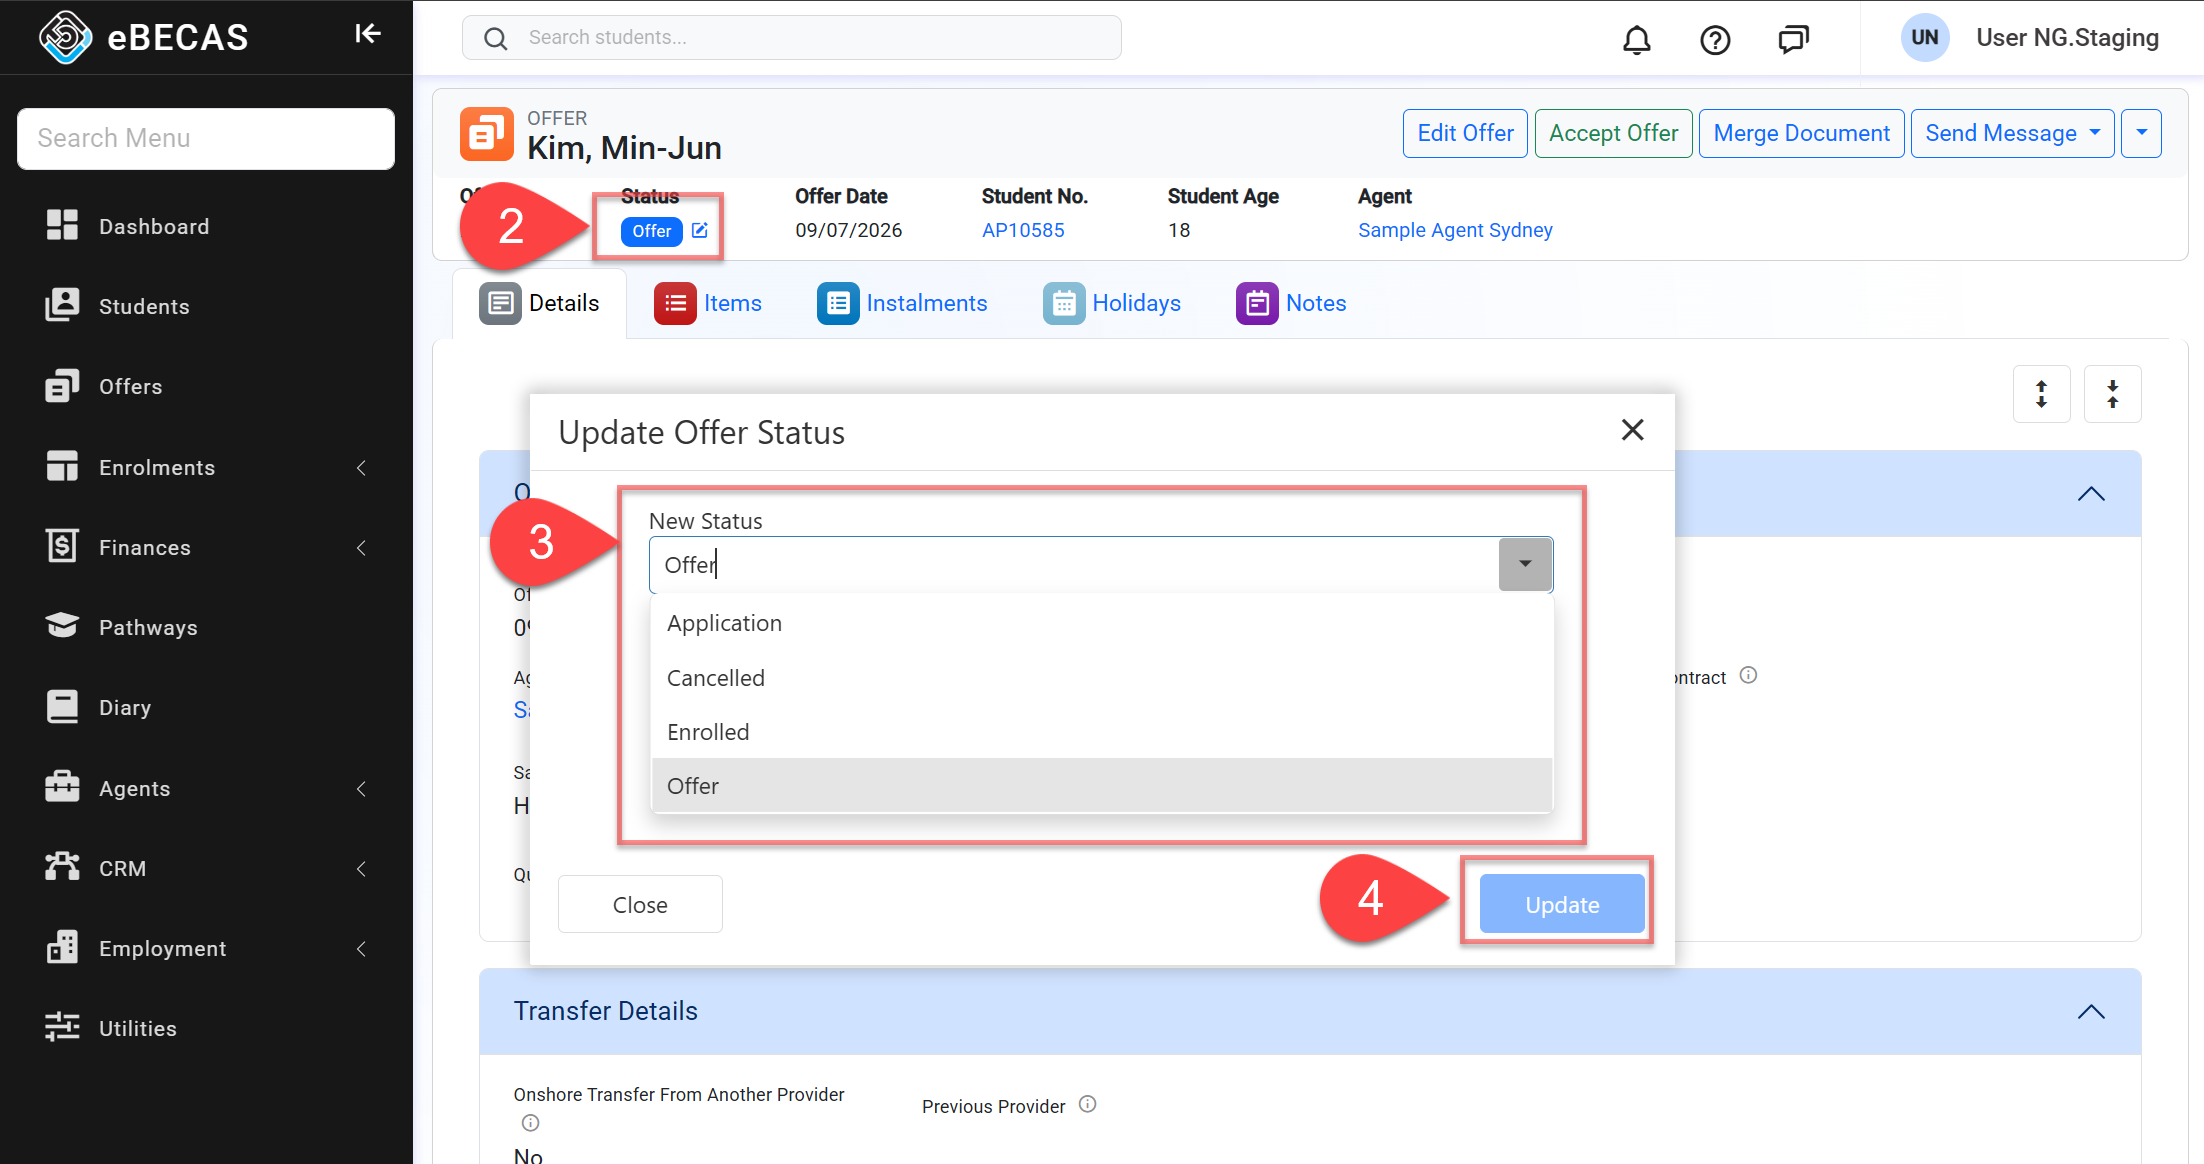
Go to the details page of the offer of interest.
-
Click on the Update icon located next to the current offer status.
-
Select the status that you’d like to change this offer to.
-
Click on the Update button to finish.
Accept an Offer
Accepting an offer is the last step of the Offer process. When an offer is accepted, the respective enrolments and invoices are created.
While it is up to your college when you accept an offer, it is not recommended to accept an offer until the agent/student confirms or pays. An offer is a pro-forma invoice, which may be subject to change. Invoices for an offer are not generated until the offer is actually accepted and an enrolment is generated. We recommend to only accept an offer once the prepayment or deposit has been received and you can confirm that the student will start their studies.
The offer process is designed to be flexible and account for changes. A student may have several alternative offers and accept one or none.
Keep the following in mind:
-
When accepting an offer, you can optionally select a custom Booking Date. The booking date records when the offer was accepted and is also used as the Invoice Date for all invoices created from the offer. If no booking date is selected, today's date is used by default. Once the offer has been accepted, the booking date cannot be changed, although the invoice dates can be updated later if required.
-
Once an offer has been accepted, it can no longer be modified. Accepting an offer creates the corresponding enrolments and invoices. As invoices form part of your financial records, any subsequent changes are more restricted and require an audit trail.
-
An offer that does not include a course does not create any enrolments. When accepting an offer of this type (Offer-Invoice), you will be prompted to select an existing enrolment for the same student to which the invoices generated from the offer will be attached.
There are two ways to accept an offer:
Accept an Offer Using the Accept Offer Button
Use this method if you want to accept the offer using today's date as the booking date.
-
Go to the details page for the offer of interest.
-
Click on Accept Offer located at the top right. An offer with status Cancelled cannot be accepted. To do so you need to change the status to Offer and then you can accept it.
-
Click on Yes, Accept Offer to finalise the process.
-
For Offer-Invoices Select an enrolment for this Offer-Invoice to be attached. Then click on Continue to proceed.
-
After accepting the offer, you will be taken to the enrolment created from it. If multiple enrolments were created, you will be taken to the student’s Enrolments tab, with the list pre-filtered to show only those linked to the accepted offer.

Accept an Offer with a Custom Booking Date
Use this method if you want to accept the offer with a booking date other than today's date.
-
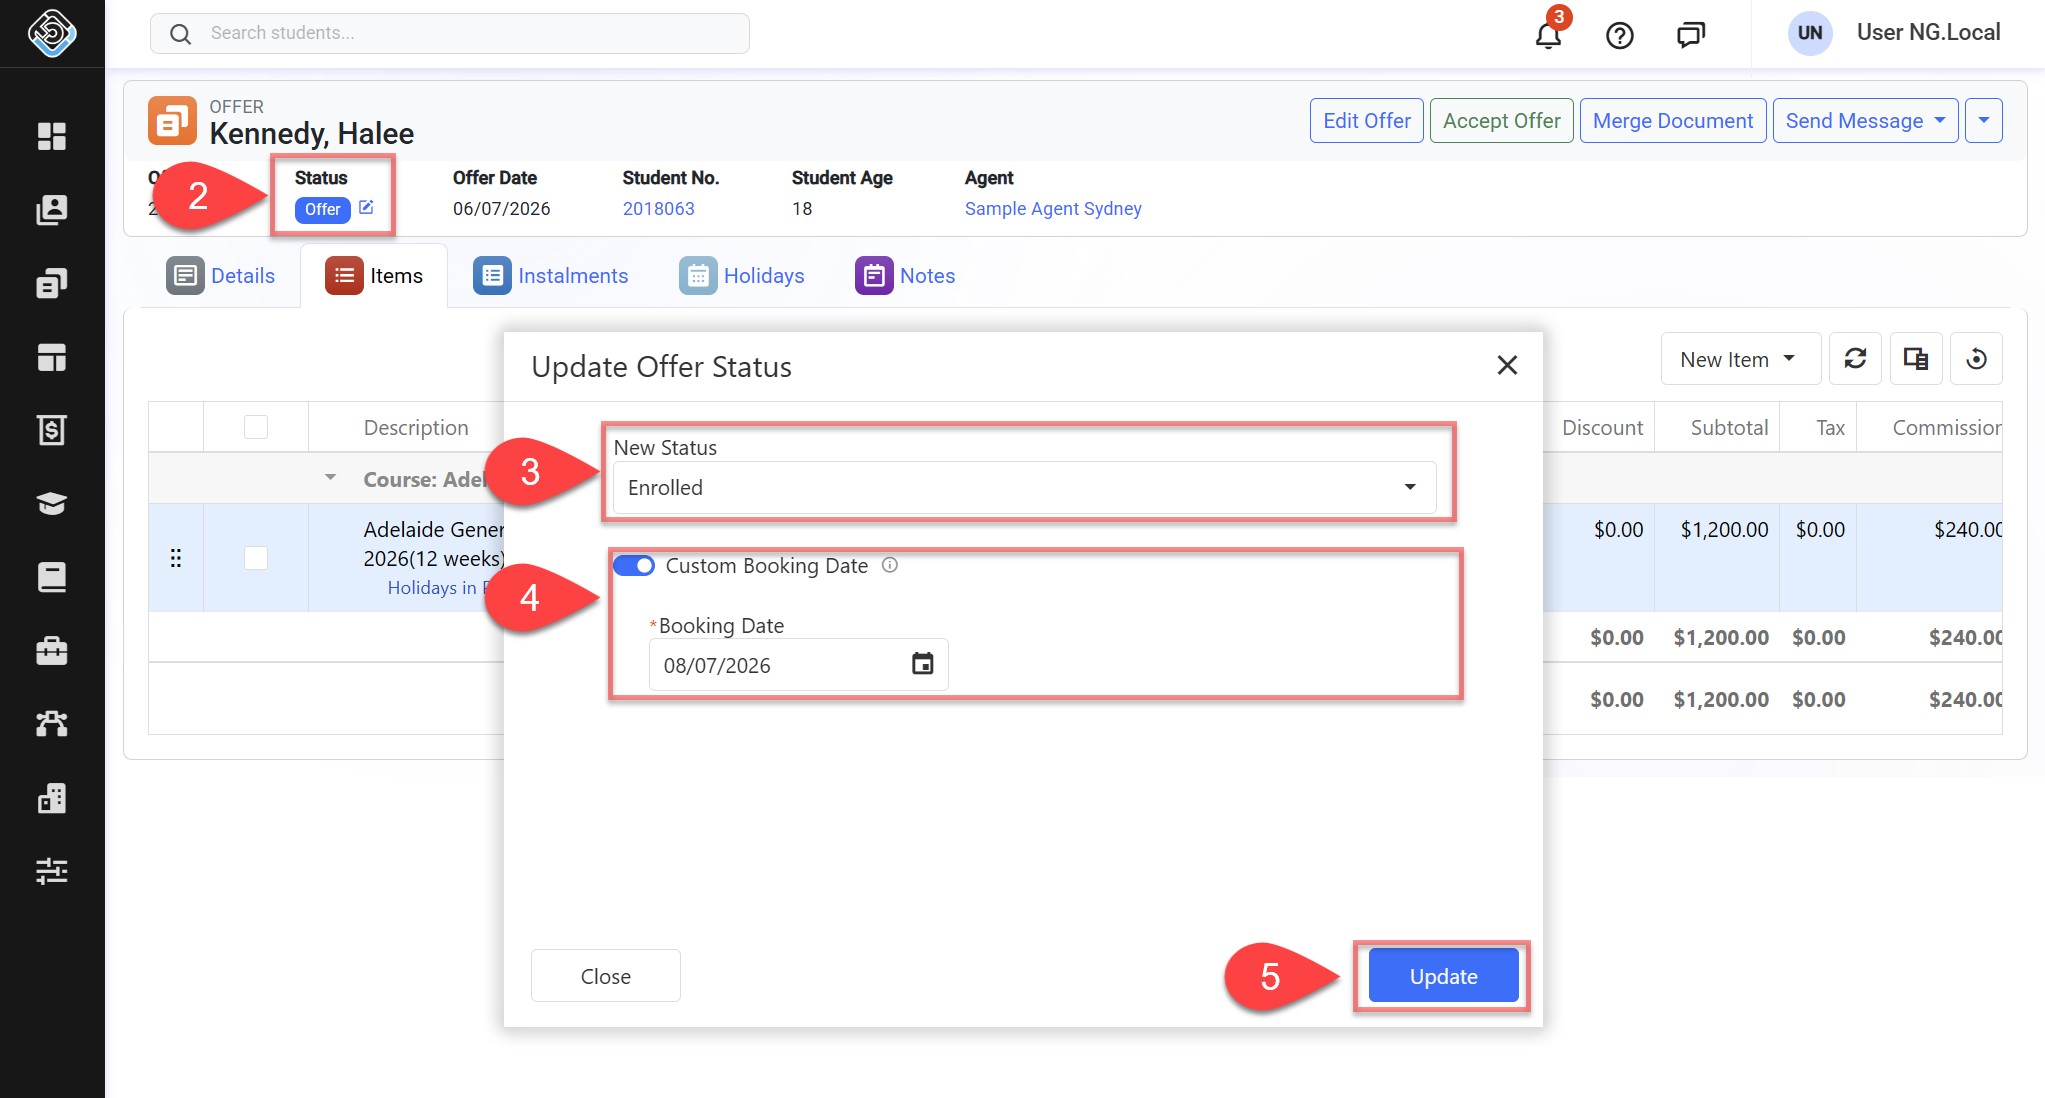
Go to the details page for the offer of interest.
-
Click on the Update icon located next to the current offer status.
-
Select Enrolled as the new status.
-
If needed, select the Custom Booking Date option and set the required Booking Date.
-
Click on Update to finalise the process.
Issue/Merge Offer Documents
When an offer is ready, users can swiftly merge documents for students or agents.
Before you can issue/merge documents for an offer, Offer Templates must be available in the system. Contact your system administrator for details.
-
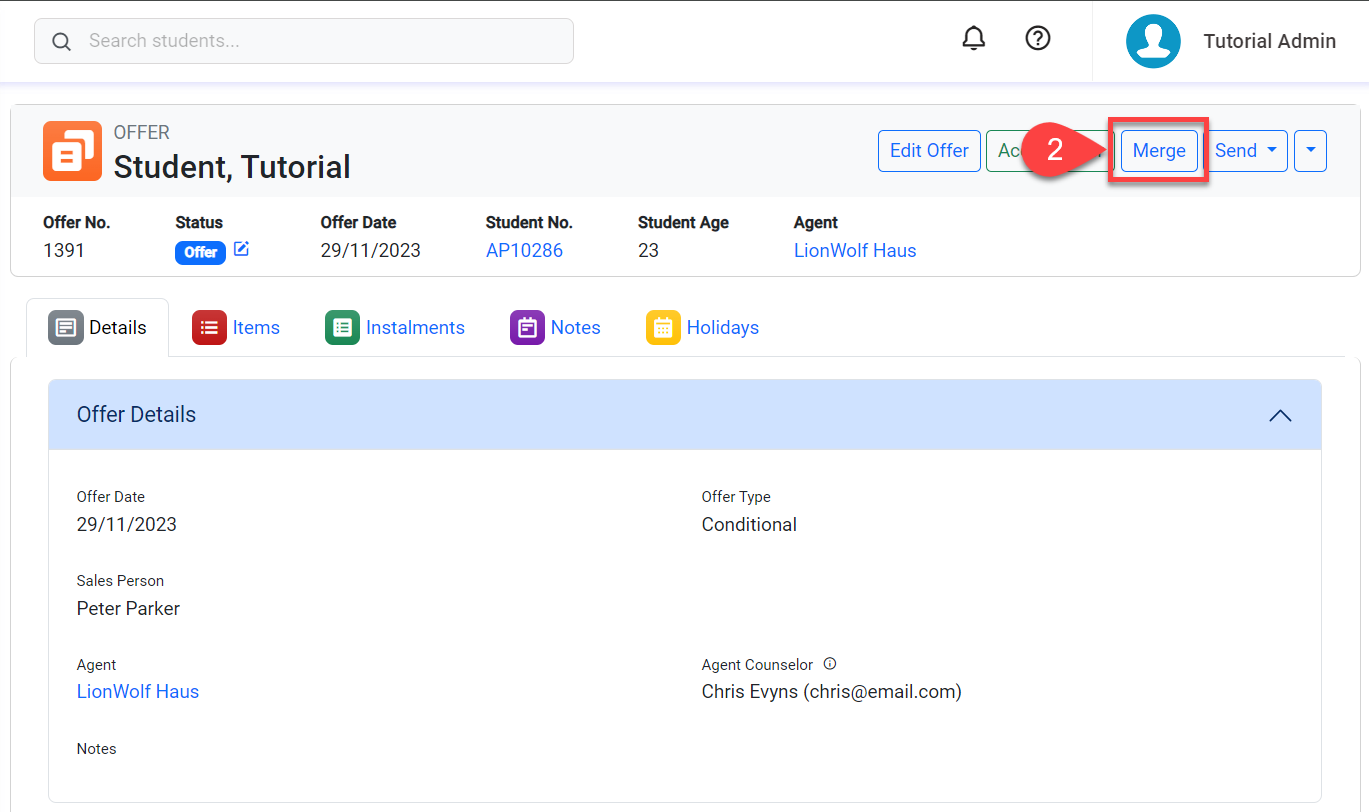
Go to the details page for the offer of interest.
-
Click on Merge at the top right.
-
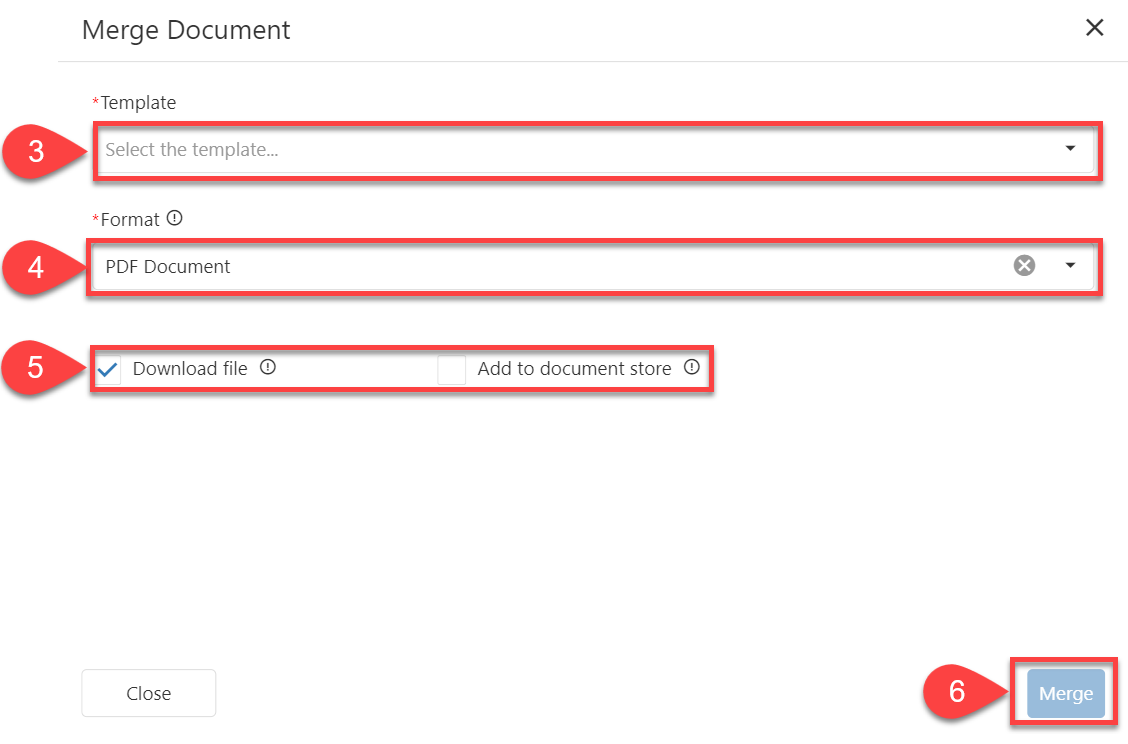
Choose the template that you want to use for this merge.
-
Select the Format for the document that you want to create.
-
Select the options for the merge process. Note that you must choose at least one option to proceed.
-
Click on Merge to start generating the document and wait for the process to complete.
-
If the Download File option was selected, the file will download automatically.
For more details about merging documents, go to this article: Merge Documents.
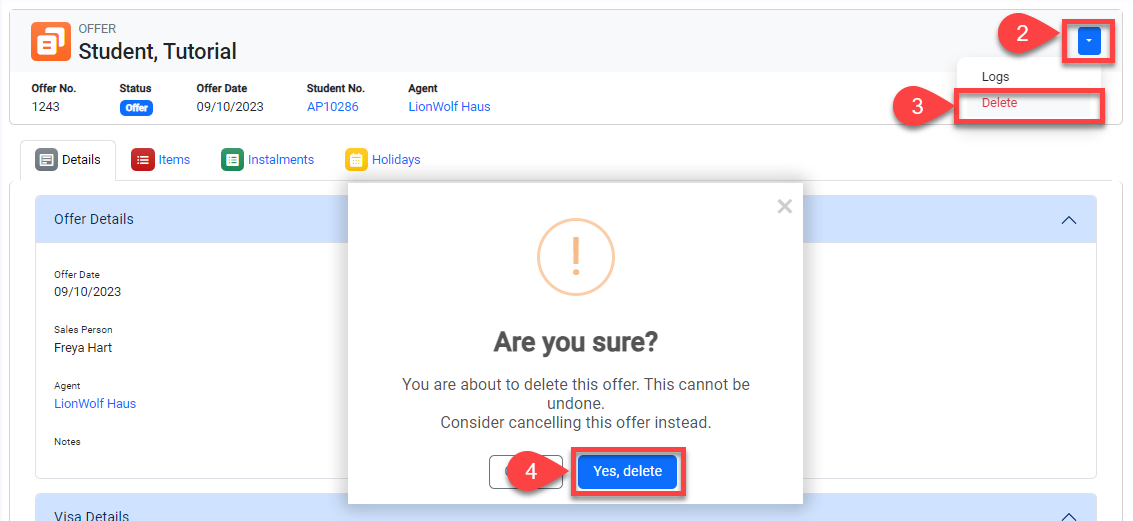
Delete Offers
-
Go to the details page for the offer of interest.
-
Click on the Dropdown button located at the top right.
-
Click on Delete.
-
Confirm to delete.
Deleting an offer cannot be undone.