eBECAS/EDMISS enables colleges to issue warnings and optionally create documents and send messages by email or SMS. Warning entries can include custom categories to help classify and track different types of issues.
When a warning is issued, the enrolment’s attendance details are recorded. This allows you to view the attendance as it was at the time the warning was created.
To support monitoring and quick navigation, the category and date of the most recent warning for each enrolment can be viewed on the enrolment layout and in the enrolments grid.
Before Issuing Enrolment Warnings
-
Specify Enrolment Warning Categories. To customise the list of available categories, update the values on the relative Enrolment Warnings Categories picklist of Enrolment Warnings object.
-
Depending on the warning method, templates of the Enrolments object are used to generate and send the warning.
-
For Document Merge and SMS Warning, templates are required.
-
For Email Warning, an Email Template is optional. You can either select a template or compose the email content manually using the email body.
-
Warning Methods
There are four methods for issuing a warning:
-
Log Only: Creates only a warning entry in the system without sending any notification to the student.
-
Document Merge: Creates a warning entry and generates a warning document. The generated document is saved to the student’s Document Store, and a link to the document is available on the warning details page.
-
Email Warning: Creates a warning entry and sends an email to the student. You can also generate documents using Enrolment Document Templates and attach them to the email. The sent email is recorded in the student’s diary, and a link to the email entry is available from the warning details page.
-
SMS Warning: Creates a warning entry and sends a SMS to the student. The sent message is recorded in the student’s diary, and a link to the diary entry is available from the warning details page.
Create Enrolment Warnings
Warnings can be issued for one or multiple enrolments.
Issue Warning for a Single Enrolment
-
Go to the Enrolment Details page of interest.
-
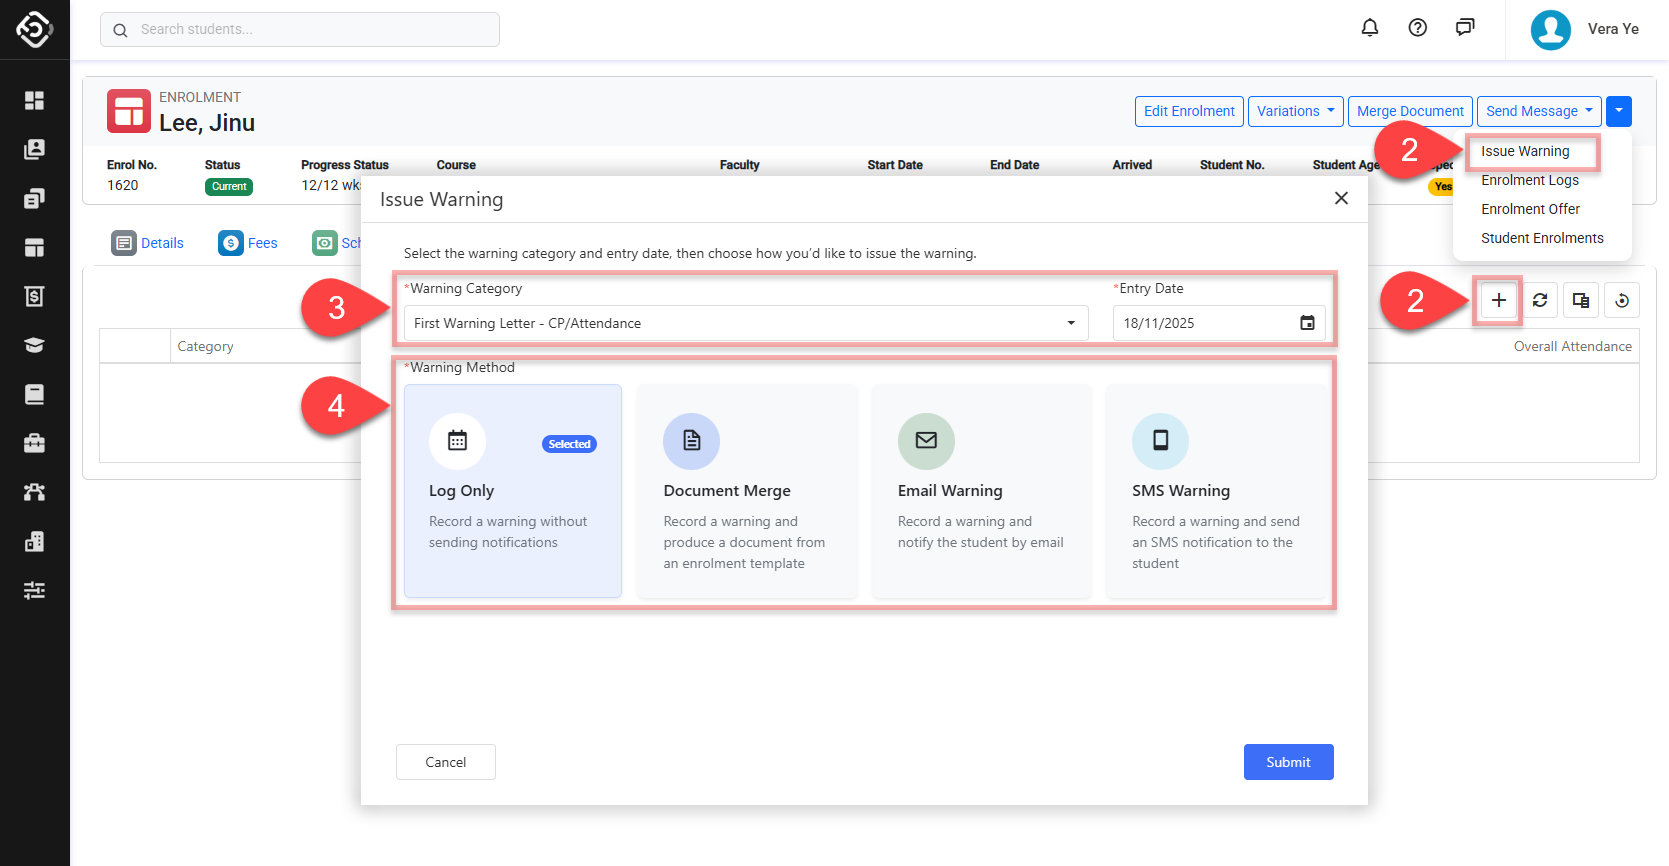
To open issue warning window, you can do either:
-
Click on the dropdown button in the enrolment header and click on the Issue Warning button
-
Click on the Warnings tab, then click on the Add (➕) button at the top right of the grid.
-
-
Enter the warning details for a warning.
-
Warning Category: Select the category for the warning entry.
-
Entry Date: Select the issue date of the warning entry.
-
-
Select warning method to issue the warning and click on Next or Submit button.
-
Follow the next step according to the selected warning method.
-
Log Only:
-
Click on Submit button and Enrolment Warning entry will be created for the enrolment, and you’ll be redirected to the enrolment warning details page.
-
-
Document Merge:
-
The Merge Document window will show. Please visit the following article for Document Merge setting: Merge Documents
-
Click on Submit button to finalise it.
-
-
Email Warning:
-
The Send Email window will show. Please visit the following article for Send Email setting: Send Emails.
-
Click on Submit button to finalise it.
-
-
SMS Warning:
-
The Send SMS window will show. Please visit the following article for Send SMS setting: Send SMS
-
Click on Submit button to finalise it.
-
-
Issue Warnings for Multiple Enrolments
-
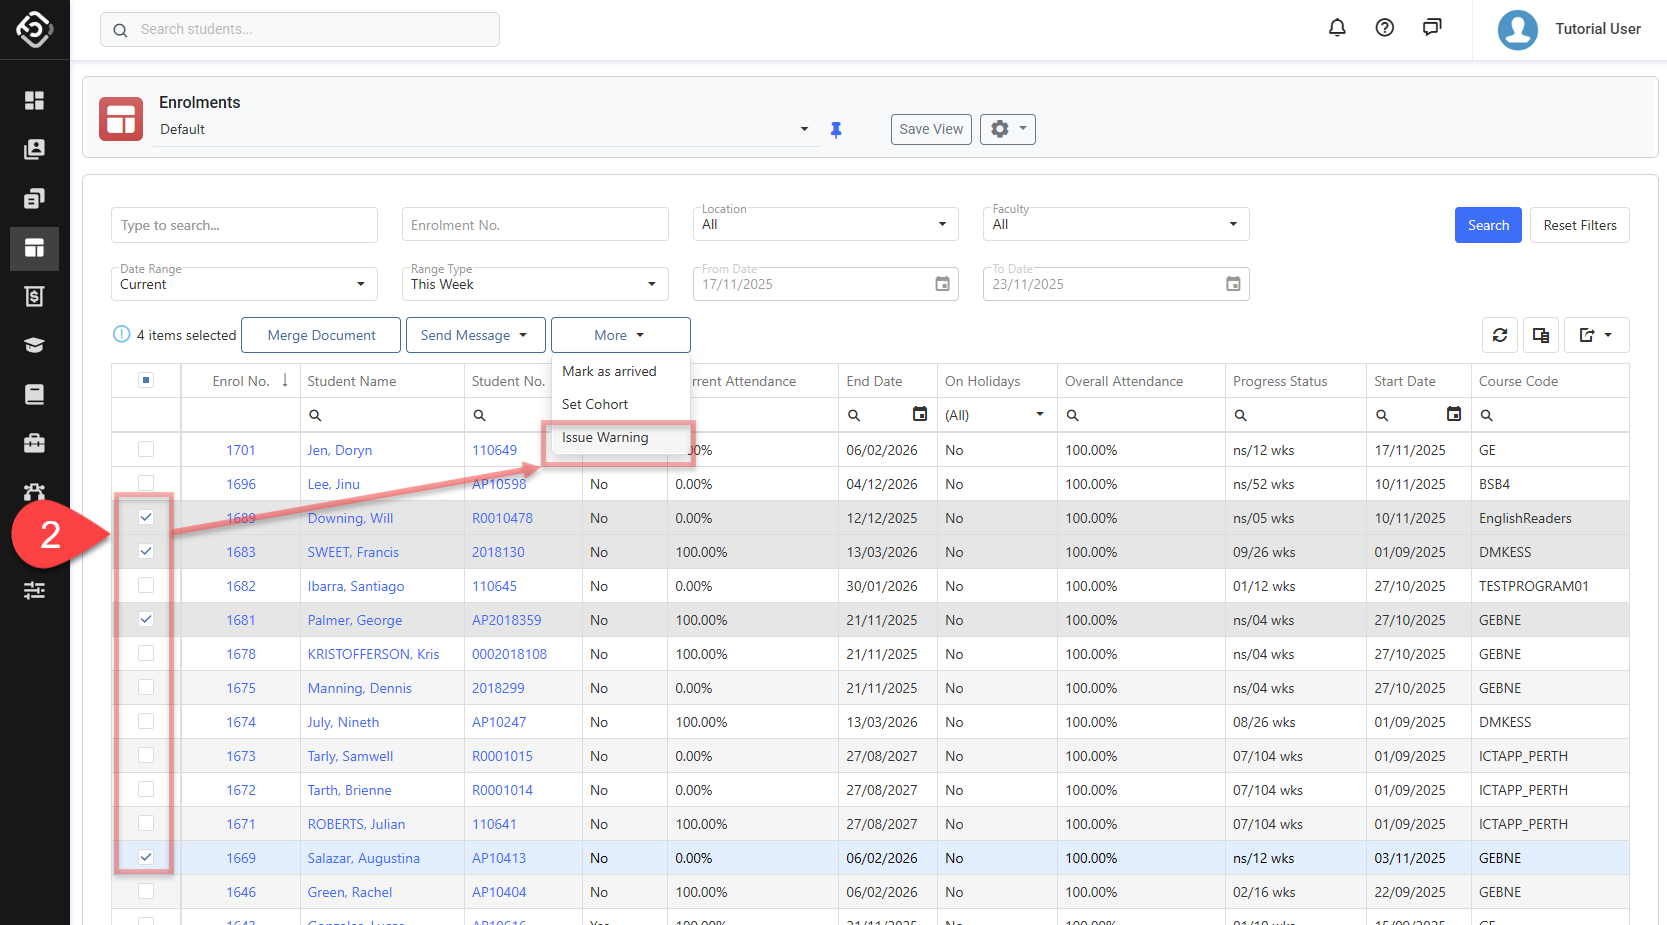
Go to the Enrolment Search and locate the enrolment(s) that you’d like to issue the warning for.
-
Select the enrolments, then click More > Issue Warning in the grid actions panel.
-
Configure enrolment warning entries. Refer to the section above: Issue Warning on Single Enrolment for more details.
-
For Document Merge, Email Warning and SMS Warning, depending on the number of records selected, click on Submit button or Start Send Process.
-
OPTIONAL BUT RECOMMENDED For Send Process, you can add a description for the process. The description you provide will help to identify the process.
-
The Send Process will start in the background.
-
Once the process is complete, a notification will be sent to the user who initiated the process. The user can also check the status from their Processes page.
-
Edit Enrolment Warnings
A enrolment warning cannot be edited once it has been created.
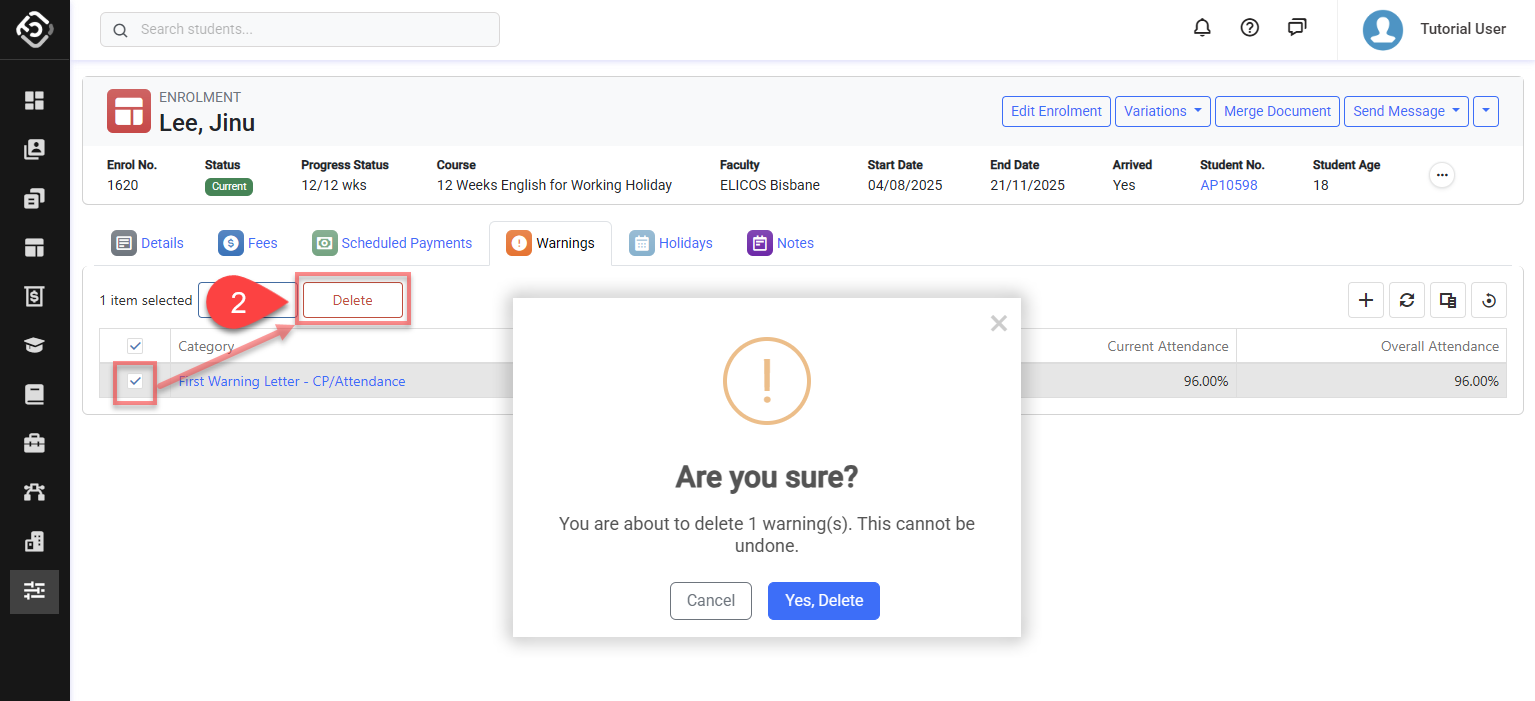
Delete Enrolment Warnings
-
Go to the enrolment details page of interest and click on the Warnings tab.
-
Select the warning entry(s) to delete and click on the Delete button on the grid actions panel.
-
Confirm to delete the warning record. This cannot be undone.
Deleting an enrolment warning does not delete the corresponding diary entry or document.