
Overview
Guest Forms is a feature included in the Equator CRM App. Contact your system administrator for details.
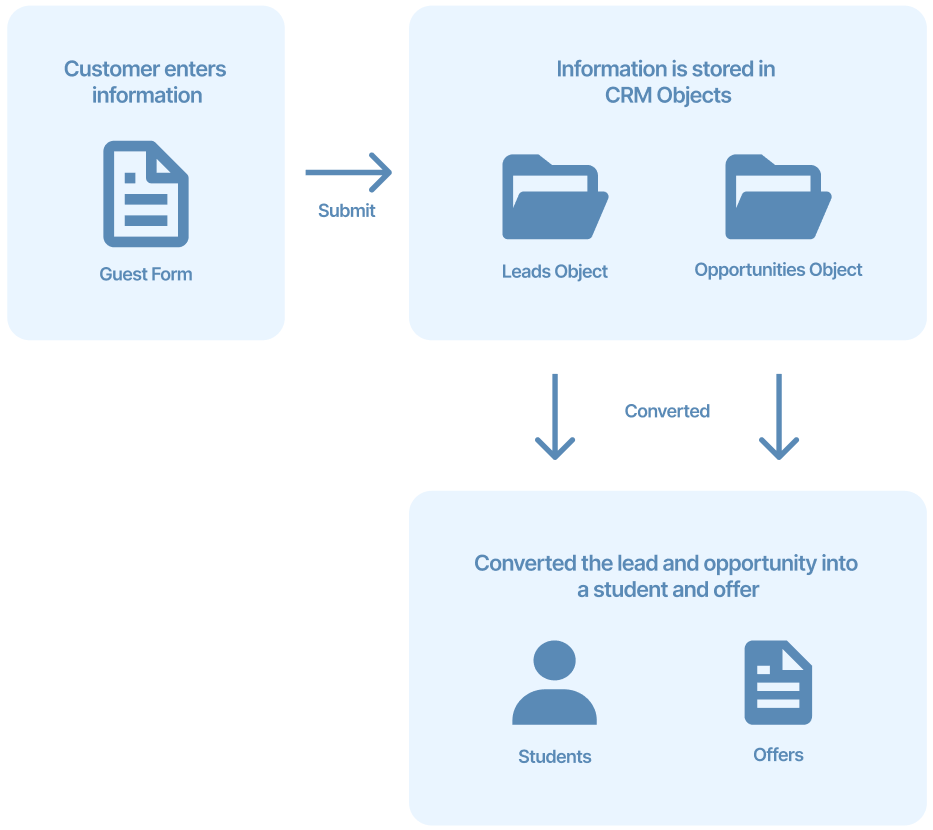
With Guest Forms, you can create and publish highly customisable forms to collect details directly in the App. Whether you want to create an Application Form or a just a simple Contact form, the Guest Forms got you covered.
Once published, these forms will have a public URL that you can share with external users such as students, agents or any other guest users. When these forms are submitted, a lead and an opportunity (if setup) will be created. You will then be able to convert the lead and opportunity into a student and offer, respectively. All of this within eBECAS/EDMISS.
Considerations for Managing Guest Forms
-
Guest Forms require the Equator CRM App and the Equator API App. Contact your system administrator for details.
-
You can create as many guest forms as layouts allowed in your subscription.
-
All the data fields in the guest forms are inherited from the leads object. This means that you can only use in the layouts for the guest forms, the fields available on the leads object. To add new fields to a guest form, you need to create these fields for the leads object.
-
Guest Forms are only accessible via their public URLs.
-
To capture details for opportunities, the Opportunity Builder must be added to the form. Visit the following article for more details: Opportunity Builder.
Set up Guest Forms
Configuration
Before you can make any Guest Forms public (accessible by non-authenticated users), you need to configure your Equator CRM App, specifically, you need to choose an API user that will be used by the system to create the leads and opportunities when the forms are submitted. To do so:
-
Select this API user on the Equator CRM App: Configuration
This API user will be used by the system to create the leads and opportunities from the submission of Guest Forms. Without this configuration, an error will display when trying to access any guest forms.
Publish Guest Forms
For Guest Forms to be accessible, they need to be active and published.
-
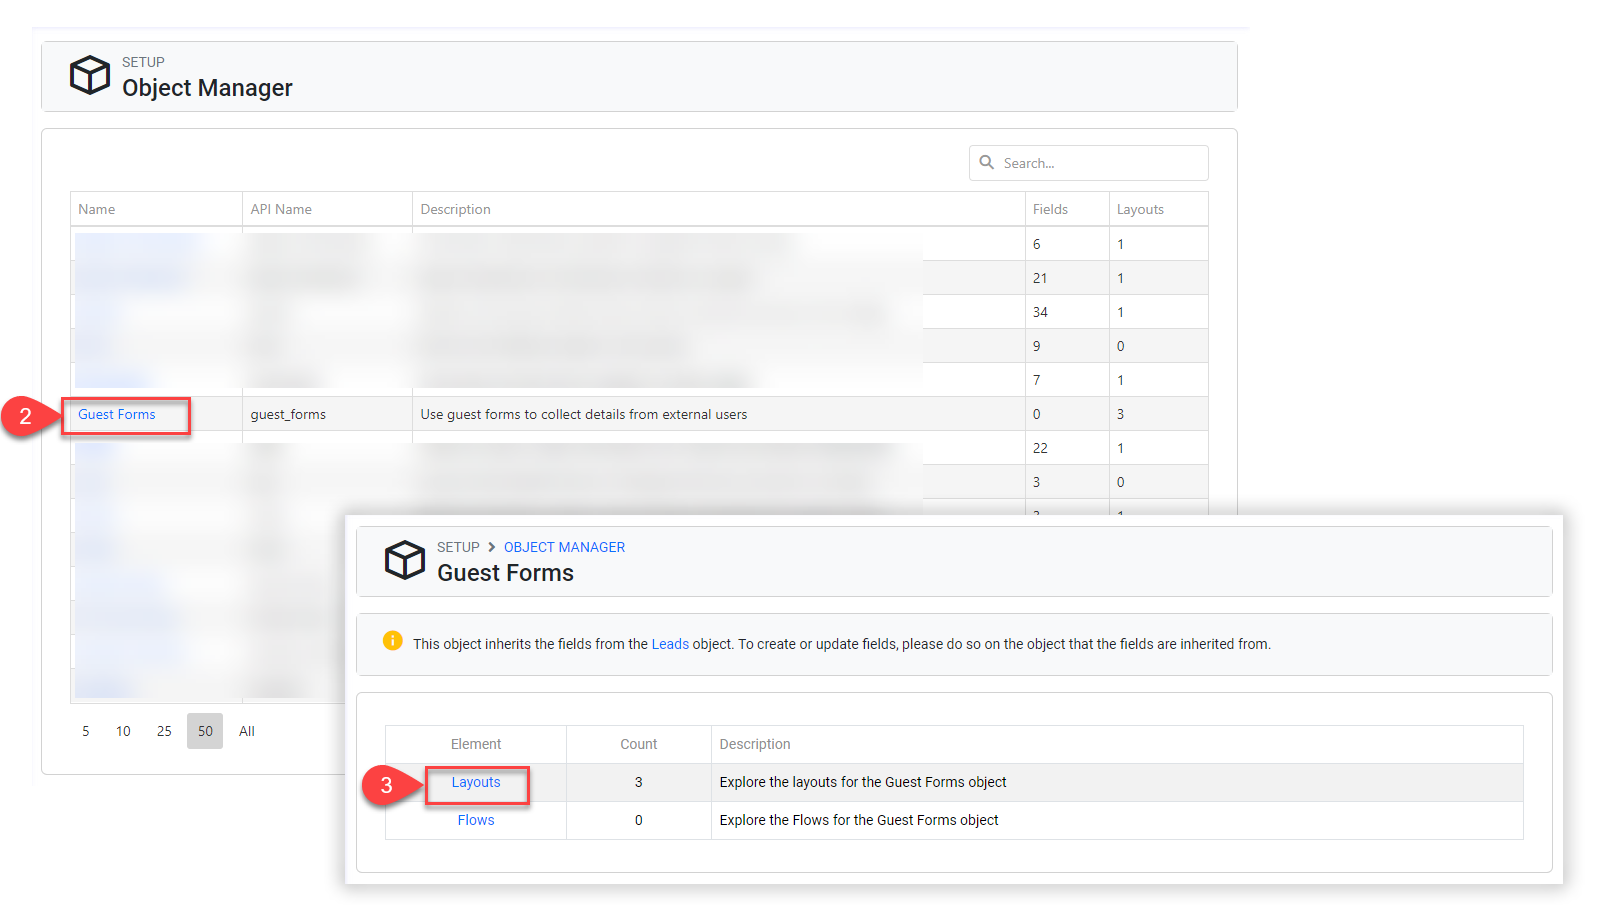
From the Utilities menu, go to Object Manager.
-
Click on Guest Forms.
-
Then click on Layouts.
-
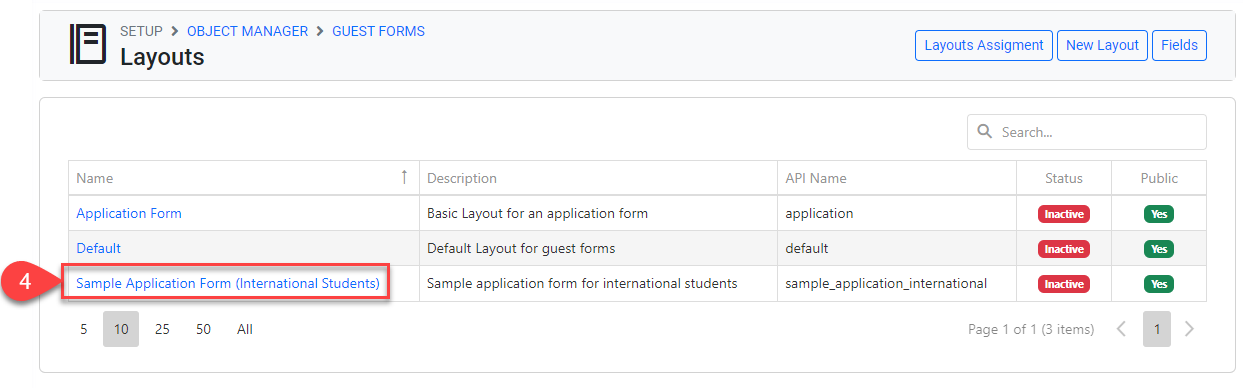
Click on the layout that you’d like to publish.
-
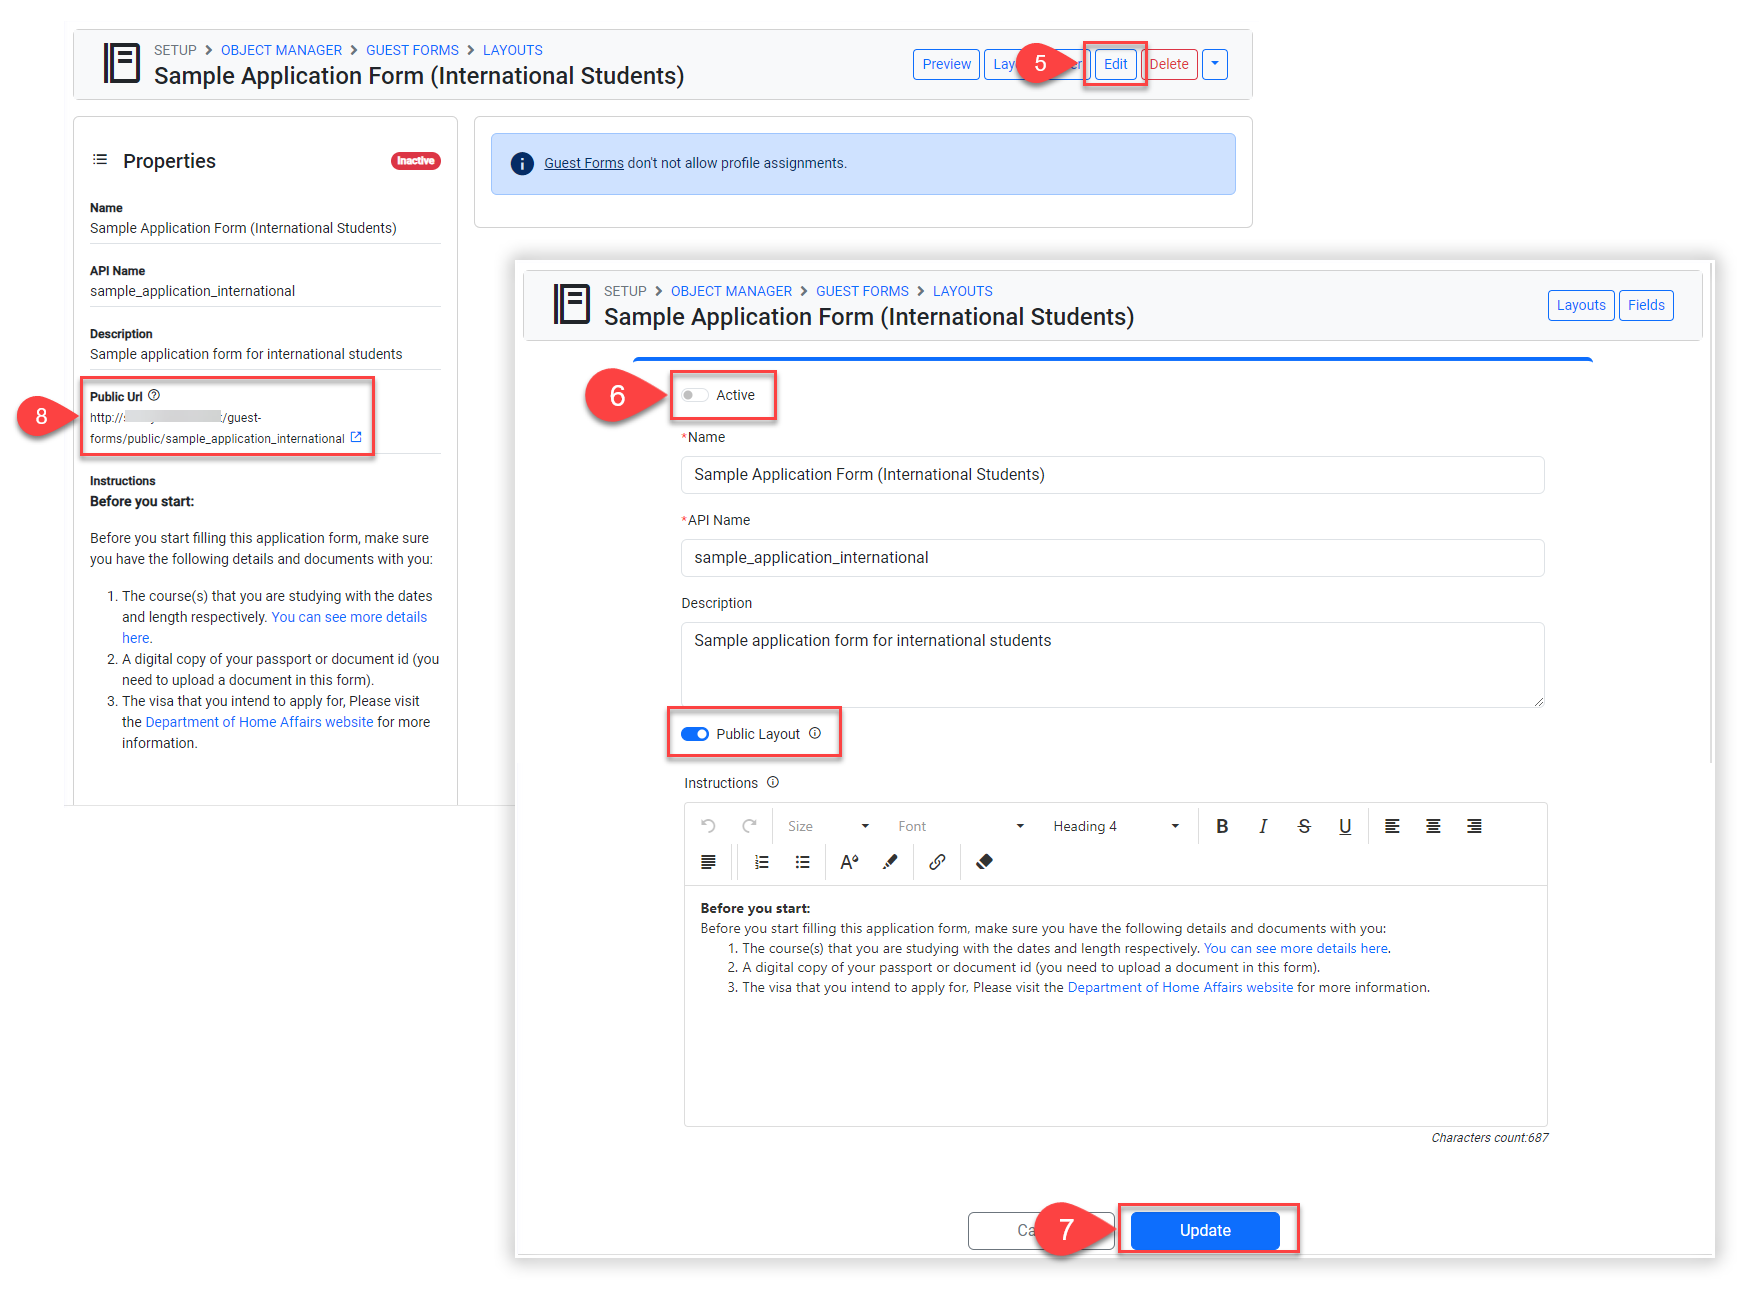
Click Edit at the top right.
-
Enable the Active and the Public Layout options.
-
Click Update to apply the changes.
-
You can now access the Guest Form through the public URL.
Manage Guest Forms
Guest Forms inherits the fields from the Leads object. This means that it uses the fields from the Leads object but it can have its own layouts.
Create a New Custom Guest Form Layout
-
From the Utilities menu, go to Object Manager.
-
Click on Guest Forms.
-
Then click Layouts.
-
Enter the details for the layout.
-
Keep the Public Layout option deactivated until the layout is ready to be published.
When you set a layout to public, the form will be immediately accessible through its public URL. -
Enter the custom instructions (if any).
These instructions will be displayed to all users at the top of the form. These instructions can be used to provide more details about the form and the next steps.
If the form does not require any instructions, leave this field blank. -
Click on Create.
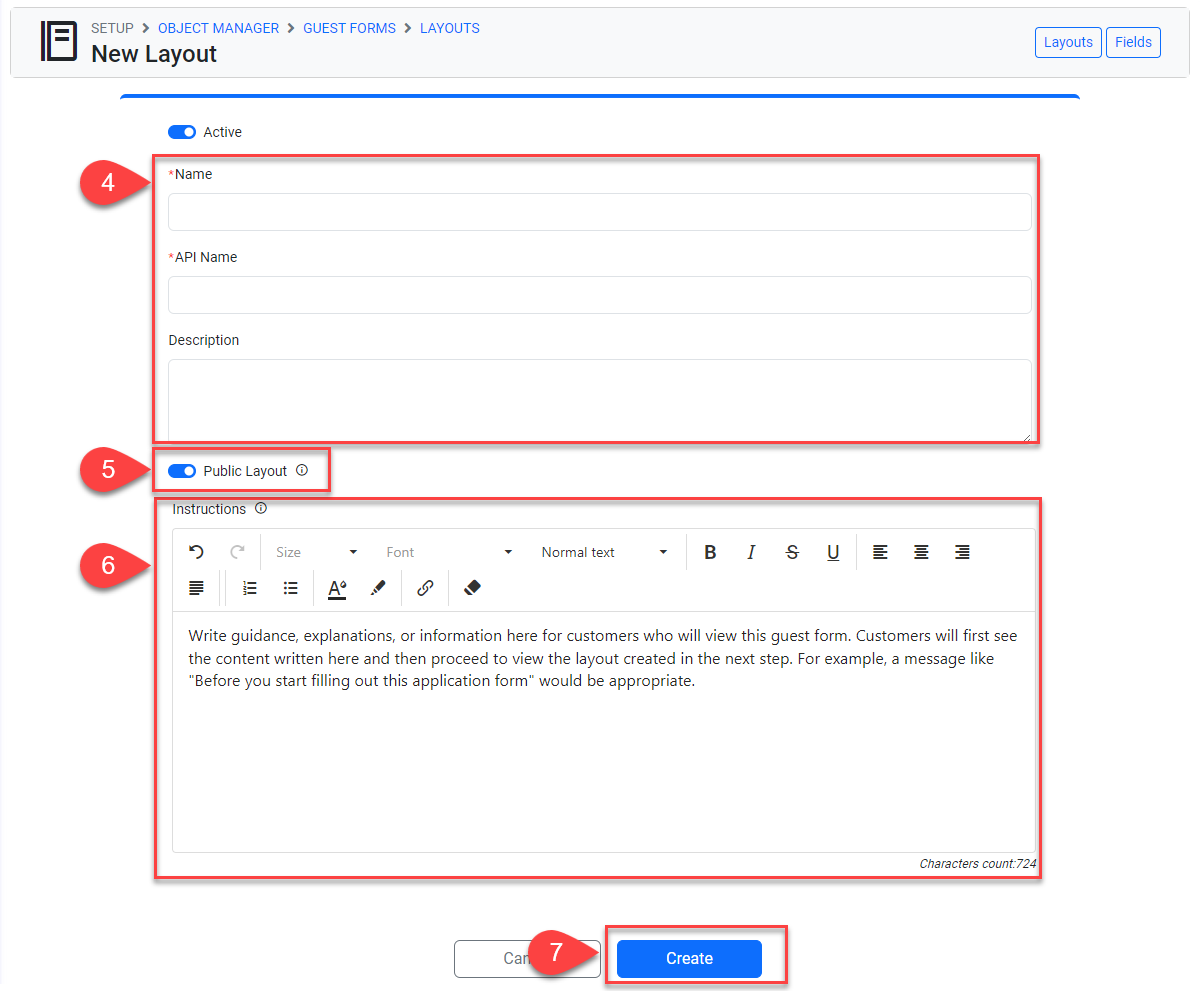
-
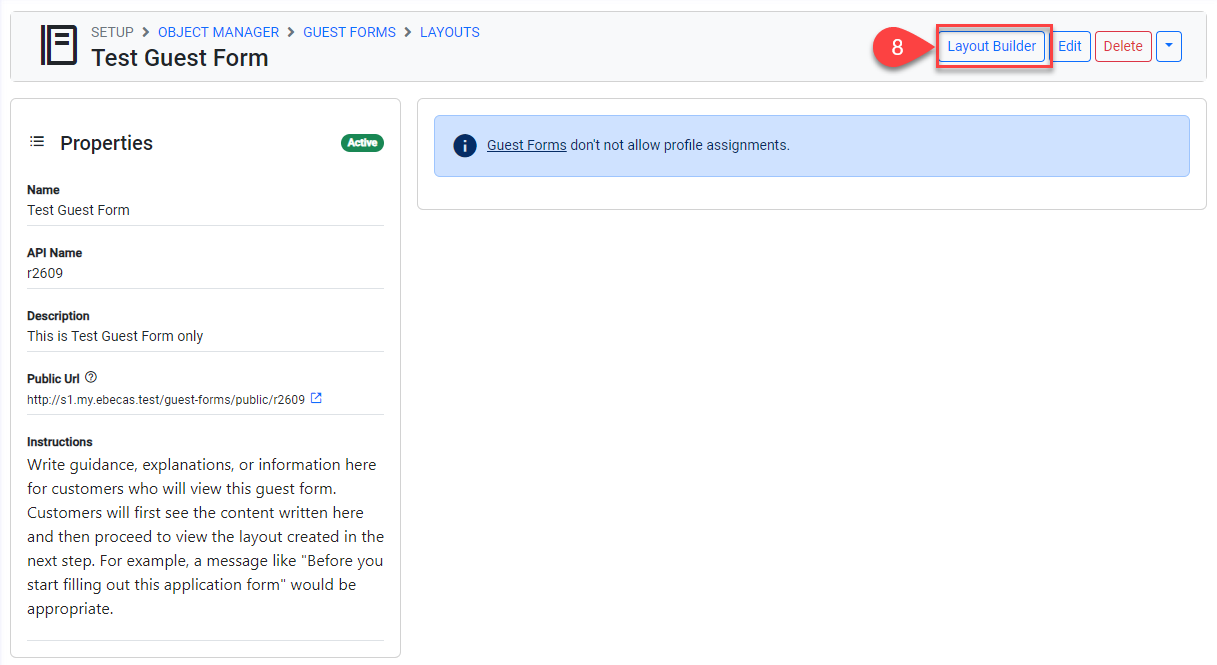
Click on the Layout Builder at the top right to set up the form. Follow the steps outlined in the following article to add sections, components and fields: Layouts: Layout Builder.
Update Guest Form Layouts
To upload the form, you need to update the layout. See the details here. Layouts: Update Layouts.
Replace the Company Logo in Guest Form
To replace the company logo in Guest Form, see the details here. Utilities | Branding.
Delete Guest Form Layouts
See the details here. Layouts: Delete Layouts.
Frequently Asked Questions (FAQs)
What happens when a Guest Form is submitted?
When a guest form is submitted, a lead (and an opportunity if setup) will be created. You can use the Lead Search or the Opportunity Search pages to find them.
For an opportunity to be created, the Guest Form layout must include the Opportunity Builder component. See the following article for details. Opportunity Builder
Can I set up a notification when a Guest Form is Submitted?
Yes. To achieve so, you need to set up a Flow for Guest forms.
-
Go to Flows of Guest Form through Utilities menu > Object Manager.
-
Enter the flow’s details and select Guest Form Layout that you’d like to use this flow for.
-
Set the Triggers and Conditions.
-
Add an Action to Send Email. Select the Recipients as needed.
For more detailed instructions on flows, please see this article; Flows.
What is the status and owner of the lead and opportunity created from a Guest Form?
By default, the status and the owner fields will be empty. However, you can customise this by creating a Flow.
-
Go to Flows for the Guest Forms object through Utilities menu > Object Manager.
-
Enter the flow’s details and select Guest Form Layout that you’d like to use this flow for.
-
Set the Triggers and Conditions.
-
Add an Action to Update Field. Select the Status or Lead Owner fields, then choose Value to be updated.
-
Repeat Step 4 to add the fields and their values you want to update through this flow.
For more detailed instructions on flows, please see this article: Flows.
Can I use our own company logo in a Guest Form?
By default, eBECAS/EDMISS logo is displayed in Guest Forms. For ensuring a consistent brand presence, you can customize it to your own brand logo via Branding feature.
Please see the details here. Utilities | Branding.