
How to Chase Overdue Invoices
Overdue invoices can impact your cash flow and create administrative pressure. This guide outlines how to identify and follow up on overdue invoices, helping you recover payments promptly and maintain clear communication with students.
What This Guide Covers
This guide outlines best practices for viewing, managing, and following up on invoices that are overdue.
Before You Start
Make sure your user account has the required permissions to view enrolments, access invoice records, and send communications. If you're unsure, check with your system administrator.
Ensure that an email template is set up for the message you plan to send. If you intend to issue documents such as invoices, the corresponding document template must also be available. This guide does not cover how to create templates.
Key Concepts
Overdue by (days) Field: This invoice field is the number of days that an invoice has been overdue.
Send Email Reminder for Overdue Invoices
We’ll send an email with the relevant invoice attached to students whose invoices are overdue between 1 days and 7 days.
In this example, a 7-day interval is used based on the assumption that the process is run weekly. Running it more frequently may lead to students receiving repeated reminders for the same invoice. Adjust the timeframes as needed to suit your organisation’s policies and procedures.
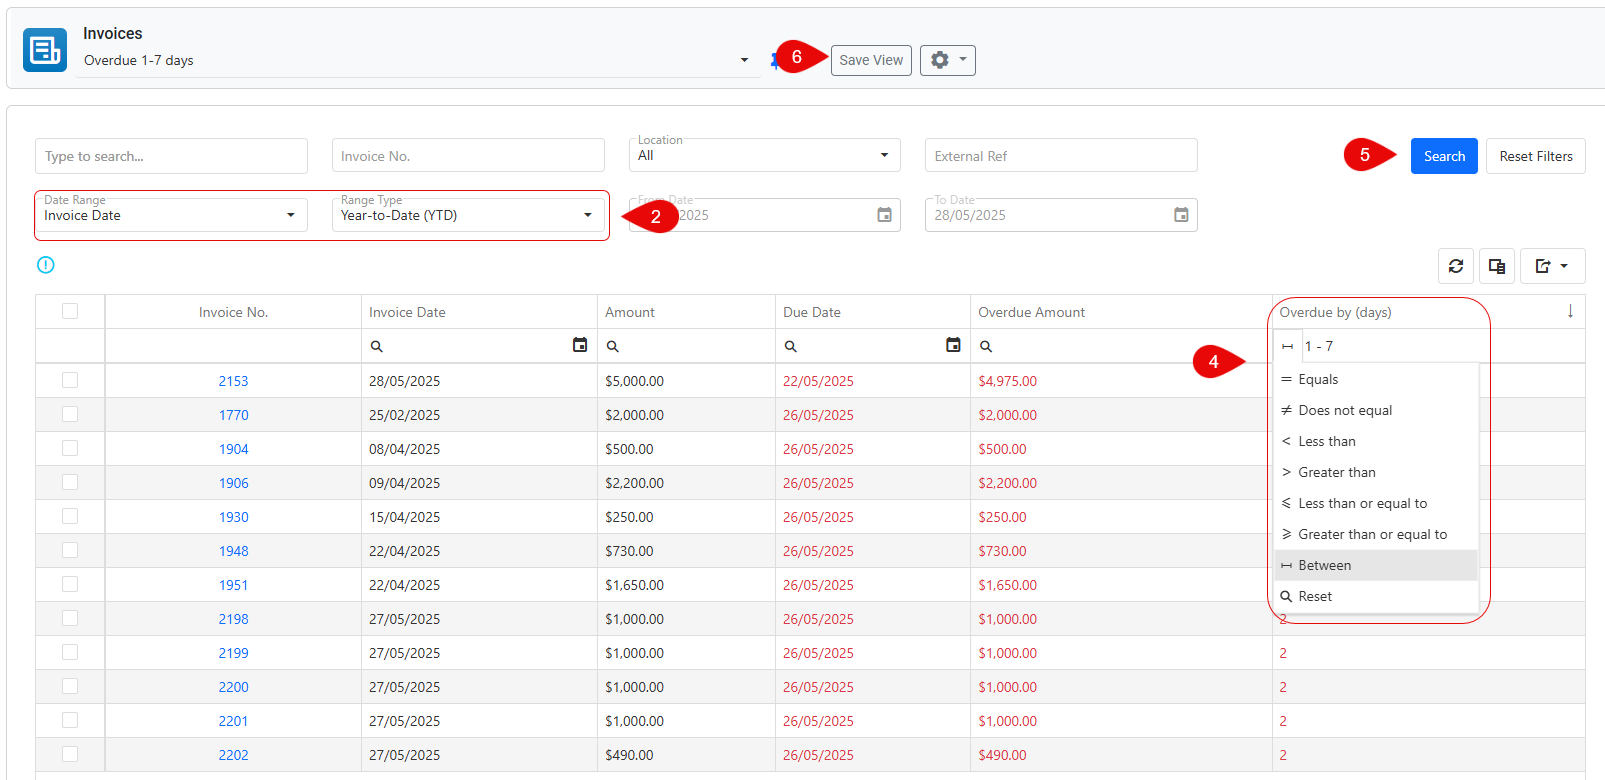
Navigate to the Invoices Search page
Adjust the Header Filter to display only invoices created this year (modify these options as needed).
Data Range: Invoice Date
Range Type: Year-to-Date (YTD)
Add the following columns to the grid if they aren’t already visible.
Amount
Due Date
Overdue amount
Overdue by (days)
Using the Column Filters on the Overdue by (days) column, Select Between and enter 7 and 14 days.
Click Search. The grid will now display all invoices created this year that are overdue by 1 to 7 days.
To quickly access this dataset without repeating the steps, click Save View in the header.
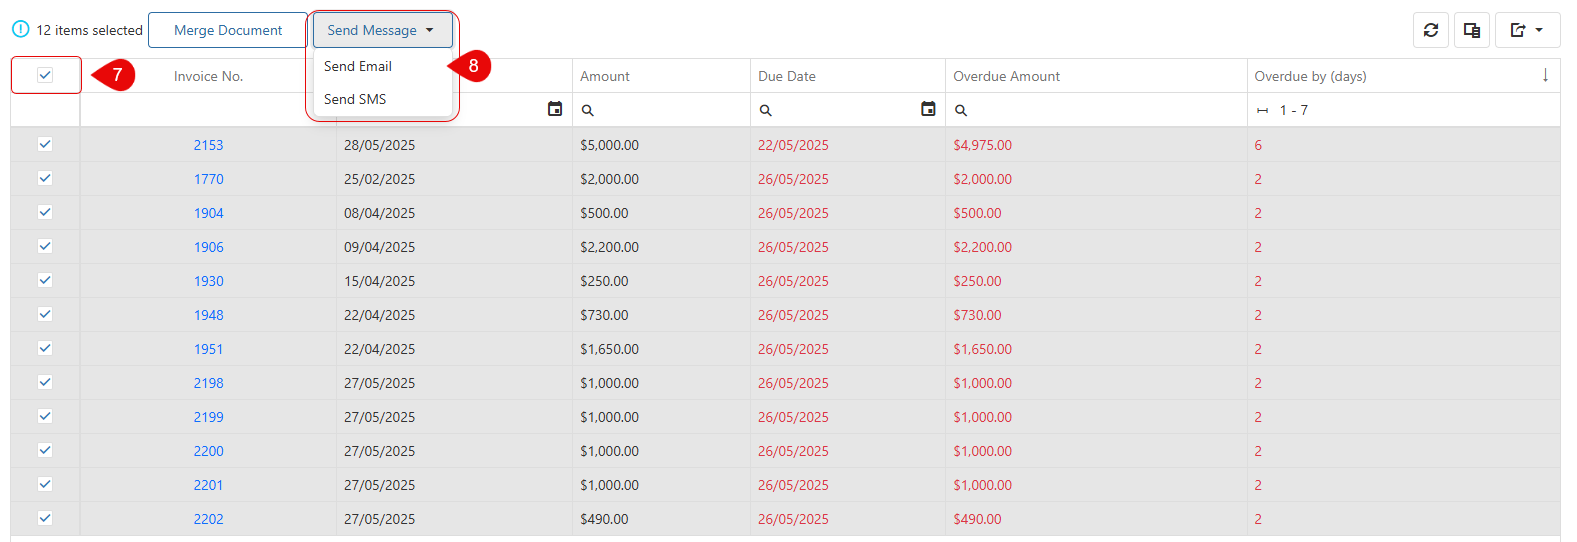
Now that the grid displays the required data, you can proceed to send the email.
Tick the checkbox in the header of the first column to select all records on the current page.
Please note that multiple invoices in the grid may belong to the same student. Sending an email to all records will result in that student receiving a separate email for each overdue invoice listed.
In the grid's action panel, click Send Message, then select Send Email. A pop-up window will appear, allowing you to configure the email.
Let’s configure and send the email. For more detailed instructions, refer to this article.
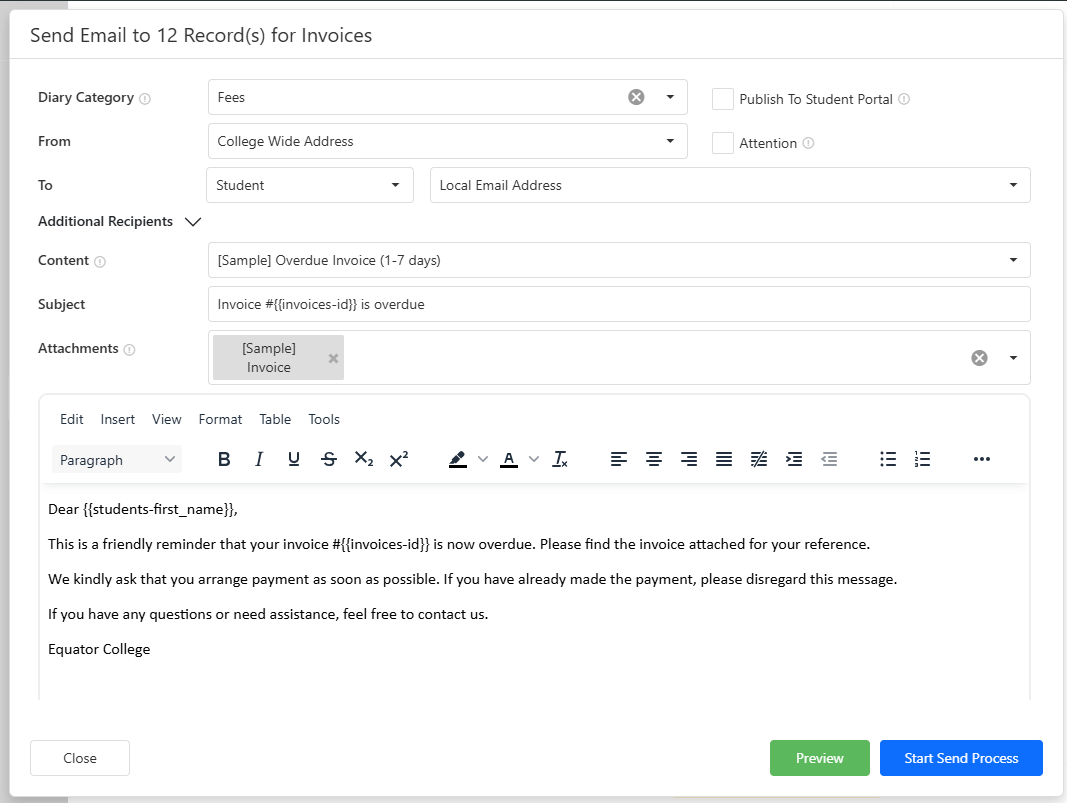
The email will be recorded and added to each student’s diary. Select the category that best matches the purpose of the email. To customise these categories, edit the Diary Categories (Students) picklist. Learn more here.
In this example, the email is being sent from the College Wide address instead of a personal email address.
The student is selected as the primary recipient, but you can also add additional recipients in the CC or BCC fields if needed (click on Additional Recipients to do so).
In the content field, choose the email template. The subject and body will be filled with the template content, which you can edit if needed.
Under attachments, select the document template to include. This document will be merged automatically during the sending process.
Click Preview to view the email using one of the selected records as a sample.
Click Send Email or Start Send Process. Depending on the number of records selected, the emails will be sent either immediately or through a background process.