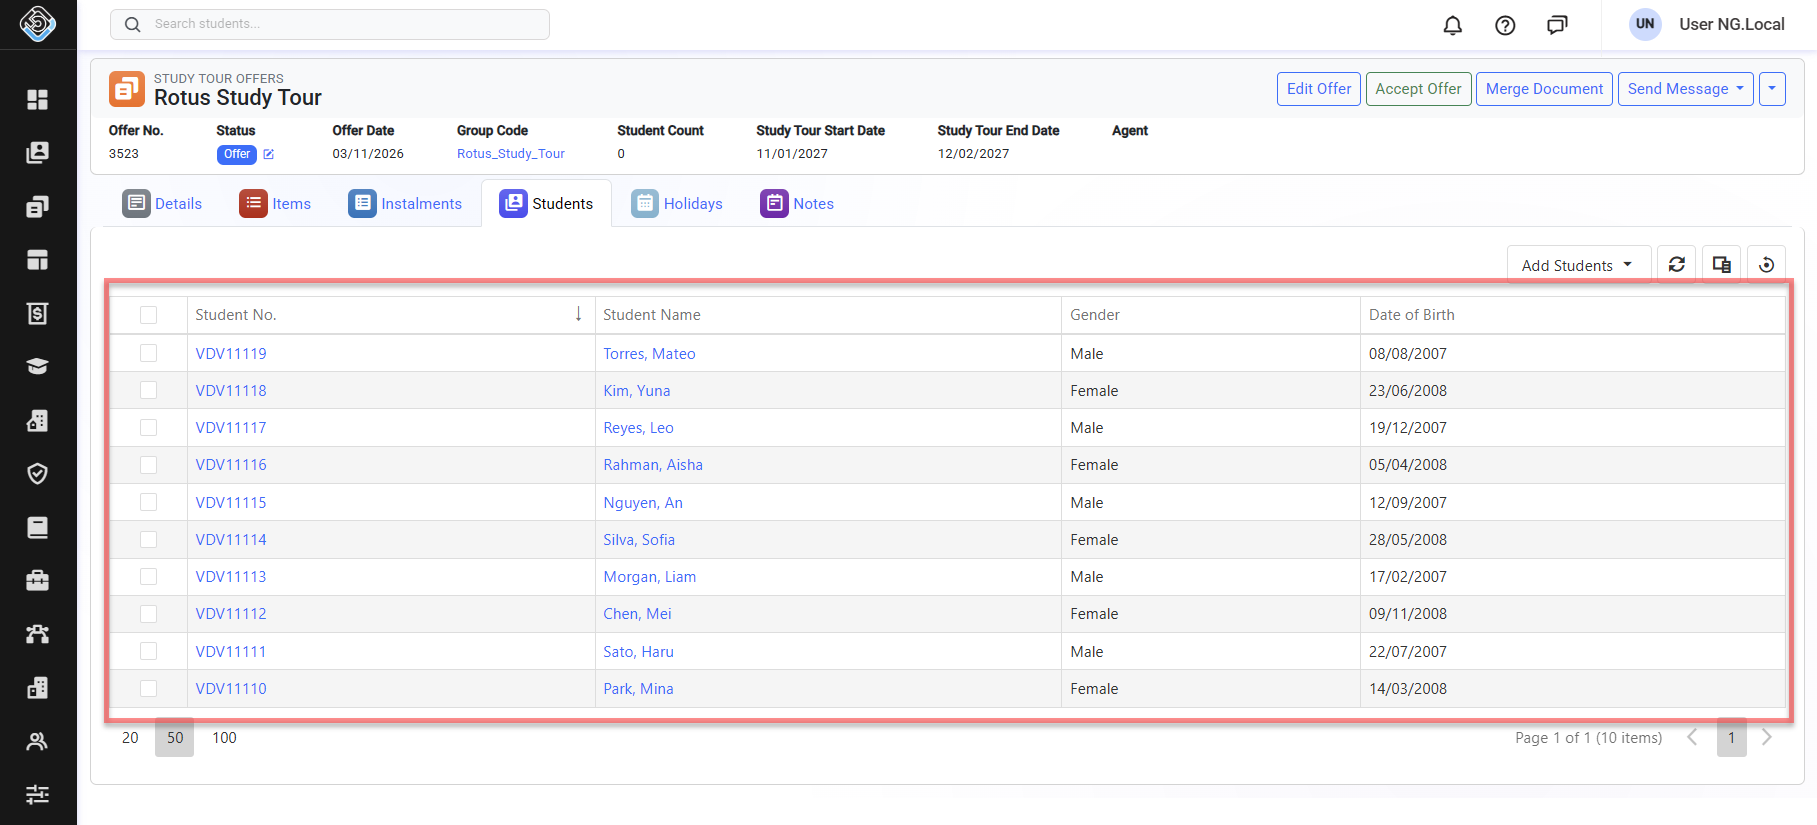
When preparing a Study Tour Offer, you can create multiple students at once by manually entering their basic personal details or importing them from a spreadsheet file. The system automatically checks for duplicates, creates records for new students and adds them to the Study Tour Offer, saving time and reducing manual data entry.
Considerations When Adding Multiple Students
Before adding multiple students to a Study Tour Offer, keep the following in mind:
-
-
Basic Student Details Only: You can enter or import basic student information, including first, middle and last name, date of birth, gender and country. Additional information can be added later from each student's Details page.
-
Before Offer Acceptance: Students can only be created in bulk and added to a Study Tour Offer before the Offer is accepted.
-
Student Count and Offer Item Multipliers: Adding students automatically updates the Student Count on the Offer. However, Offer item multipliers are not updated automatically. Review and adjust these multipliers as needed after adding students.
-
Create and Add Multiple Students
Use the New Students (Multiple) option to create multiple student records and add them to a Study Tour Offer in one batch. You can review and correct student details, check for duplicates and make any necessary adjustments before submitting the group.
-
Open the relevant Study Tour Offer and go to the Students tab.
-
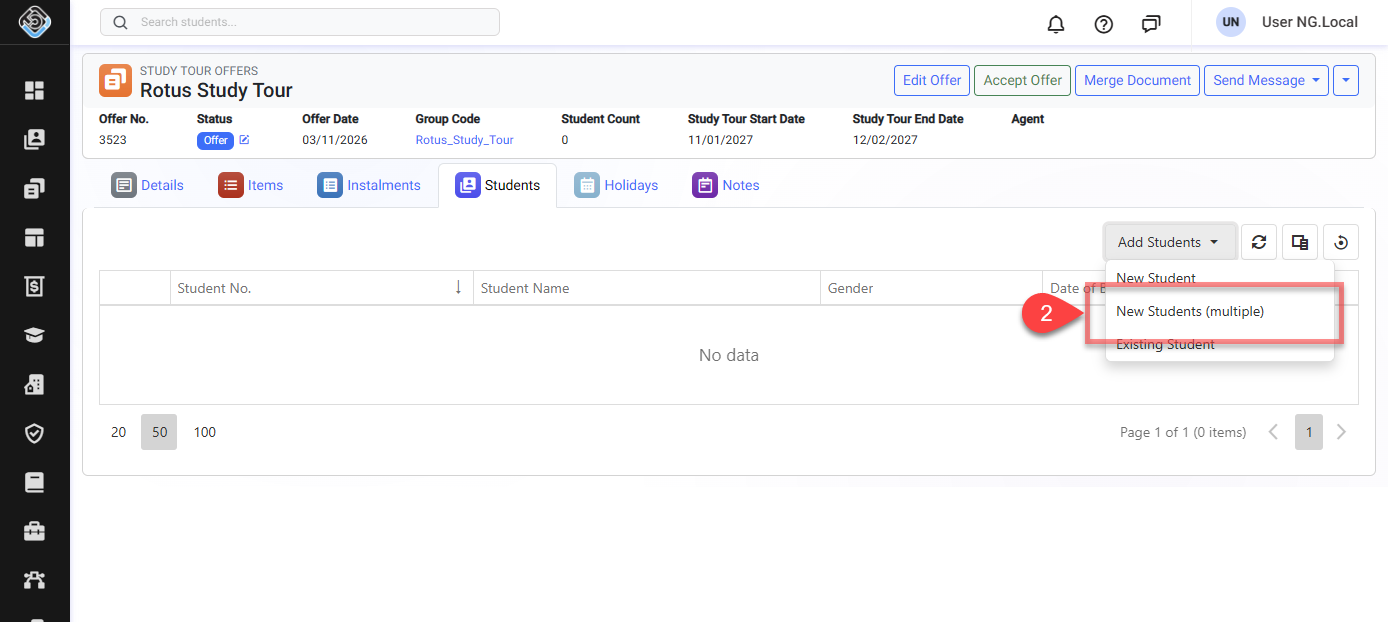
Click Add Students > New Students (Multiple) to open the New Students for Study Tour Offer window.
-
A new pop-up window will open, displaying a grid with the options available to manage the process.
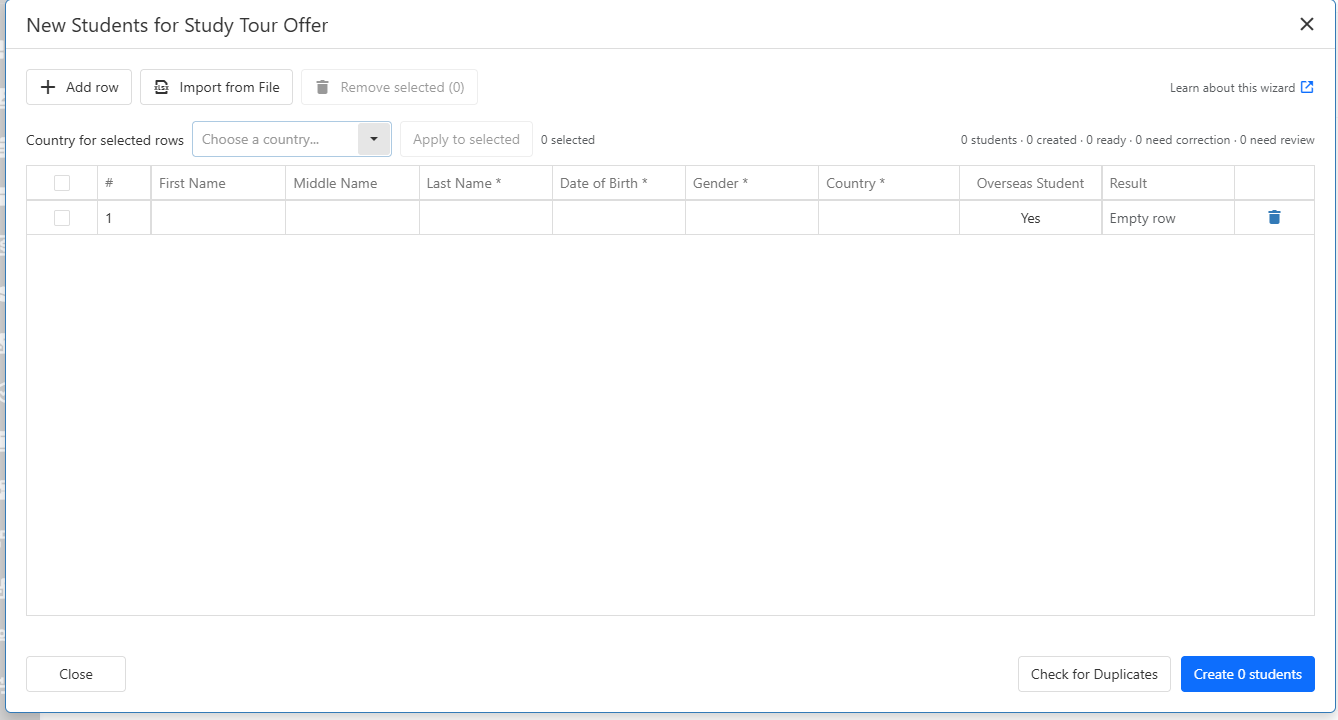
Let’s go through the process.
Step 1: Enter Student Details
You can enter student details directly into the grid or import them from an Excel file.
Option 1: Enter Student Details Manually
Enter each student's details directly into the grid, using one row per student. You can edit the details or remove rows as needed before proceeding.
To add more students, click Add Row to insert additional rows into the grid.
Option 2: Import the Student Details from a File
-
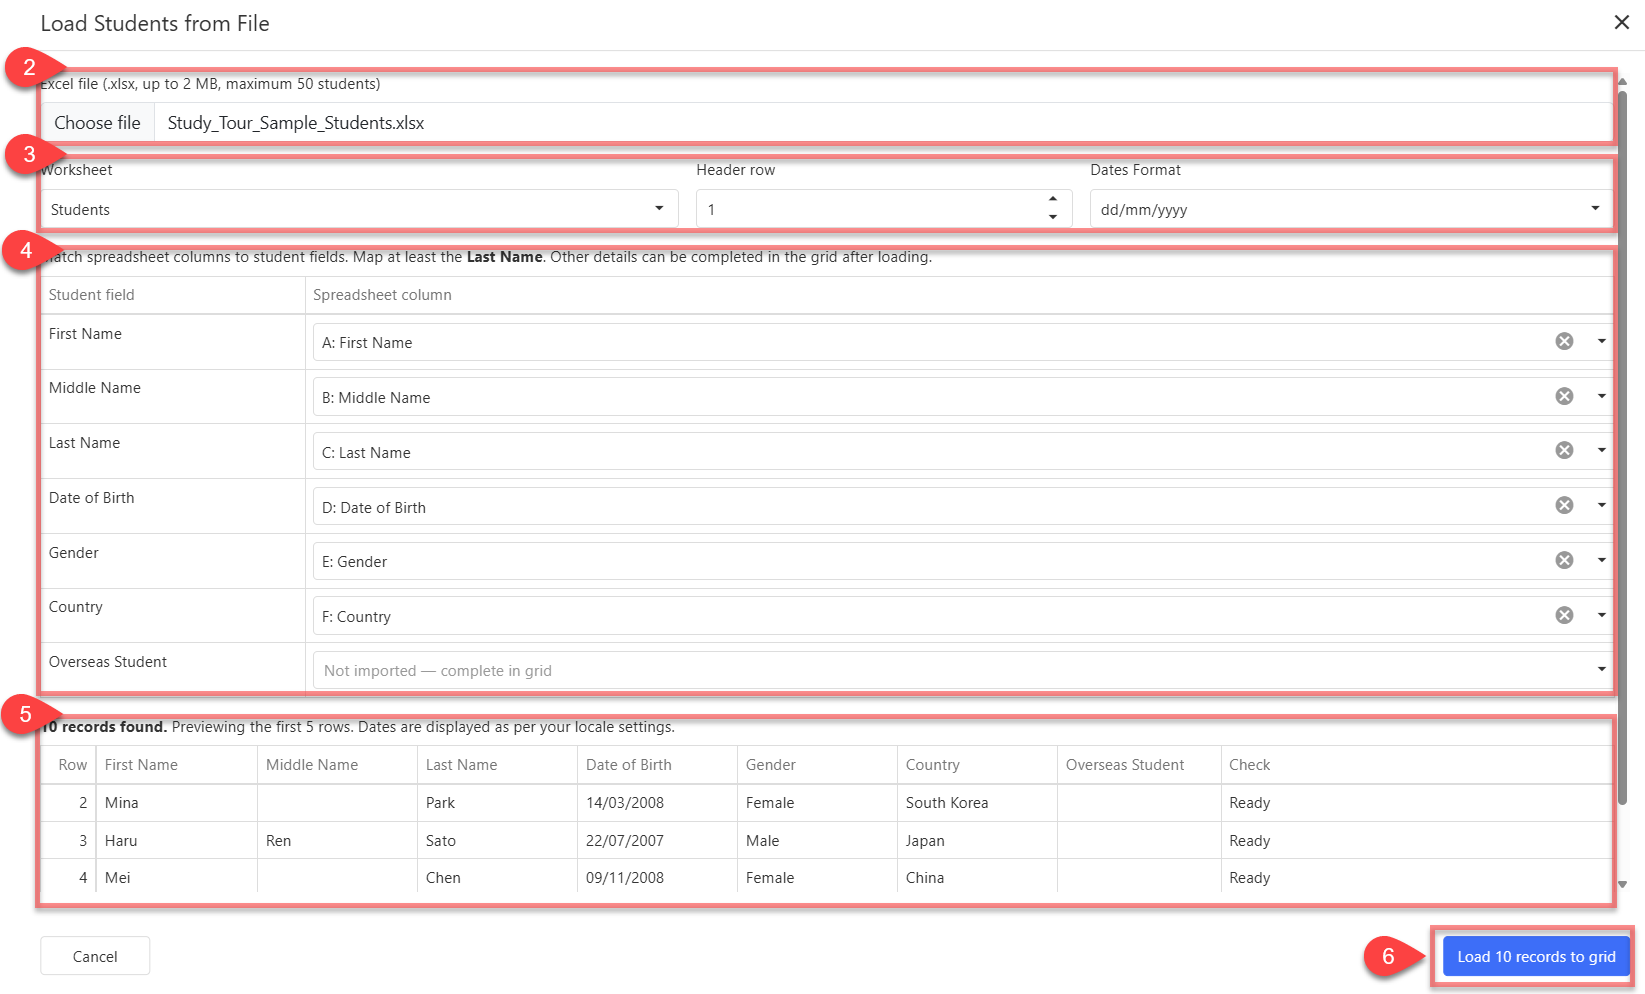
Click Import from File to open the Load Students from File window.
-
Click Choose File and select your Excel spreadsheet (.xlsx). The file must not exceed 2 MB and can contain a maximum of 50 students per import.
-
Select the Worksheet containing the student details, specify the Header Row containing the column headings, and choose the Date Format used in the spreadsheet.
-
Map the spreadsheet columns to the corresponding student fields. At a minimum, Last Name must be mapped. Other details can be completed in the student grid after importing.
-
Review the total number of records and the preview of the first five rows. Use the Check column to identify any values that need attention. Dates in the preview are displayed according to your locale settings.
-
Click Load Records to Grid to load the student details into the wizard.
The records from your file will be loaded into the main grid.
Step 2: Review and Correct Student Details
The wizard flags cells with missing or invalid values. For each row marked Needs correction , read the message in the Result column and update the flagged cells. For example, if a country from the spreadsheet is unrecognised, select the correct value in the Country cell.
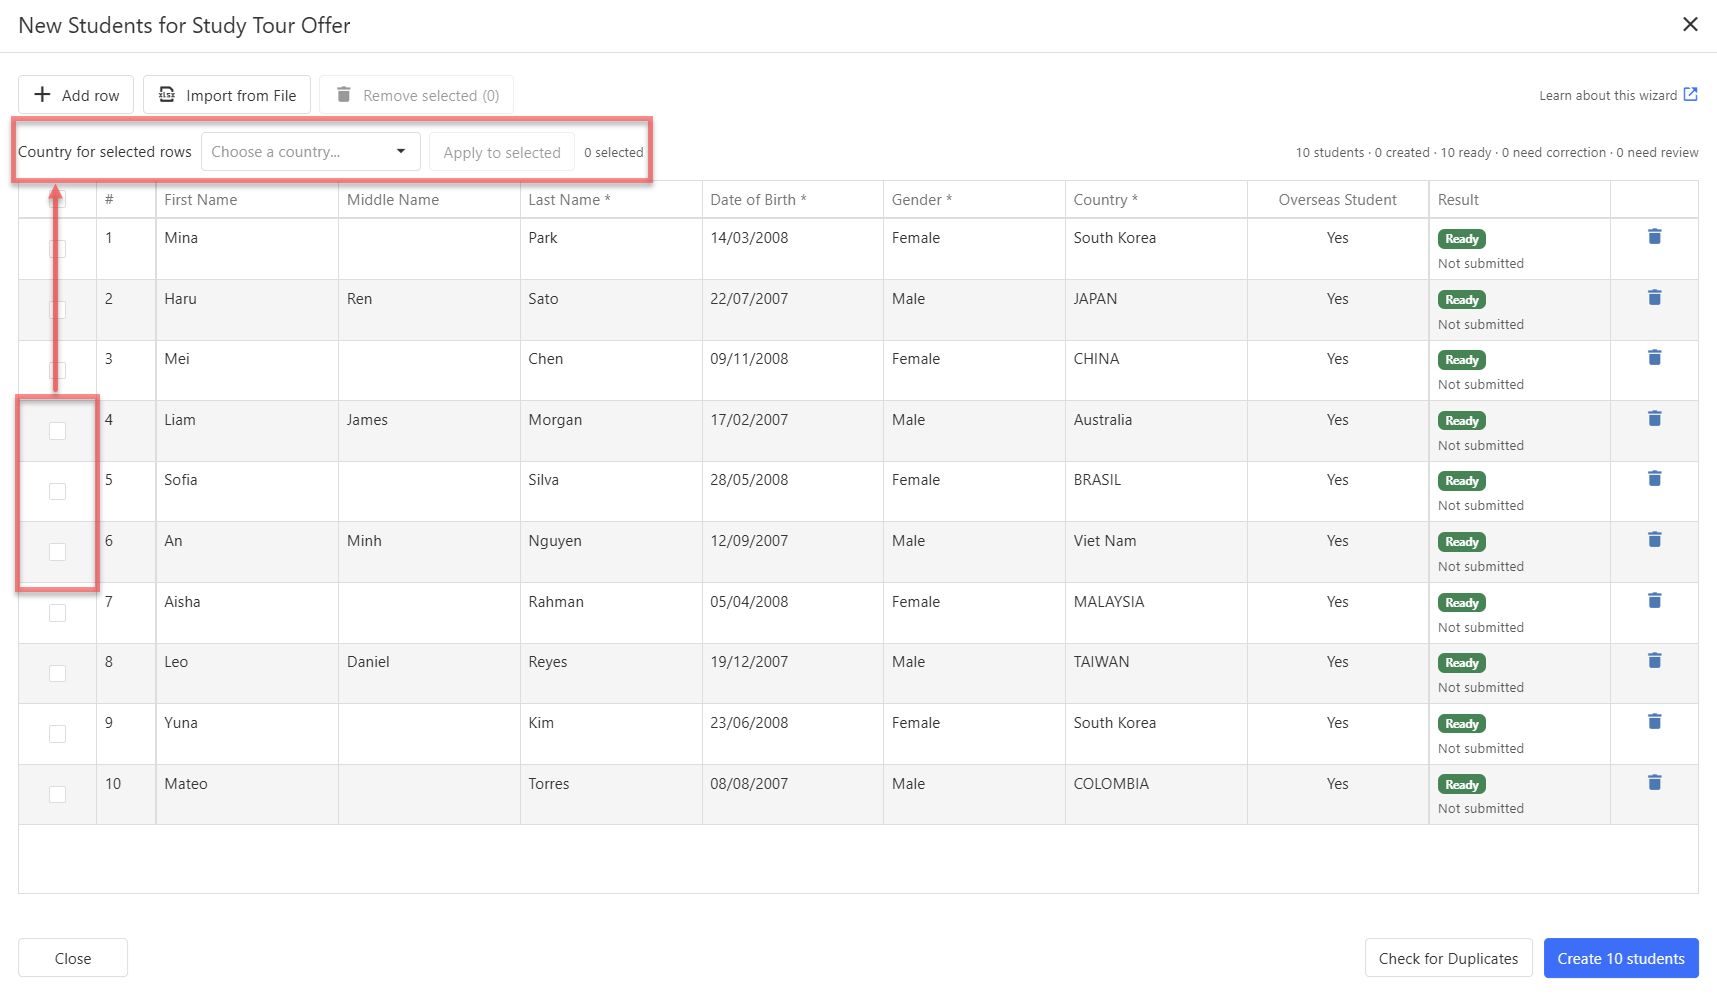
To apply the same country to several students, select their rows, choose a country under Country for selected rows, and click Apply to selected.
Step 3: Check for Potential Duplicates
Optional But Recommended
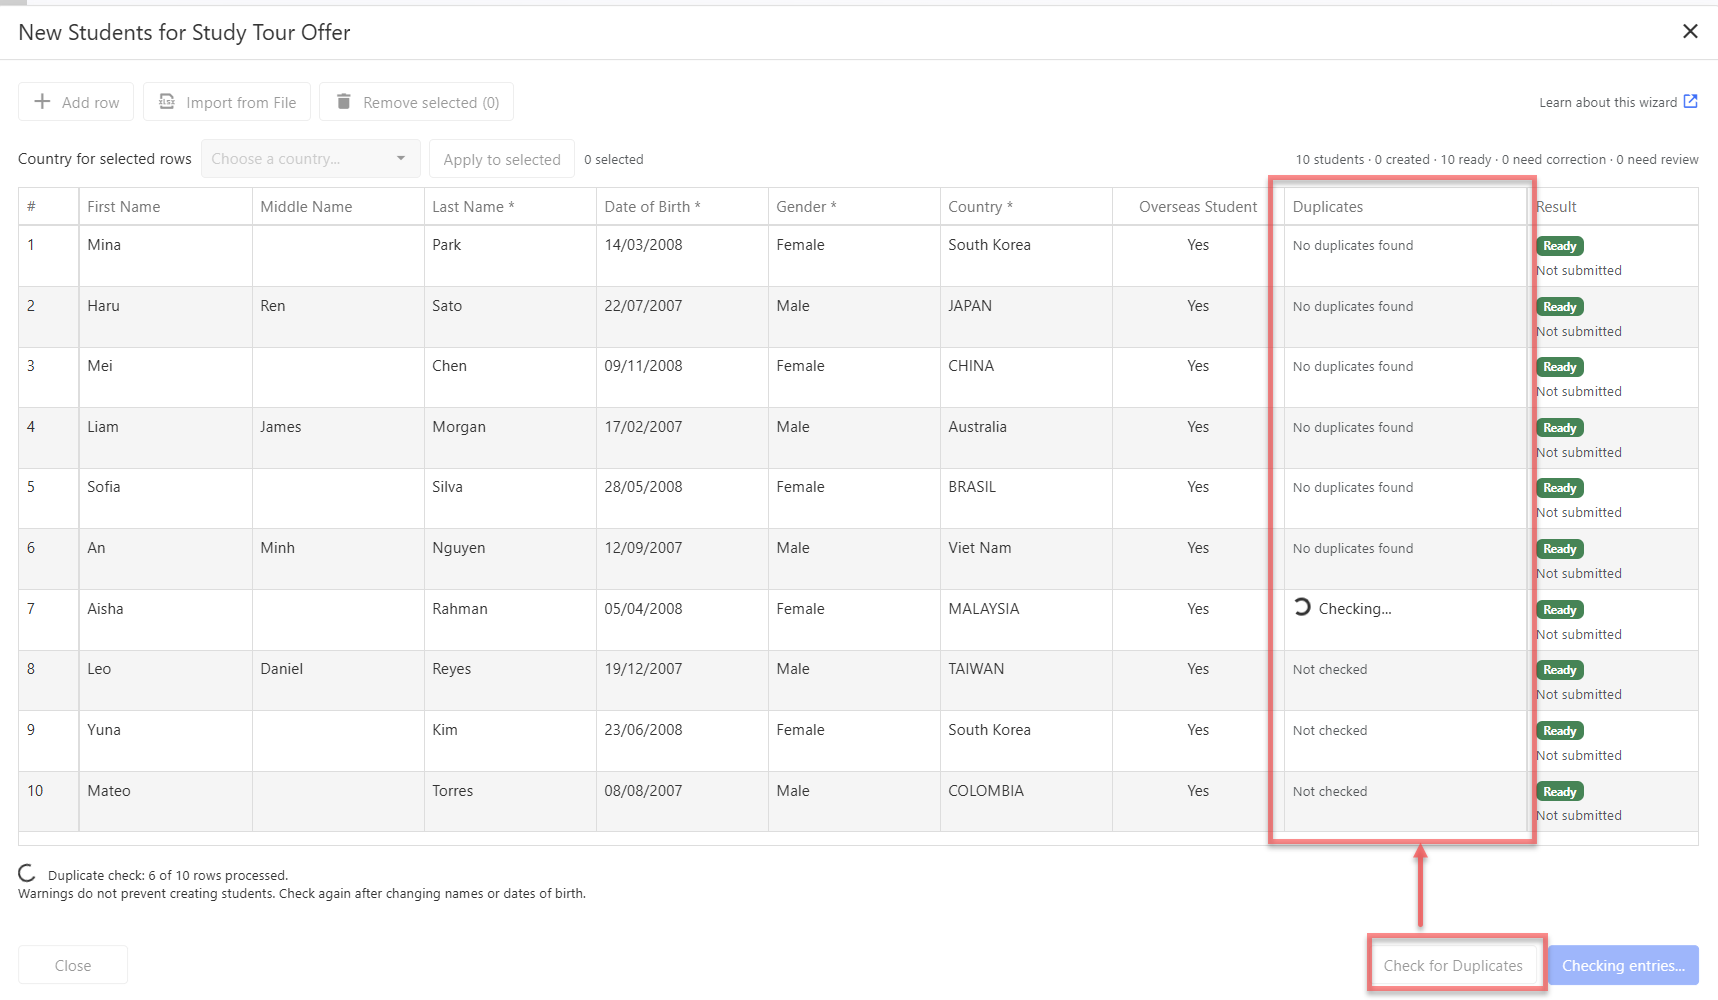
To check for potential duplicates against student records already in the system, click Check for Duplicates. This optional check compares each student in the grid with existing student records using last name and date of birth. Review any potential matches in the Duplicates column to confirm whether the student already exists.
This check does not identify duplicates within the current grid. Potential duplicate warnings do not prevent you from creating students.
Step 4: Submit and Review Results
Click Create Students to start creating the student records. Keep the wizard open while the batch is processed.
The progress bar below the grid shows how many students have been processed, how many have been successfully created and how many require attention.
Use the Result column to track each student.
-
Waiting means the student has yet to be submitted.
-
Processing identifies the student currently being processed.
-
Created means the student record was created and added to the offer. Click the student number or name to open the record.
-
For Needs correction or Needs review, read the message in the row and resolve the issue before trying again.
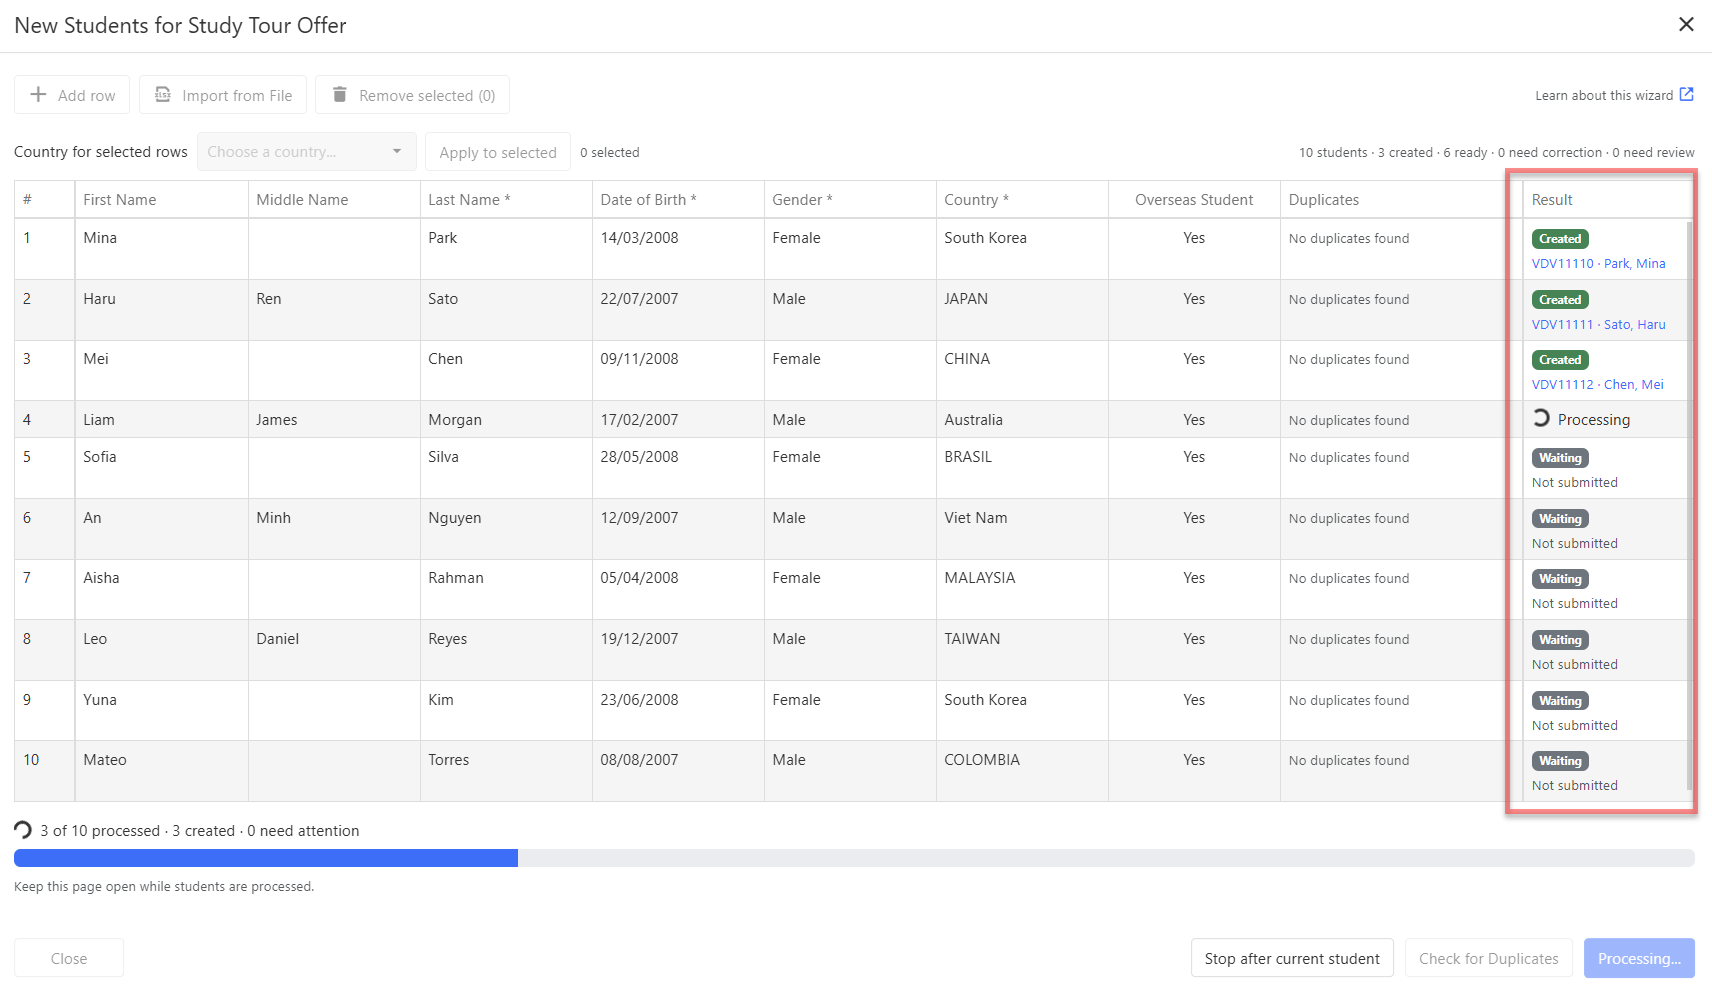
To pause the process, click Stop After Current Student. The wizard will finish processing the current student and leave the remaining students marked as Waiting.
Keep the wizard open and click Resume Students when you are ready to continue.
If you close the wizard before the batch is complete, any students already created will remain linked to the offer. Before attempting to create the remaining students, check the Students tab to avoid creating duplicates.
Once processing is complete, click Close and review the offer’s Students tab to confirm that the students were added successfully. Then, review and adjust the Student Multipliers on the relevant Offer Items as needed.