
Once an external payment is ready for reconciliation, you can review and reconcile it manually on an individual basis.
If this is your first time reconciling payments, we recommend reviewing the following article to understand the general concept of external payment reconciliation:
Considerations for Manual Reconciliation of External Payments
-
Only one payment can be reconciled at a time.
-
Only the full amount of the payment can be reconciled. Partial reconciliation is not supported.
-
Overpayments are not supported.
-
Surcharges are not supported.
-
The system suggests and preselects invoices and amounts based on the payment details and the Order of Fees set in your system configuration. You can still allocate funds to different enrolments or invoices for the same student.
-
For payments made for Offers, the Offer must first be accepted. The payment can then be allocated to the respective invoices.
-
When allocating funds across multiple enrolments, a separate receipt is created for each enrolment.
Reconcile External Payments Manually
Before reconciling an external payment, ensure the Reconciliation Status is marked as REAdy to reconcile .
You can begin manual reconciliation in two ways:
Option 1: From External Payments Search
-
Locate and select the payment to reconcile (only one payment can be selected).
-
In the actions panel, click Reconcile > Review & Reconcile.
-
The Reconciliation Wizard will open.
Option 2: From External Payment Details
-
Open the details page of the payment.
-
In the header, click Reconcile > Review & Reconcile.
-
The Reconciliation Wizard will open.
Manual Reconciliation Wizard
The Manual Reconciliation Wizard allows you to review customise how the payment is allocated. It consists of two steps, with most options automatically preselected based on your system settings and the payment details.
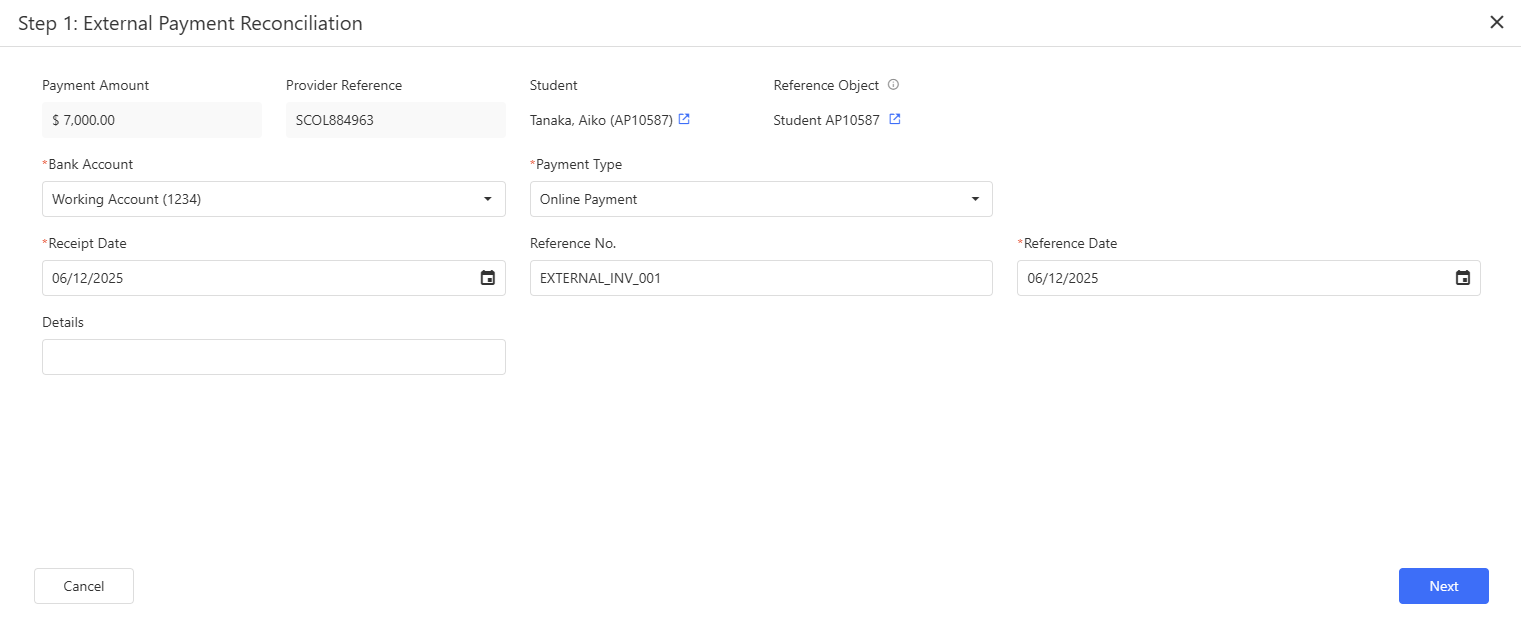
Step 1: Payment Details for Receipts
In this step, you can review and update the details of the receipt(s) that will be created during reconciliation.
To make the process easier, some fields are pre-filled with information from your system settings (refer to the Default Settings section) and the payment record. Adjust if needed, then click on Next to continue.
Step 2: Payment Allocation
In this step, you decide how the payment amount is allocated.
This step has the following components:
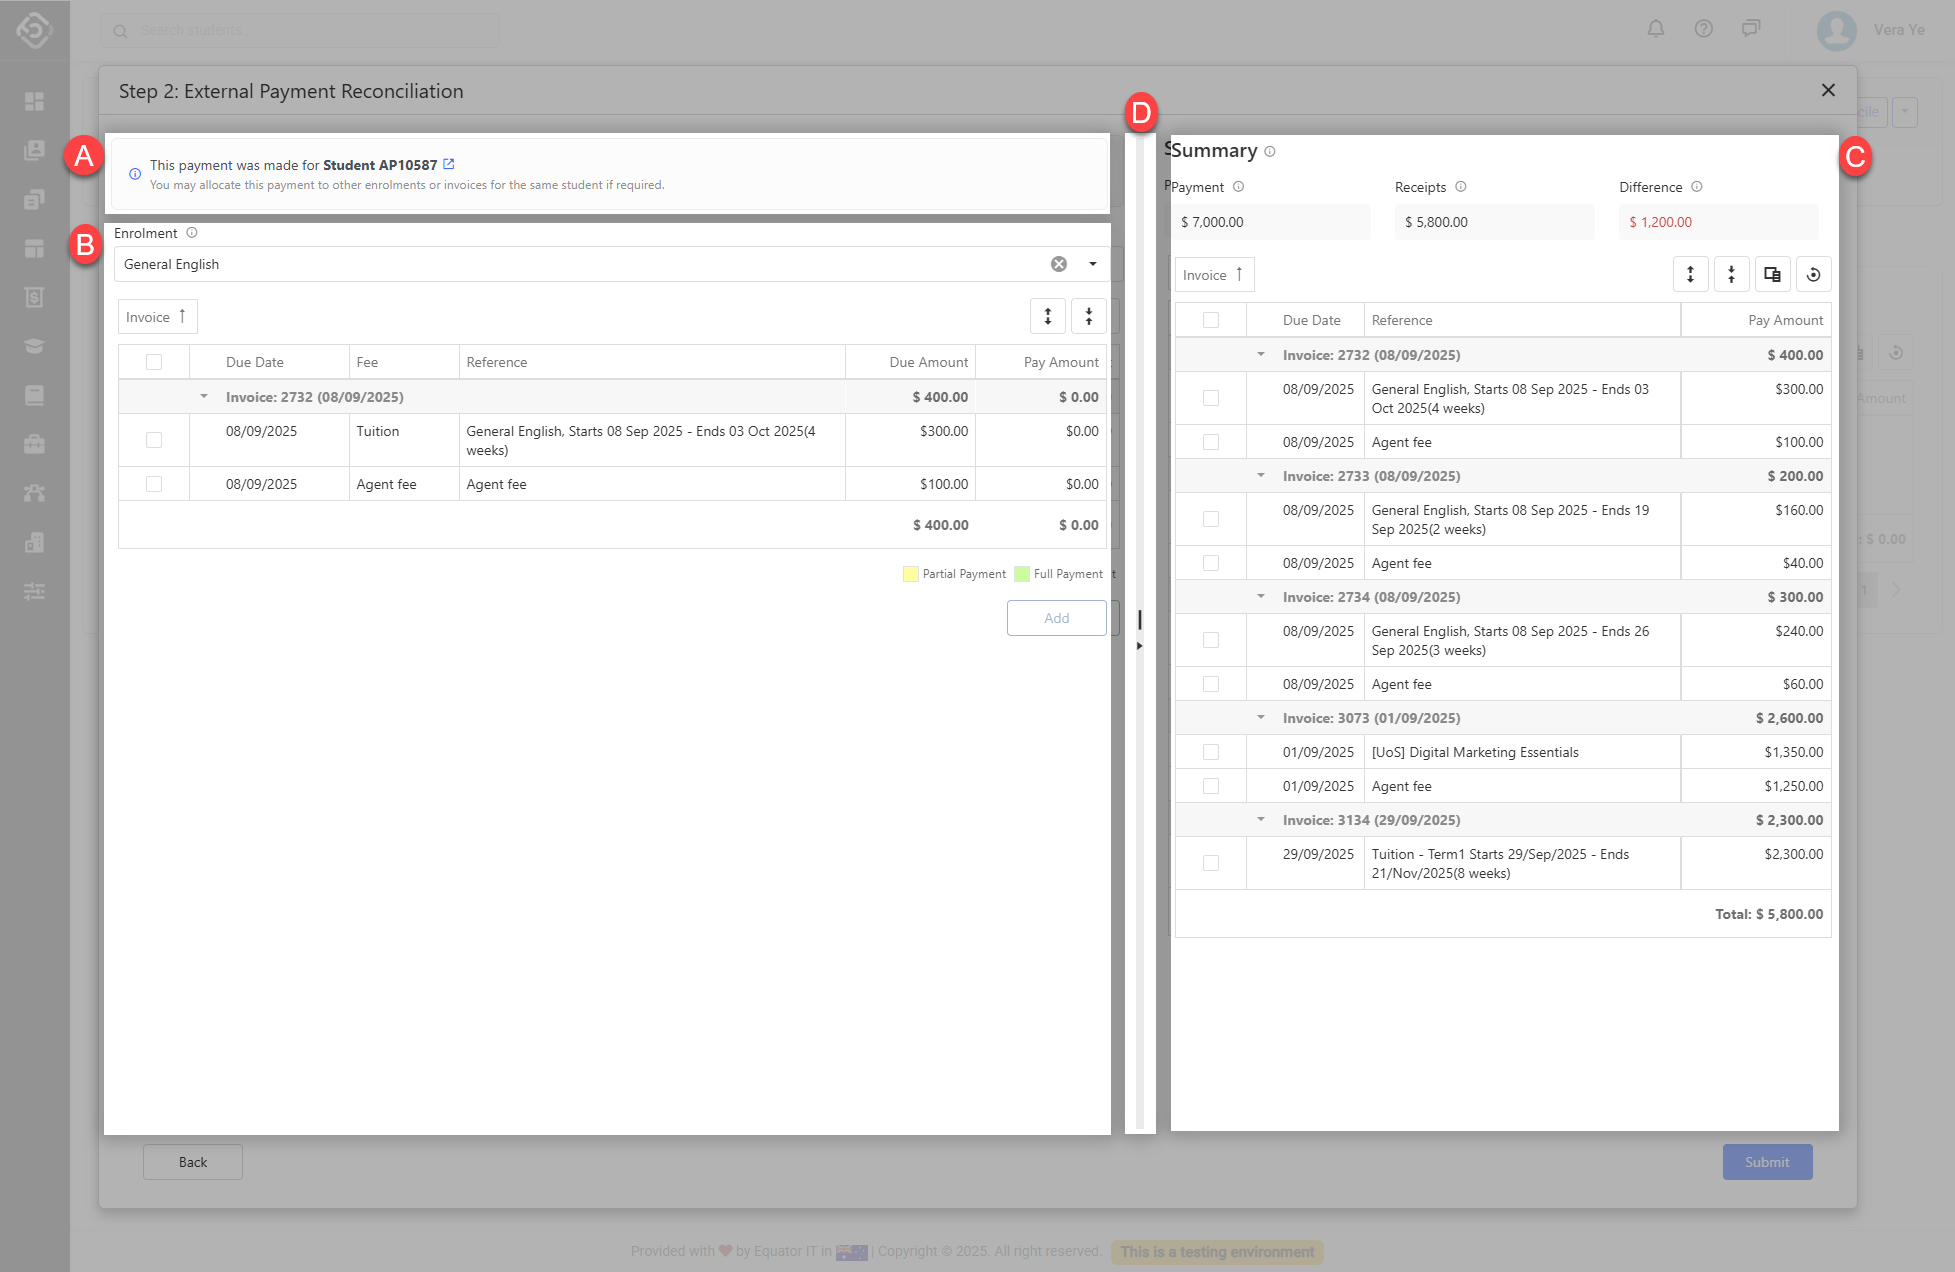
A. Reference Object Details: Displays the object and record the payment was originally made for.
B. Enrolments/Invoices Selection: Search for the enrolments and invoices that are due and available for payment.
C. Summary: This panel displays a summary of the payments to be made and reconciled.
D. Panel Divider: You can adjust the layout by resizing the panels or collapsing the summary section as needed while reviewing the payments.
Default Allocation
By default, the system suggests a payment allocation based on the payment details, the object the payment was originally made for and on your system settings. For example, if a payment was recorded for an enrolment, only invoices for that enrolment are considered by default.
The suggested payment allocation appears automatically in the Summary panel. If it does not meet your needs, you can adjust it manually before the payment is allocated and reconciled.
The system suggests the allocation based on the following rules:
-
Invoices are paid in order of earliest due date. Any remaining amount is applied to the next invoice.
-
Within each invoice, the payment is allocated based on the Order of Fees set in your system settings.
Manual allocation
You can adjust the invoices and amounts to be paid. To do so:
-
Search and select a student enrolment to view the outstanding invoices available for payment. You can then select the invoices and amounts in two different ways:
-
Using the checkbox column, select the rows to include and click on the Pay Selected button from the grid’s action panel. This will pay the full amount for the records selected and add them automatically to the summary.
-
Manually enter an amount in the Amount cell and click on Add to Summary at the bottom of the grid.
-
-
After adding all the invoices and amounts, make sure there is no difference between the payment amount and the total invoices to be paid.
-
Review the items in the summary panel to make sure the payment is allocated as intended.
-
Click on Submit to create the respective receipts and reconcile the payment against those receipts.
.gif)